Setting Azure Pipelines to automate collector runs
This page provides basic guidance on how to use Azure Pipelines to automate the operation of data.world collectors. You can further improve your process with advanced features offered by Azure, like group variables, and so on.
STEP 1: Set up the collectors
Follow the instructions for generating a command for running the collectors. For parameters that you want to set as environment variables, set the values as variables instead of real values. For safety, the system already suggests using variables for sensitive data like passwords.
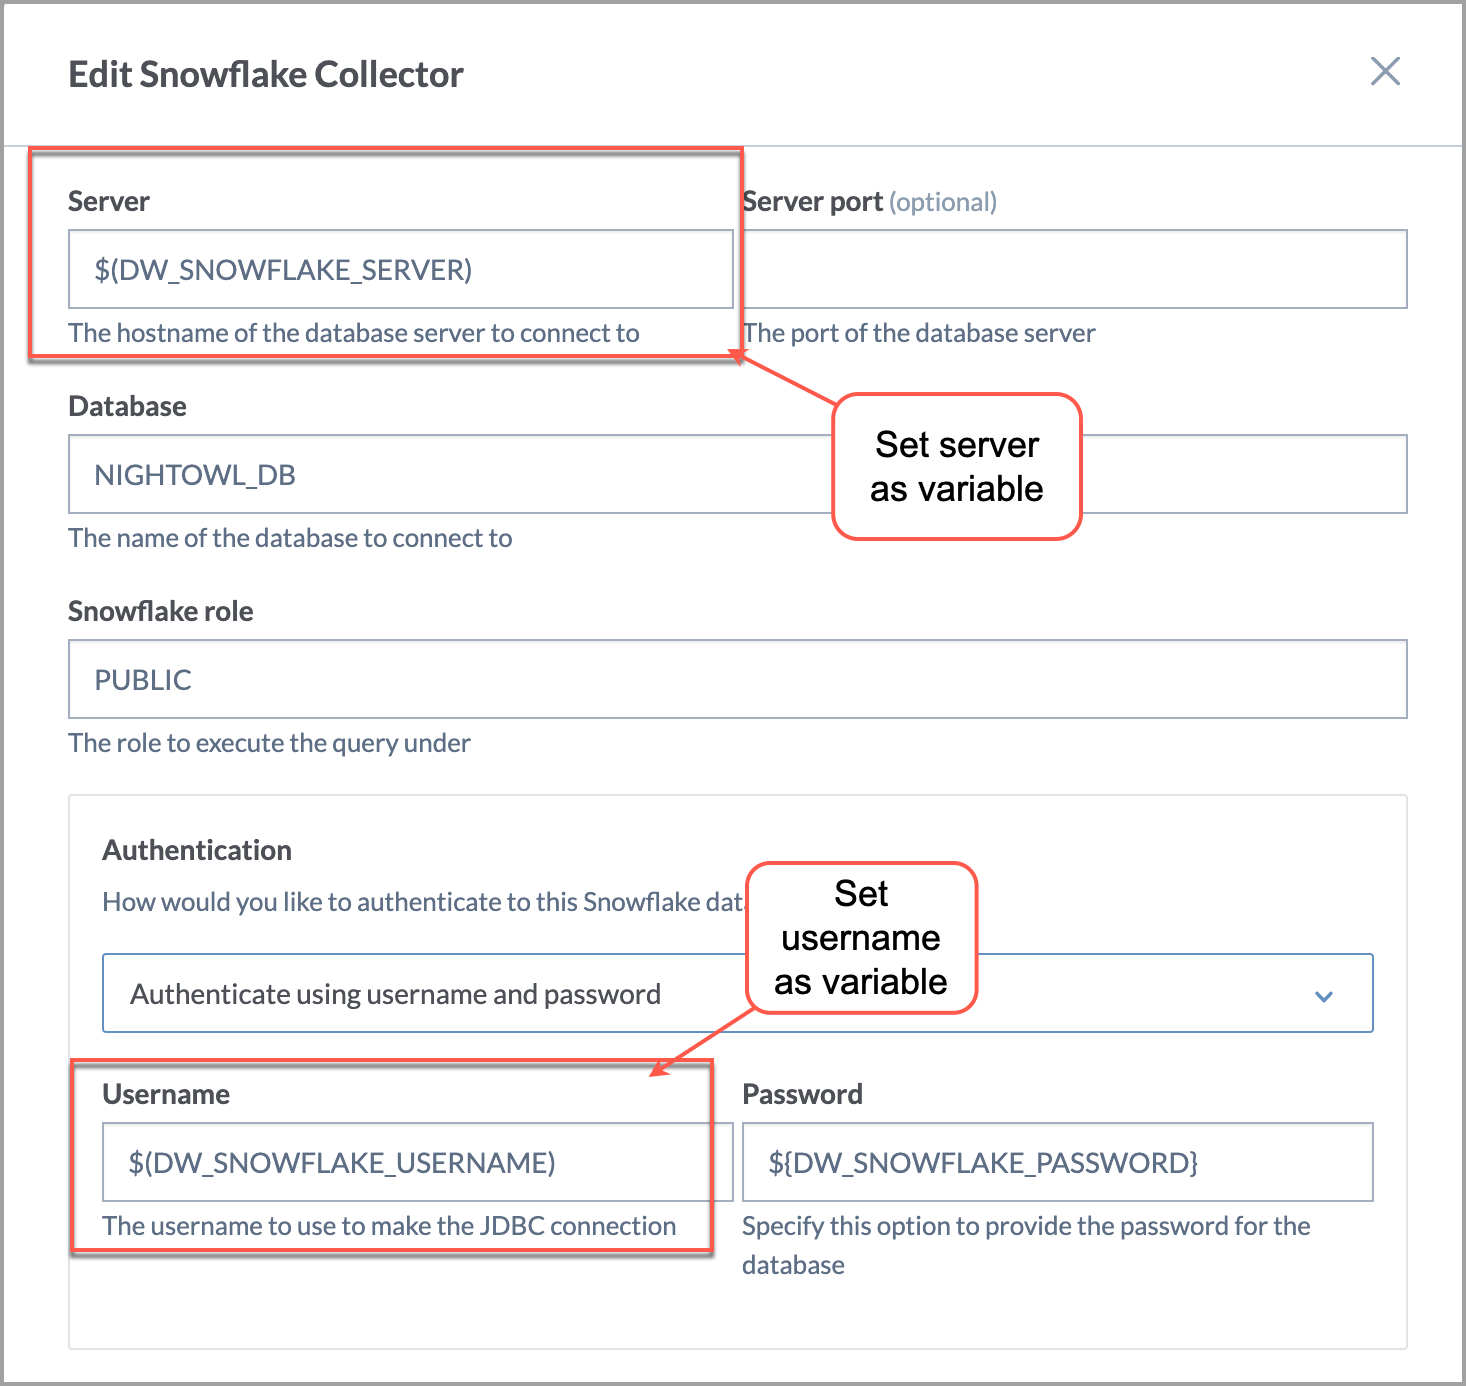
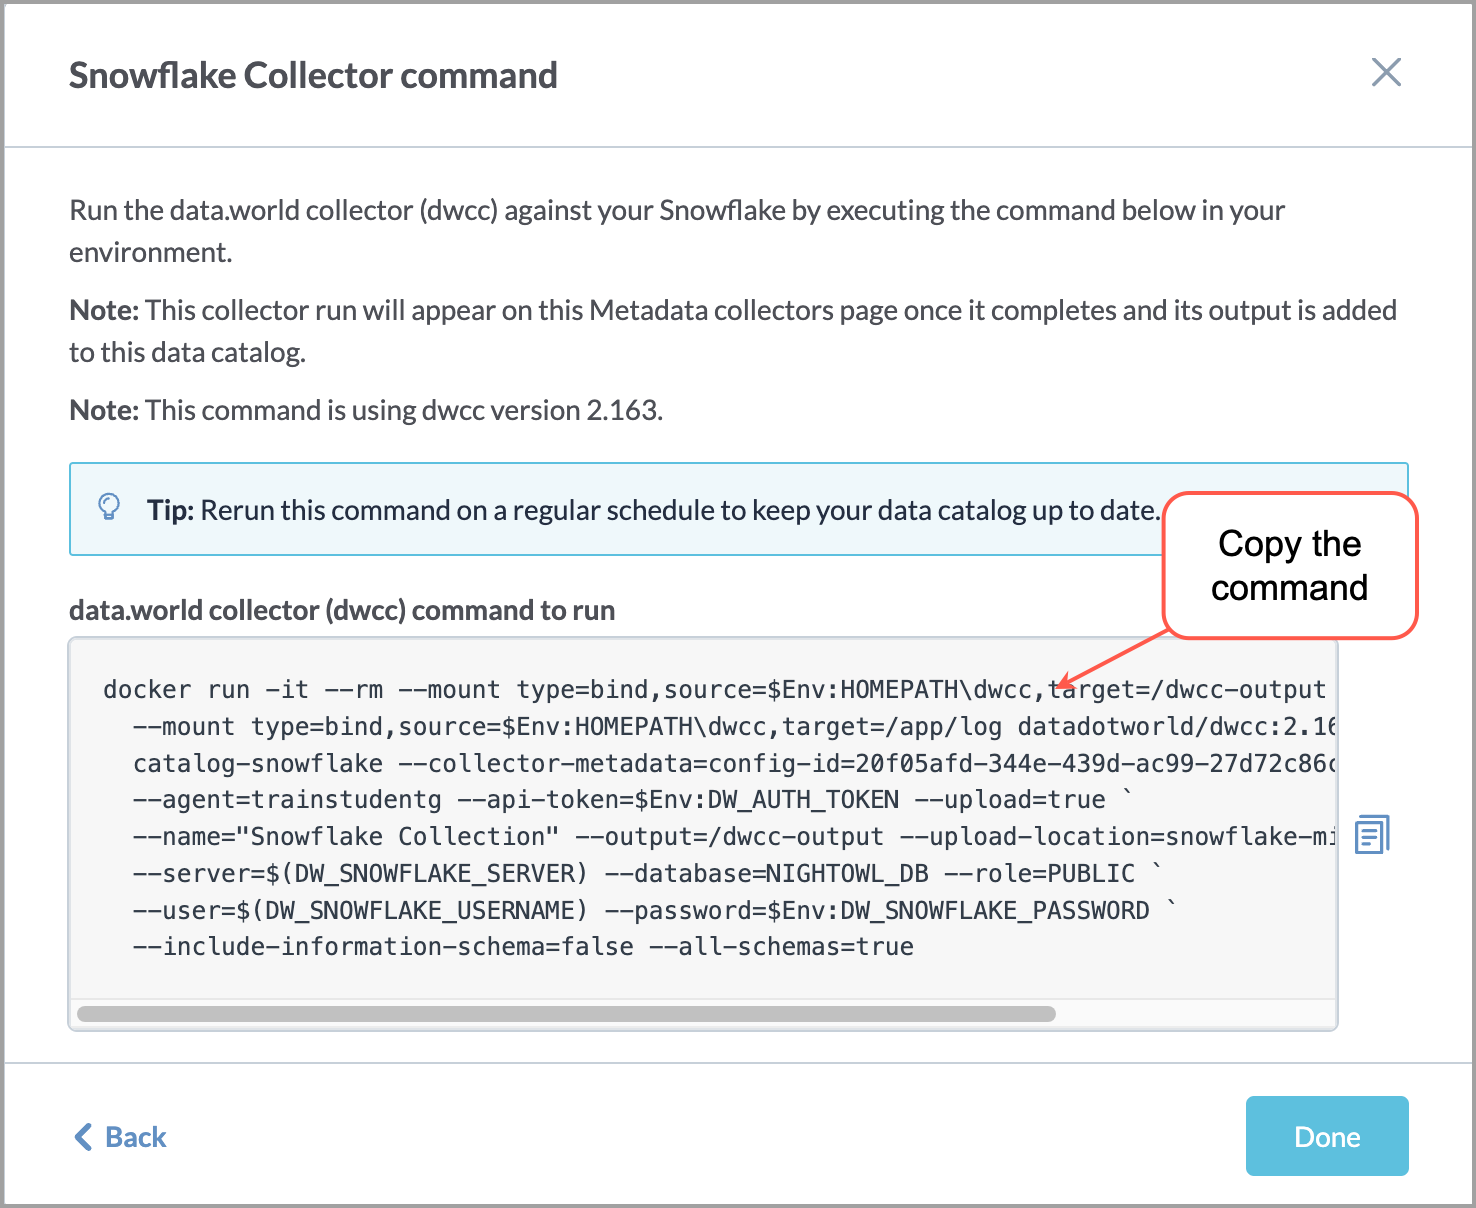
At the end, copy the CLI command from the UI.
STEP 2: Prepare the CLI command for using in the script
Paste the command for the collector in a text editor and make the following edits to the command to get it ready for use in the script.
docker run -it --rm --mount type=bind,source=${HOME}/dwcc,target=/dwcc-output \
  --mount type=bind,source=${HOME}/dwcc,target=/app/log datadotworld/dwcc:2.163 \
  catalog-snowflake --collector-metadata=config-id=405b03db-40d3-4bc2-9424-b41fb8d6598f \
  --agent=8bank --api-token=${DW_AUTH_TOKEN} --upload=true --name="Snowflake Collection" \
  --output=/dwcc-output --upload-location=ddw-snowflake-mikeg-catalog-sandbox \
  --server=$(DW_SNOWFLAKE_SERVER) --database=NIGHTOWL_DB --role=PUBLIC \
  --user=$(DW_SNOWFLAKE_USERNAME) --password=${DW_SNOWFLAKE_PASSWORD} \
  --include-information-schema=false --all-schemas=true
Remove --it, which runs Docker in interactive mode.
--it
Remove all mount commands:
--mount type=bind,source=${HOME}/dwcc,target=/dwcc-output \
  --mount type=bind,source=${HOME}/dwcc,target=/app/log
Check all variables to make sure the syntax matches the Windows format.
For example: change ${DW_SNOWFLAKE_PASSWORD} to $(DW_SNOWFLAKE_PASSWORD)Remove the output location from the command.
--output=/dwcc-output
The updated command will look like:
docker run --rm datadotworld/dwcc:2.163 \
  catalog-snowflake --collector-metadata=config-id=8785a98c-6c4e-4e61-b902-640a708e897f \
    --agent=mikeg-catalog-sources --site=solutions --api-token=$(DW_AUTH_TOKEN) \
    --upload=true --name="NIGHTOWL_DB Collection" \
  --upload-location=ddw-snowflake-mikeg-catalog-sandbox --server=$(DW_SNOWFLAKE_SERVER) \
    --port=443 --database=NIGHTOWL_DB --role=PUBLIC --user=$(DW_SNOWFLAKE_USERNAME) \
  --password=$(DW_SNOWFLAKE_PASSWORD) --include-information-schema=false \
   --all-schemas=true
STEP 3: Setting up the pipeline in Azure
This is a basic configuration for running Azure Pipelines. You may want to optimize the runtime, make use of variable groups to save off variables, and optimize for multiple jobs depending on your own setup.
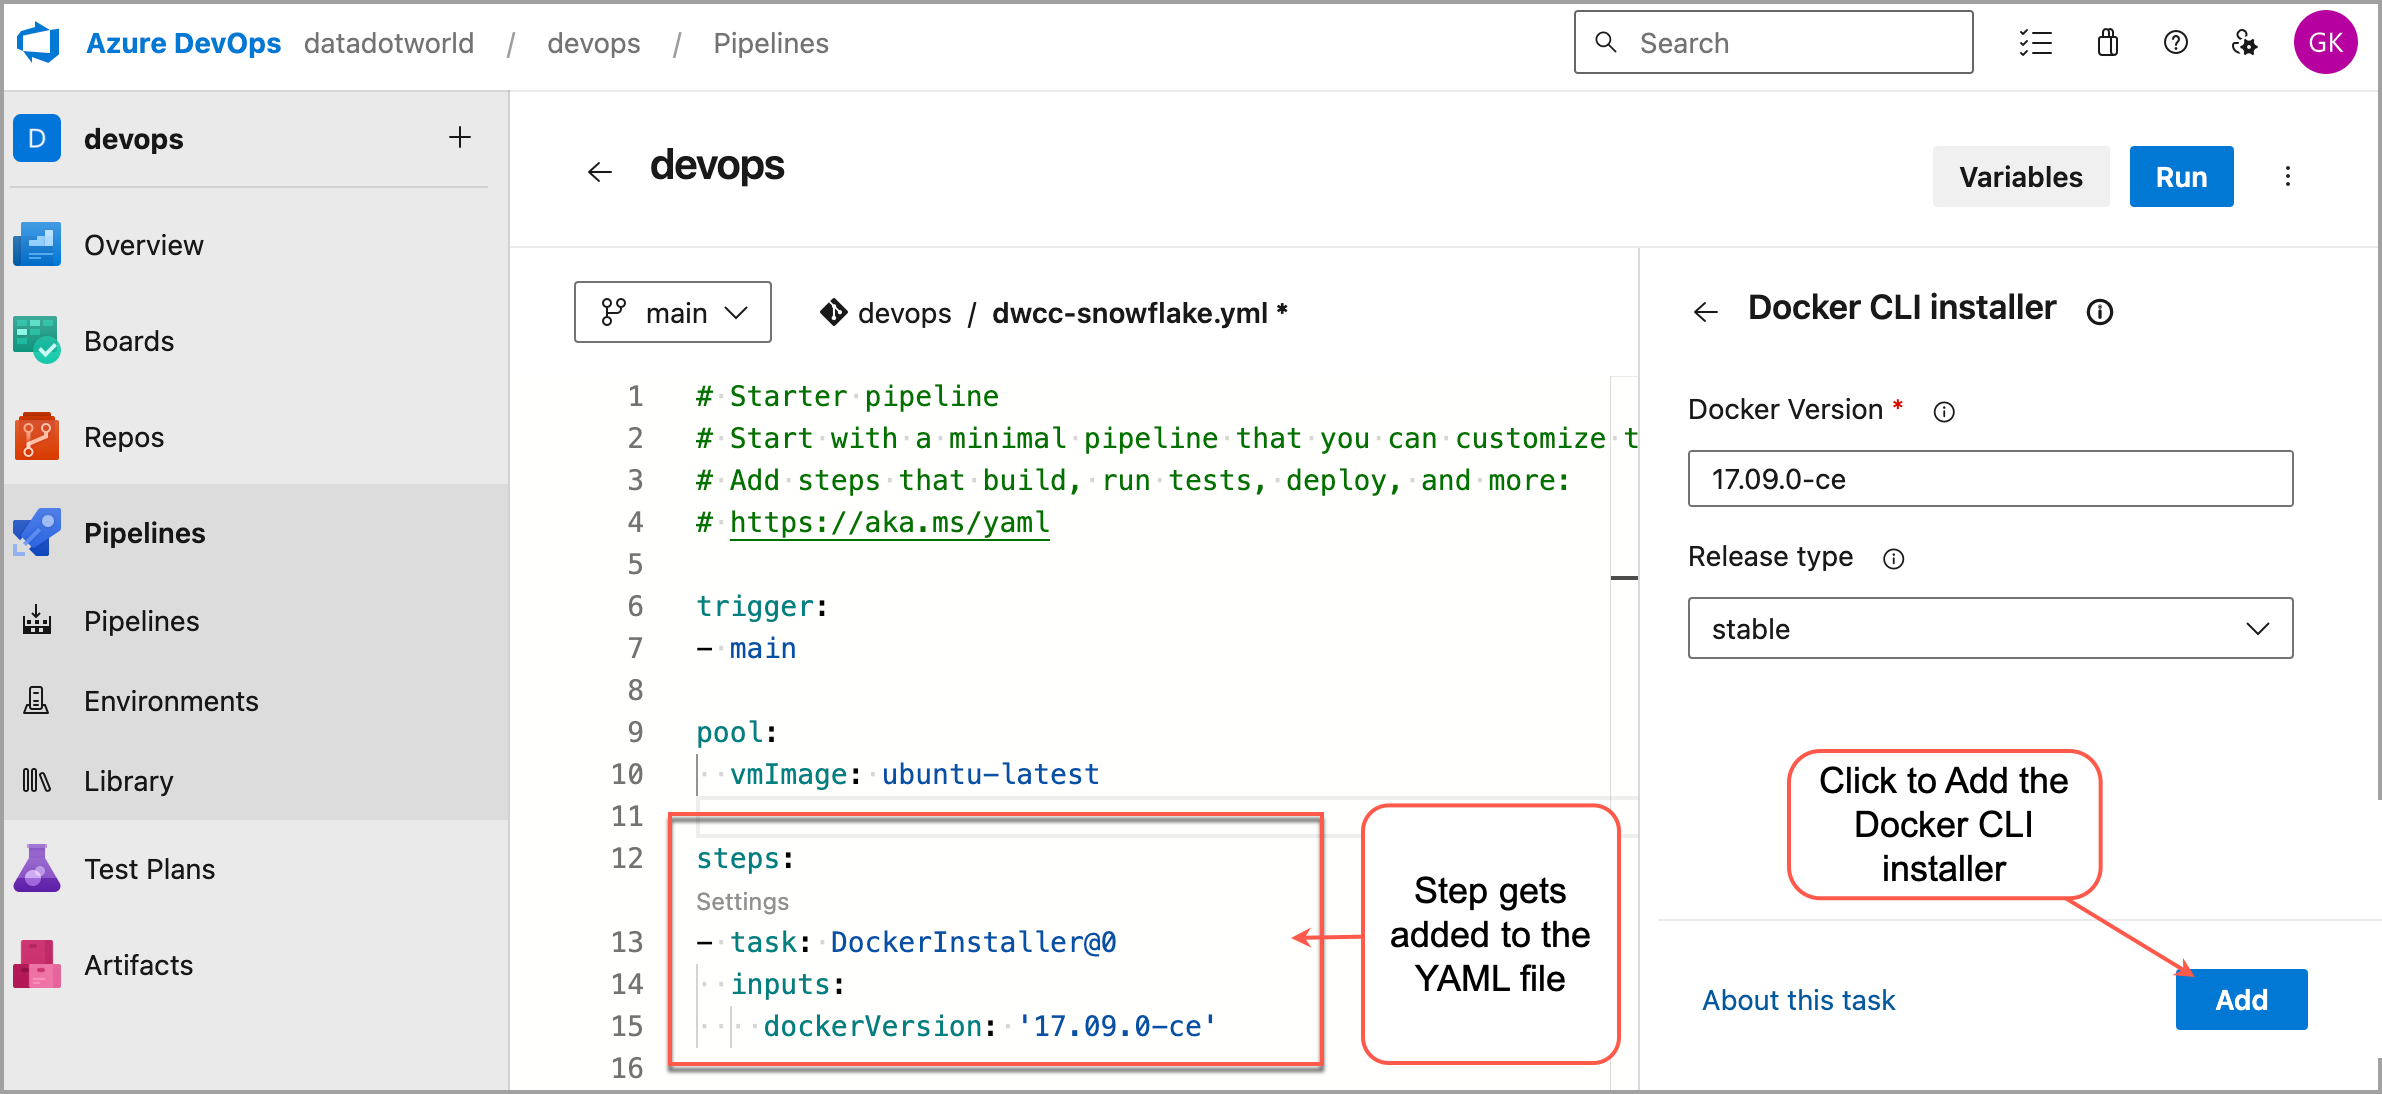
In Azure DevOps, navigate to Pipelines. Click the New pipeline button.
On the Connect page, select a repo. You must have a repo set up either in Azure or in one of their supported repository stores. In this example, we use the default Azure repo and choose the starter pipeline. It gives a basic YAML file.
Rename the YAML file to something meaningful, for example, dwcc-snowflake.yml.
Make the following edits to the YAML file:
Under Steps, add a step to install Docker using the pre-built task within Azure DevOps. Click Show assistant and search for Docker CLI installer.
Next add the script for running the collector and edit the display name. This is the script you prepared here.

Set the environment variables under the Variables section with the relevant values related to your data.world authentication token and Snowflake server, username, and password.
Next, click Save and run to the pipeline. It takes you to the Job page where you can monitor the running of the pipeline.
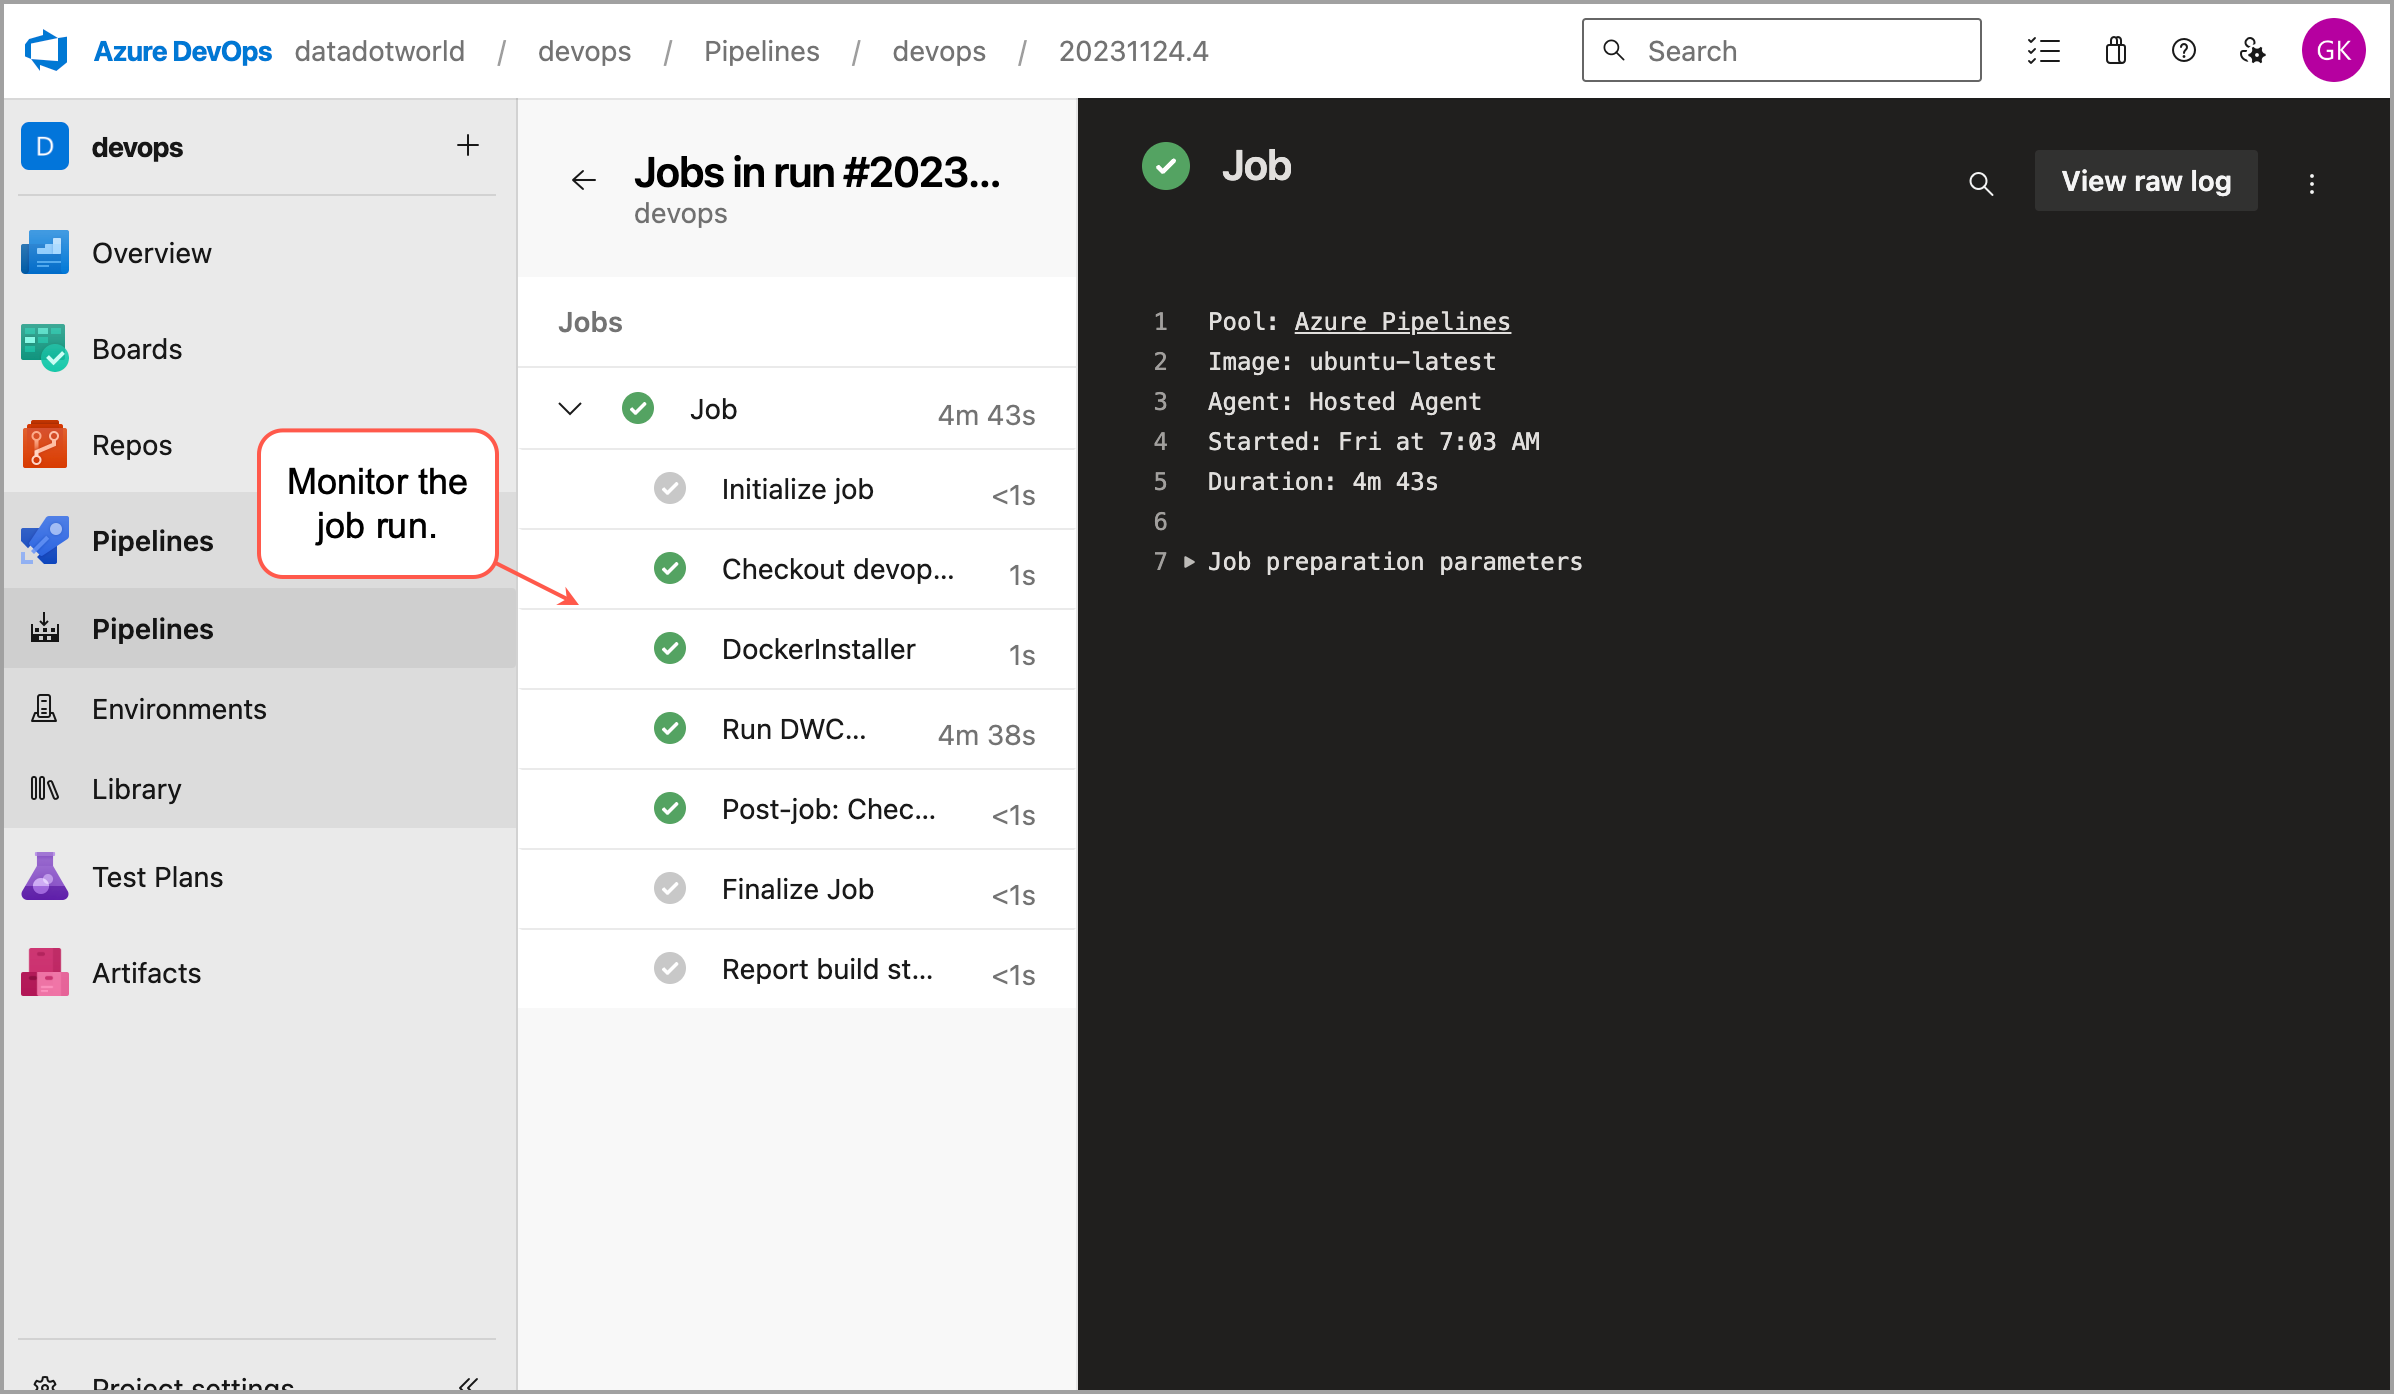
After running, check for the success message on the Azure DevOps job page, and verify that the collector log files and output files were uploaded.
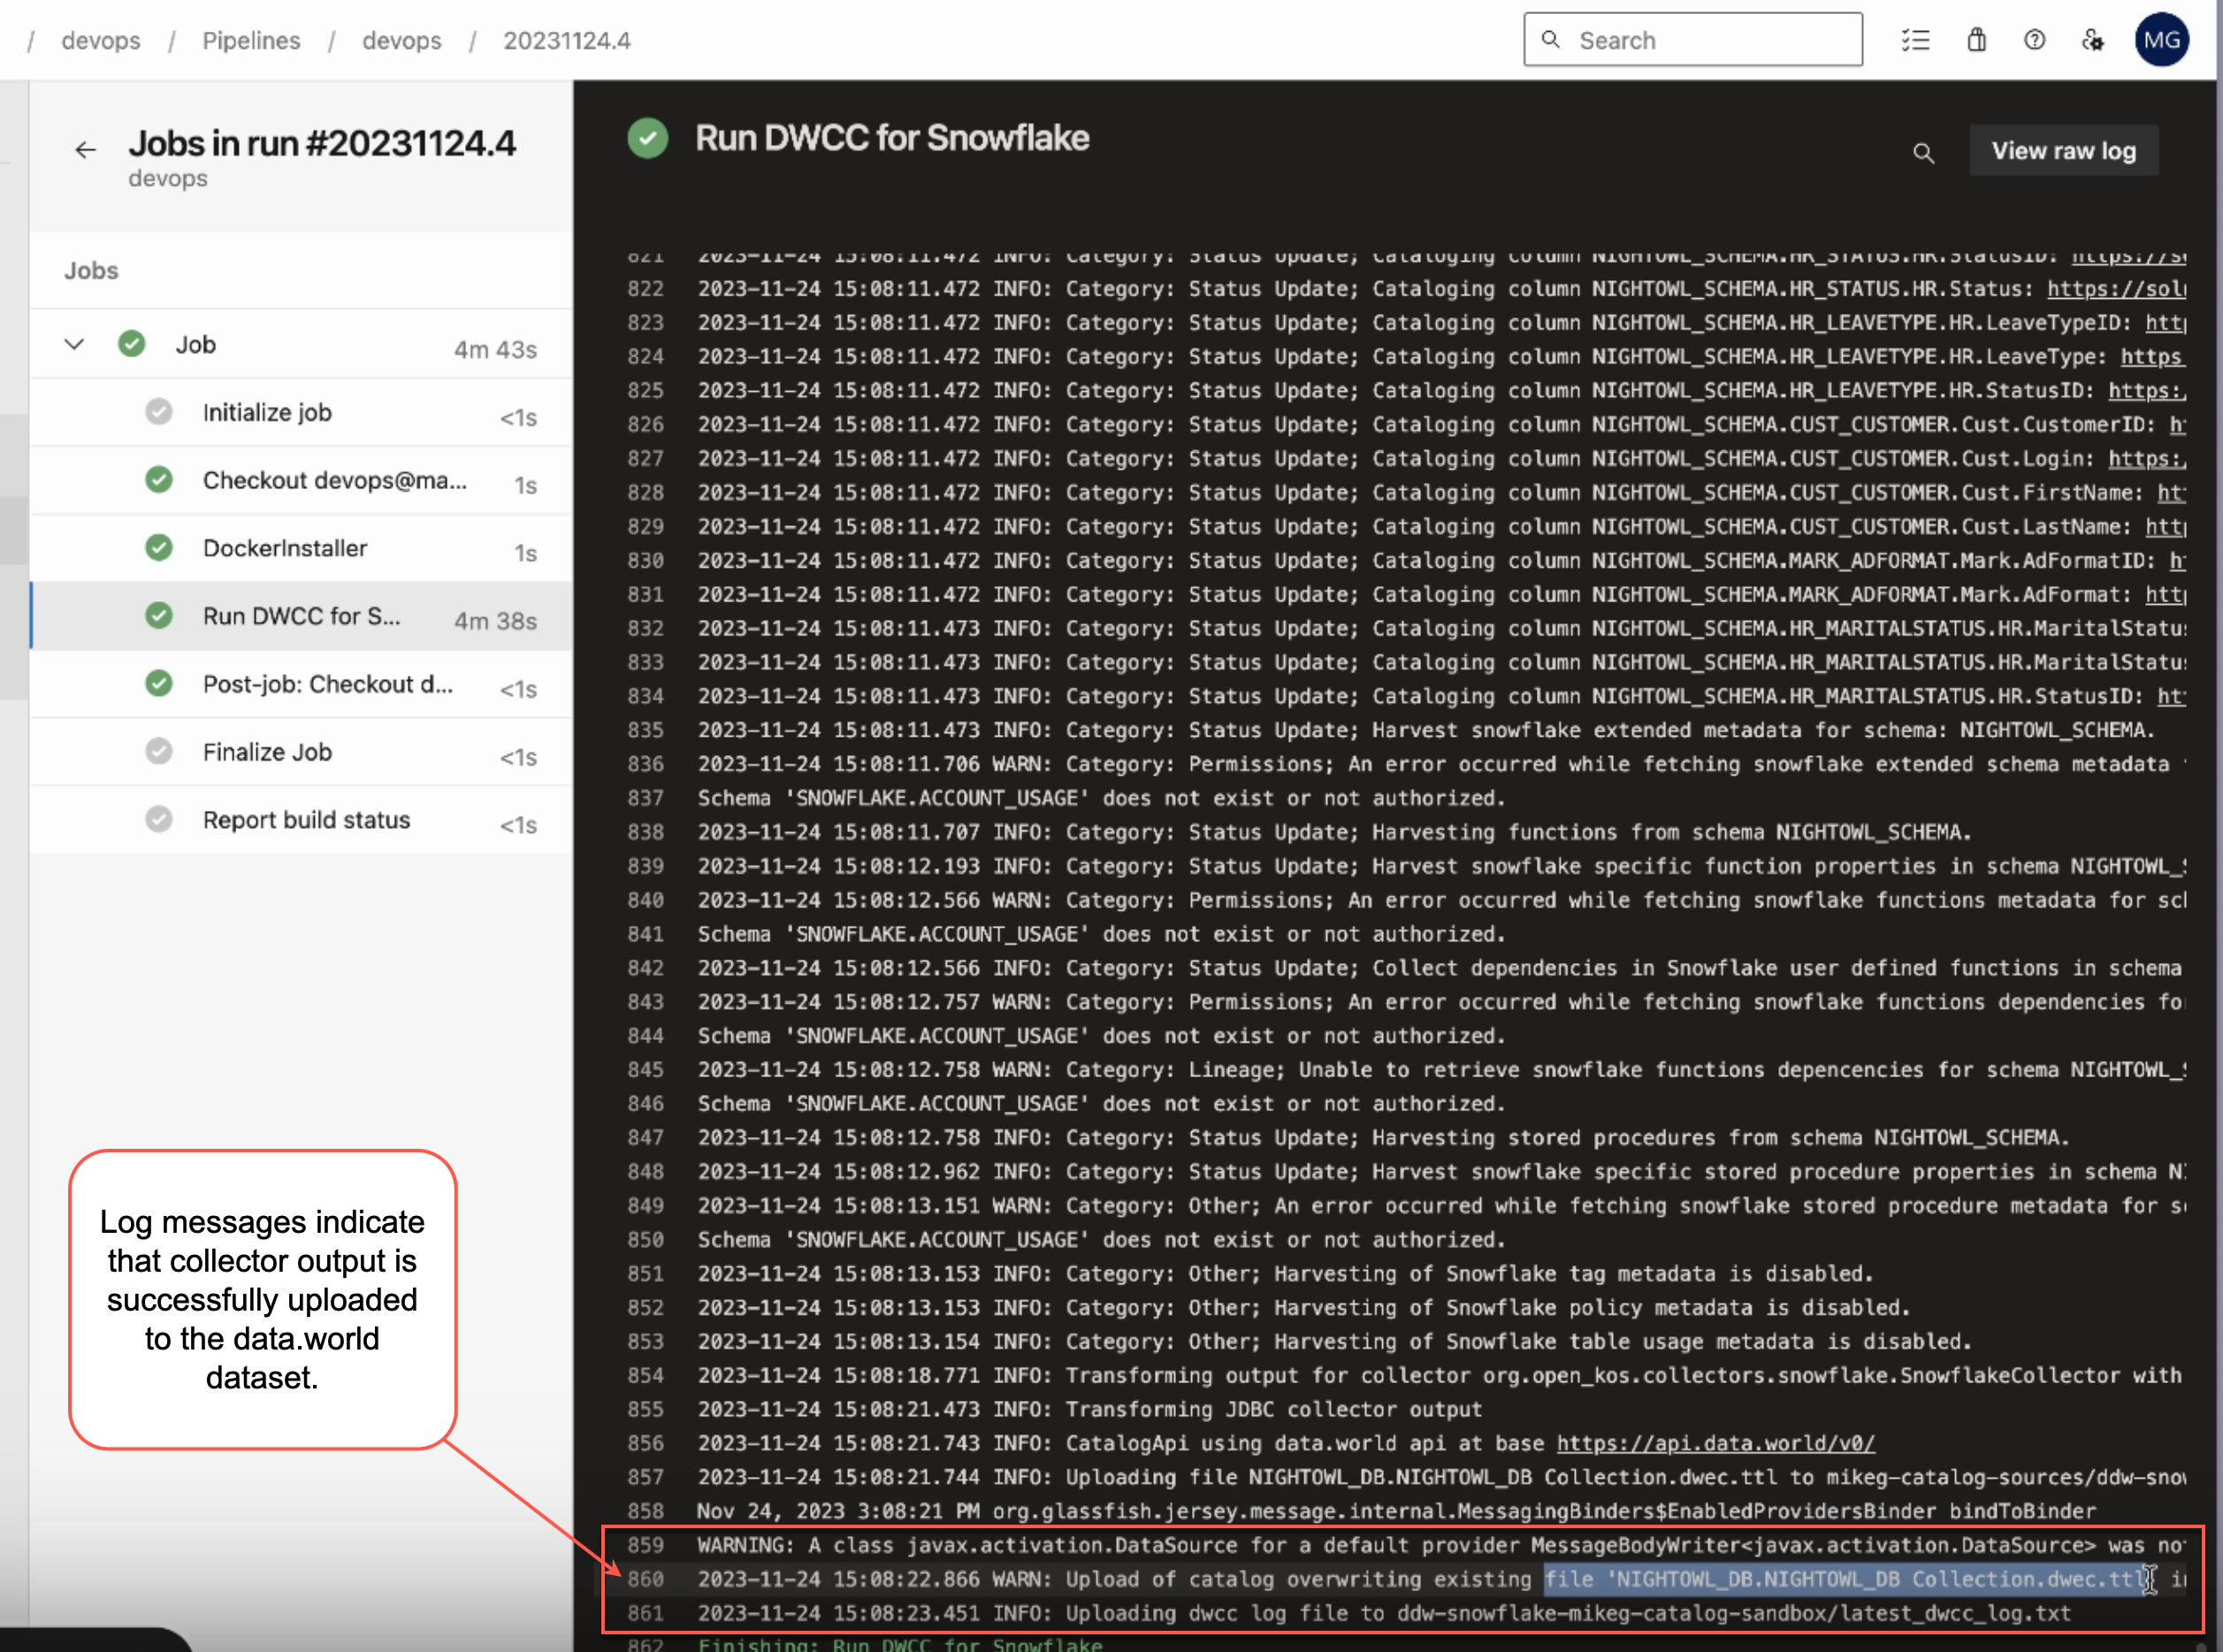
Next, you can go to your data.world installation and check the dataset to verify that the output is visible there.
STEP 4: Set up a schedule for the pipeline
Follow the Azure documentation to set the pipeline to run on a schedule. This ensures the collectors operate at set intervals, providing you with the most up-to-date metadata in data.world.