Cataloging sensitive data with DWCC-SDD using Catalog Toolkit (legacy version)
See About Sensitive Data Discovery (legacy version) to learn more about the Sensitive Data Discovery collector.
Important
If Catalog toolkit is not deployed on your system, use this documentation.
There are four parts to using the DWCC-SDD collector to catalog the sensitive data in your data source:
Set up the required resources.
Configure your organization for displaying SDD metadata.
Run the collectors.
Sync the SDD metadata to the organization.
The first time you run the SDD collector, you will need to do all of these steps in order. Once you have completed your configuration, however, you can set the collectors to run and upload your sensitive data catalog file automatically as needed.
STEP 1: Set up the required resources
The first part of running the collector is to gather all the required resources. You will need:
To request the Sensitive Data Collector from support
Docker installed on the machine from which you wish to run the collector
Note
The DWCC-SDD collector only runs with Docker.
STEP A: Request the Sensitive Data Collector from support
Submit a request from our support website. Note that support will turn on this feature only if you have bought the add-on for it.
STEP B: Install Docker
Note
The DWCC-SDD collector only runs with Docker.
Install Docker on the machine from which you wish to run the collector.
STEP 2: Configure your organization
STEP A: Add Sensitive Data Discovery as a Source in the Catalog Configuration Organization
Note
This task is performed in the Catalog configuration organization.
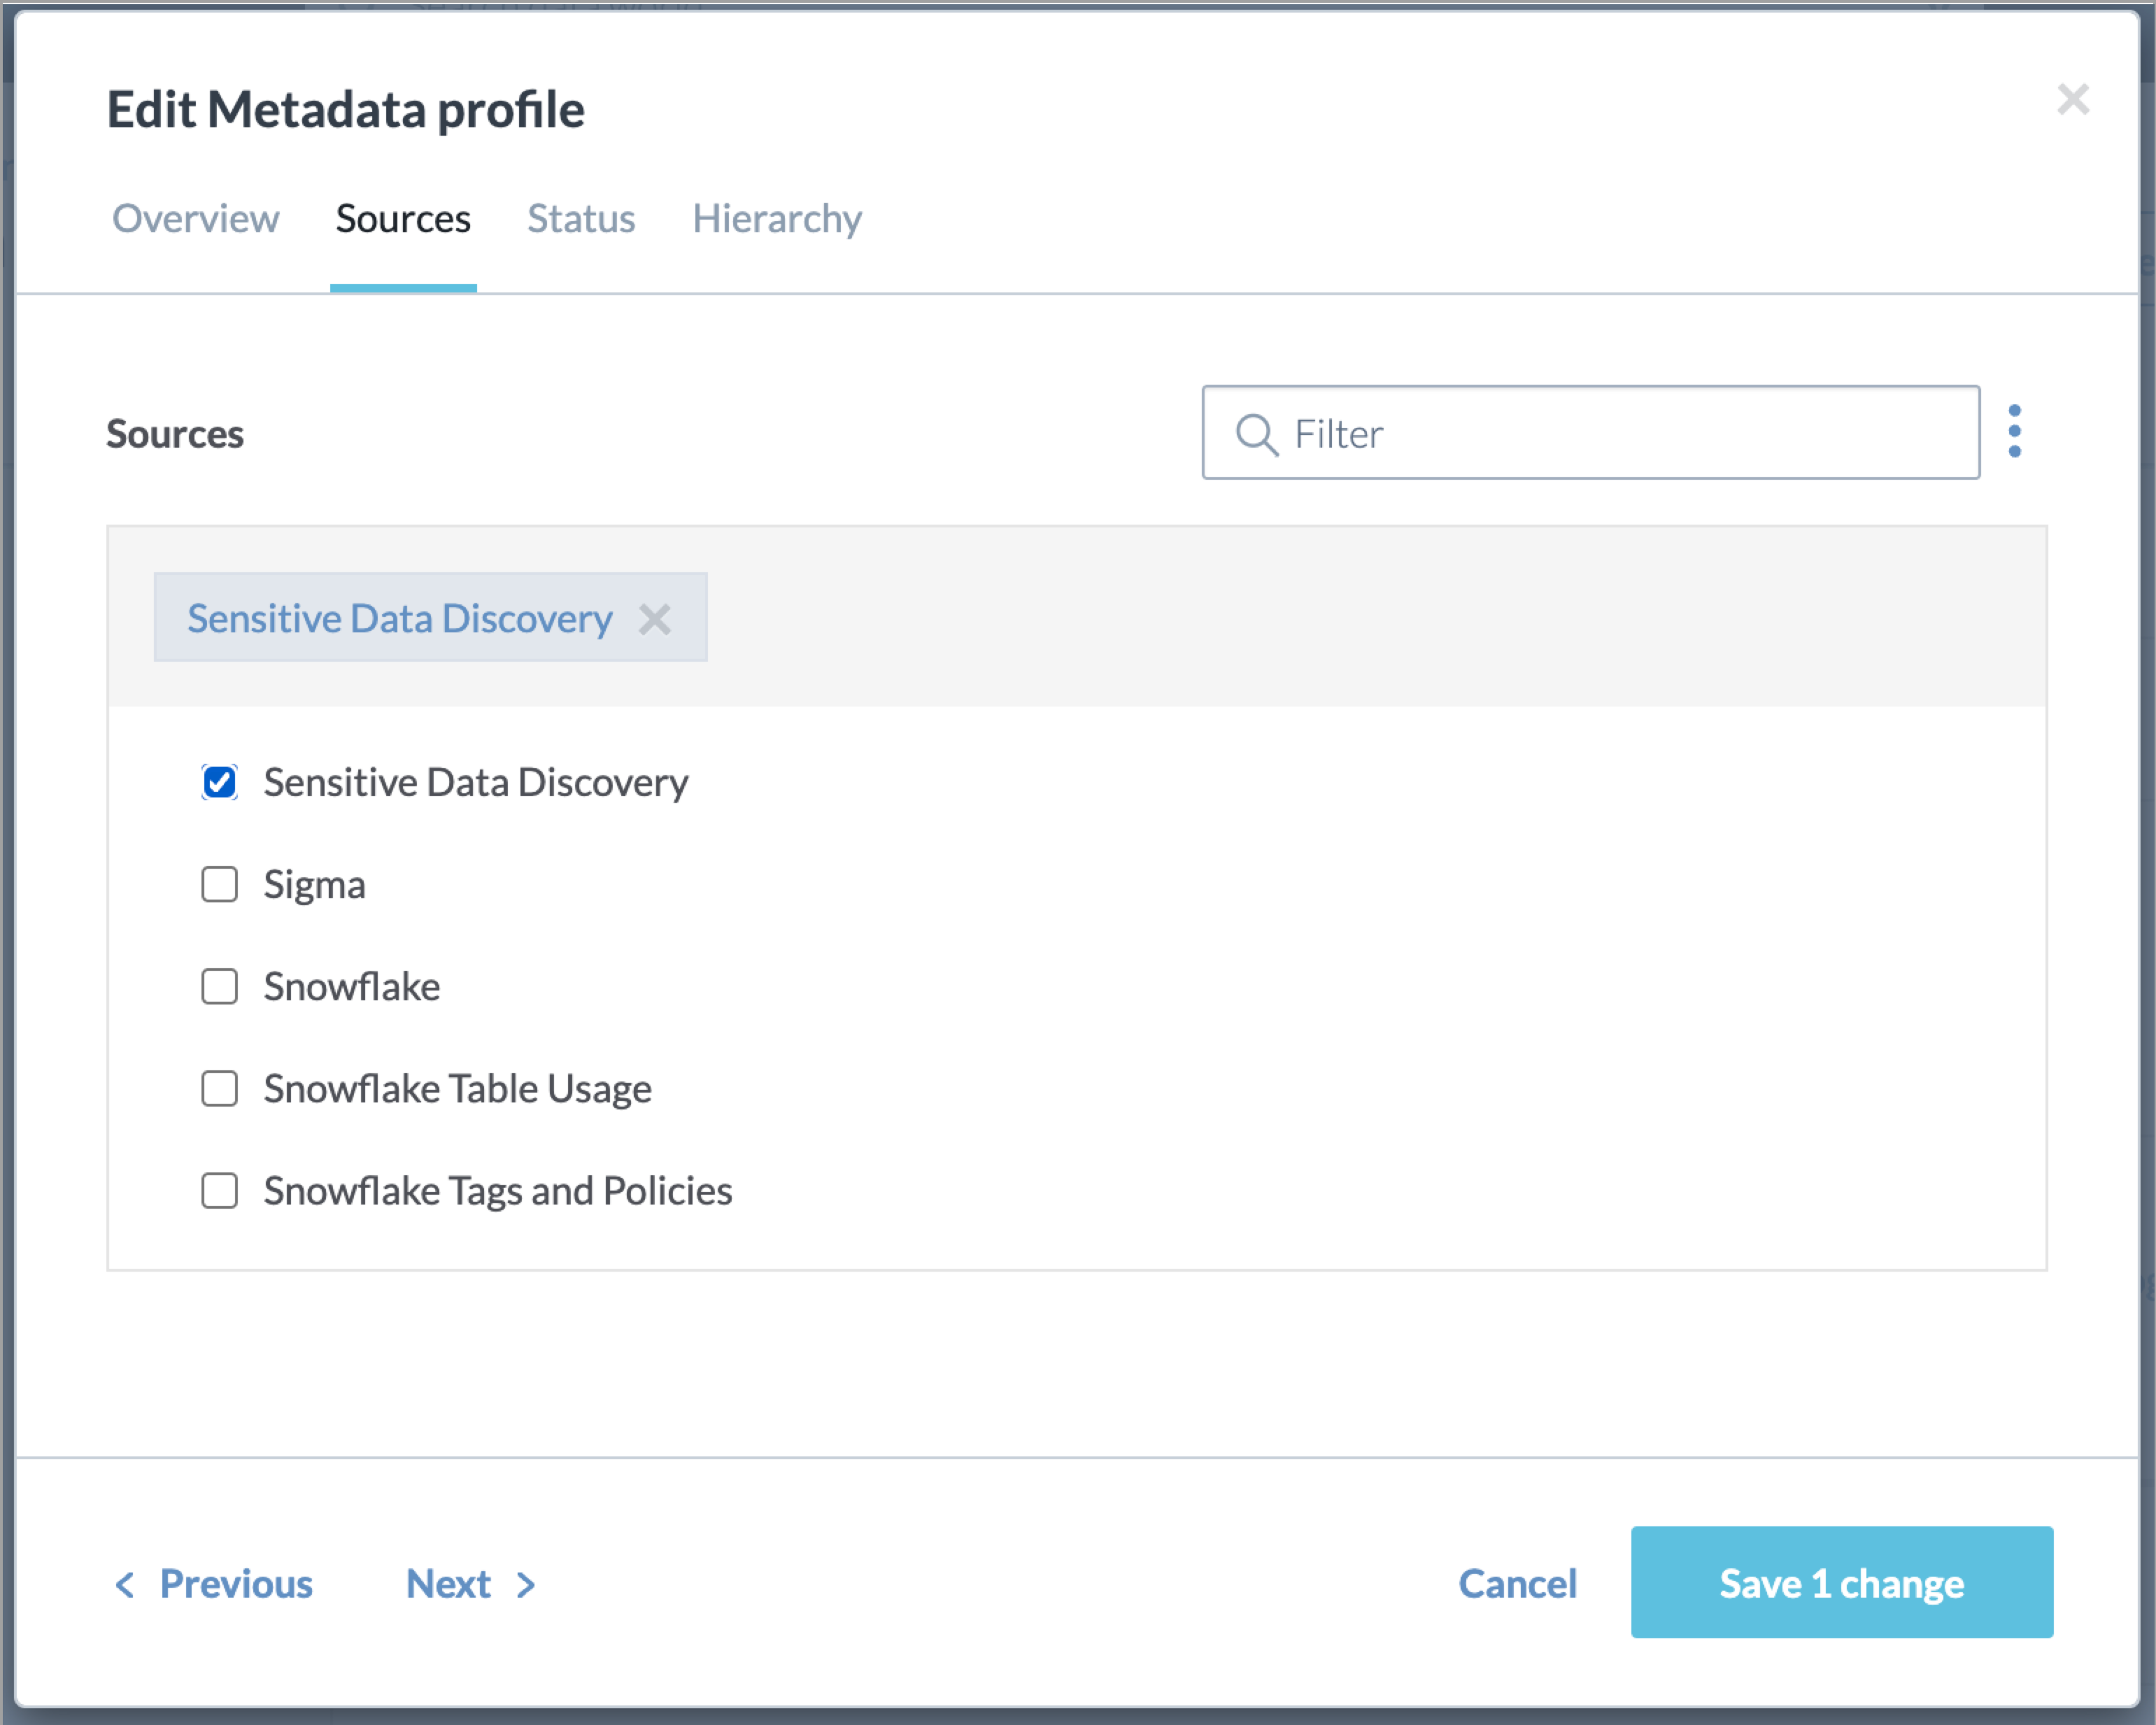
In the Catalog Configuration organization, from the Catalog experience, browse to the Metadata profile collection.
On the Overview tab, locate the Other Modules field and click in to edit.
Select Sensitive Data Discovery. Click Save changes.
STEP B: Publish the metadata profile to the destination organizations
Important
This task is performed in the Catalog configuration organization.
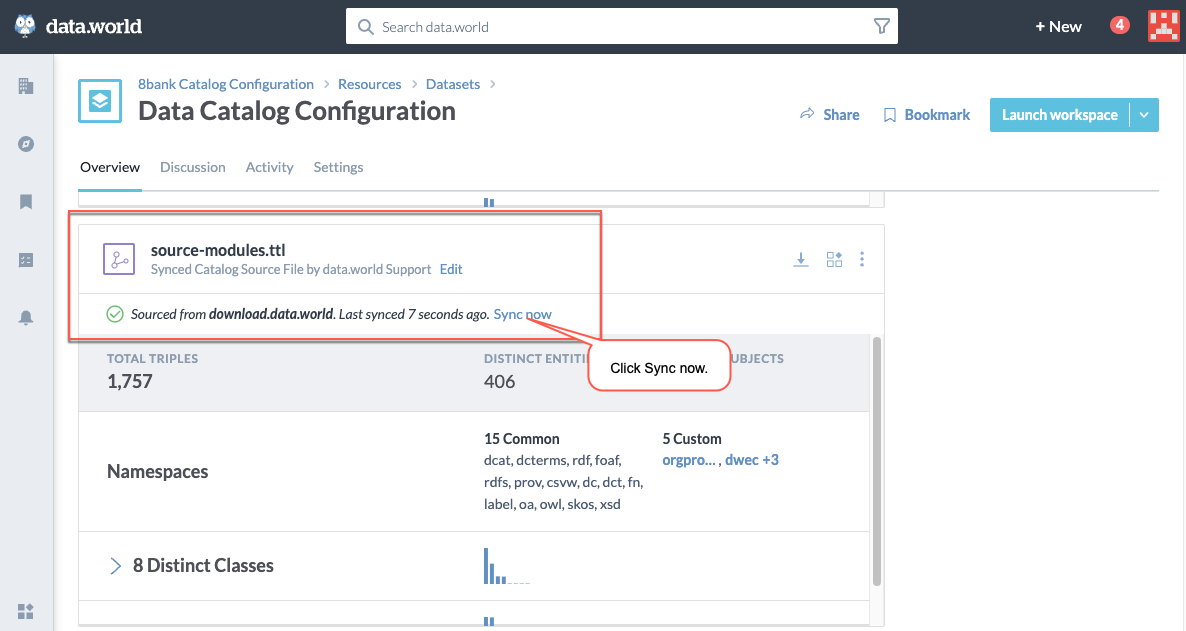
In the Catalog Configuration organization, from the Workbench experience, browse to the Data Catalog Configuration dataset.
In the dataset, find the source-modules.ttl file, and click Sync now.
Publish the updated metadata profile to the destination organization, following the steps outlined here.
STEP 3: Run the collector
Important
You can only run DWCC-SDD on a database that has already been cataloged.
Open a terminal window from the directory where you uploaded the dwcc-sdd-x.y.tar.gz zip file. Unzip and load the file into Docker using with the following command
gunzip dwcc-sdd-x.y.tar.gz && docker load -i dwcc-sdd-x.y.tar
Run the collector. If you are going to run DWCC-SDD on Snowflake, the command will be:
docker run -it --rm --mount type=bind,source=/tmp,target=/dwcc-output \
--mount type=bind,source=/tmp,target=/app/log dwcc-sdd:latest \
catalog-snowflake -S <SCHEMA> -a <DDW ORG> -d <DATABASE> -n <CATALOG NAME> -o "/dwcc-output" \
-P <PSWD> -r PUBLIC -s <CONNECTION> -p 443 -u <USER>
Command examples for other sources are available here. The resulting file will be <database_name>.<catalog_name>-sdd.dwec.ttl
Save the resulting file <database_name>.<catalog_name>-sdd.dwec.ttl from SDD docker to the DDW Sensitive Data Discovery Main or Sandbox (ID: ddw-sensitive-data) dataset in the in the Catalog Sources organization.
STEP 4: Sync the SDD metadata to the catalog
Note
This task is performed in the Main or Sandbox organization.
After the SDD collector output has been uploaded to the landing dataset, the metadata needs to be synced to the destination catalog.
In the destination organization (Main or Sandbox), from the Workbench experience, navigate to the DDW Main or Sandbox Catalog dataset. This dataset ID is ddw-catalogs.
Sync the Main or Sandbox Catalog Sensitive Data Discovery.ttl file. You must set the file to auto-sync every hour to ensure the latest updates get synced to the catalog periodically.
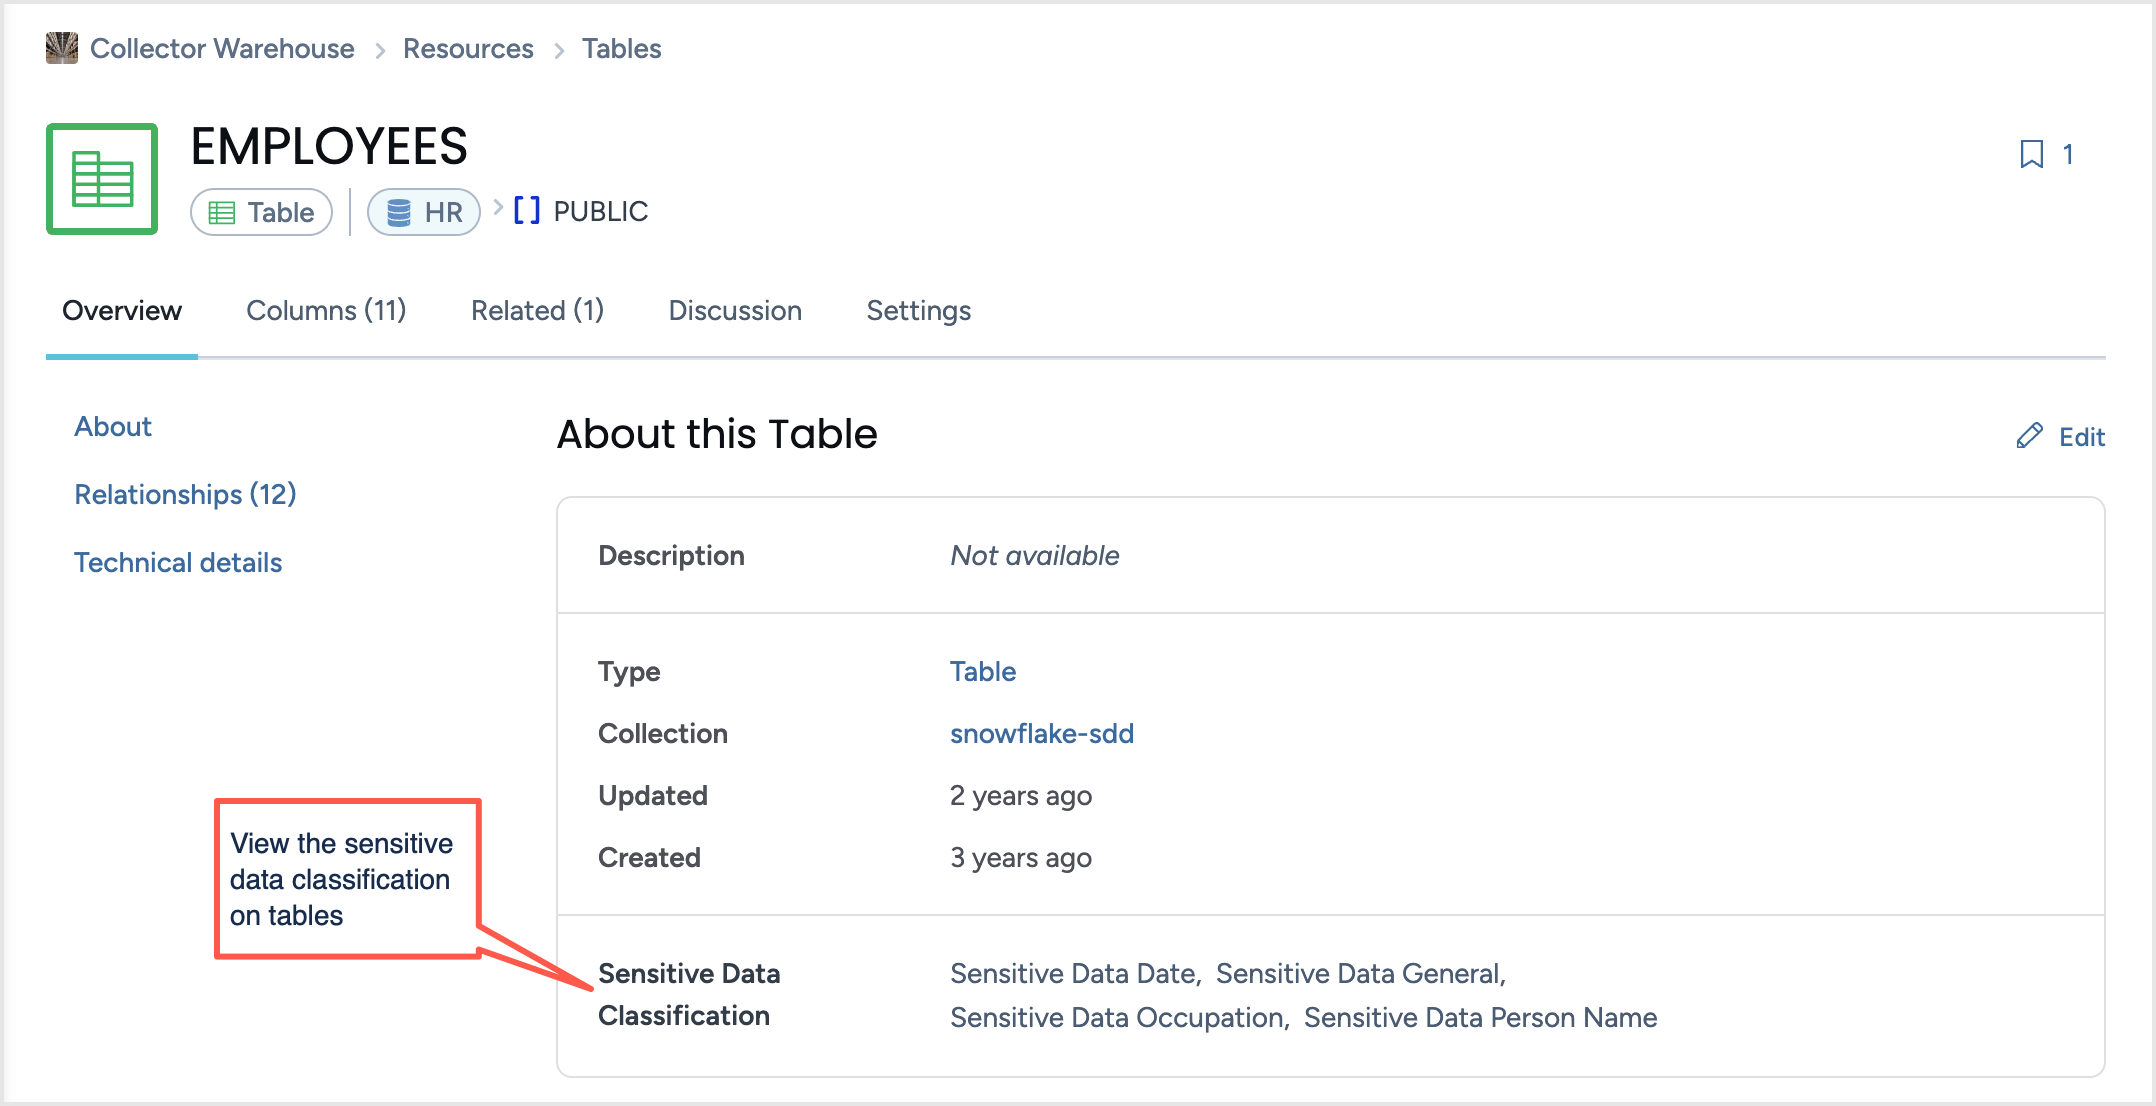
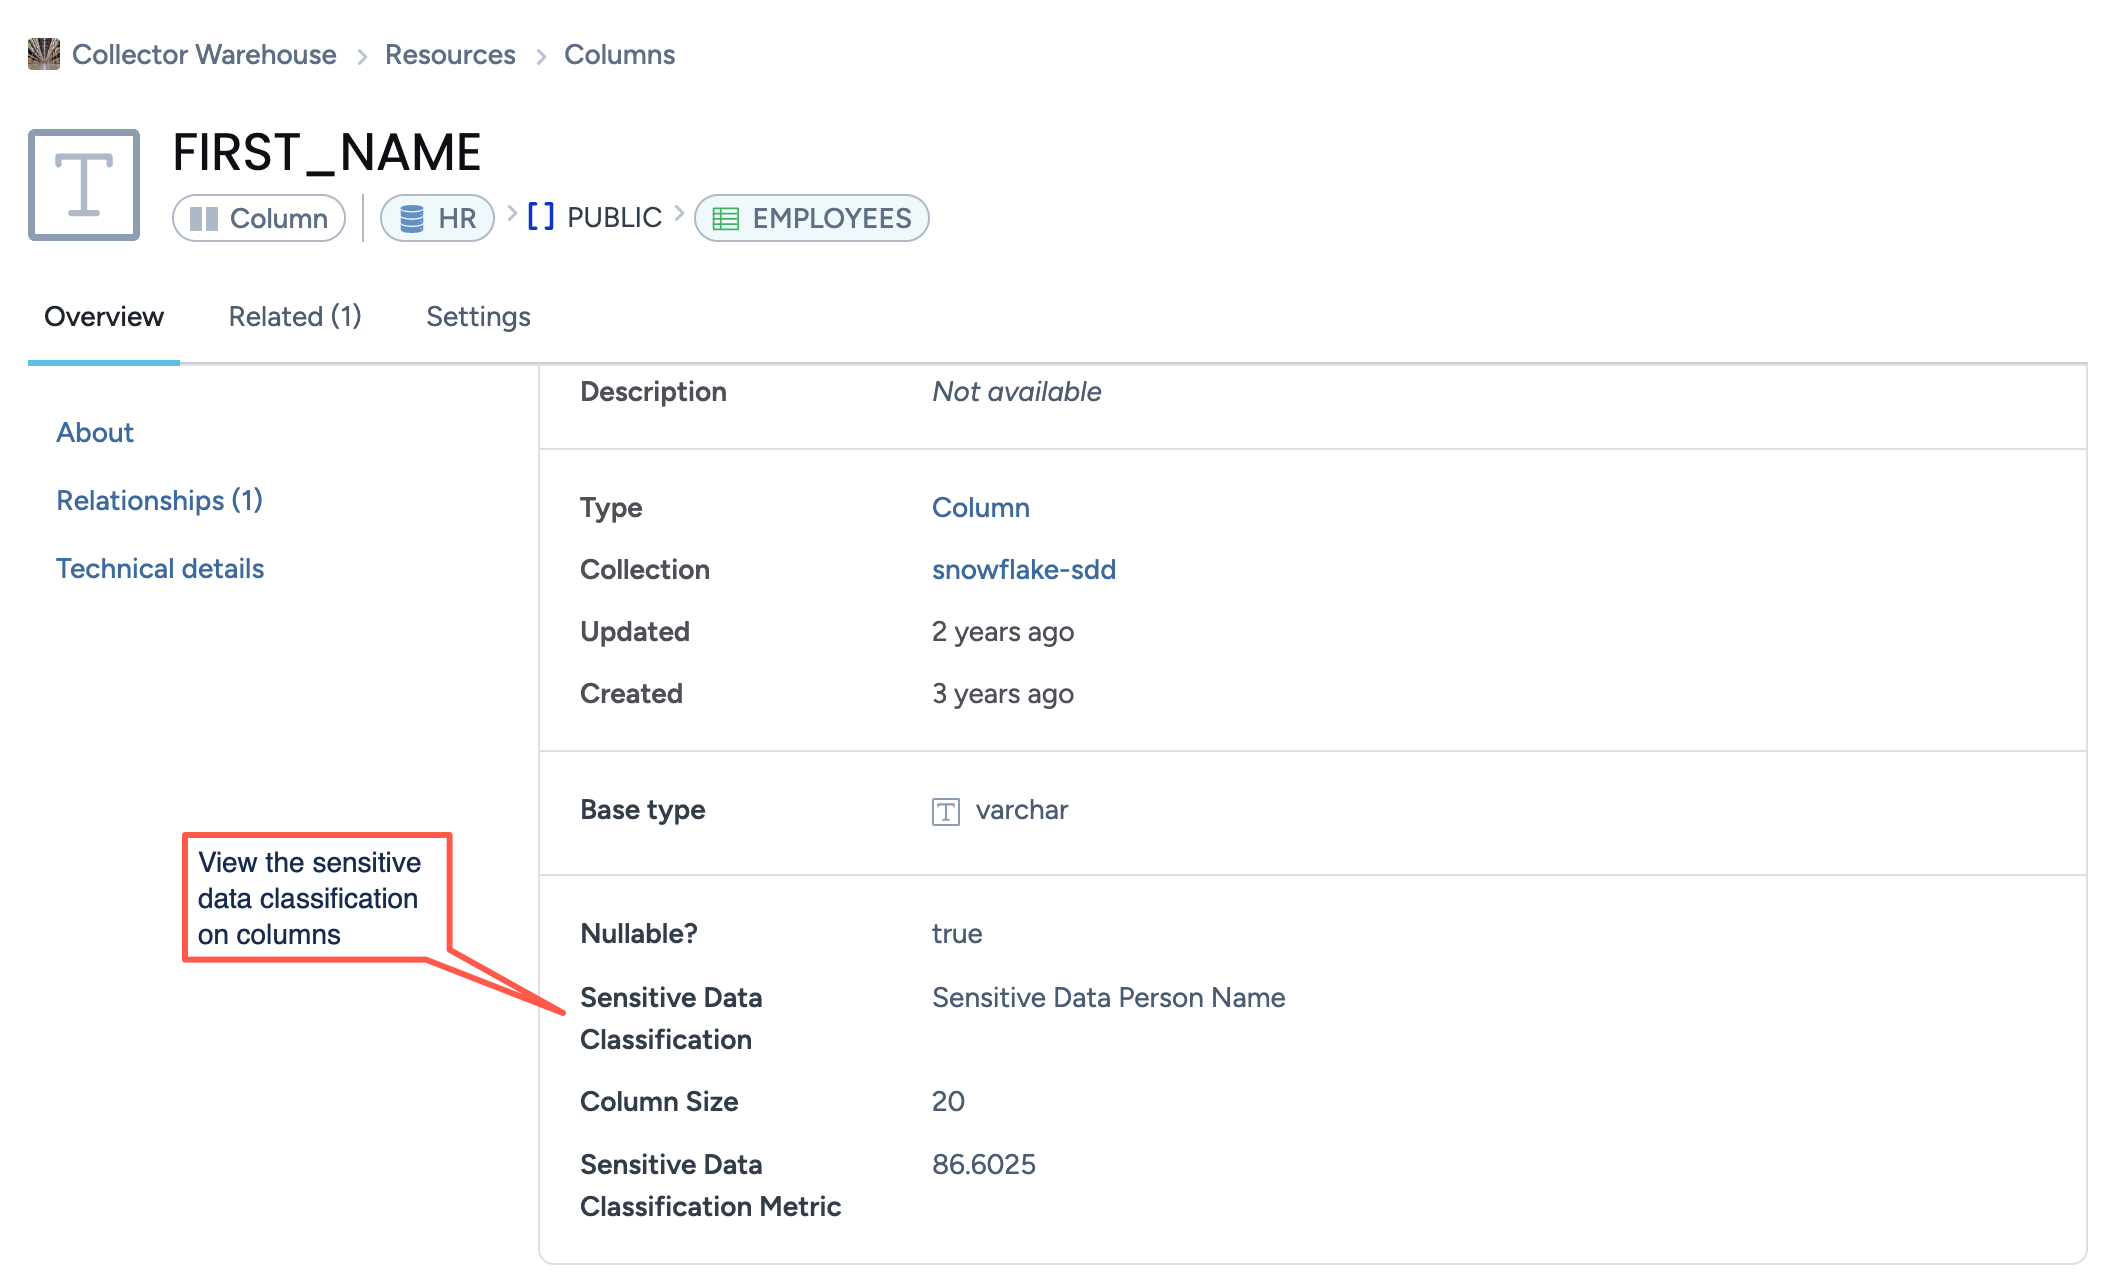
View the results
Now that you have set up sensitive data, you can:
Browse to the resources to see the type of sensitive data.
On various product pages such as Search results, Resources, use the Sensitive Type filter to narrow down lists by sensitive types attached to the resources.