Sharing projects
Once you have created a project share it with other users so that they can use the project or contribute to it.
Sharing project with organizations and organization members
You can create a project in an organization and not share it with any members of the project till it is all set and ready for use. Once you are ready that members of the project share it with all of the organization or selective members.
To share a project with organizations and organization members:
In the Workbench experience, create a project and do not share with anyone.
When you are ready for the rest of the org to use the project, go to the Settings tab of the project. In the Access and Ownership section, do one of the following:
In the Manage access settings, click the Grant access to all members button to invite everyone in an organization to access the project. Sharing the project with all of the organization ensures that as new members get added to the organization, they automatically get access to the project.
Click the Grant access button, to give access to only selective members of the organization. or to give special permissions to certain members of the organization. For example, you could set all of the organization to be able to view the project, but you may want to give only handful of members the ability to edit the project.
In the Grant access window, do the following:
If you are granting access to an organization, the name is selected by default and you can't edit it. If you are giving access to selective members, you get the option to type the username, full name, or email. If you do not find someone you are looking for, type in their email address to invite the person to view your project.
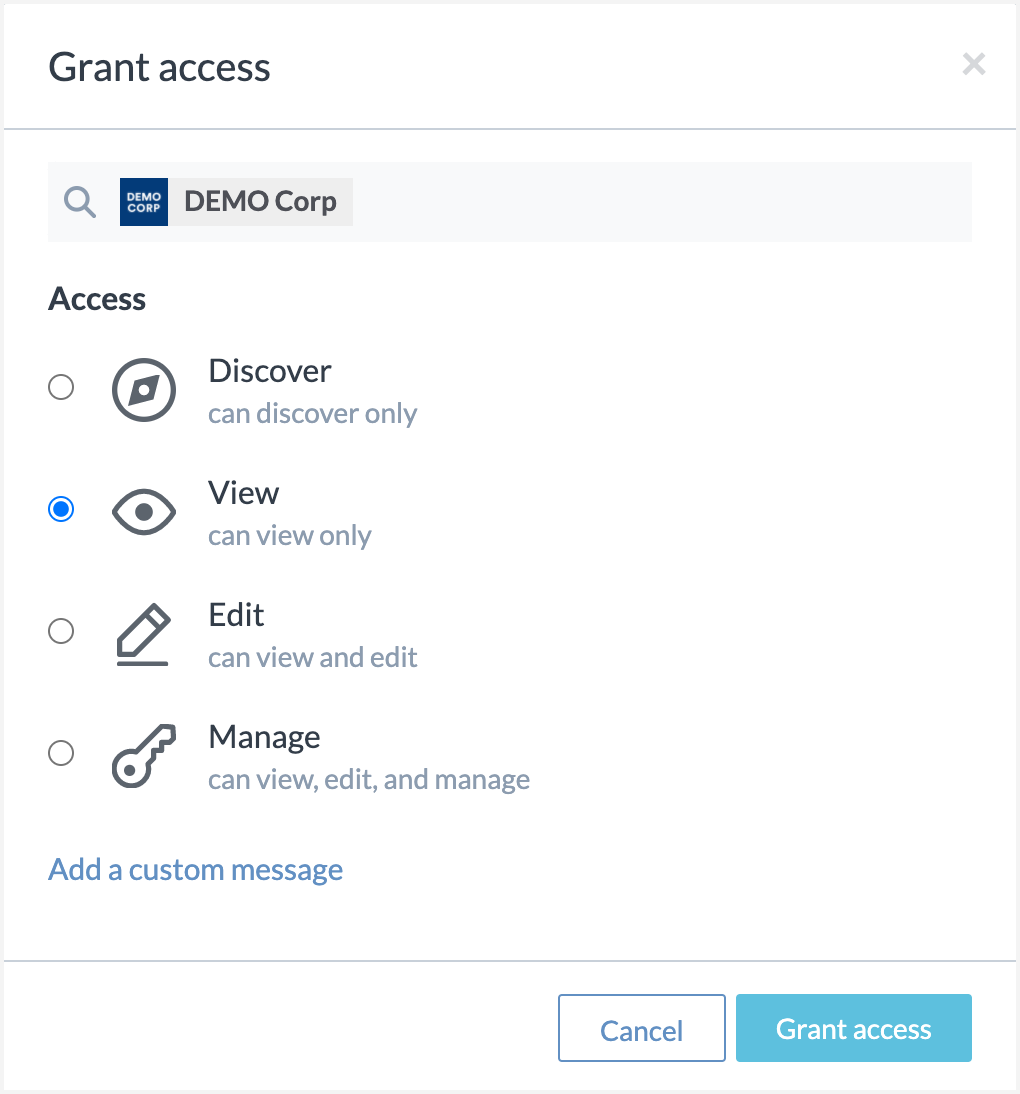
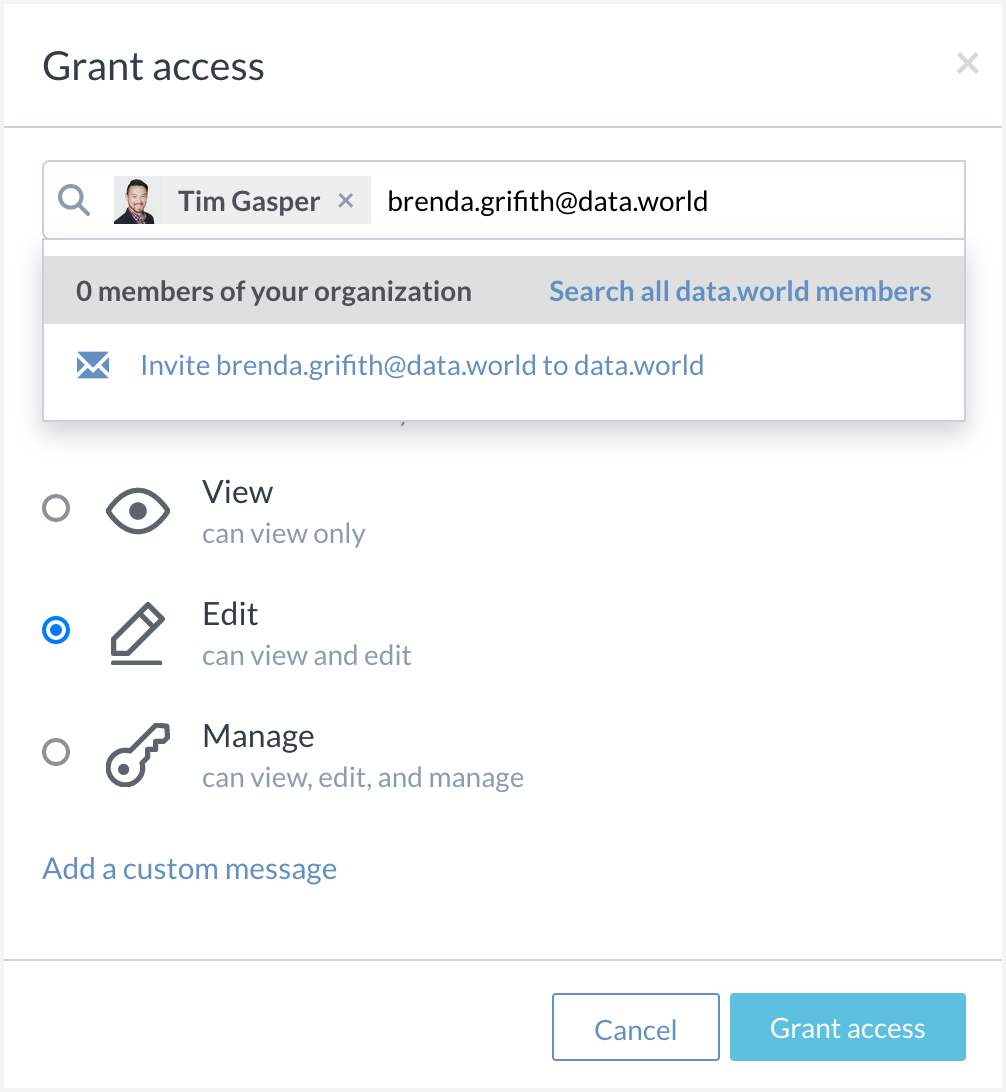
Specify if the members of the organization can Discover, View, Edit, or Manage the project.
Click the Add a custom message link to open the text box to add an optional message to the invite.
Click the Grant access button.
Sharing your personal projects with organizations
You can create projects in your personal space and share with an organization when you are ready. You can only suggest projects to the organizations that are setup to accept suggestions.
To share your personal project with an organization:
In the Workbench experience, create a project in your personal space.
When you are ready to share the project with an organization, go to the Settings tab of the project. In the Access and Ownership section, click the Grant access button.
In the Grant access window that opens, search for the organization where you want to suggest the project. Only the organizations that have the Allow community members to propose new resources setting enabled show in the list. The organization administrators are notified about the invitation and they can choose to accept the invitation and contribute to the project.
Managing access requests
When you make a project discoverable, users can view certain aspects of the project and can request access to contribute to the project. All such access requests are available in the Notification page and on the Settings tab of the Project Details page.
To manage access requests:
From the Notifications page, approve the access request or browse to the project for which access has been requested.
From the Settings tab, go to the Access and Ownership section. Here you can review the request and accept or reject and adjust the permission level for the user requesting access.