Add a mapping to a relationship
Follow these steps to add a mapping to an relationship:
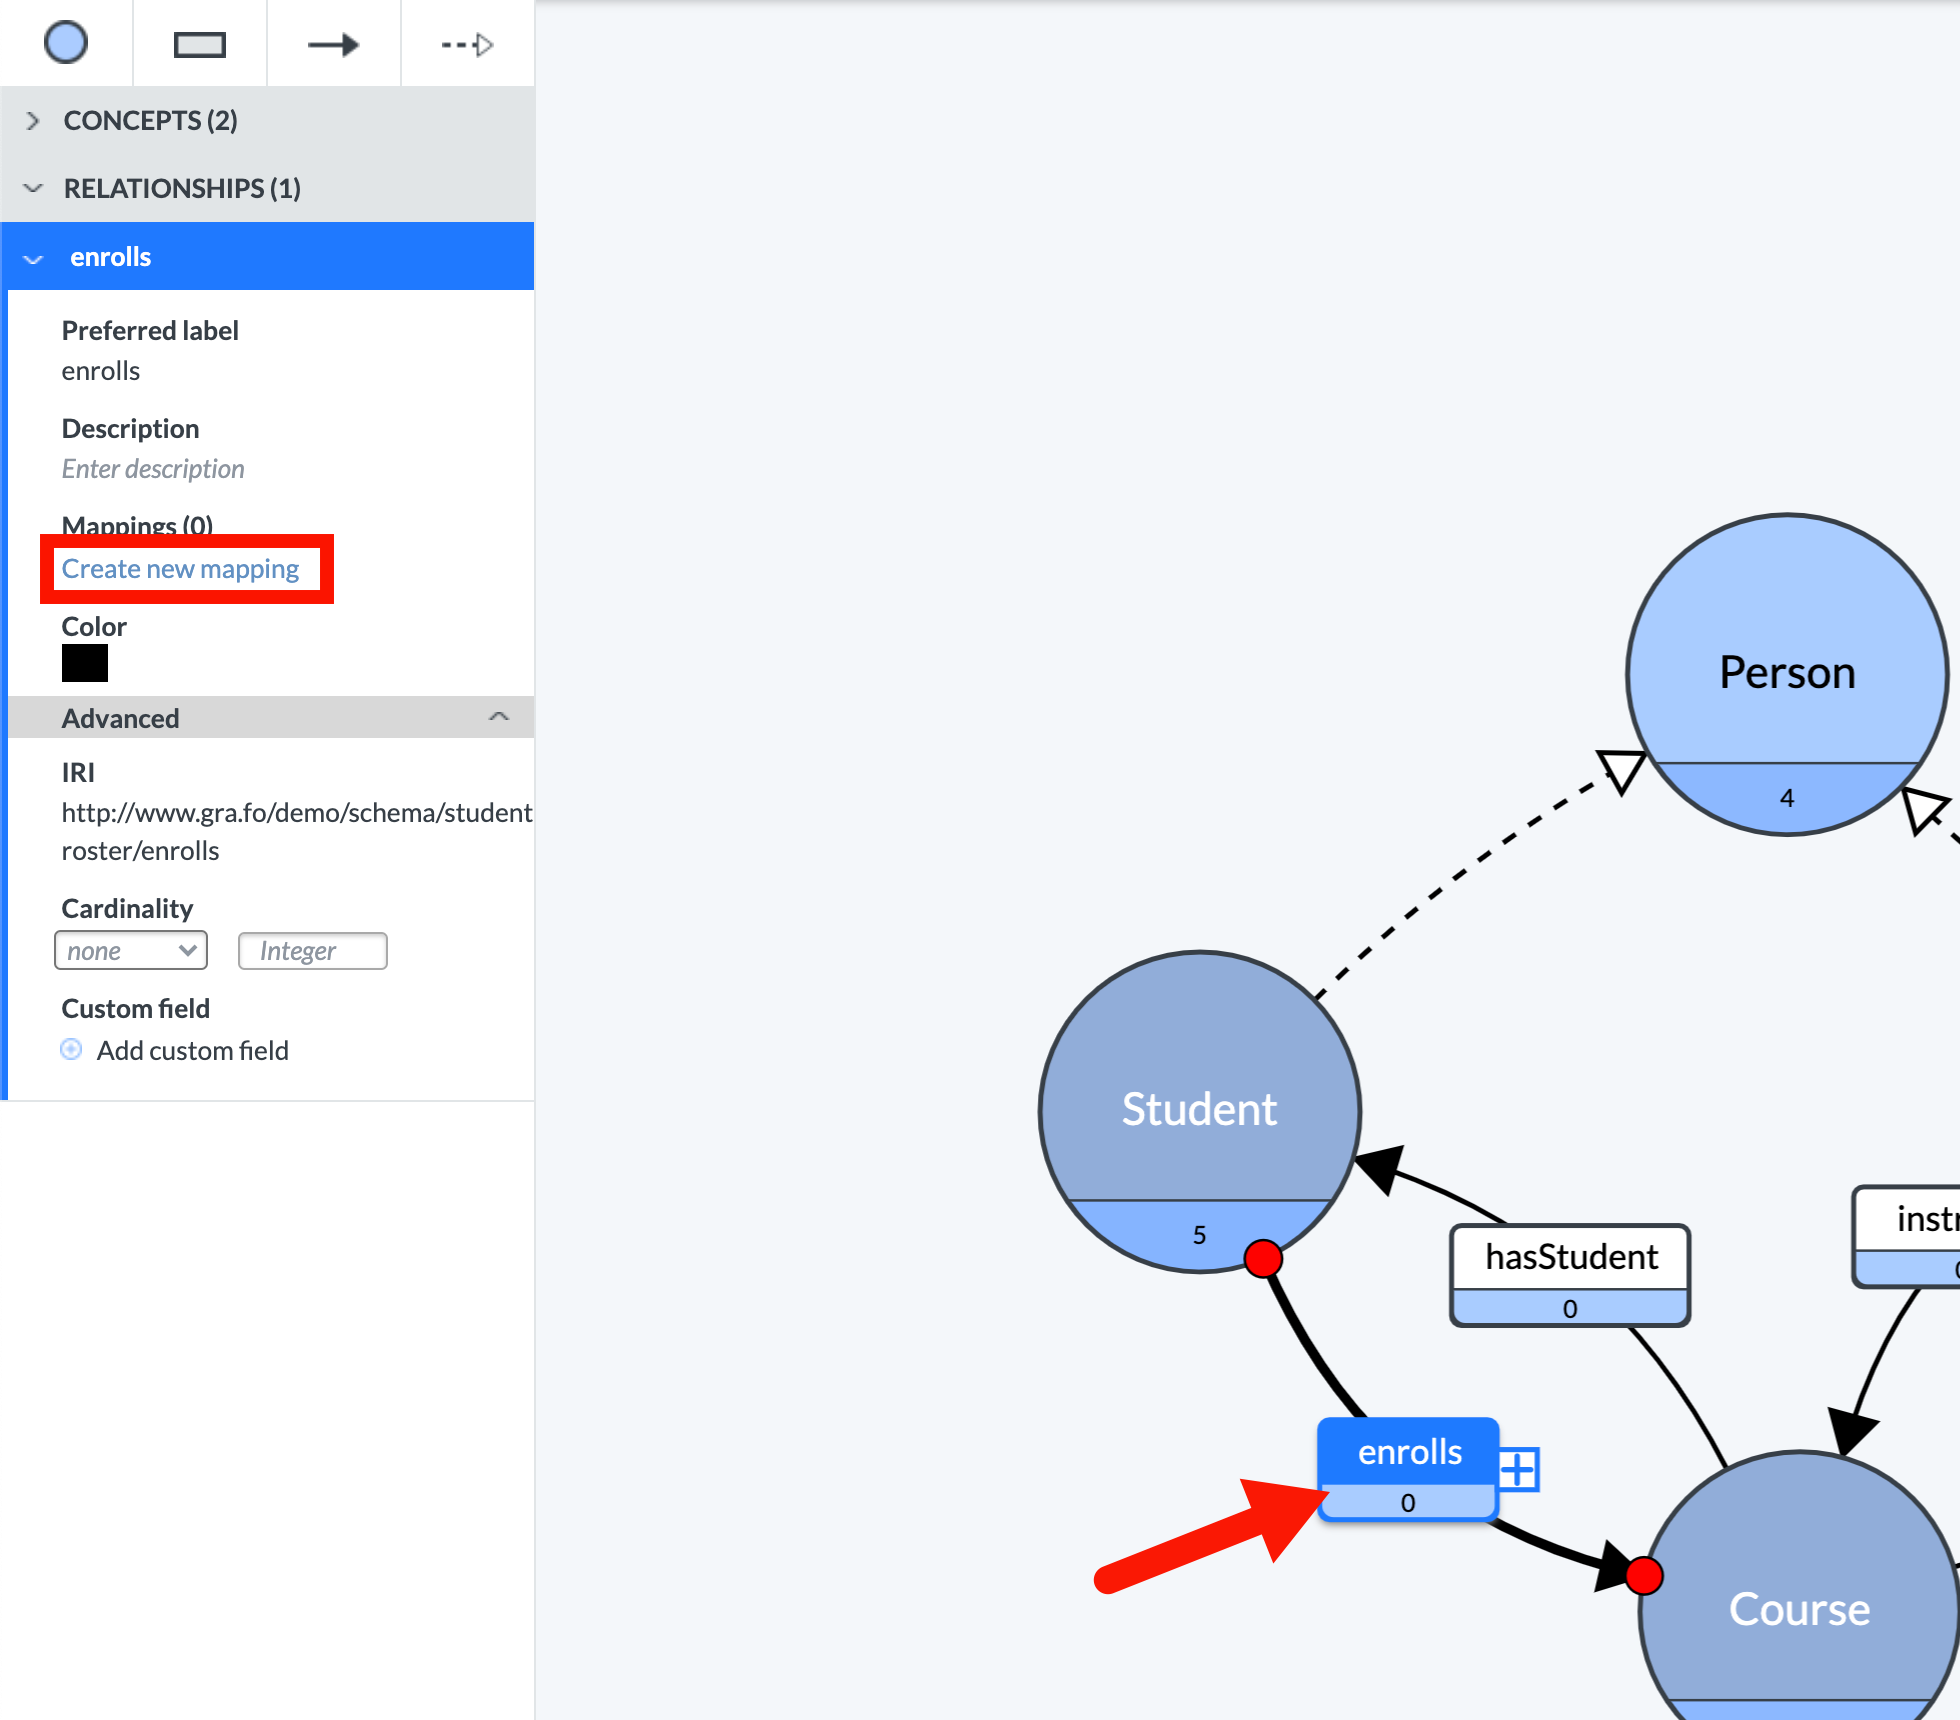
1. Click on the element containing the attribute to which you want to add a mapping. Then click Create a new mapping.

2. A popup window will appear, in which you configure the mapping.

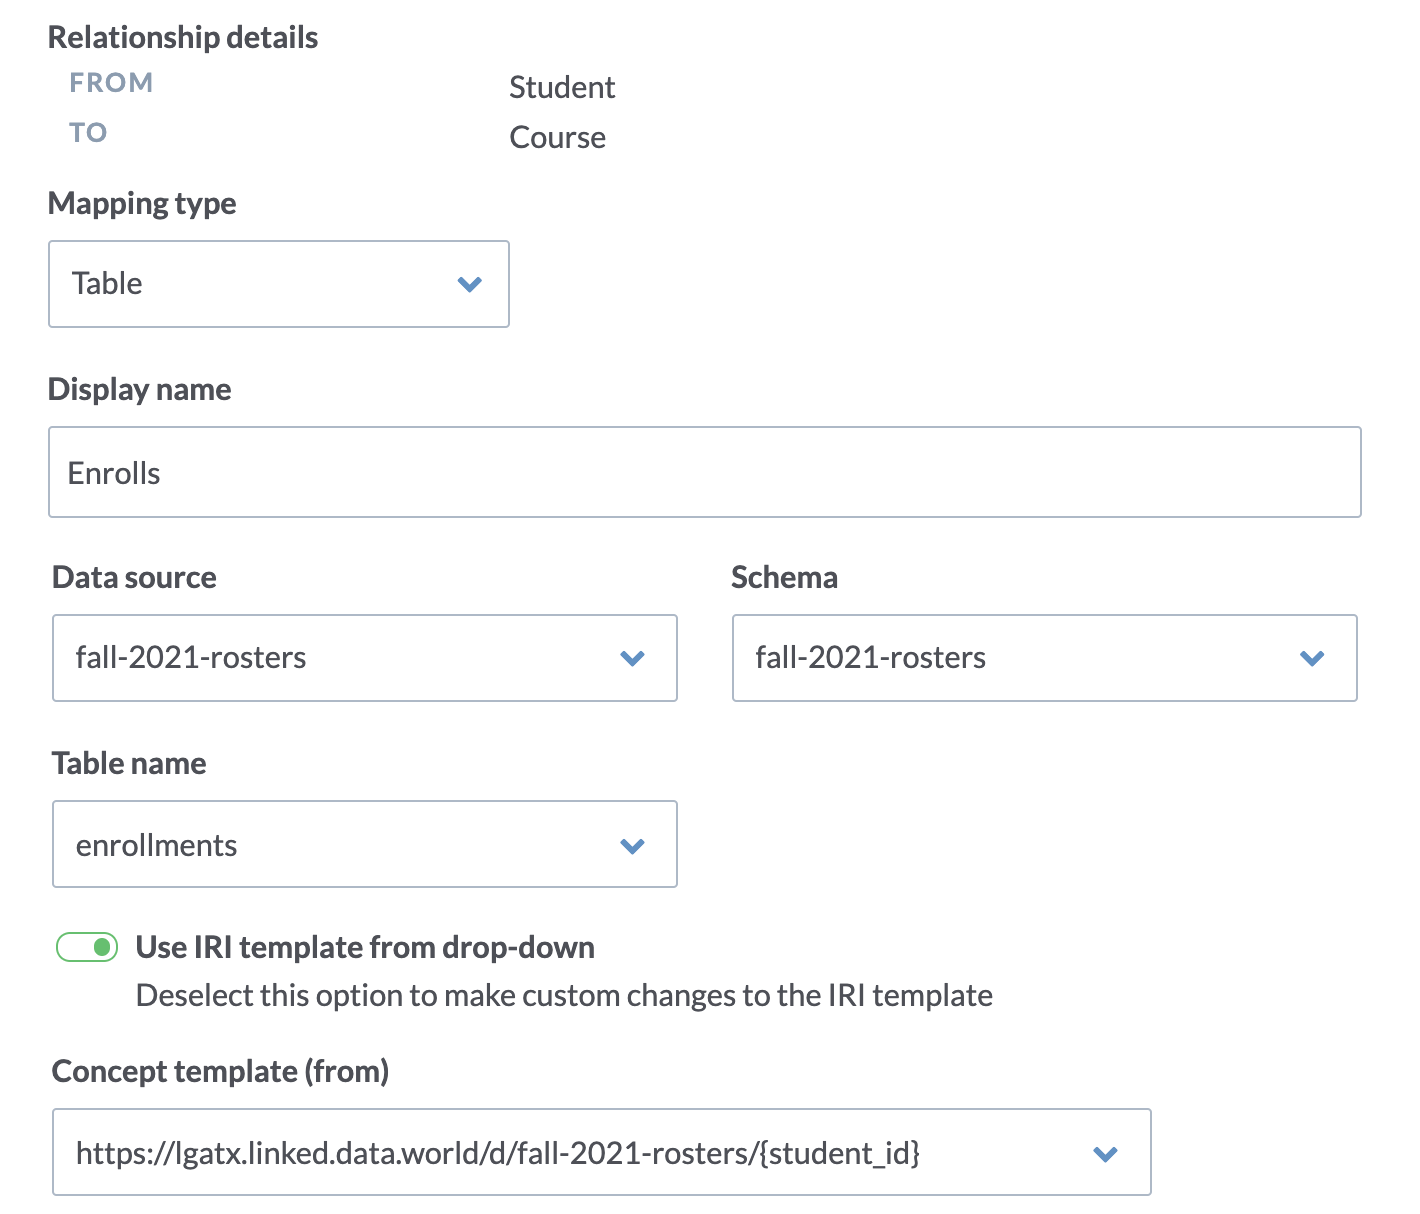
3. For Mapping Type, you can specify Table or View mappings, and enter a Display Name. Choose the Data Source, Schema, Table Name, and Column.
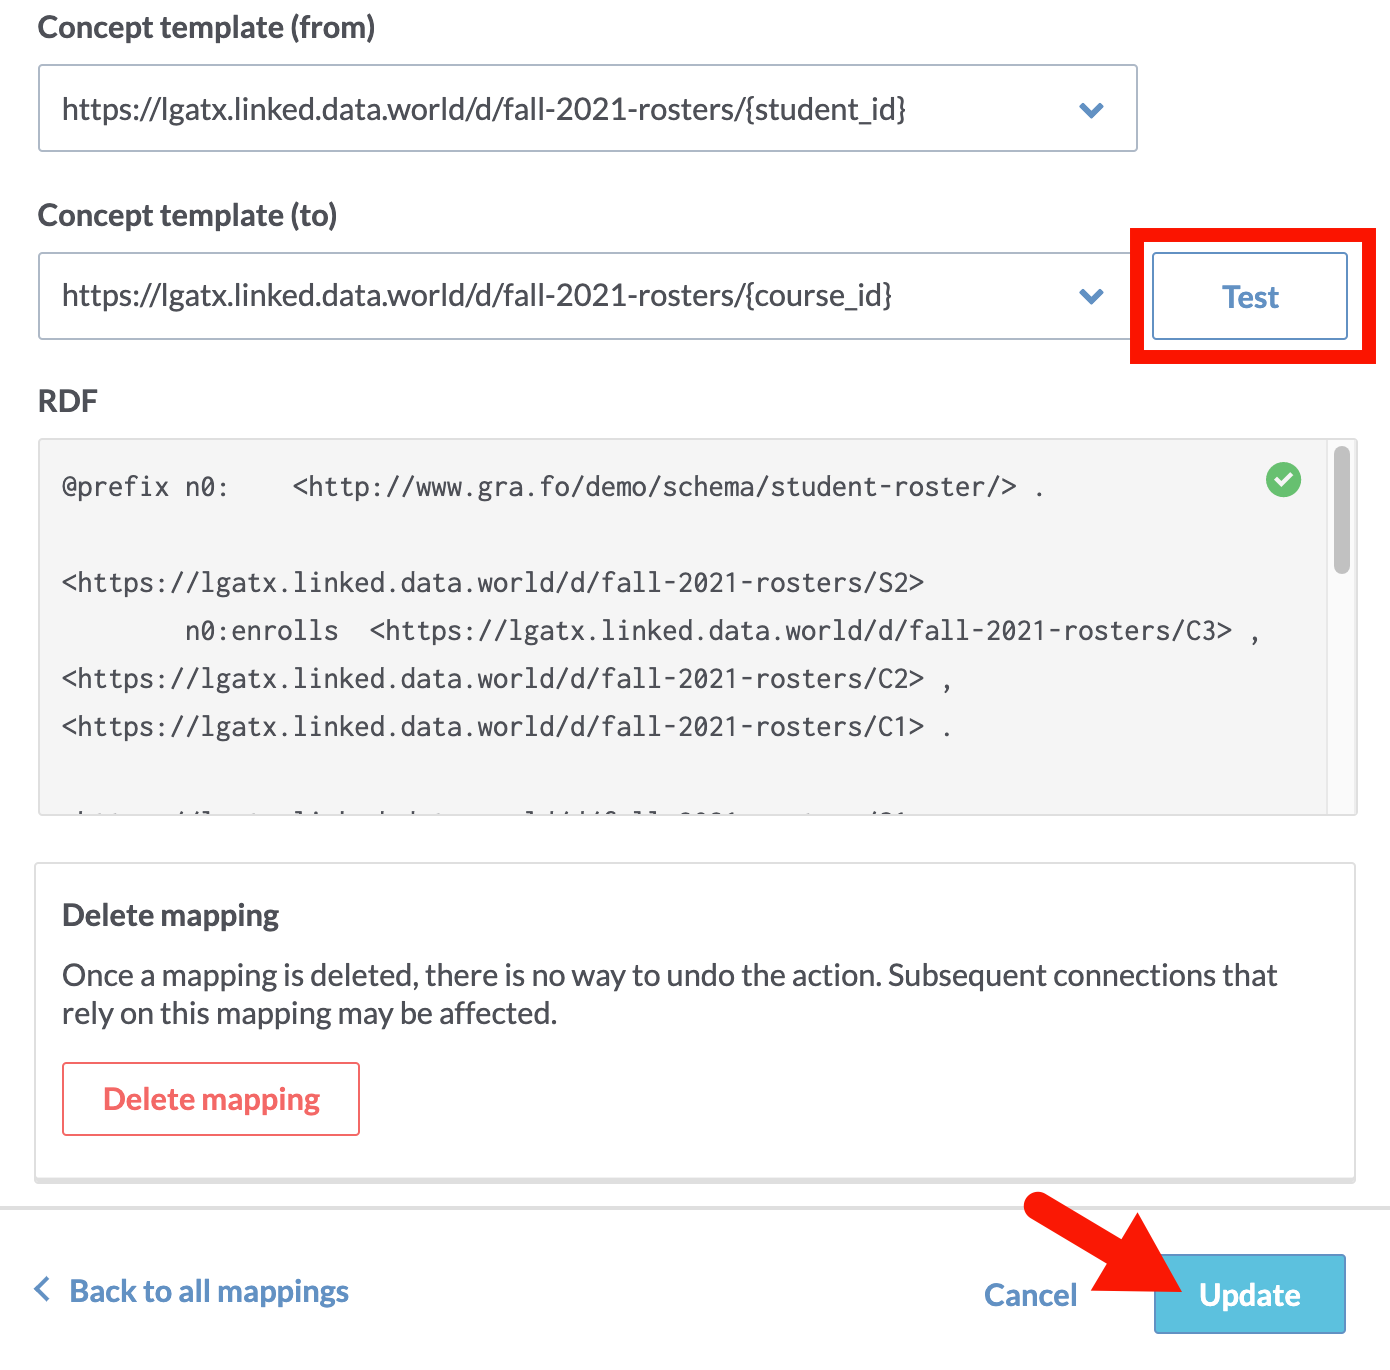
4. In most cases, it is best to automatically generate an IRI template, which will generate a unique identifier that corresponds to the unique keys in the chosen Column. Because this is a relationship, you'll need to choose a Concept Template (from) and Concept Template (to) in the drop-downs.
5. To test the IRI templates, click Test. The results will appear in the RDF field.
6. Click the Create button to add the mapping to the document.
