Athena connection
Pre-configuration task: Creating a dedicated IAM role for Athena connections
To configure a virtual connection to Athena you will need to create a dedicated IAM role in your Amazon Web Services (AWS) console and enter the AWS Amazon Resource Name (ARN) for it in the Add a new Athena connection window in data.world. To create the role, however, first you will need to get the AWS External ID from the Add a new Athena connection window in data.world.
To create the AWS role and the connection to Athena:
In data.world, open the Add a new Athena connection window. Follow the Configuring a connection to Athena instructions until step 3.
From the Add a new Athena connection window, copy the External ID and do not close the window.
Warning
You have to leave the Add a new Athena connection window open while you connect to the AWS console and create the role needed for the connection because every time you open the dialog to create a new connection, a new external ID is generated.
Go to the AWS console and select Create role.
Use the following parameters for the role:
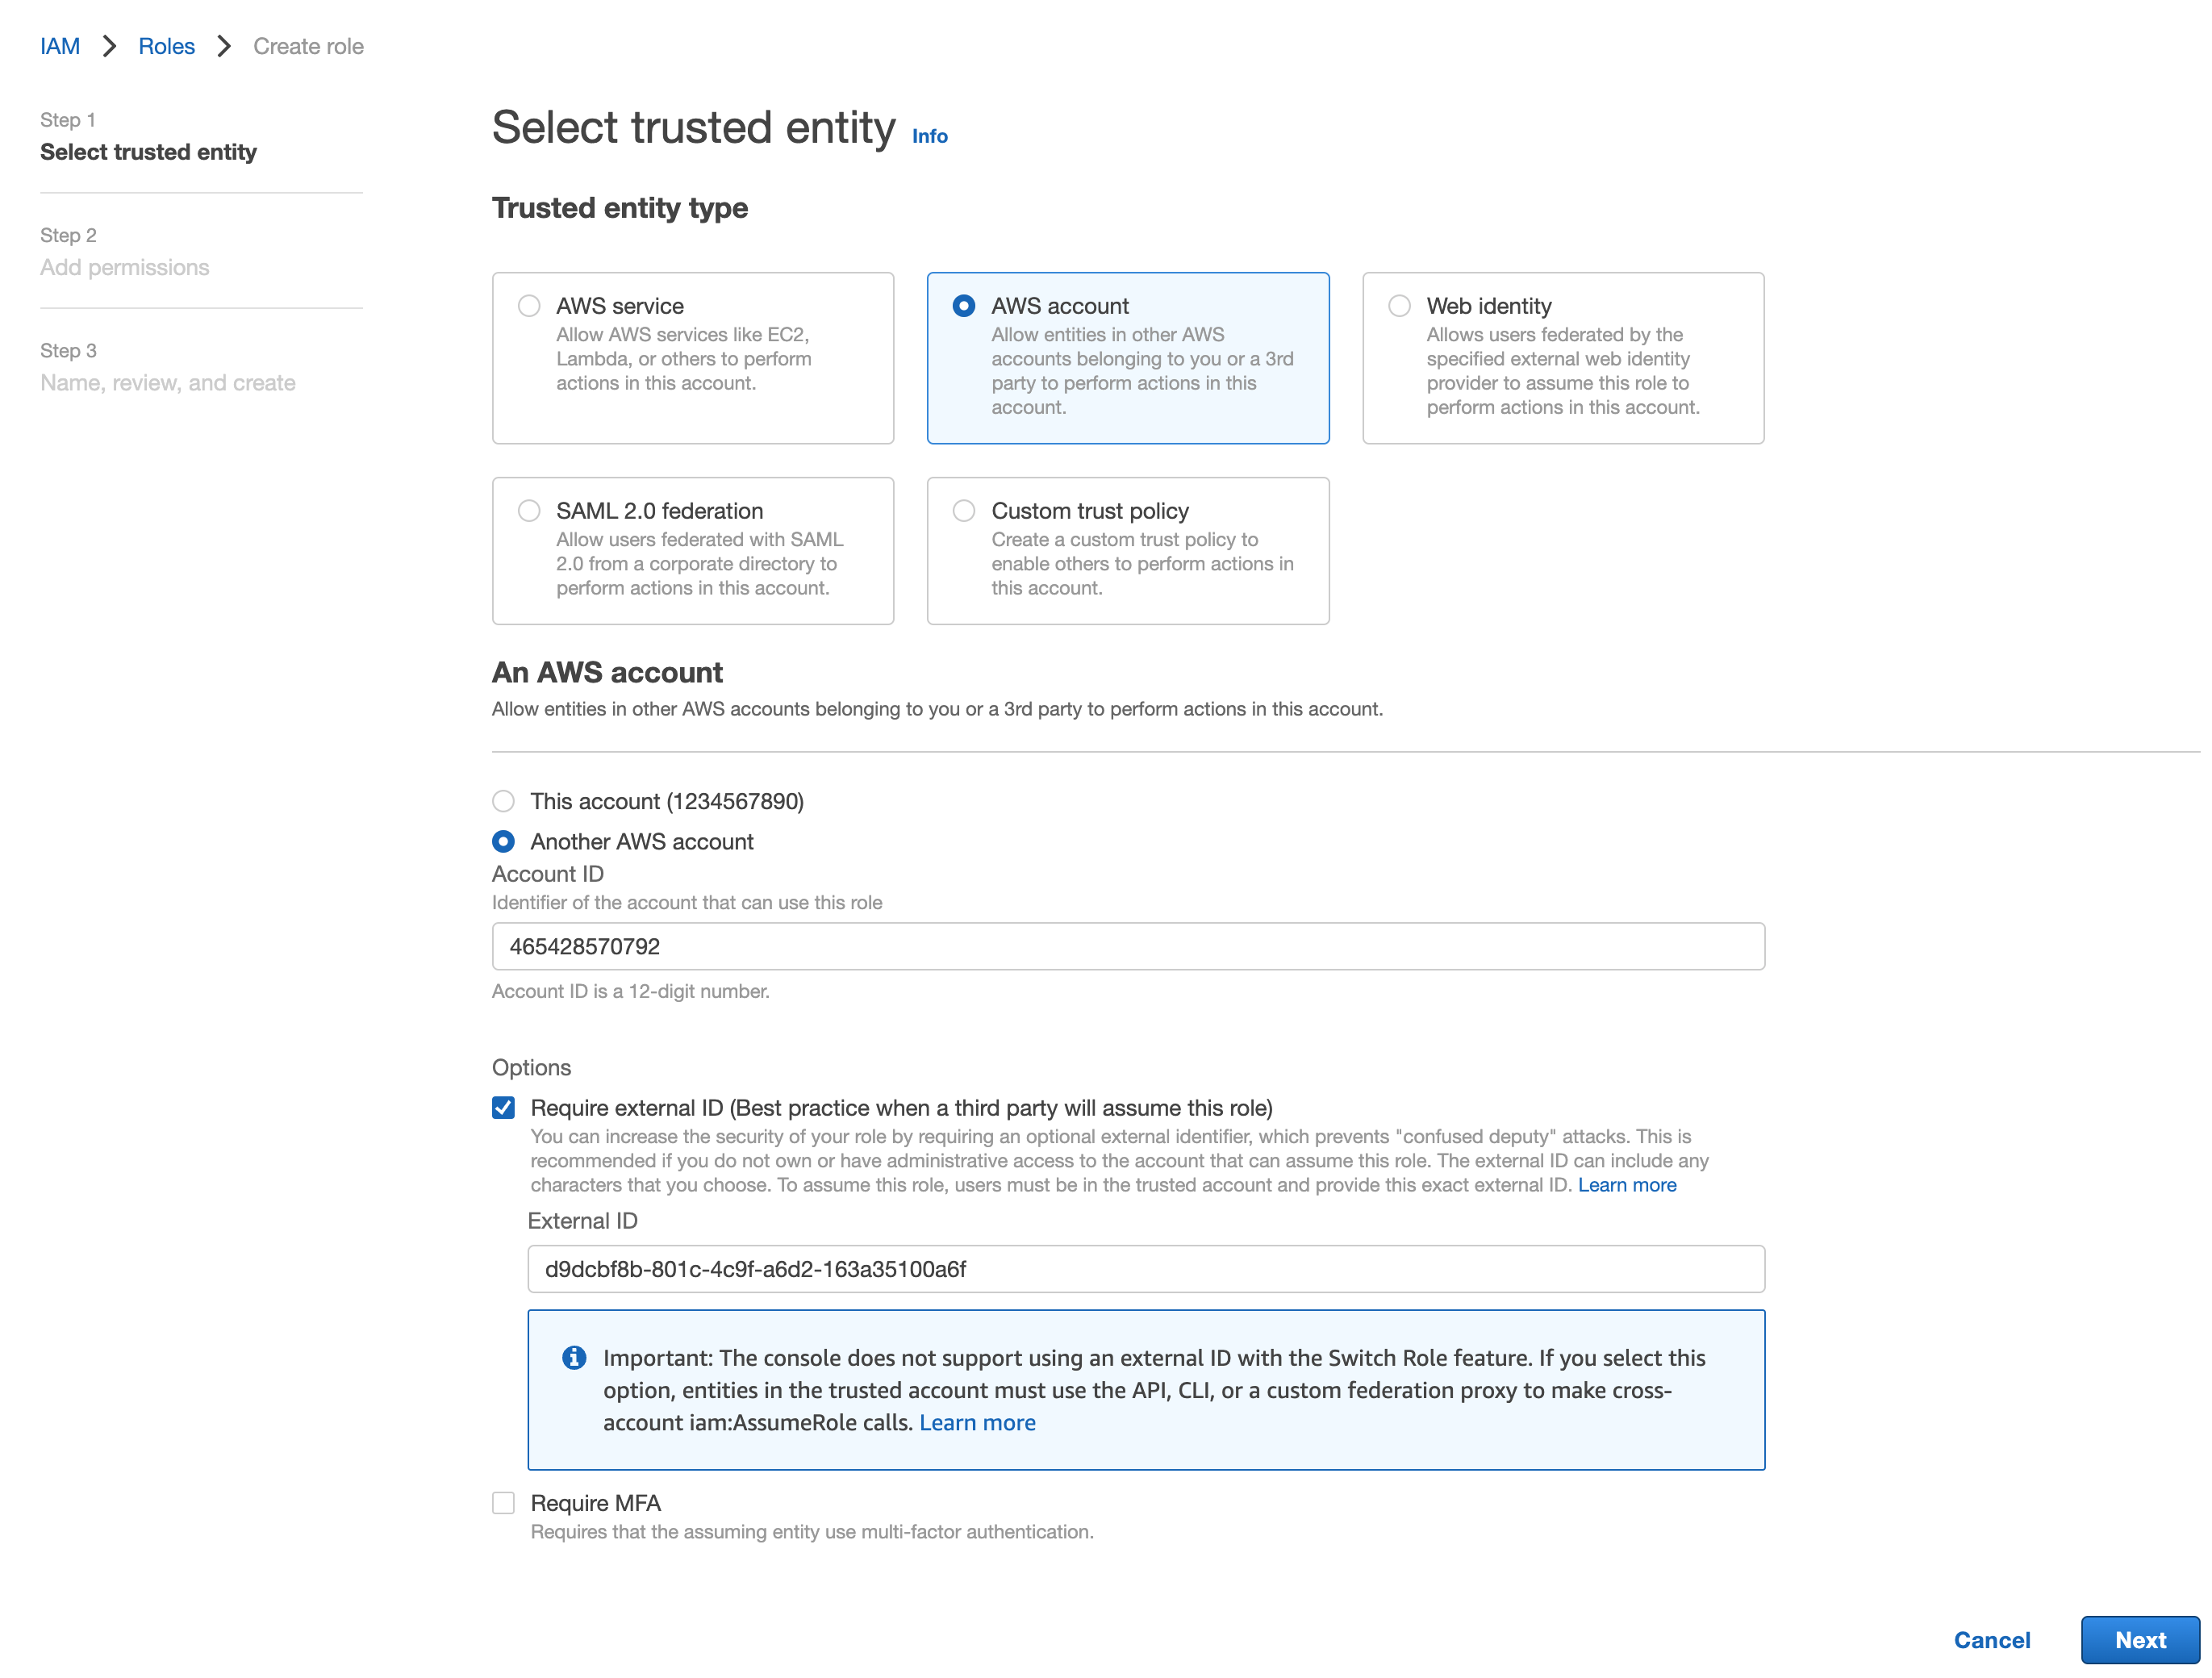
From the Trusted entity type section, select AWS account.
From the An AWS account section, select Another AWS account.
In the Account ID field, provide 465428570792. This is the unique AWS identifier for data.world.
From the Options section, select Require external ID.
In the External ID field, provide the value copied from the AWS external ID field in data.world.
Click Next. The App permissions page opens.
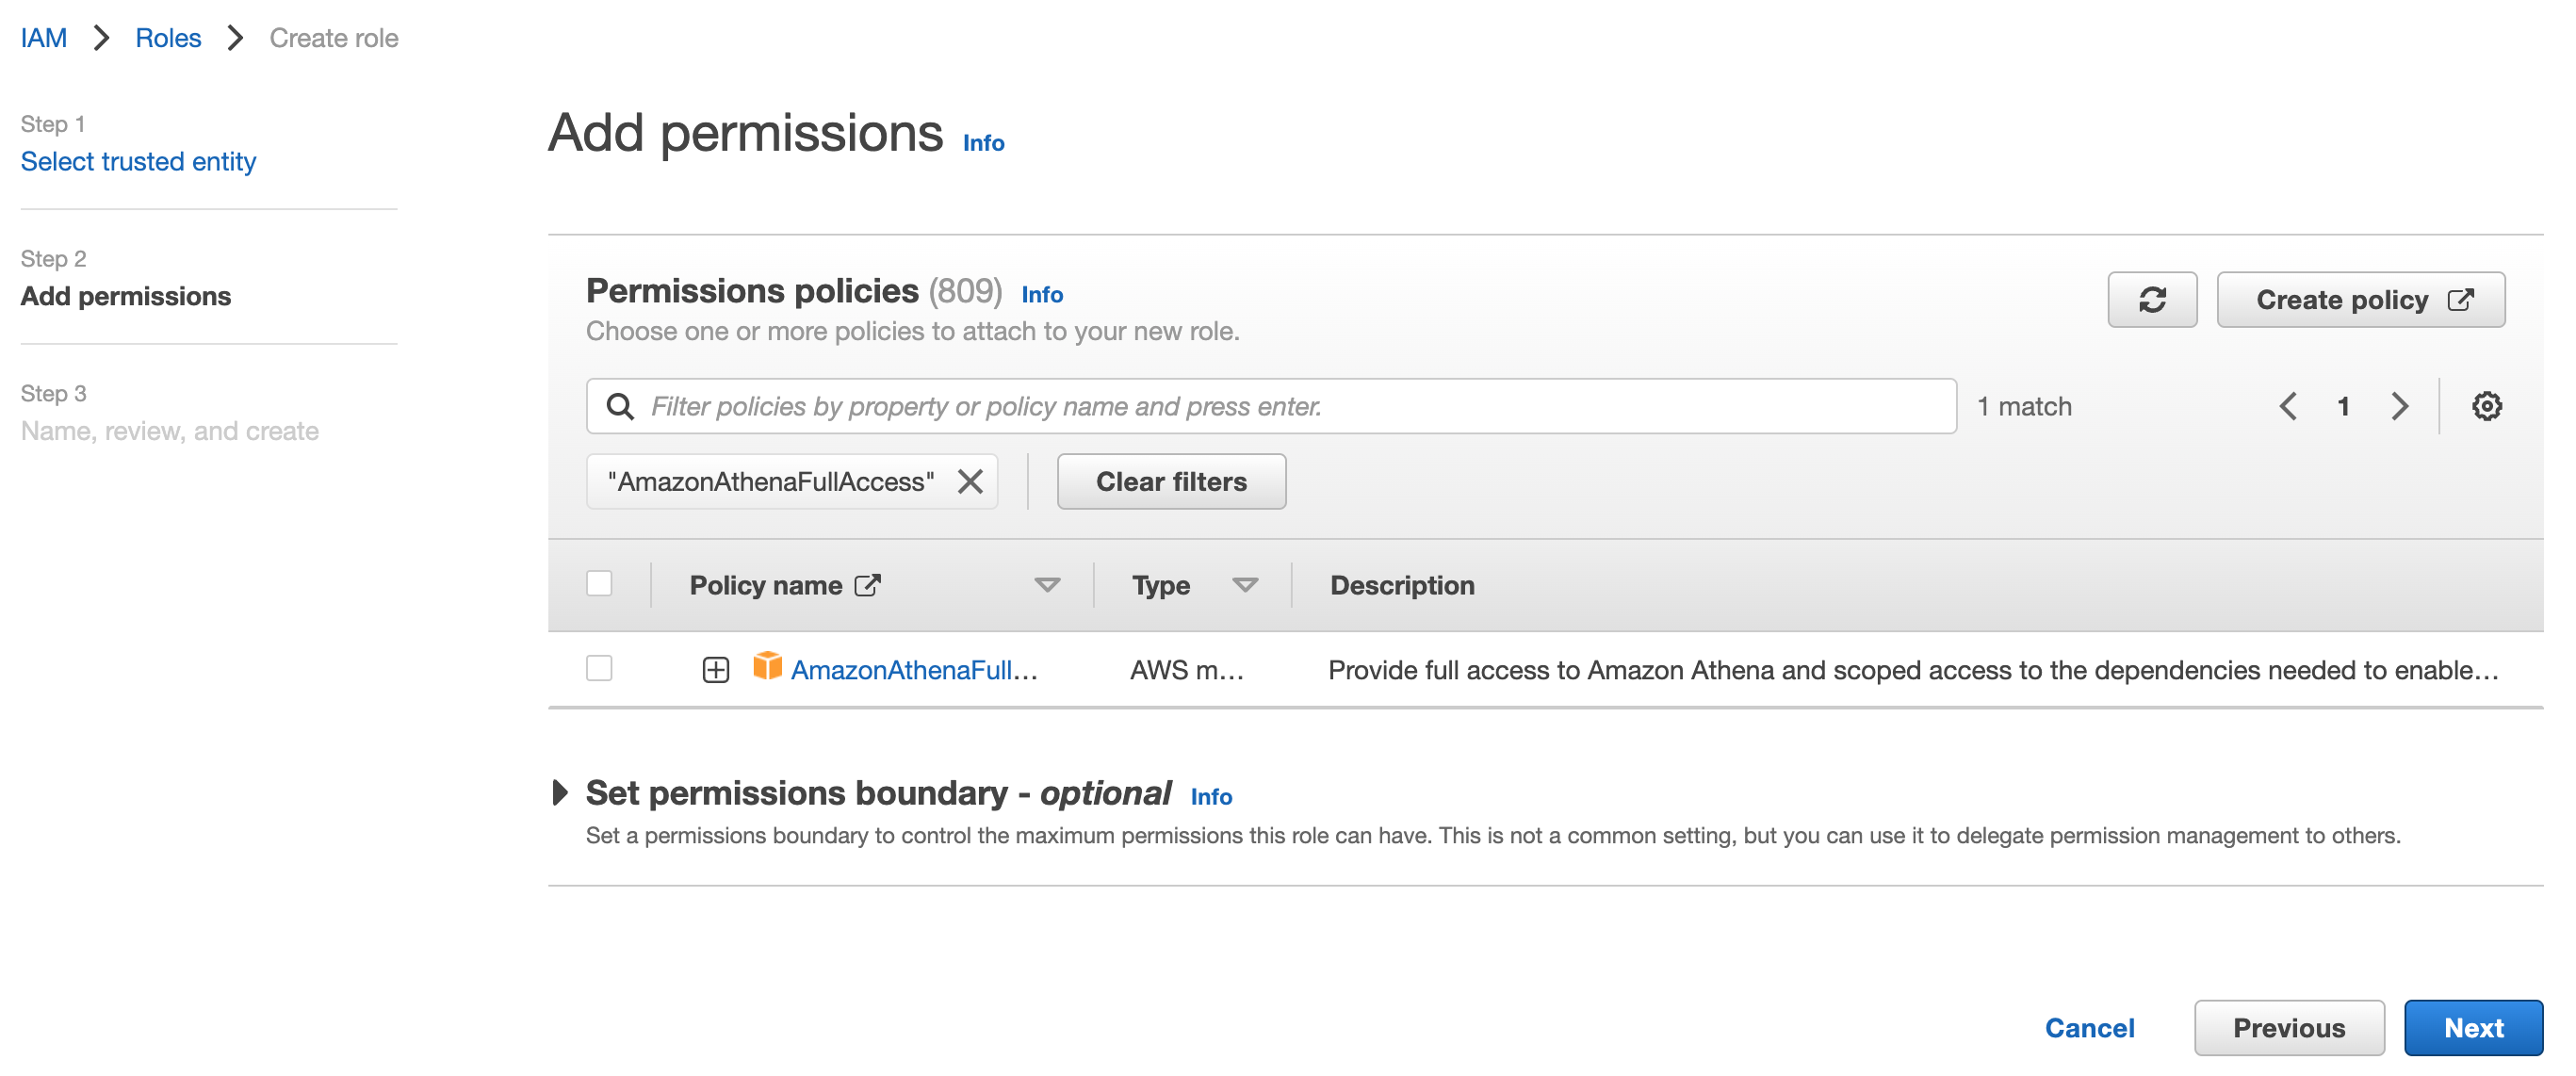
In the Permissions policies section, use the search bar to find the following two policies and select them:
AmazonAthenaFullAccess
AmazonS3FullAccess
Note
You may choose to be more fine grained in precisely which buckets you allow data.world to access. We will only need write access on the S3 output bucket location configured earlier. Otherwise, the minimum permissions required to query data from table backing buckets is required.
Click Next. The Name, review, and create page opens.
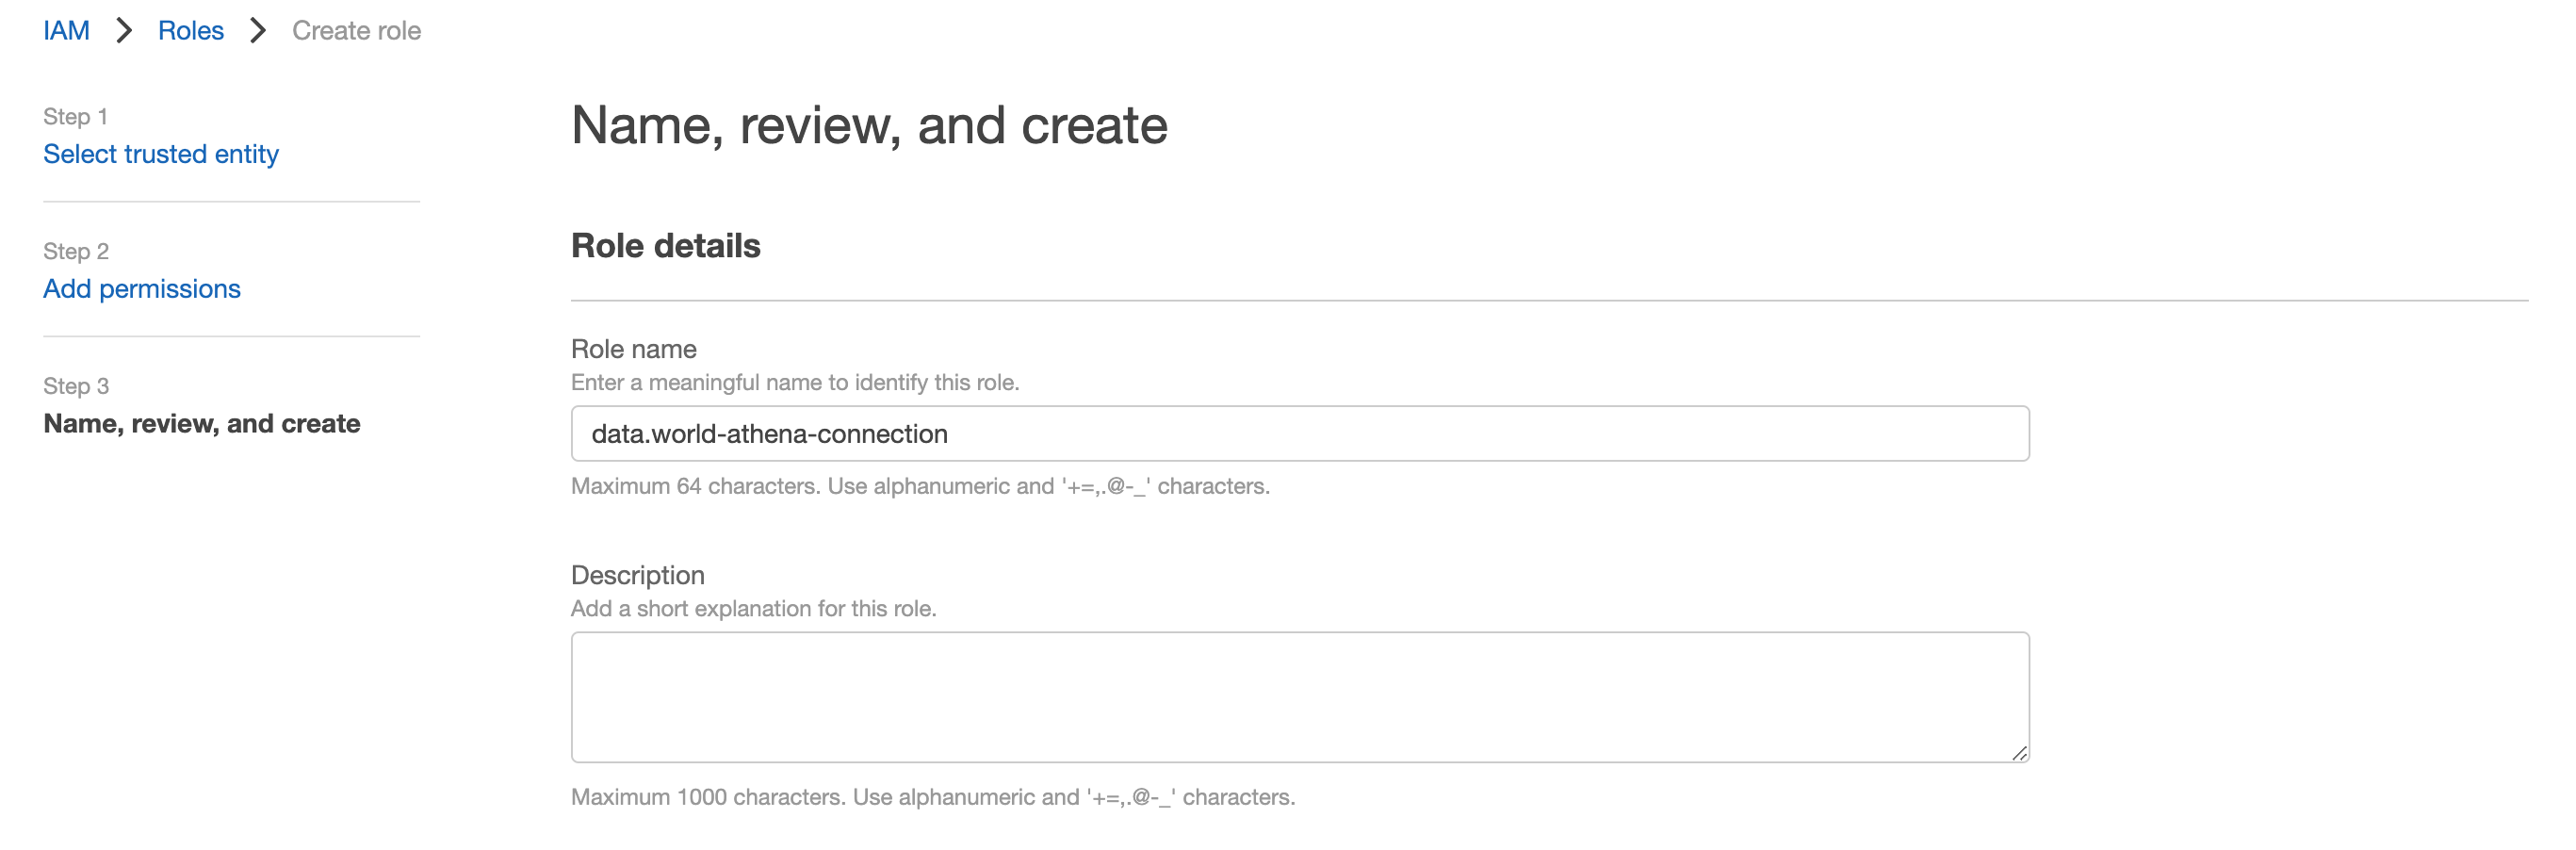
In the Role details section, provide a role name and description.
Optionally, in the Step 3: Add tags section, you can add any tags you would like.
Click Create role. You should see a confirmation Role created message.
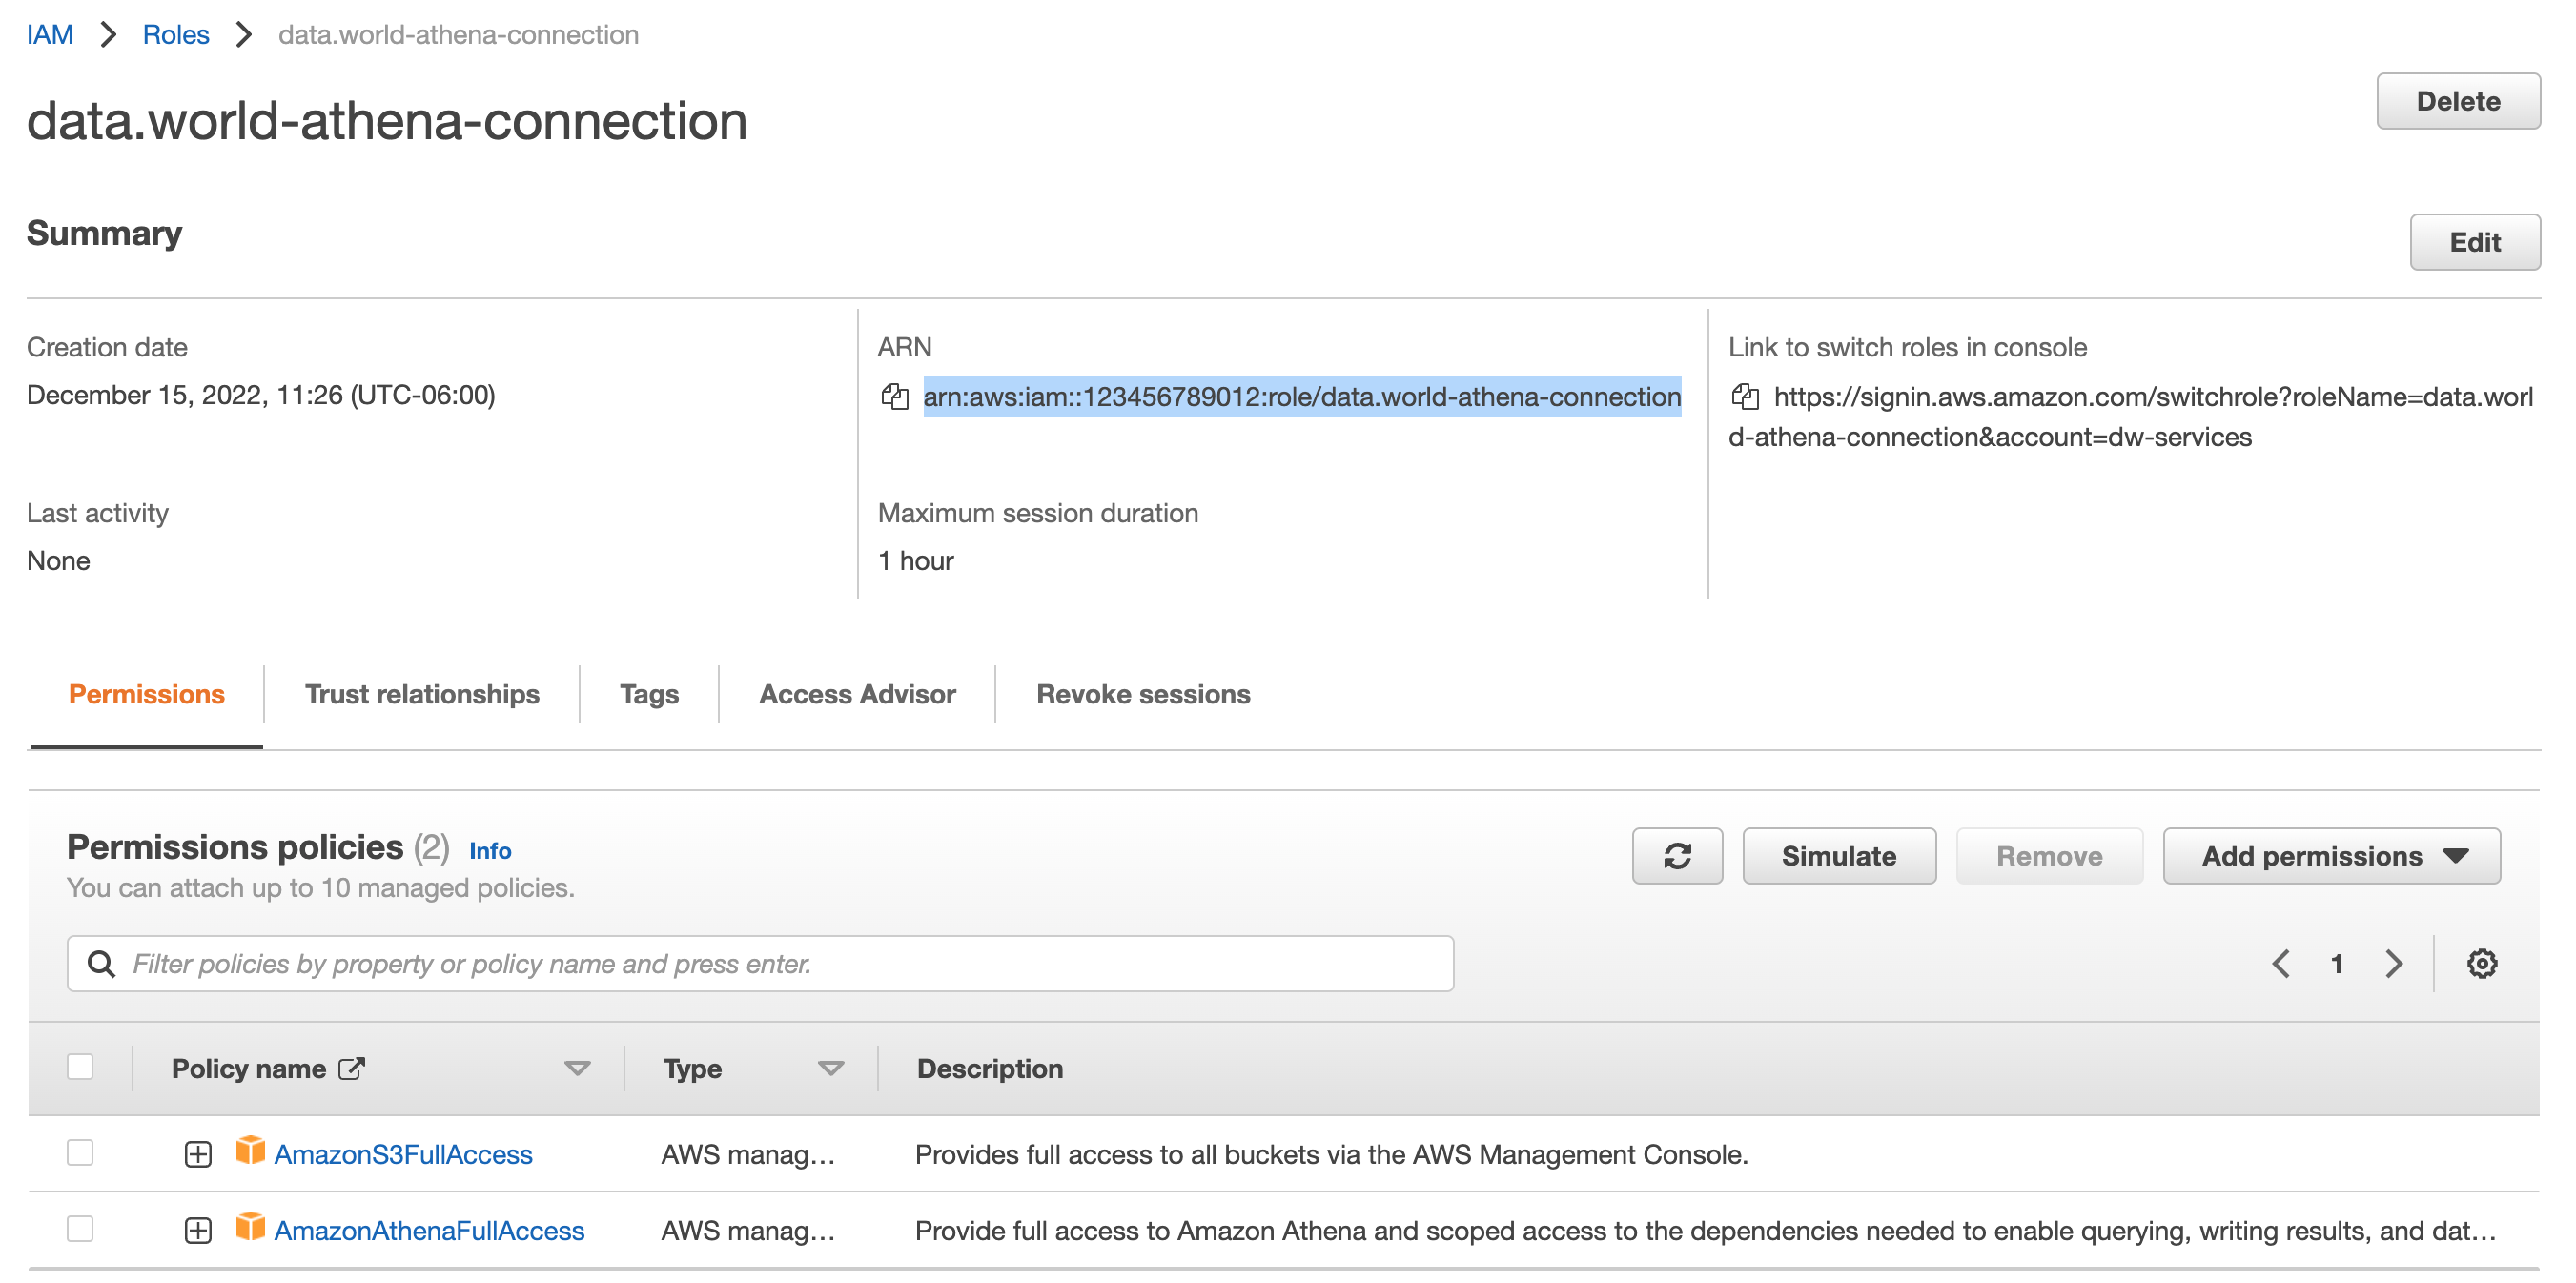
Find the role you have just created and open it.
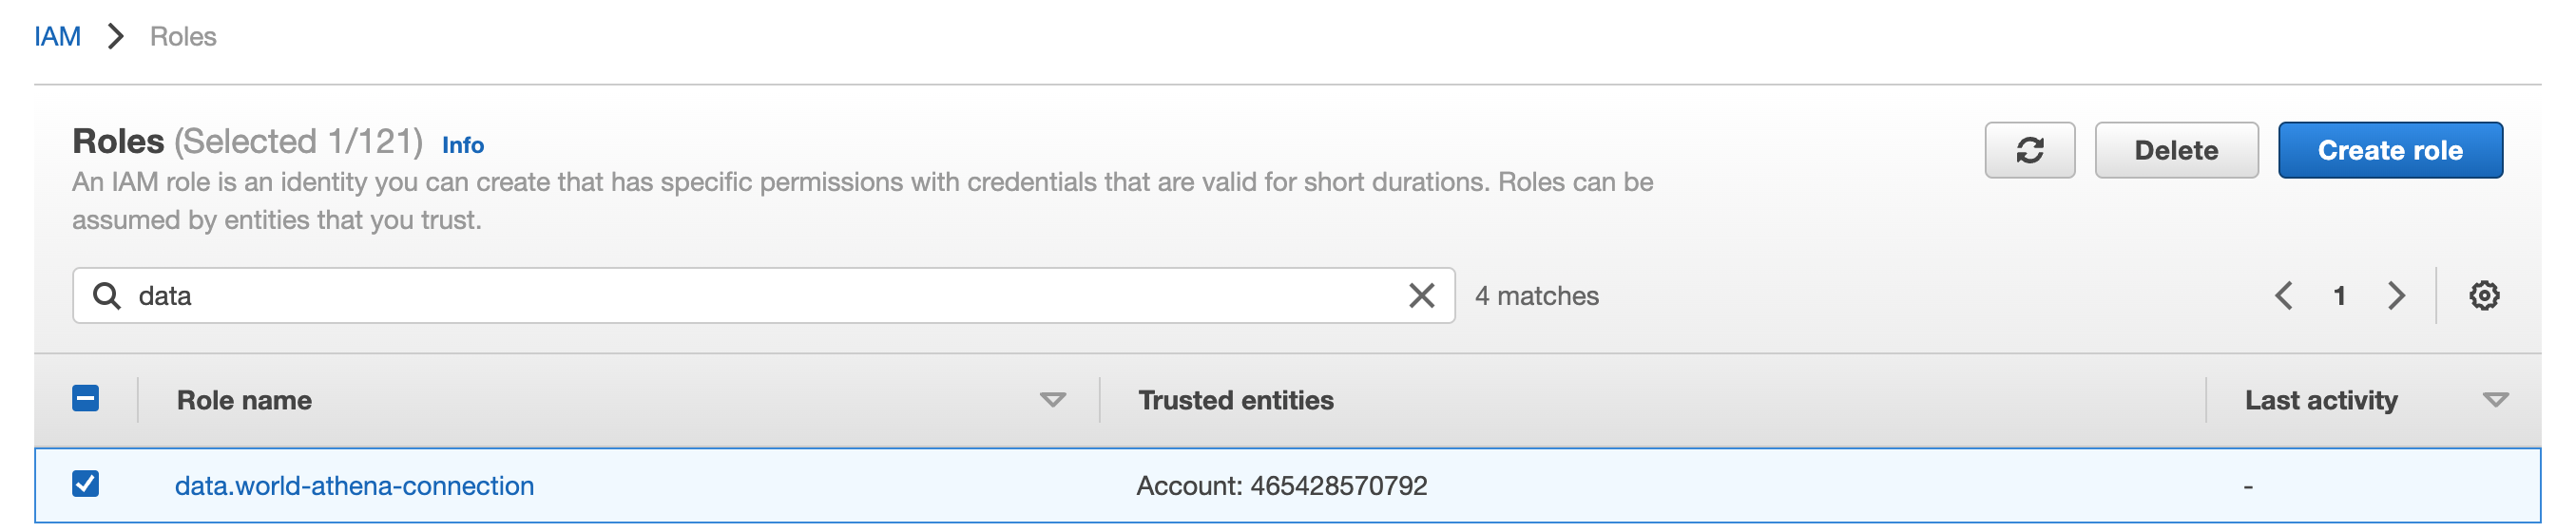
In the Summary section, copy its ARN, and paste the ARN into the AWS ARN field in the dialog window you left open for adding a new Athena connection.
Configuring a connection to Athena
Note
Before configuring a connection to Athena you need to have set up an IAM role in the AWS console.
To set a connection:
Browse to the Catalog experience.
On the Admin page, go to the Connection manager section.
Click the Add connection button.
In the Add an organization-level connection window, select Athena.
In the Add a new Athena connection window, set the following:
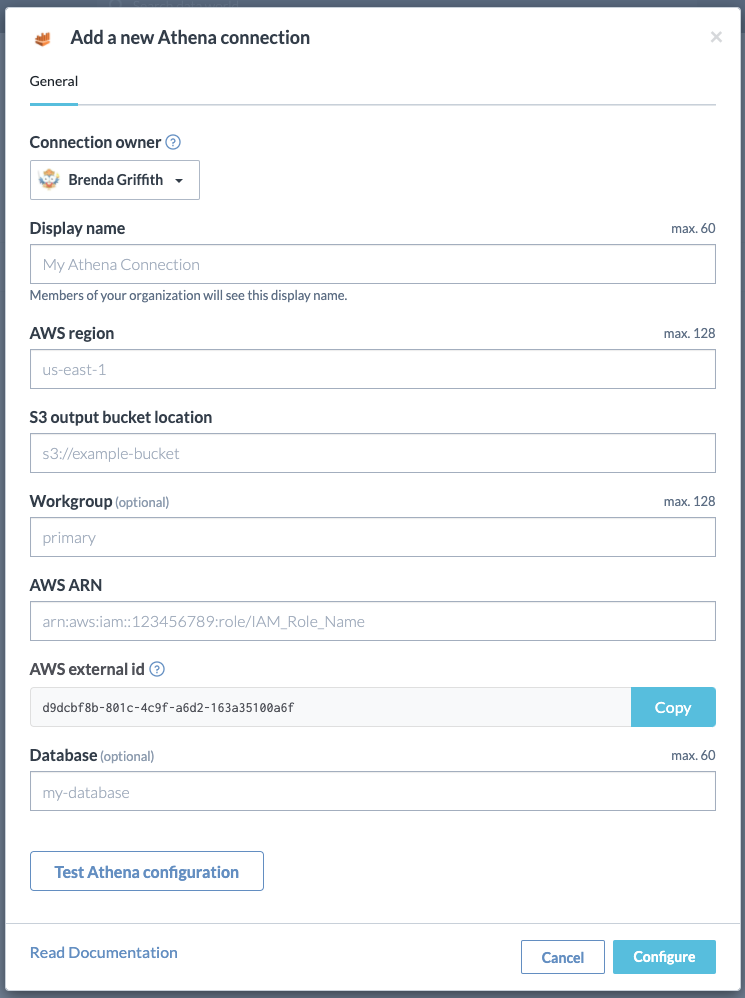
AWS region: Provide the AWS region. For example, us-east-1, us-west-1, etc.
S3 output bucket Location: The Amazon S3 bucket where query results should be stored. The location should start with s3://. For example, to store results in a folder named test-folder-1 inside an S3 bucket named query-results-bucket, you would set the location to s3://query-results-bucket/test-folder-1
Workgroup: If your Athena instance is configured with different workspaces you can assign your connection to a workspace here
AWS ARN: A dedicated Identity Access Management (IAM) role created specifically for data.world. This role must be created before you can configure a connection to Athena. For example, the value will look like Arn:aws:iam::123:role/IAM_Role_Name
AWS external ID: This is a read-only field and the information is used while Creating a dedicated IAM role for Athena connections.
Database (optional): You can specify it here or you can choose from a dropdown list when you create a dataset.
Click the Test Athena configuration button to test your configuration. It is essential to test your connections to ensure the application can successfully connect to the source system.
Click Configure to save your configuration.
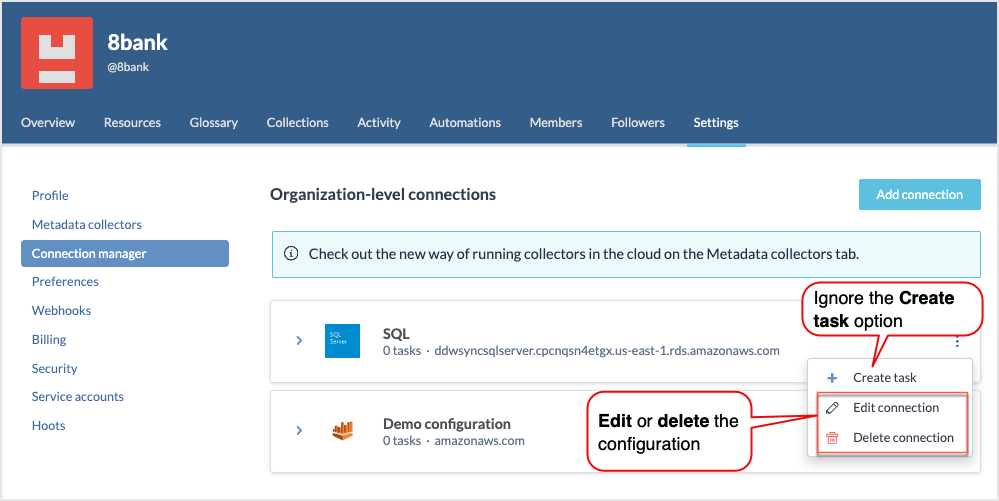
The saved configuration is added to the list of Organization-level connections. From here, you have the option to edit or delete a connection. Although you will see a Create task option for a connection, it is not applicable for data virtualization and data extraction and should be disregarded. This Create task option was originally intended for metadata collection, but this feature has since been deprecated and should not be used. To configure metadata collection, use the Metadata collectors configuration available in the product.
Editing connections
To edit a connection:
Locate the connection you want to edit.
Click the Three dot menu and select Edit connection.
In the Edit connection window, make the desired changes. Note that when you are editing a connection, you are required to provide the sensitive information for the connection again, for example, Connection password.
After modifying the connection details, click the Test configuration button to recheck the set up and ensure it is functioning as expected.
Deleting connections
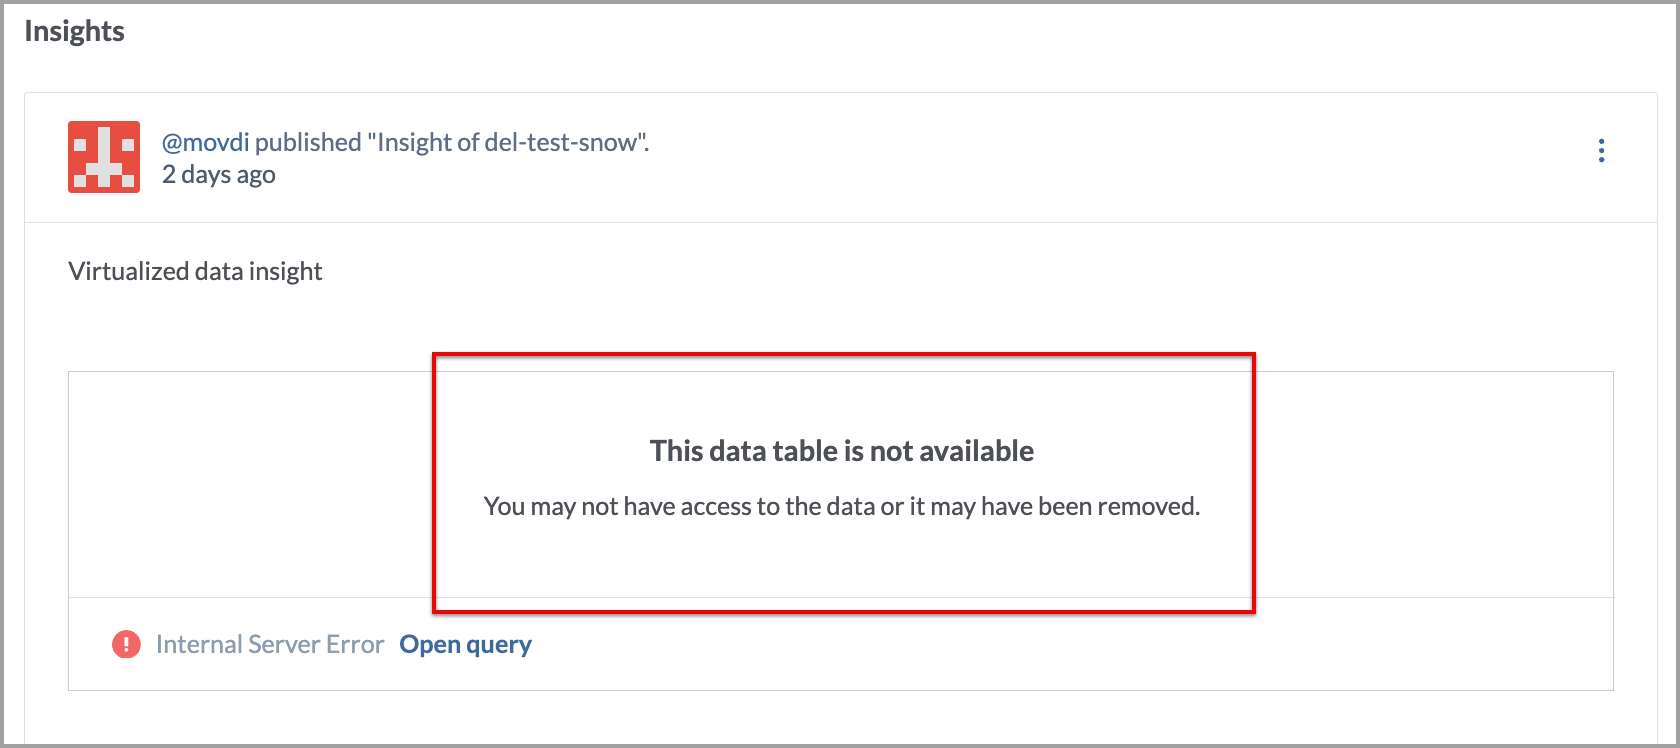
Deleting a connection causes all dependent resources, including virtualized connections and queries, to lose access to their data source. While the resources persist, they cannot access or retrieve data without a functioning connection.
For example, If you delete the connection, the following error message will appear for the Insight:
To delete a connection:
Locate the connection you want to delete.
Click the Three dot menu and select Delete connection.
Confirm the deletion. Once deleted the connection cannot be restored. You have to set a new connection again.