Creating custom relationships for lineage in Eureka Explorer (CTK)
In this topic, you will learn how to manually create a lineage relationship between two resources in your catalog.
Why would I do this?
The system automatically collects lineage when supported systems are integrated through collectors. But there are many cases where you need to go beyond what is automated:
Your tools or workflows are not supported by existing collectors.
You want to model internal processes or business-specific flows that are not part of technical pipelines.
You need to supplement or correct existing lineage with curated edits.
Manually defined lineage relationships allow you to fill in these gaps — and once configured, they appear directly in the Lineage tab (Eureka Explorer) and Related tab just like collected lineage. For example, if your organization uses Tableau dashboards built from Snowflake tables, but no collector connects the two, you can manually define that relationship:
Tableau dashboard was derived from Snowflake table.
This lets your data teams trace origins, understand dependencies, and visualize connections — all without needing custom connectors or engineering work.
How it works?
You will define a custom relationship using a specific lineage IRI predicate (for example, wasDerivedFrom). This predicate signals the system to treat the connection as a lineage link, making it visible in the Eureka Explorer interactive graph.
You will also configure the direction of the relationship:
The source is the resulting resource. For example, the dashboard.
The target is the original input. For example, the table.
With these settings, the lineage graph shows an arrow pointing from the table to the dashboard — reflecting actual data flow — while the Related tab shows labels like:
Tableau dashboard — Was derived from — Snowflake table.
Snowflake table — Is the source of — Tableau dashboard.
This setup provides a consistent, trustworthy view of how data moves through your environment — whether collected or manually curated.
Create a lineage relationship
Note
Perform this task in the Catalog Configuration organization.
To add a new custom lineage relationship:
In the Catalog experience, go to the Resources page and click the New button.
On the Create a new resource page, in the Select type tab, select Relationship. Click the Continue to configure fields button.
The Relationship page opens.
In the Configure fields tab, set the following in the About section.
In the Title field, provide a name of the relationship you want to add.
From the Collections dropdown, select the Metadata profile collection.
In the Description field, provide a brief description of the relationship. For example, Captures lineage from upstream tables to downstream dashboards.
In the Configure fields tab, set the following in the More information section.
Source types: Select the output resource type — the result of the lineage transformation. Click Add to confirm.
Target types: Select the input resource type — where the data originally came from. Click Add to confirm.
Source to target label: Provide the field name that describes how the source relates to the target. For example, Was derived from.
Source to target label - plural: Provide the plural form of the field name when multiple targets are listed. For example, Were derived from.
Target to source label: Provide the field name that describes how the target relates to the source. For example, Is the source of.
Target to source label - plural: Provide the plural form of the field name when multiple sources are listed. For example, Are the source of.
In the Configure fields tab, set the following in the Technical details section.
IRI override: Provide the fully qualified IRI to designate this relationship as a lineage predicate. For example, http://www.w3.org/ns/prov#wasDerivedFrom.
You can use any compatible lineage predicate from your knowledge graph. To find other supported lineage predicates, see Querying lineage metadata in your data catalog.
Click Continue to review Relationship. In the Review Relationship tab, check the configuration details for any possible errors before saving it. If adjustments are needed, click Back to edit the configuration.
Click Create Relationship. The creation page is closed and you are taken to your new Relationship page. You can return to this page anytime to edit configurations or add additional resource types to the relationship.
Publish the changes
See: Publishing changes.
View the results!
Note
Perform this task in the Catalog Sandbox organization.
To view the custom lineage relationships:
In the Catalog Sandbox organization, find a resource where you added a new custom lineage relationship.
On the Resource page, from the Three dot menu, select Edit relationships.
Or, browse to the Related tab. Here you can see all the related resources. From the Actions dropdown, select Edit relationships.
Verify that the new relationship type appears and that you can successfully link resources. Once added, the relationship now appears in the Related tab on both resources using the labels you defined.
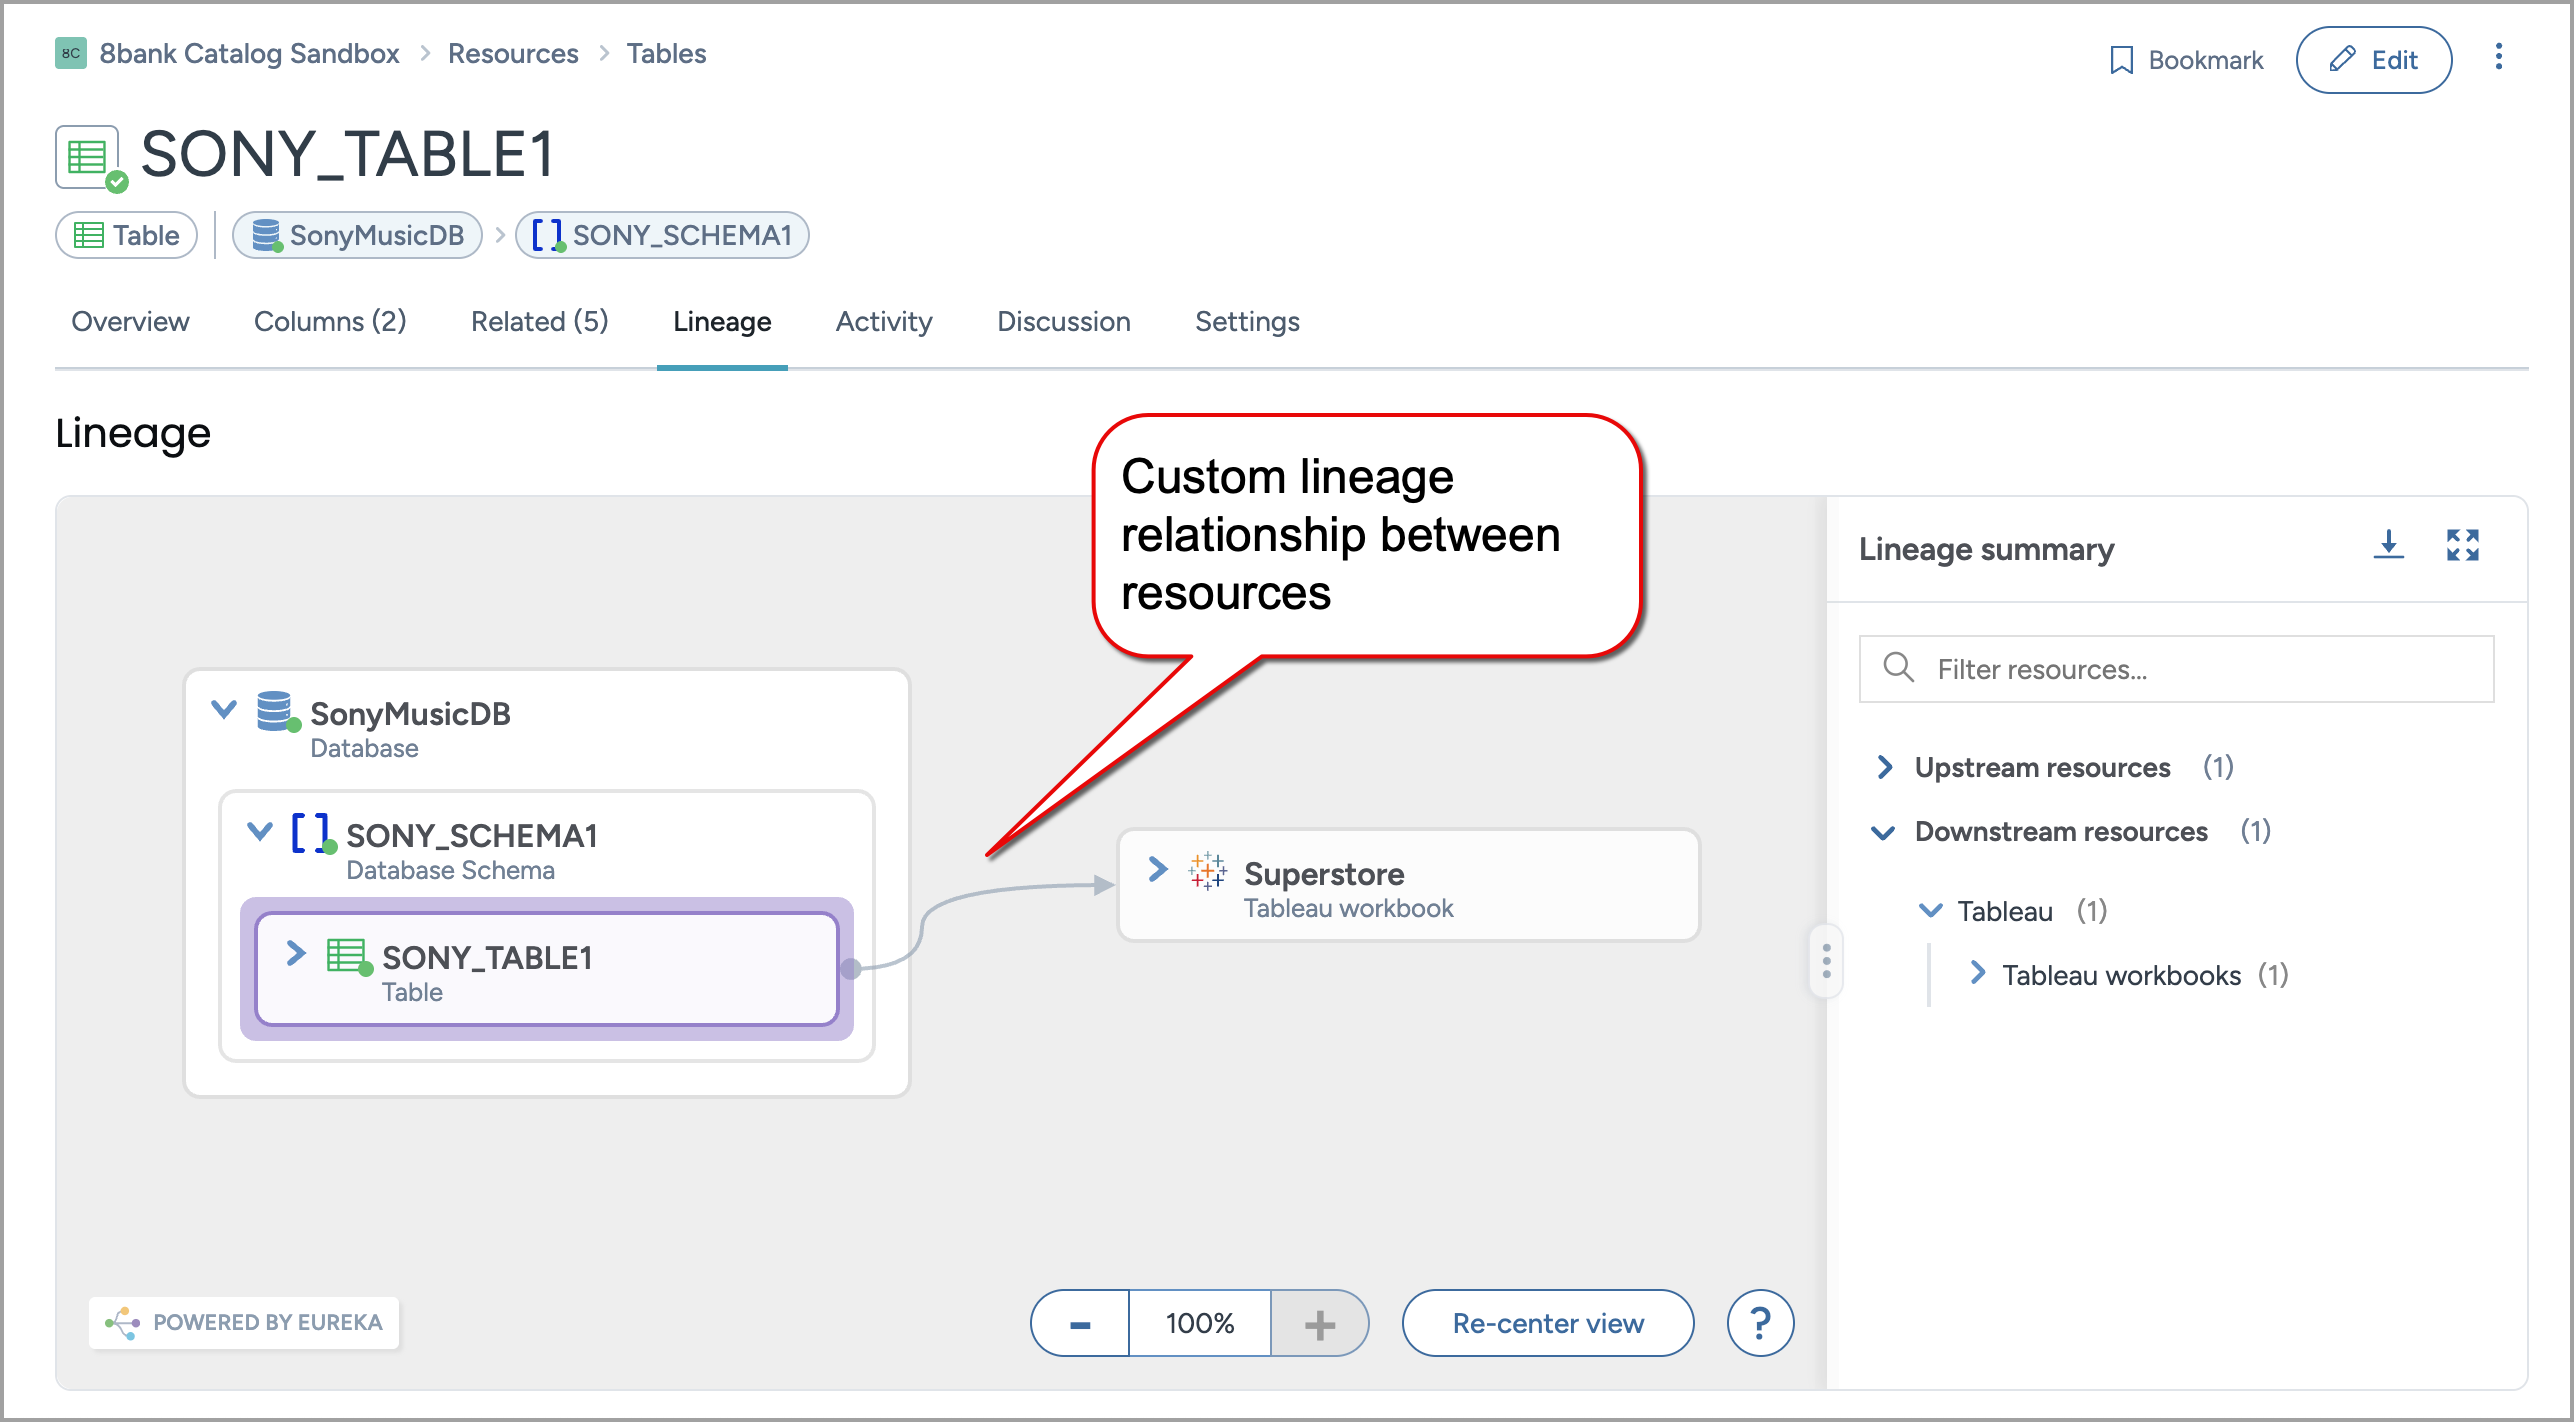
Go to the Lineage tab of either resource. You should now see the following:
A directional connection between the two resources.
An arrow from the upstream to the downstream resource, matching the flow of data.
The relationship integrated into the Eureka Explorer graph alongside any collected lineage.