Preparing to run the Looker collector
Setting up pre-requisites for running the collector
Make sure that the machine from where you are running the collector meets the following hardware and software requirements.
Item | Requirement |
|---|---|
Hardware (for on-premise runs only) Note: The following specs are based upon running one collector process at a time. Please adjust the hardware if you are running multiple collectors at the same time. | |
RAM | 8 GB |
CPU | 2 Ghz processor |
Software (for on-premise runs only) Docker or Java Runtime Environment | |
Docker | Click here to get Docker. |
Java Runtime Environment | OpenJDK 17 is supported and available here. |
data.world specific objects (for both cloud and on-premise runs) | |
Dataset | You must have a ddw-catalogs dataset set up to hold your catalog files when you are done running the collector. If you are using Catalog Toolkit , follow these instructions to prepare the datasets for collectors. |
Network connection | |
Allowlist IPs and domains | |
Setting up permissions in Looker
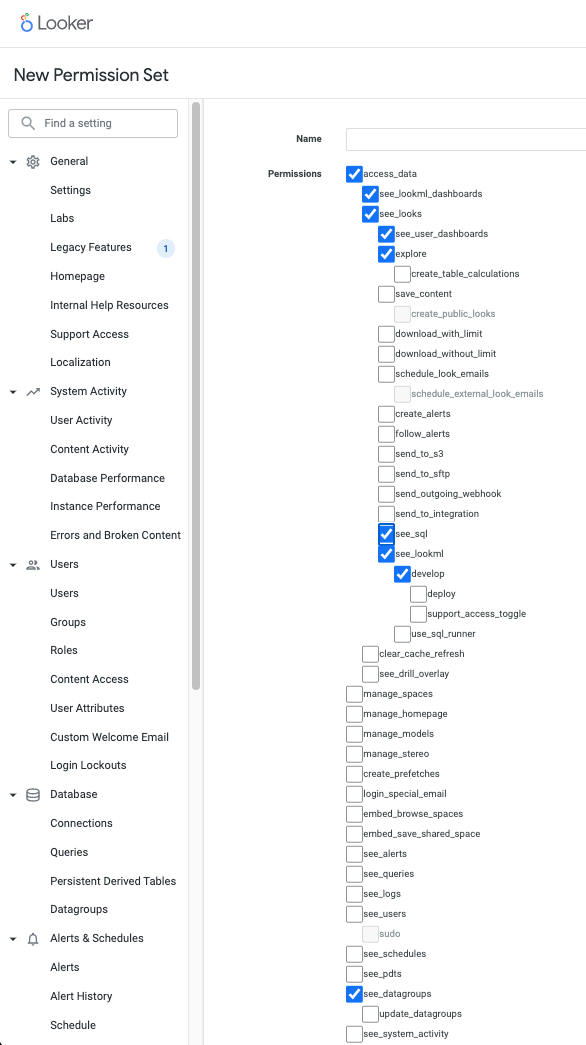
In order to scan a Looker account you will need to set up a specific role in Looker with these permissions checked:
access_data
see_lookml_dashboards
see_looks
see_user_dashboards
explore (optional, needed if Looker Explores has to be crawled)
see_lookml
develop
see_datagroups
see_sql
The Looker permissions are set under Admin > Roles > New Permission Set in Looker:
The permissions indicated will enable you to create catalogs for all the models and explores that you have access to. Here is more information from the Looker documentation about how access to content is managed:
Data Access, which controls which data a user is allowed to view, is primarily managed via Model Sets. Model Sets make up one half of a Looker role which is applied to users and groups. Data access can be further restricted within a model using access filters to limit which rows of data they can see, as though there was an automatic filter on their queries. You can also restrict access to specific Explores, joins, views, or fields using access grants.
To restrict access using an access grant you will need to:
Define an access grant
Apply the required_access_grants to the explore.
Here is an example of how an access grant could be structured based on a user attribute called “department”:
1 access_grant: datadotworld_scannable_explore {
2  user_attribute: department
3  allowed_values: [ "datadotworld" ]
4 }
More info on the access_grant can be found here.
Then you can apply the required_access_grants to the explore:
1 explore: explore_name {
2  required_access_grants: [datadotworld_scannable_explore, access_grant_name, …]
3  }
4 }