Approving suggested changes
Once a suggested change is submitted, authorized users receive notifications via email and in-app alerts.
After all approvers have processed the suggested changes, the user who suggested the changes is notified of the decision. If an email address is specified in the automation configuration, a notification is also sent to that address upon approval of changes for Source of record fields. For systems integrated with ServiceNow, a ticket is automatically generated in the ServiceNow instance so that someone can process the changes requested for Source of record fields and make the actual changes in the source system.
If a suggested change is rejected, the requester is informed about it via email.
Reviewing and approving suggested changes in data.world
From the email in your inbox, click the View task button to navigate to the suggested changes.
If you are already in the application, browse to the Catalog experience. From the Governance page, browse to the Pending changes section. You will see a list of all suggested changes for the catalog resources.
Look for tasks that are not yet claimed. Either select a single task or multiple tasks to process them.
From the Actions button, select Claim unclaimed tasks option.
The claimed tasks get assigned to you.
Click the Expand button next to the task to review the details of the suggested changes.
Next from the Actions button, select the Approve claimed tasks or Reject claimed tasks option. If you think you are not the right person to review the suggestions, select the Release claimed tasks option to release the tasks.
You can also browse to a resource to review and complete the task from the resource page. On the resource page, go to the Approvals tab and review the suggested changes. You have the choice to either Approve or Reject the suggestions. If you think you are not the right person to review the suggestions, click the Release button to release the task.
When all suggestions for a resource are approved, the system automatically updates the resource status to the value configured in the automation, for example, Approved. This update occurs only after approval—not when suggestions are submitted. Configuring the status update is optional when setting up the automation.
Viewing suggested changes tickets in ServiceNow
Upon approval in data.world, a ticket is created in the ServiceNow system.
Navigate to the ticket to view detailed information about the approved changes. The Changes field of the ticket displays the details of the approved suggestions in data.world.
Important
If you cannot see the Description field, edit the view in ServiceNow to make the field visible on the page.
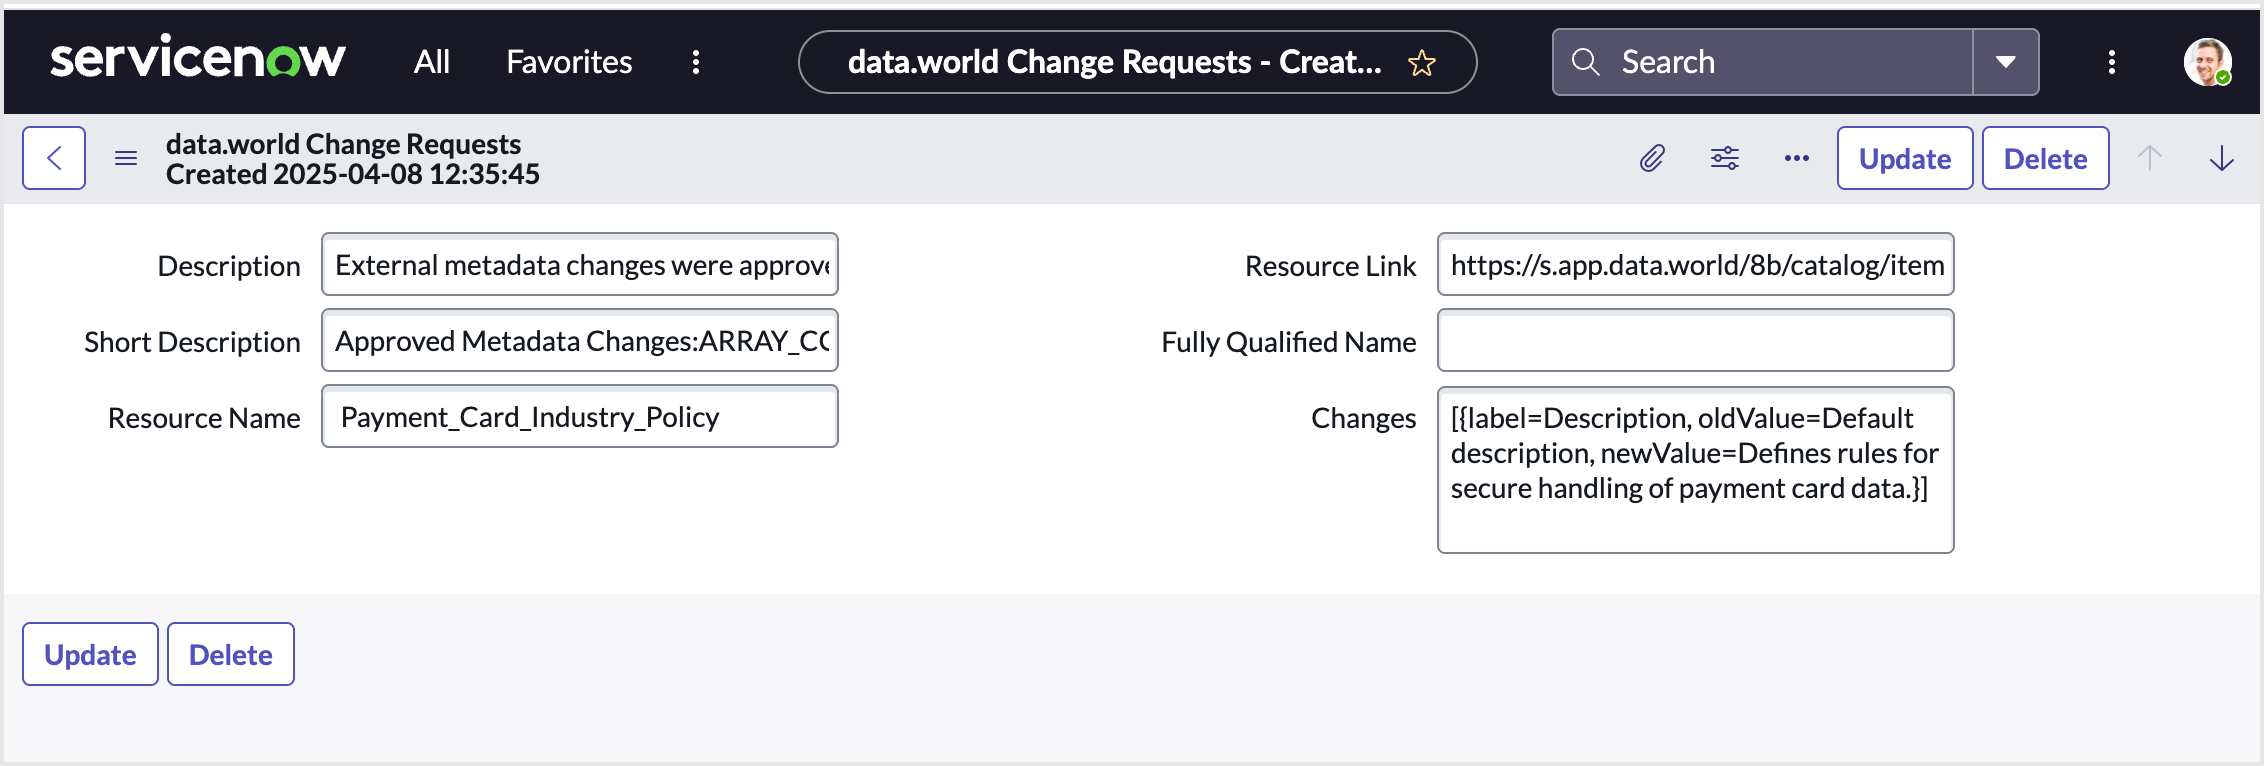
From the Resource link field of the ticket, copy the link for the Resource. Open it in a web browser to see the details of the resource in data.world.
Important
Ensure you have a data.world account and the necessary permissions to view these details.
Follow the workflow in ServiceNow to complete the access request task.