Running the Microsoft Fabric collector in Cloud
Configuring the cloud collector for Microsoft Fabric
To configure the cloud collector for Microsoft Fabric:
In the Catalog experience, go to the Admin page > Metadata collectors section.
Click the Add a collector button.

On the Choose metadata collector screen, select the correct metadata source. Click Next.
On the Choose where the collector will run screen, in the Cloud section, select data.world. Click Next.

On the Configure a cloud Microsoft Fabric Collector screen, set the following:
On the next screen, set the following properties and click Next.
Table 2.Field name
Description
Required?
Microsoft Entra client ID
The client ID of the registered application in Microsoft Entra.
Yes
Microsoft Entra client secret
The client secret for the registered application in Microsoft Entra.
Yes
Microsoft Entra Tenant ID
The tenant ID that identifies the organization in Microsoft Entra.
Yes
Disable harvesting notebook definition
Specify whether to skip harvesting notebook definition.
No
On the next screen, set the following Power BI options and click Next.
Table 3.Field name
Description
Required?
Maximum Power BI Expression Length
Set the maximum number of characters in a Table expression (coming from Semantic Models and Dataflows) that will be parsed for lineage metadata. Expressions longer than this will be skipped. Default is 32000.
No
Datasource Name Mapping File
If you have configured source details in the datasources.yml file, upload the file.
No
Skip harvesting lineage metadata
Skip harvesting of intra-database lineage metadata. This applies only to database resources such as views.
No
Catalog report preview images
Specify if the collector should catalog preview images. The default setting is false. Ensure that you have met all pre-requisites for using this feature.
No
Disable max requests wait
Disable waiting up to an hour for the Power BI API endpoints to reset throttling limits (error code 429 - too many requests). When not disabled, the collector retries every 5 minutes for up to an hour. If this option is disabled, the Max retries and Retry delay options will be used instead.
No
On the next screen, set the following advanced properties and click Next.
Table 4.Field name
Description
Required?
Collect extended properties for SQL Database Resources
Harvest information about extended properties from SQL Server type databases.
No
JDBC properties
JDBC driver properties to pass through to driver connection, as name=value. Use the parameter multiple times for multiple properties.
Note: By default the collector uses authentication=ActiveDirectoryServicePrincipal, and encrypt=true
Yes
Exclude delta table files
Specify whether to exclude delta table internal files (parquet files and _delta_log folders) from lakehouse file cataloging. Delta tables themselves are still cataloged via the Table API.
No
Schemas to collect
Select from one of the following options:
Collect all schema, Specify which schemas to collect
Yes
Collect all schema
Catalog all schemas to which the user has access.
Specify which schemas to collect
Select this option to specify the names of the database schema to be catalog.
Exclude Schema
Specify the name or regular expression of the database schema to be excluded. Applicable only if Collect all schema option is selected.
No
Include Information Schema
Include the database's Information Schema in catalog collection.
No
OneLake API page size
Page size for OneLake API pagination. Default is 5000.
No
On the next screen, set the following properties and click Next.
Important
If you are using Catalog Toolkit, make sure you select the relevant module for data profiling to use this feature.
Table 5.Field name
Description
Required?
Enable column statistics collection
To enable harvesting of column statistics (i.e., data profiling).
Note: Activating the profiling feature may extend the running time of the collector. This is because the collector needs to read the table data to be able to gather metadata for profiling.
No
Target sample size for column statistics
The number of rows sampled for computation of column statistics and string-value histograms.
No
Disable lineage collection
Skip harvesting of intra-database lineage metadata.
No
Disable extended metadata collection
Skip harvesting of extended metadata for resource types such as database, schema, table, columns functions, stored procedures, user defined types, synonyms. Basic metadata for these resource types will still be harvested.
No
Enable sample string values collection
Enable sampling and storage of sample values for string-valued columns.
No
Exclude system functions
Specify to exclude harvesting of built-in system functions.
No
Disable harvesting graphql API definition
Specify whether to skip harvesting GraphQL API definition.
No
Max retries
Specify the number of times to retry an API call which has failed. The default value is 5.
No
Retry delay
Specify the amount of time in seconds to wait between retries of an API call which has failed. The default is to try with a delay of 2 seconds between each call.
No
On the next screen, provide the Collector configuration name and an optional Configuration description, and set the run schedule. You can also set the schedule at a later point.
Click Save and View to go the collector details page.
Scheduling collector runs
Important things to note:
Different collectors can be scheduled to run at the same time, but one collector can only run once a day.
It is recommended that you schedule the runs in off-peak hours.
The collector runs in the timezone in which the scheduler is located. For example, if the scheduler sets the collector runs from PST timezone, the collectors will follow the PST timezone.
Runs may start up to one hour after the scheduled time.
Cloud collectors are designed to automatically run against the latest version of the collector supported by the UI.
To schedule collector runs:
On the Configured collectors page, locate the collector you want to run on a schedule.
Click the Edit configurations button.
Go to the screen where you can set the schedule for the collector and set the following:
Enable the Scheduled runs option.
From the Frequency dropdown, select from Daily, Weekly, or Monthly.
For Weekly and Monthly options, select the day when the collector should run.
Select the time for running the collector.
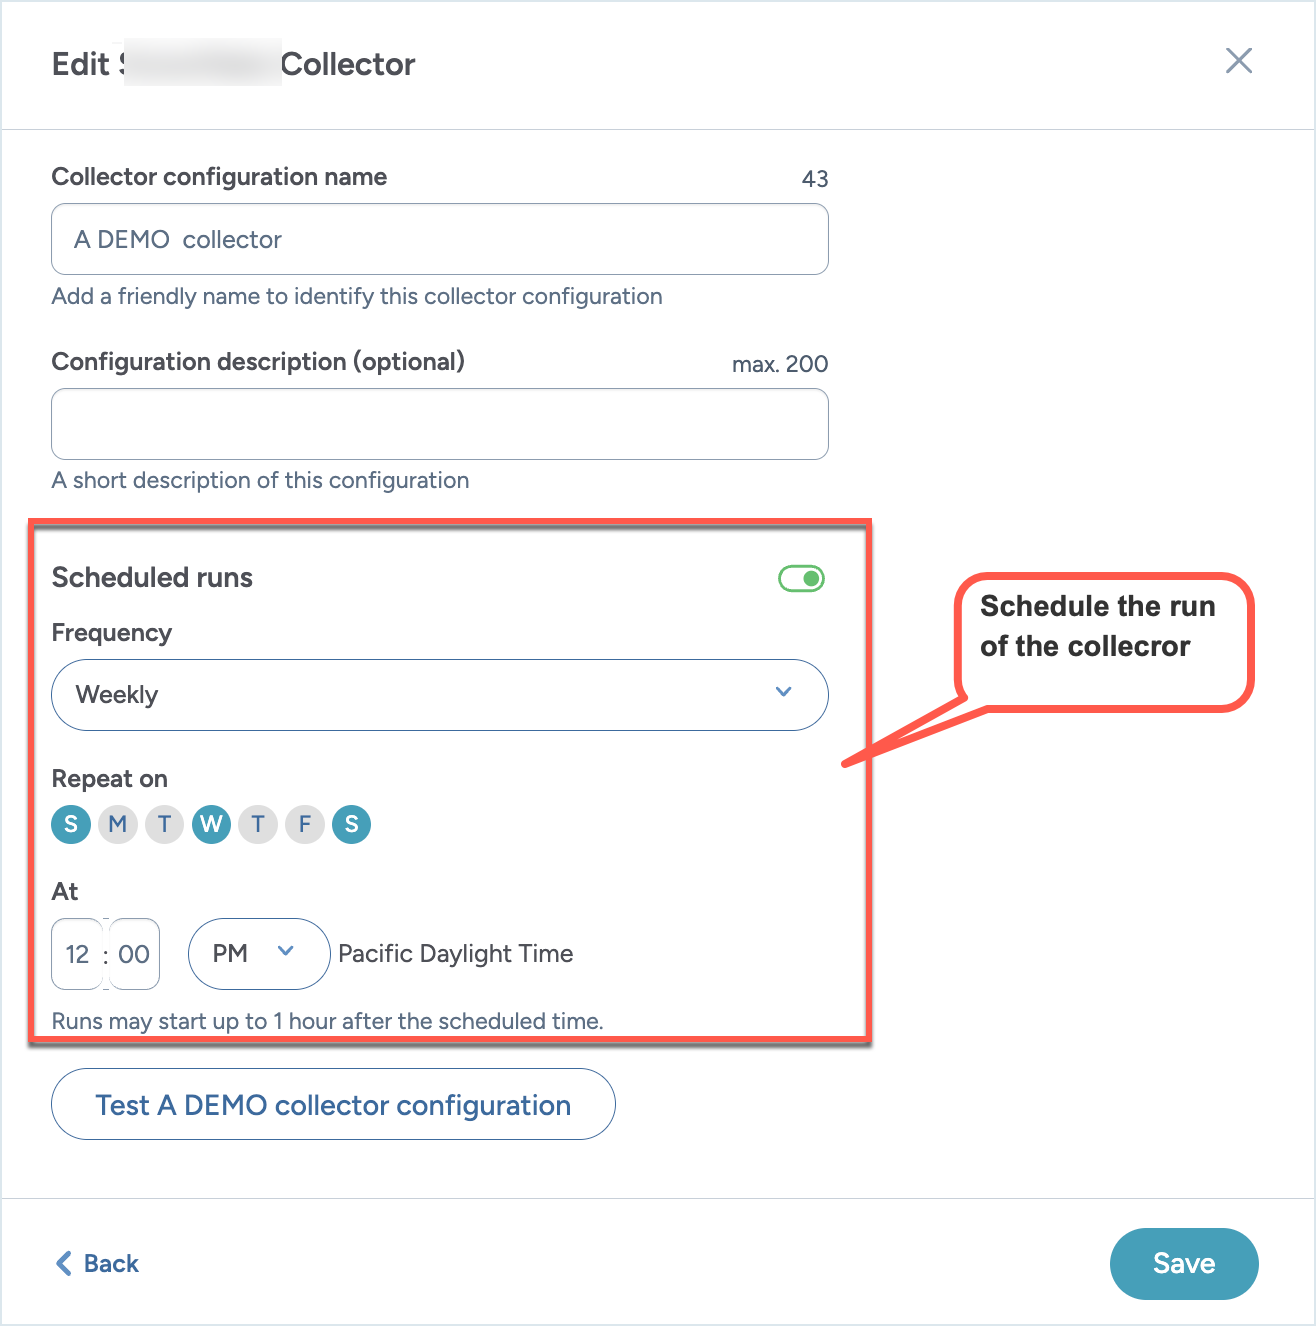
Click Save and view. The schedule and next run date and time are displayed on the collector details page.
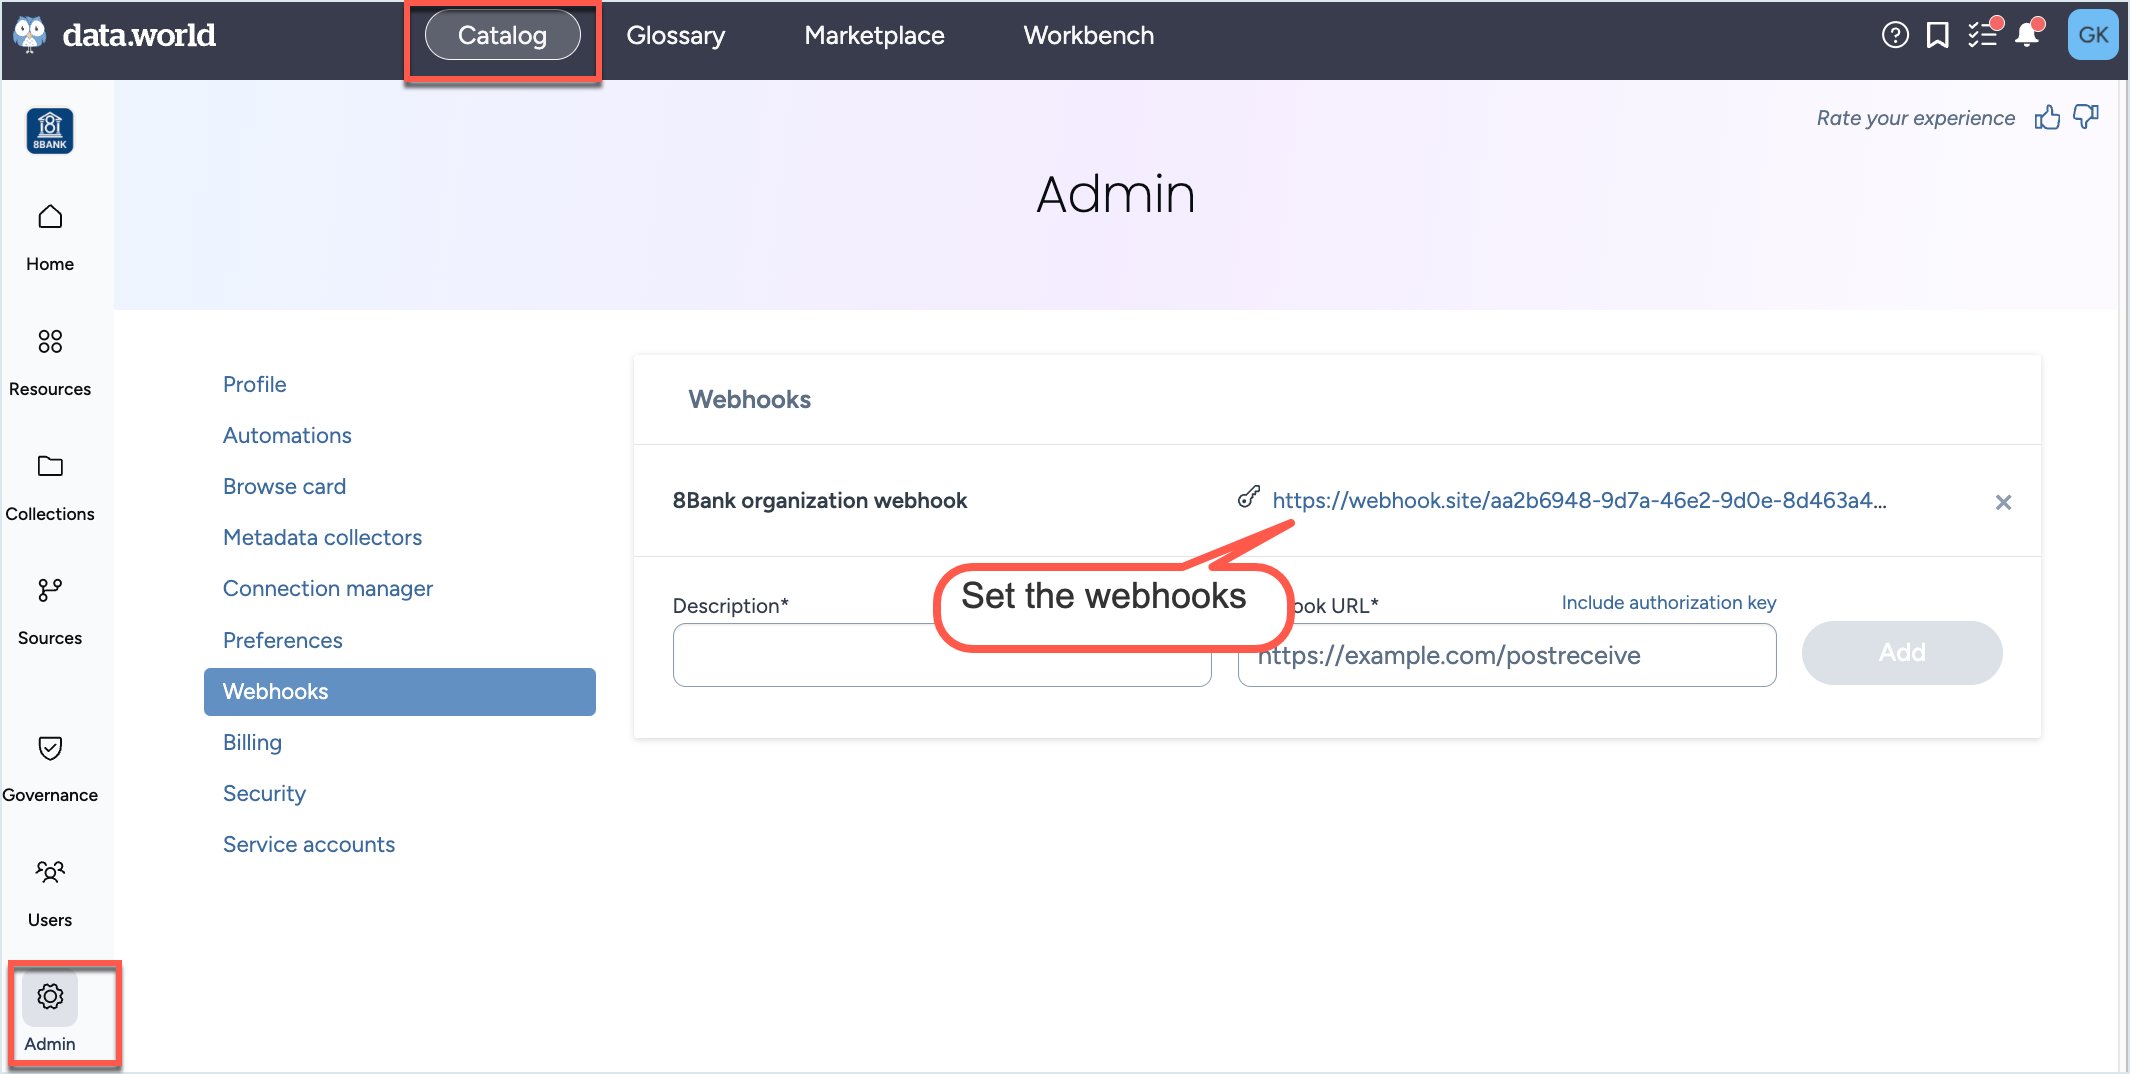
To get notifications about the collector runs, simply setup web hooks at the Organization level from the Catalog experience> Admin page. The Webhooks will automatically start capturing the Status events (Pending, Provisioning, Running, Completed, Error, Cancelled) for the collector runs.
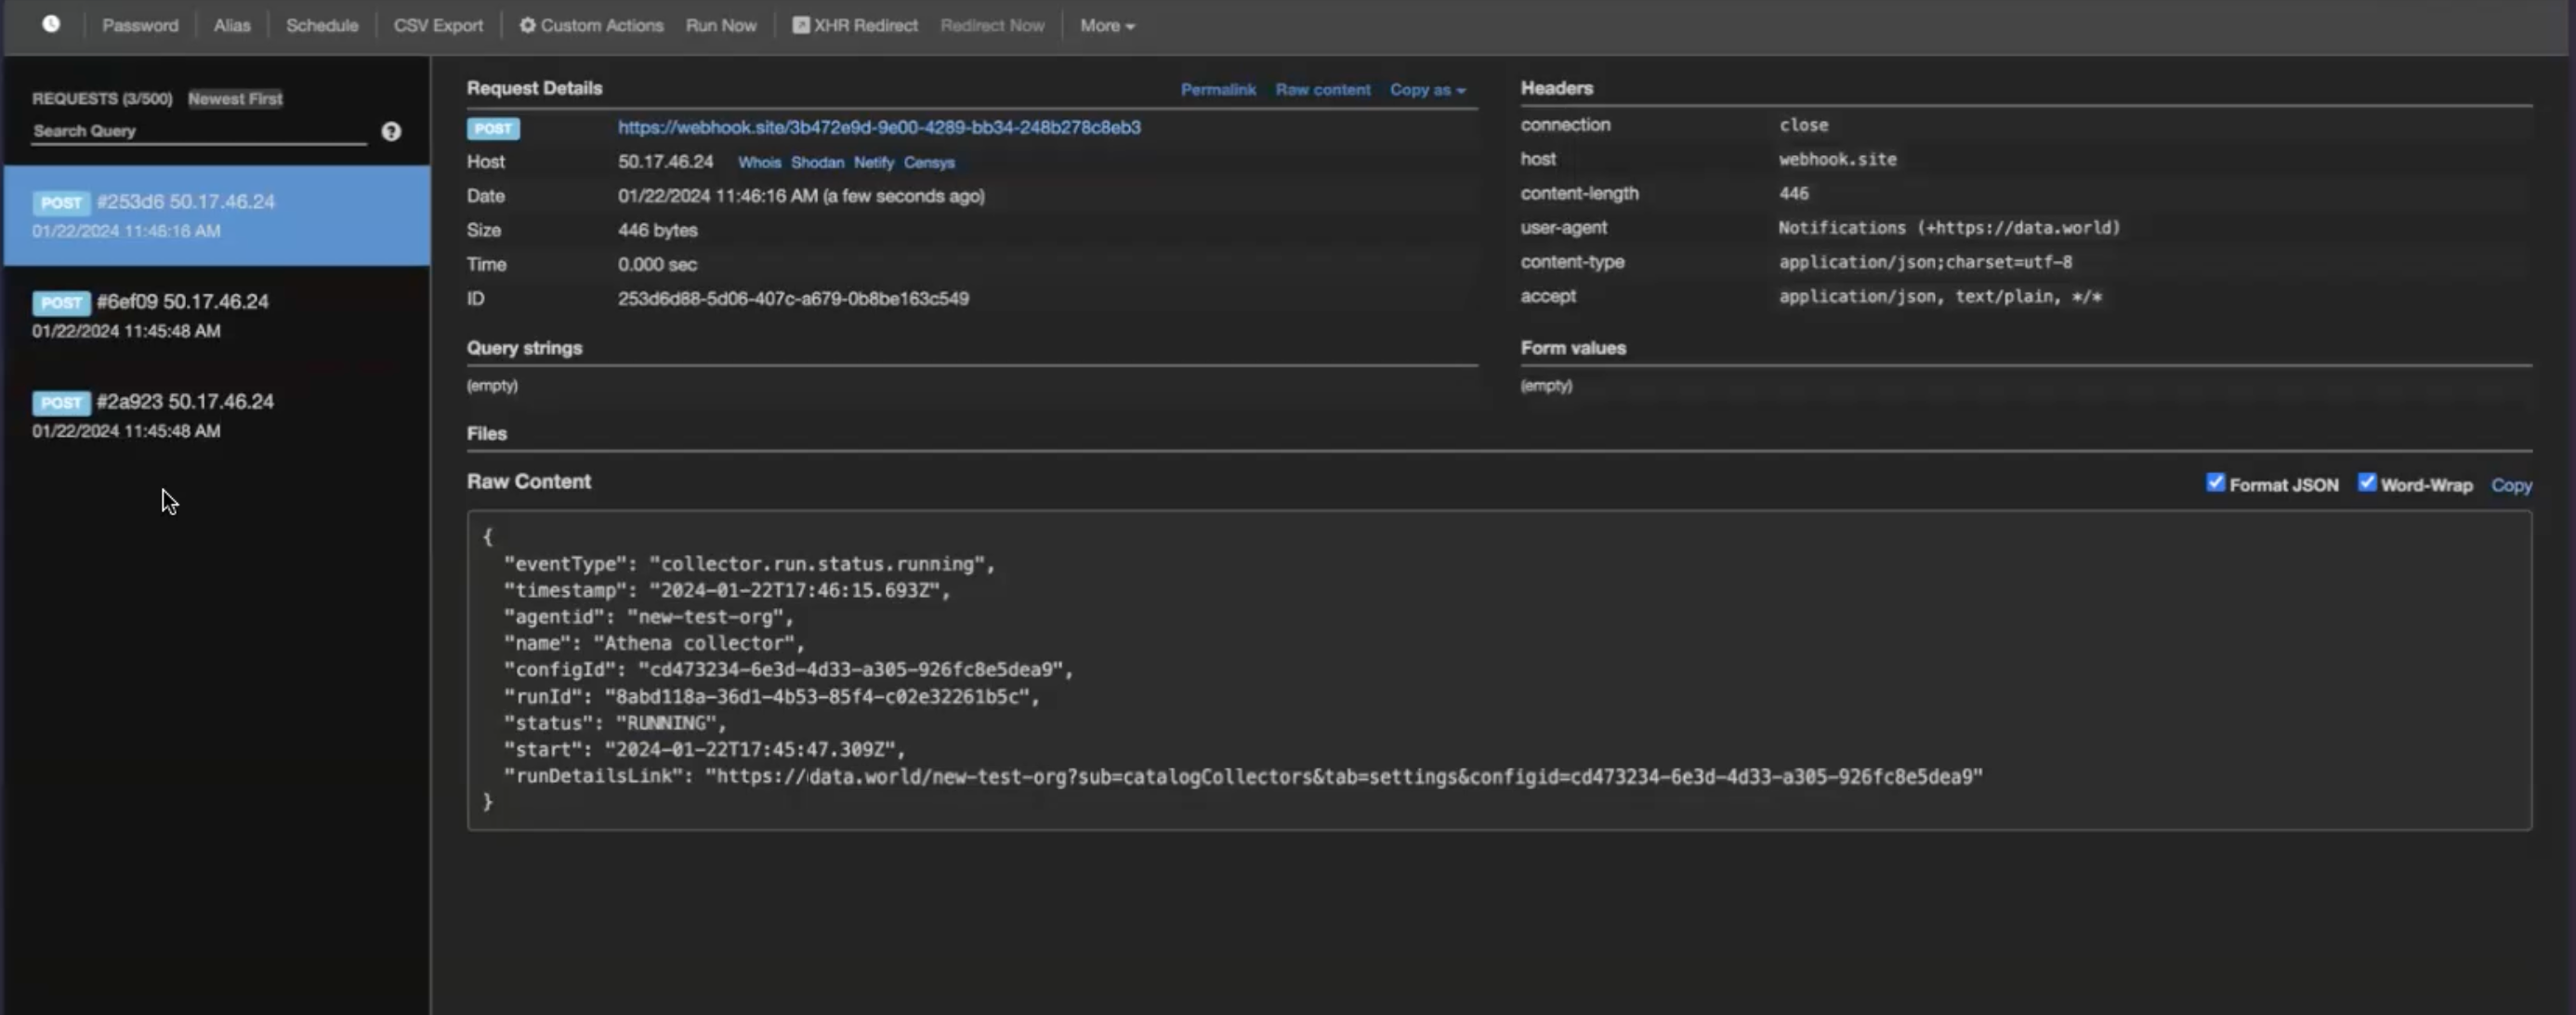
Sample data captured by the webhook.
Running collectors manually
After setting up the collector configuration, it's recommended to manually execute it once to confirm everything is set up correctly. Even for collectors scheduled to run automatically, you can initiate them manually at any time. Cloud collectors are designed to automatically run against the latest version of the collector supported by the UI.
To run the collectors manually:
On the Configured collectors page, locate the collector you want to run.
On the collector configuration details page, click the Run now button. Alternatively, on the Configured collectors page, click the Three dot menu and click Run/Sync now button.
On both pages, the Status field shows the status as Running with information about time elapsed since the run was started.
The collector starts running in the background and you can navigate away from the page at any time. If a collector run errors out, the Status section and the Status field update to an Error state.
After the collector has completed the required pre-configuration steps and starts harvesting the metadata, you get an option to Cancel the harvesting process, if you want. The Status section and the Status field update to Canceled.
After the collector run has completed, the Status section of the collector configuration details page updates to show the successful status. The Last run summary page also updates to show the total number of resource collected and total number of types of resources collected. The Resources collected by type gives granular level information about the number of resources collected for each type of resource.
Browse to the Collection and Dataset specified while running the collector to view the collector output.
To get notifications about the collector runs, simply setup web hooks at the Organization level from the Catalog experience > Admin page. The Webhooks will automatically start capturing the Status events (Pending, Provisioning, Running, Completed, Error, Cancelled) for the collector runs.
Sample data captured by the webhook.
Canceling a collector run
After starting a collector run, you can cancel it if needed.
Important things to note:
Logs generate only after the collector starts up (about 5 minutes). No logs are available if the collector is canceled before this period.
After canceling a run, the collector produces the logs within 5 minutes
To stop a running collector:
Locate the running collector you want to stop. After the collector has completed the required pre-configuration steps and starts harvesting the metadata, you get an option to Cancel it.
On the collector configuration details page, click the Cancel run button. Alternatively, on the Configured collectors page, click the Three dot menu and click Cancel run button.
The collector stops running. On both pages, the Status field shows the status as Canceled with information about time elapsed since the run was canceled.
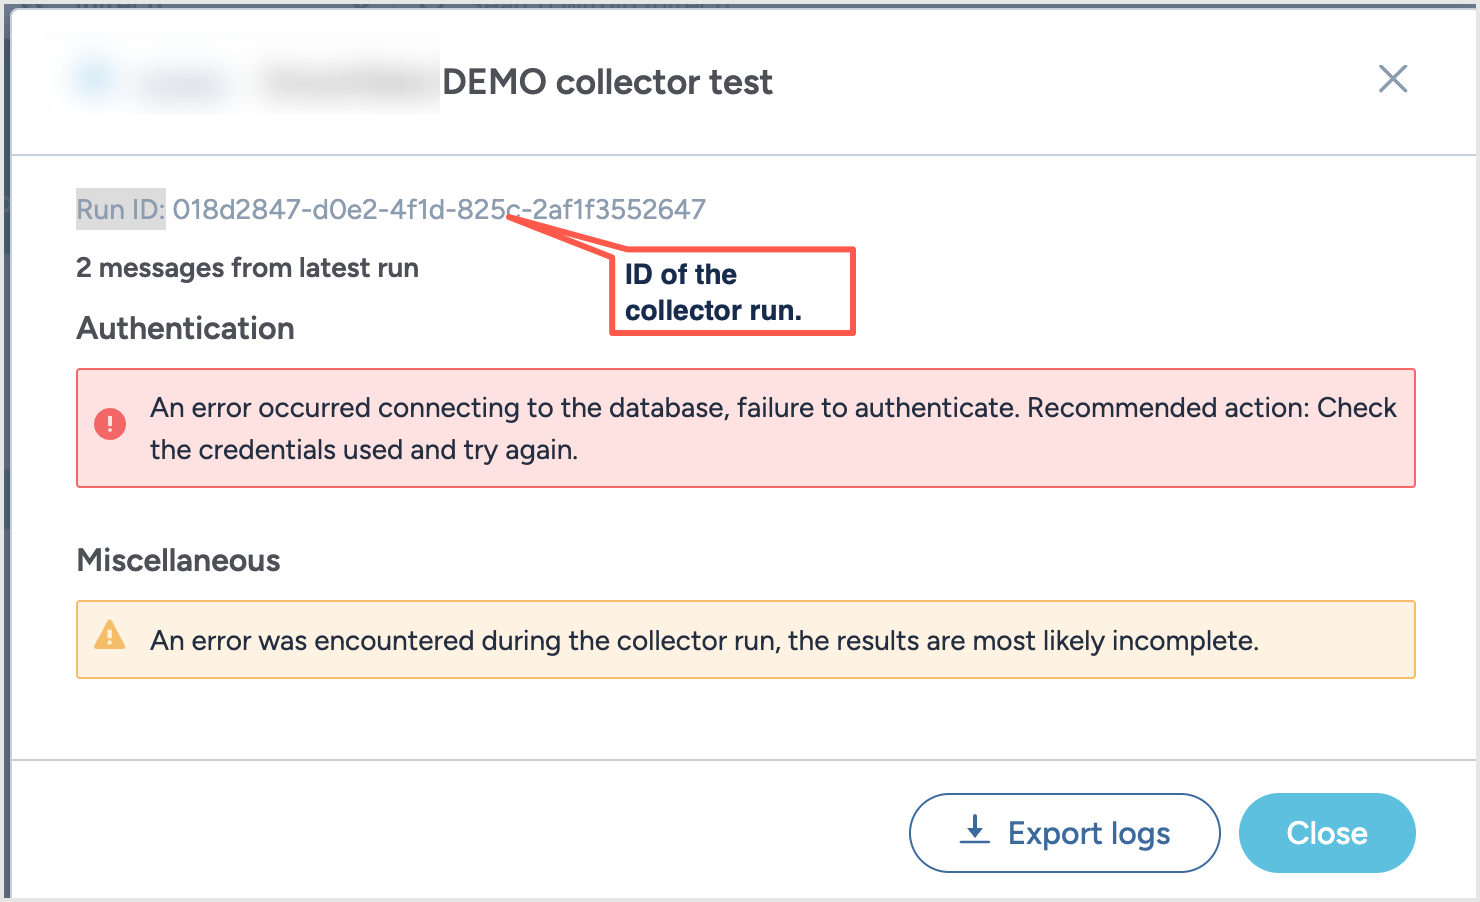
The collector produces a log file in 5 minutes after stop running. To download a logs, click the View debugging info link. A pop-up window opens.
In the pop-up window, click Export logs to download the log file. The window also includes the Run ID of the collector run that failed. While reporting this issue to data.world support team, include this Run ID to help expedite the troubleshooting process.
Copying collector configurations
After you have configured a collector for a source system, you can easily create a copy of the configuration to configure another collector for the same source system but for different parameters.
To copy collector configurations:
On the Configured collectors page, locate the collector configuration you want to copy.
From the Three dot menu, click Duplicate configuration.
In the Edit Collector window, provide a new name for the collector configuration. Optionally, set a schedule. Click Save and view.
You are taken to the copied collector configuration page. Click the Edit Configuration button to adjust the details of the configuration.
Deleting configurations
Important things to note:
Deleting the configuration will not affect the resources that were collected from previous runs.
Any scheduled future runs for the collector are suspended.
To delete a configuration:
On the Configured collectors page, locate the collector configuration you want to delete.
From the Three dot menu, click the Delete configuration button.
Confirm the deletion. The configuration is deleted and removed from the Configured collectors page.