Excel
The data.world add-in for Microsoft Excel lets you work with your data directly from Excel. You can explore, analyze, and visualize live data, then publish charts and share updates without leaving your spreadsheet. This is ideal for analysts, collaborators, and decision-makers who want to stay in flow while reducing manual effort.
Key benefits include:
Import data from data.world: Import live data and queries directly into Excel to work with real-time, trusted data.
Upload spreadsheets to data.world: Upload Excel data to datasets or projects, keeping your team aligned and reducing versioning issues.
Publish charts as insights: Convert Excel charts into visual insights on data.world to share findings where people collaborate.
Sync data in both directions: Keep Excel and data.world connected, minimizing manual effort and maintaining up-to-date information.
Enabling Excel integration
Start by enabling the data.world add-in in Excel. This unlocks the full functionality of the integration, allowing you to access and sync data without leaving your spreadsheet.
To enable the Excel integration:
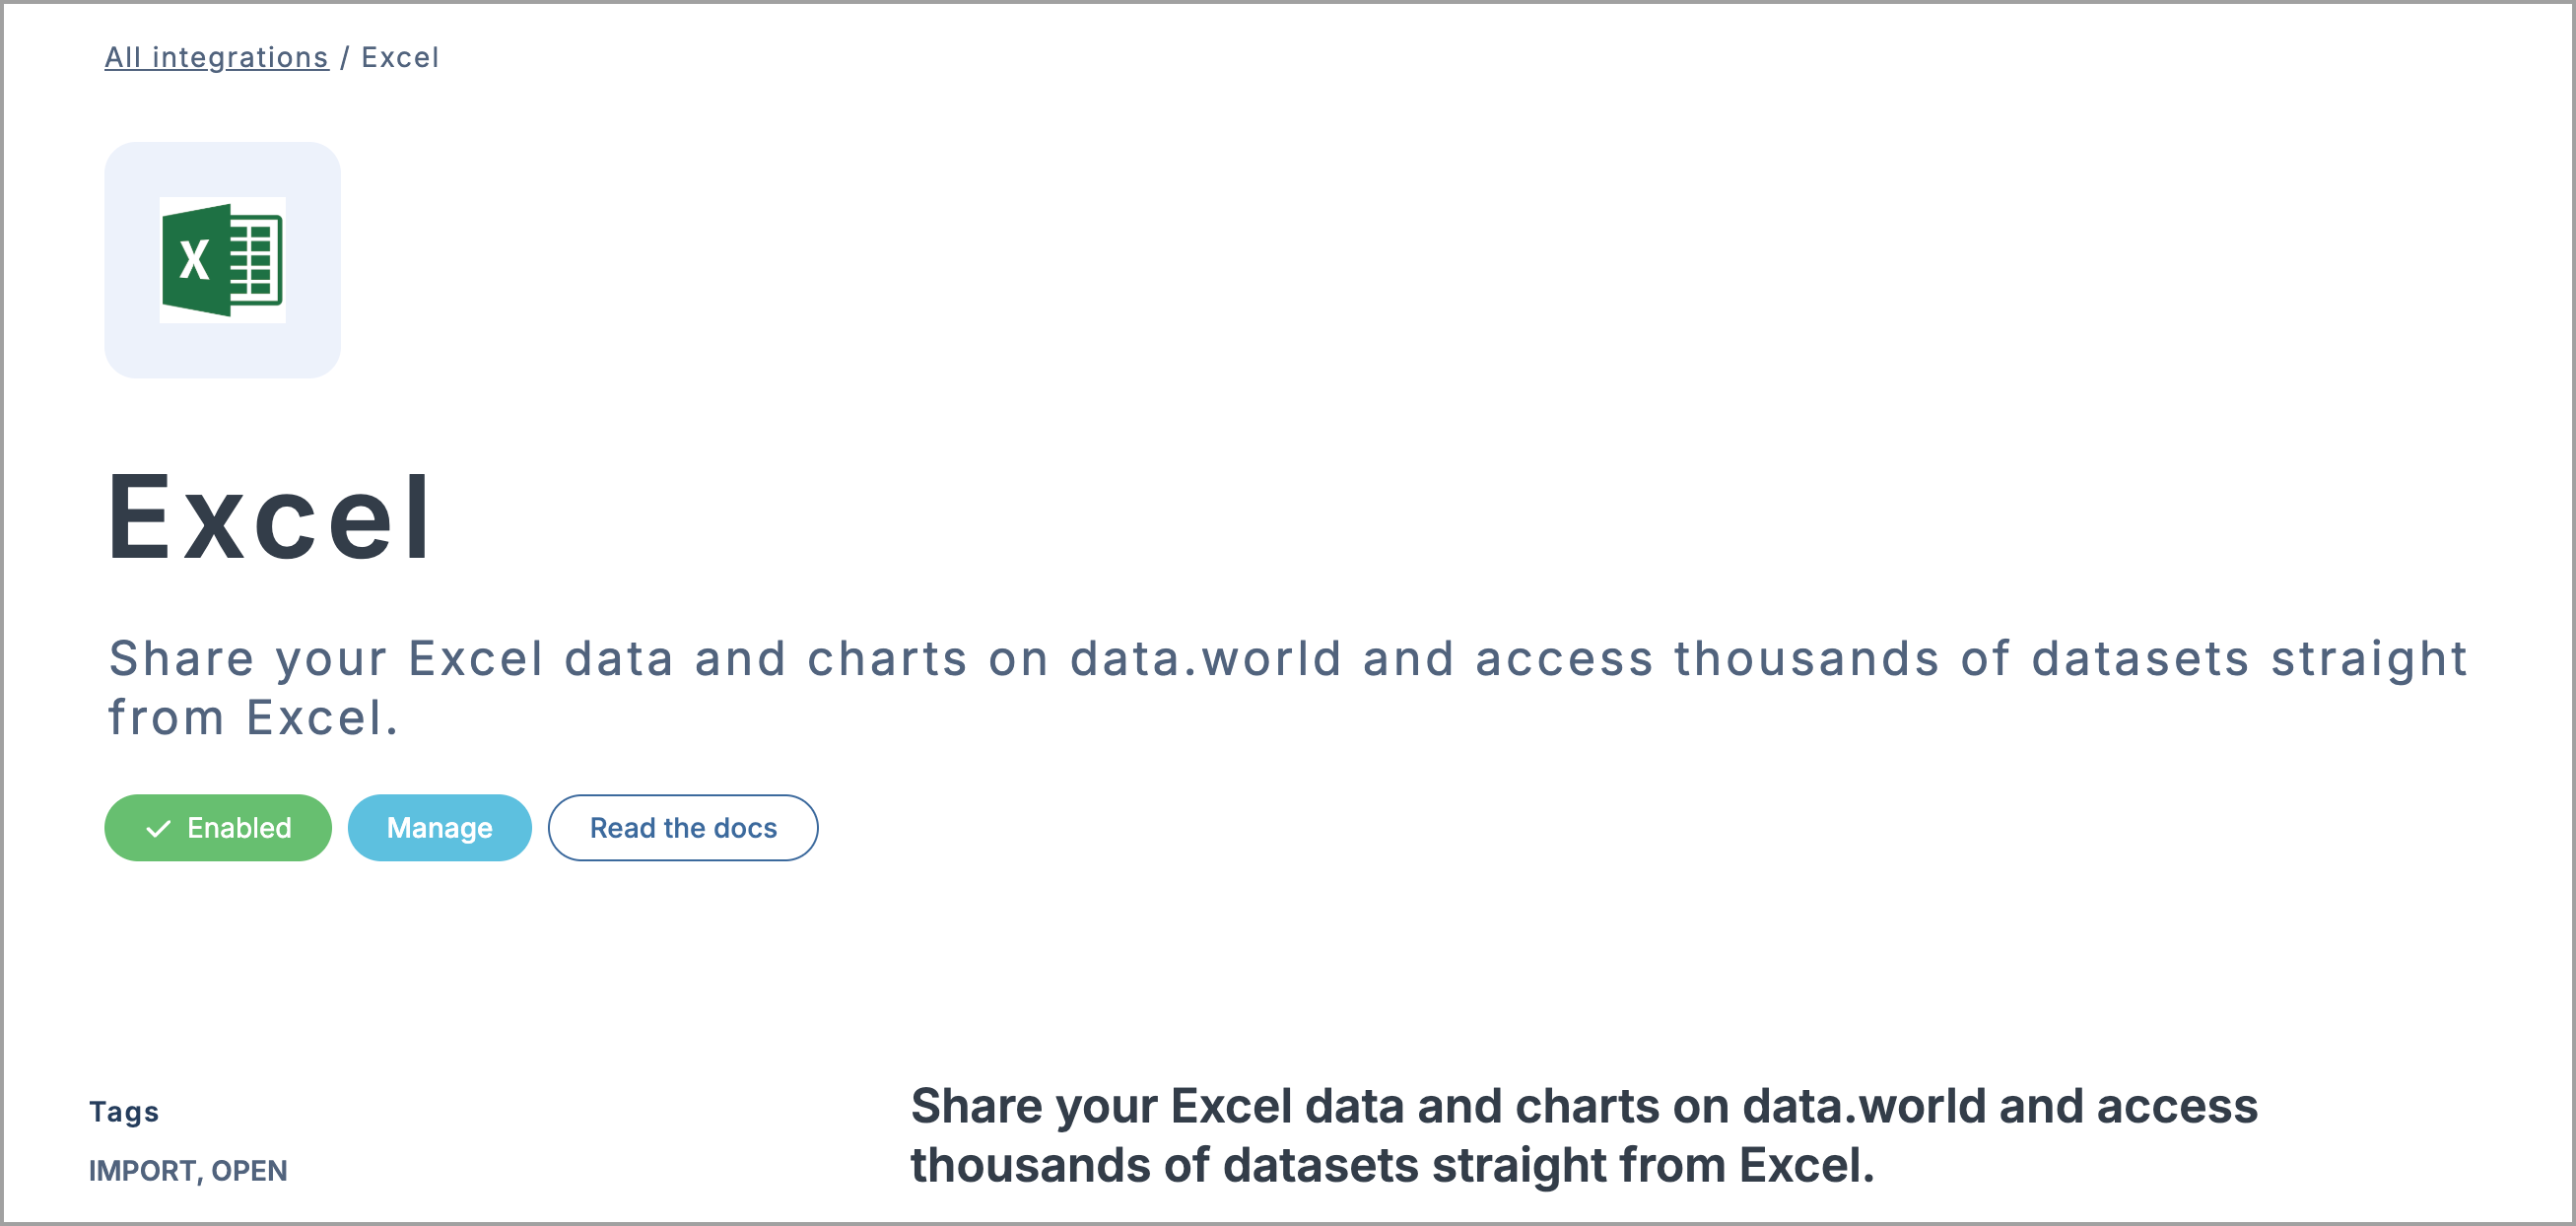
Go to the Excel integration page on data.world.
Click Enable integration and review the requested permissions. Click Authorize Excel Add-in to confirm. Once authorized, the integration will be enabled for your account.
Next, open Microsoft Excel.
In the Home tab, click Add-ins > search for data.world — Datasets and Insights, and click Add.
Click Continue to confirm. Three new icons will appear in the Excel toolbar: Publish Insights, Sync Data, and Import Data.
Next, you will need to connect Excel to data.world.
Connecting your account to Excel
To begin using the integration, you need to authenticate your data.world account. This ensures secure access to your datasets and projects within Excel.
To connect your account to Excel:
In Microsoft Excel, in the Home tab, click any data.world icon in the toolbar (for example, Sync Data). The data.world login panel opens.
To sign in with your credentials:
Click Sign in.
Enter your username or email address and password. Click Sign in.
To sign in with an access token:
Click the Access code link, then paste your token into the Enter your data.world access code field.
To get your token, do the following:
Go to the Excel Integration page on data.world.
Click Manage under the Manage API token section.
Click Get Token > Copy.
Once authenticated, you are ready to import and sync data.
Uploading data from Excel to data.world
Easily share your work by uploading selected cells, sheets, or full workbooks from Excel into your data.world projects. This keeps your team aligned and helps eliminate versioning issues.
To upload data from Excel:
In Excel, in the Home tab, click Sync Data in the toolbar. The Upload data window opens.
In the Upload from section, choose the data source:
Current selection: Upload only the selected cells.
Current sheet: Upload the entire worksheet.
In the Save data to section, click Browse to select where to save the data. The Select a dataset or project window opens.
To upload to an existing dataset or project on data.world, simply select it from the list.
To save data to a new dataset, click Create a new dataset. Provide a Dataset title, choose the permissions and click Create Dataset.
Private: Only users you invite can see the data.
Open: Anyone can view, query, or download the data.
Note
You can change the permission settings later, after uploading a dataset.
Next, in the Upload data window, in the File name section, provide a name for your file.
This name will appear with a CSV extension. You can rename it later if needed.
Click Upload to start uploading.
Your file will appear in the Recent Uploads list. To upload another file, click New upload.
Updating datasets from Excel
Make updates to your Excel files and push changes directly to data.world. With just a few clicks, your project stays in sync with the latest data edits.
To update dataset from Excel:
In Excel, in the Home tab, click Sync Data in the toolbar. The Recent Uploads window opens.
In the Recent Uploads list, locate your file.
Click the Upload icon next to the file to re-sync the data.
Importing data from data.world into Excel
Quickly pull tables or saved queries into Excel to run analyses or build dashboards. Importing live data ensures you are always working with the latest information.
To import a table or query into Excel:
In Excel, in the Home tab, click Import Data in the toolbar. The Import Data window opens.
In the Import from section, click Browse to select a dataset or project from data.world. The Select a dataset or project window opens.
In the Select a dataset or project window, select the dataset or project you want to import from the list.
In the Source section, choose the source type and select the data from the dropdown:
Table: A CSV or tabular file.
Query: A saved query from a dataset or project.
In the Save data to field, enter the name of the Excel sheet where you want to place the imported data.
Warning
If you enter the name of an existing sheet, Excel will overwrite its content.
Click Import to start pulling in the data.
Excel will load the data into your selected sheet. You will also see the file listed under Recent Imports. To import another file, click New import.
Publishing insights from Excel
Turn Excel charts into visual insights and publish them to your data.world project. This enables easy sharing of analysis results and promotes collaborative decision-making.
To publish a chart as an insight:
In Excel, in the Home tab, click Publish Insights in the toolbar. The New Insight window opens.
In the Pick a chart section, select the chart you want to publish. To refresh the list and see newly added charts, click Refresh.
Next, set the following parameters and click OK to publish.
Project URL: Paste the URL of the project where you want to publish the insight, or click Browse to select one.
To create a new project, click Create a new project and set its visibility (public or private).
Title: Enter a title for your insight (max 60 characters).
Add Comment: (Optional) Include any context or notes to accompany the chart.
Note
This will appear as a comment, not a description. To add a description, publish the insight and edit it in your project.
Your chart is now published to the Insights section of the selected project, along with any comments you have added.
To view your insight, click View on data.world. To publish another chart, click Publish new insight.
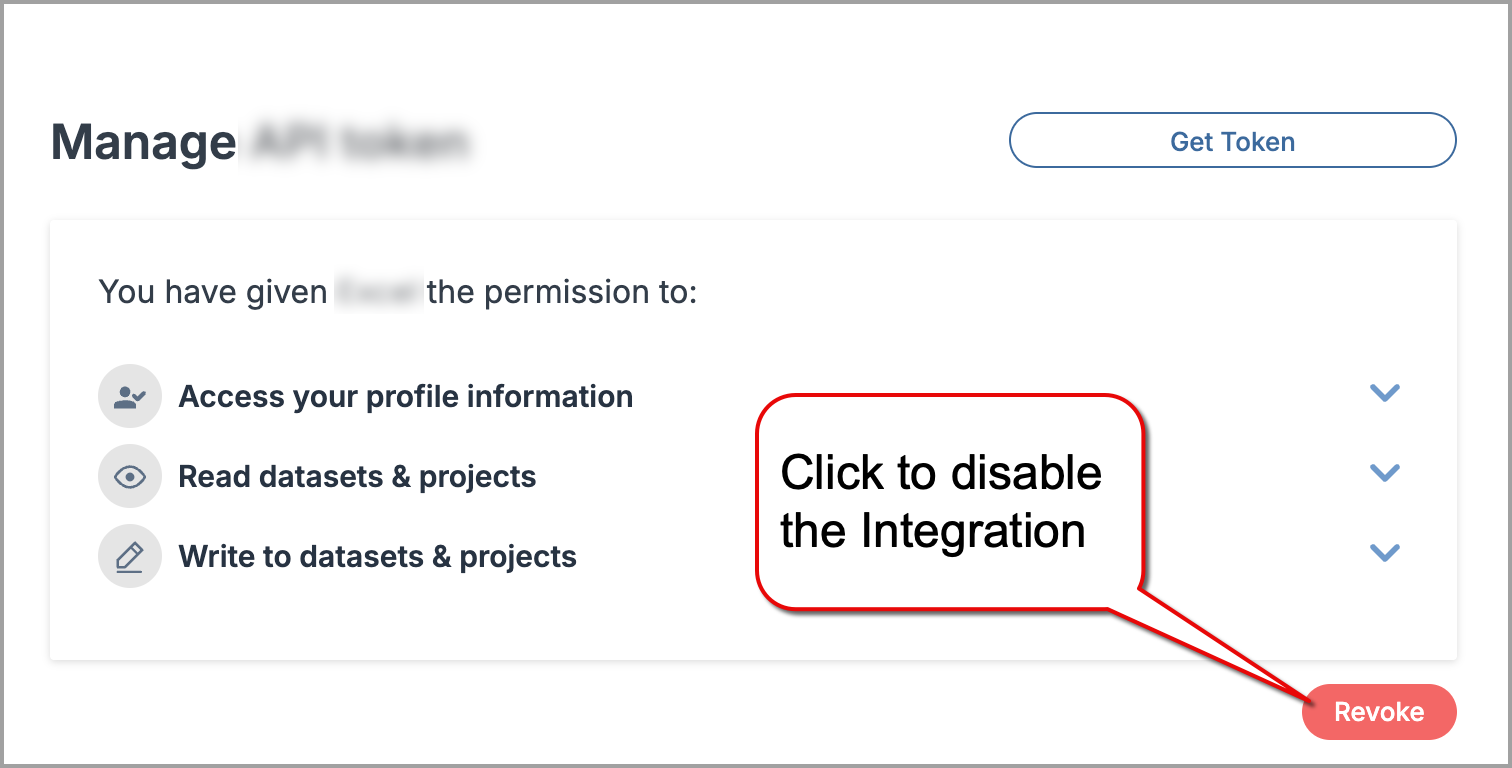
Disabling the integration
Disabling the integration will revoke the application access to your data.world account, datasets and projects data.
Important
To use the integration again, you will need to reconnect and reauthorize access.
To disable an integration:
Go to the integration page.
On the integration page, click the Manage button.
In the Manage section, click Revoke and confirm disconnecting the integration.