Configuring SCIM in Okta
Enabling SCIM in Okta
To configure SCIM in Okta:
Login in to your Okta account.
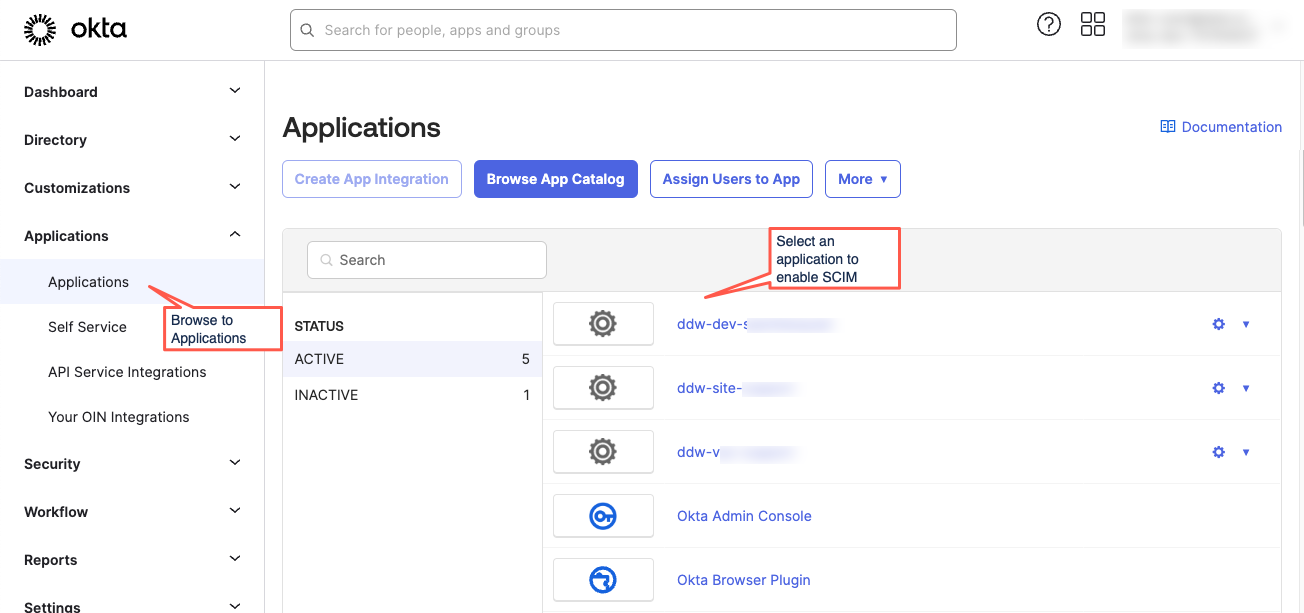
In the Left navigation, browse to Applications > Applications.
From the list of applications, find the one configured with SSO for data.world and click it to open its configuration page.
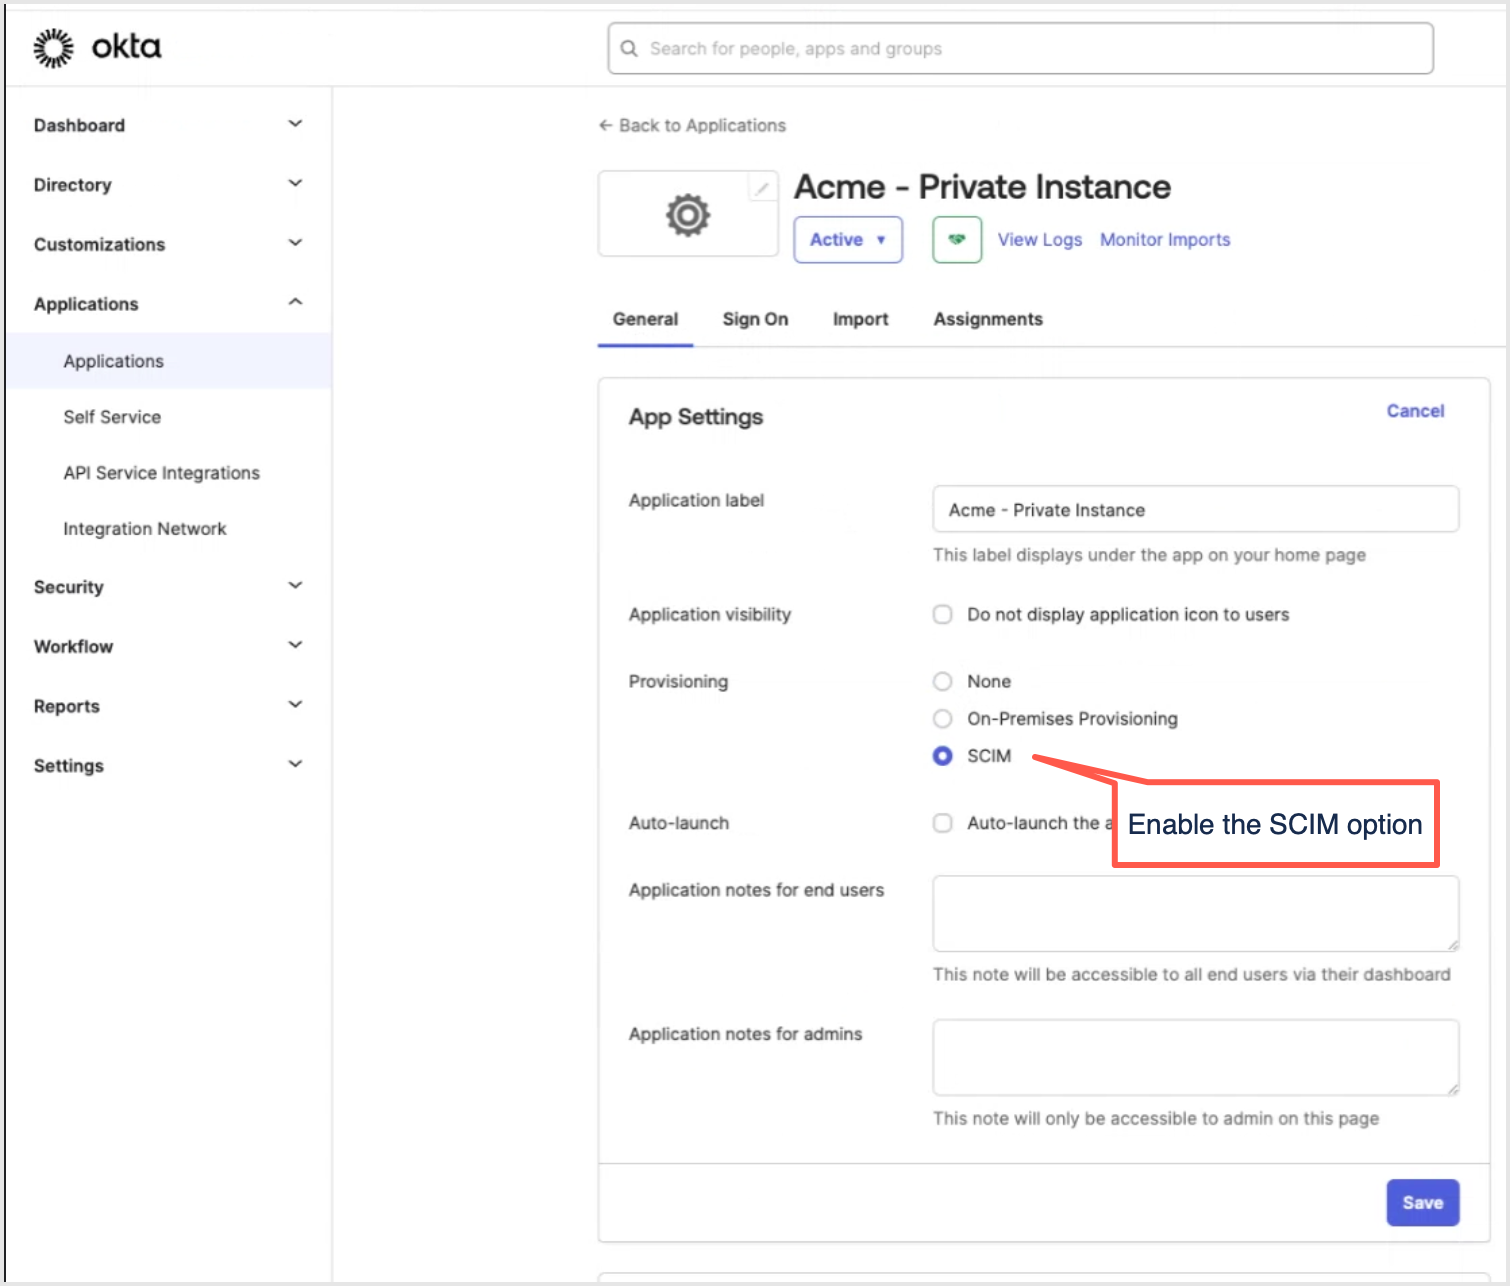
The application details page opens. On the General tab, in the App Settings section, click the Edit button. Enable the Provisioning > SCIM option. Click Save.
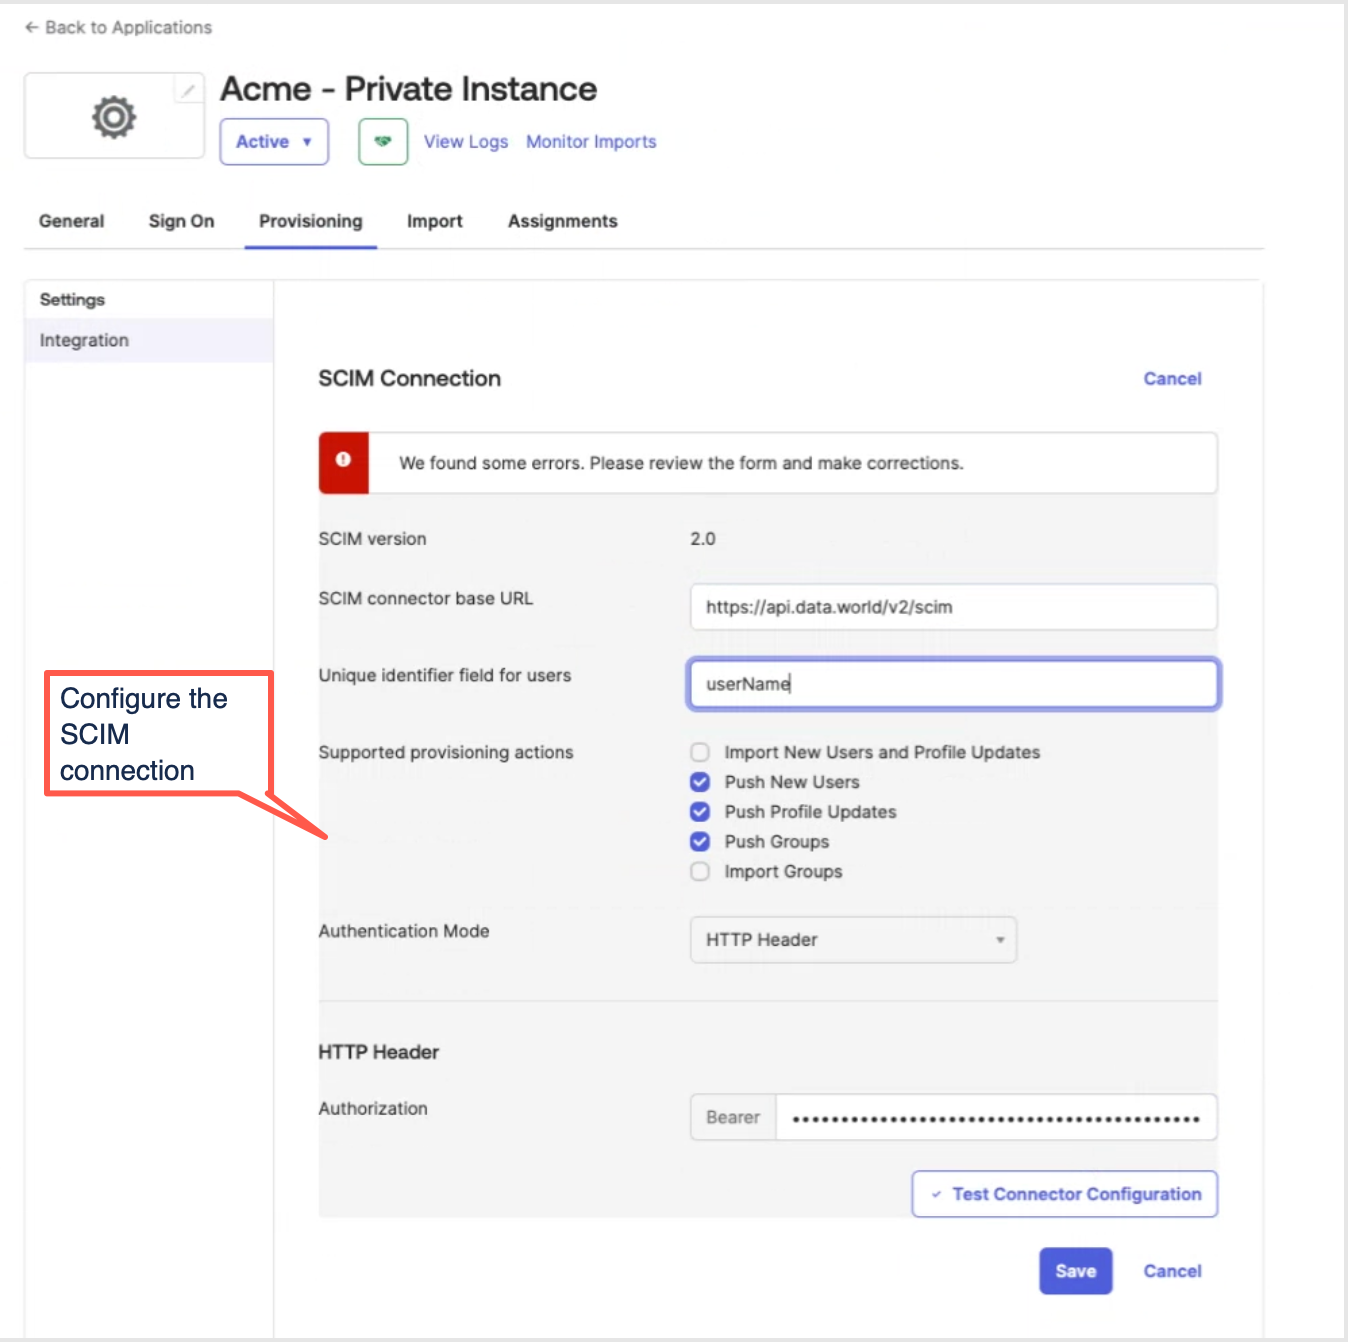
Next, go the Provisioning tab and in the Integration section, click the Edit button and set the following SCIM connection details.
SCIM connector base URL: Set the URL as https://api.data.world/v2/scim
Unique identifier field for users: Set the value as userName.
Supported provisioning actions: Select Push new users, Push profile updates, Push groups.
Authentication mode: Set the value to HTTP Header.
Authorization: Provide the service token you copied from data.world.
Click Test connector configuration to make the connection is setup correctly.
Click Save.
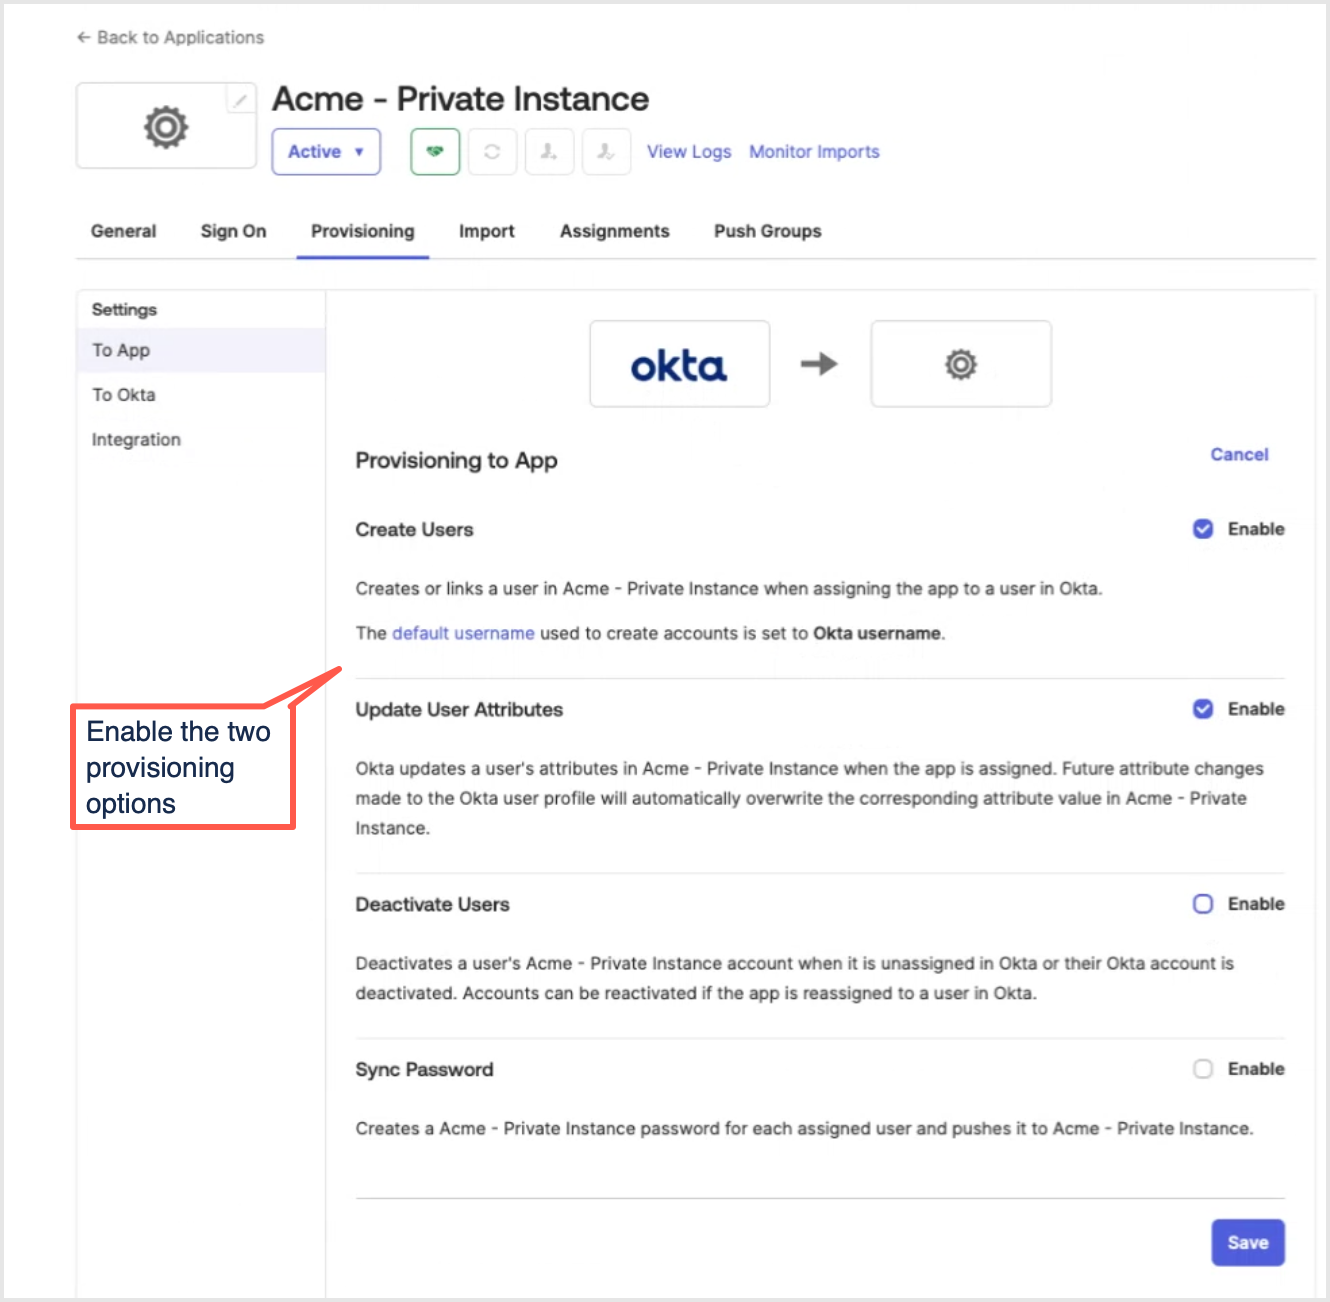
Once you save the configuration, the Provisioning tab refreshes and a new To App section appears in the left navigation. Click the Edit button to select the following two options. Click Save.
Create users
Update user attributes
Provisioning user groups in Okta
Groups in Okta serve the function of managing access to various resources. When setting up these groups, it is important to organize users based on similar access requirements. Once the groups are established and synced with data.world, they are transformed into Teams within data.world. You can subsequently assign these Teams to specific catalog organizations, allowing you to control their access to data.world resources efficiently.
To provision user groups in Okta:
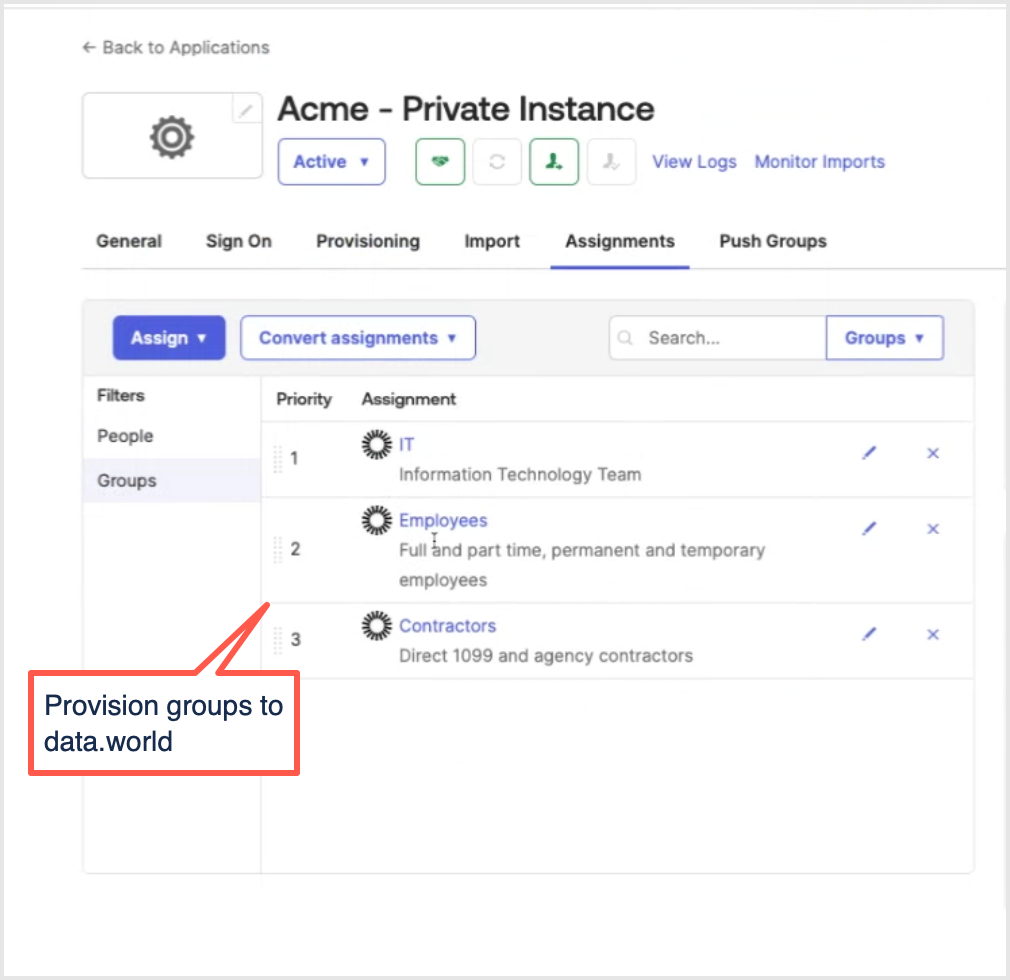
On the application details page, go to the Assignments tab, Groups section. Provision the user groups that should have access to data.world.
Important
Check to make sure that the group names do not have any special characters, for example, hyphens (-).
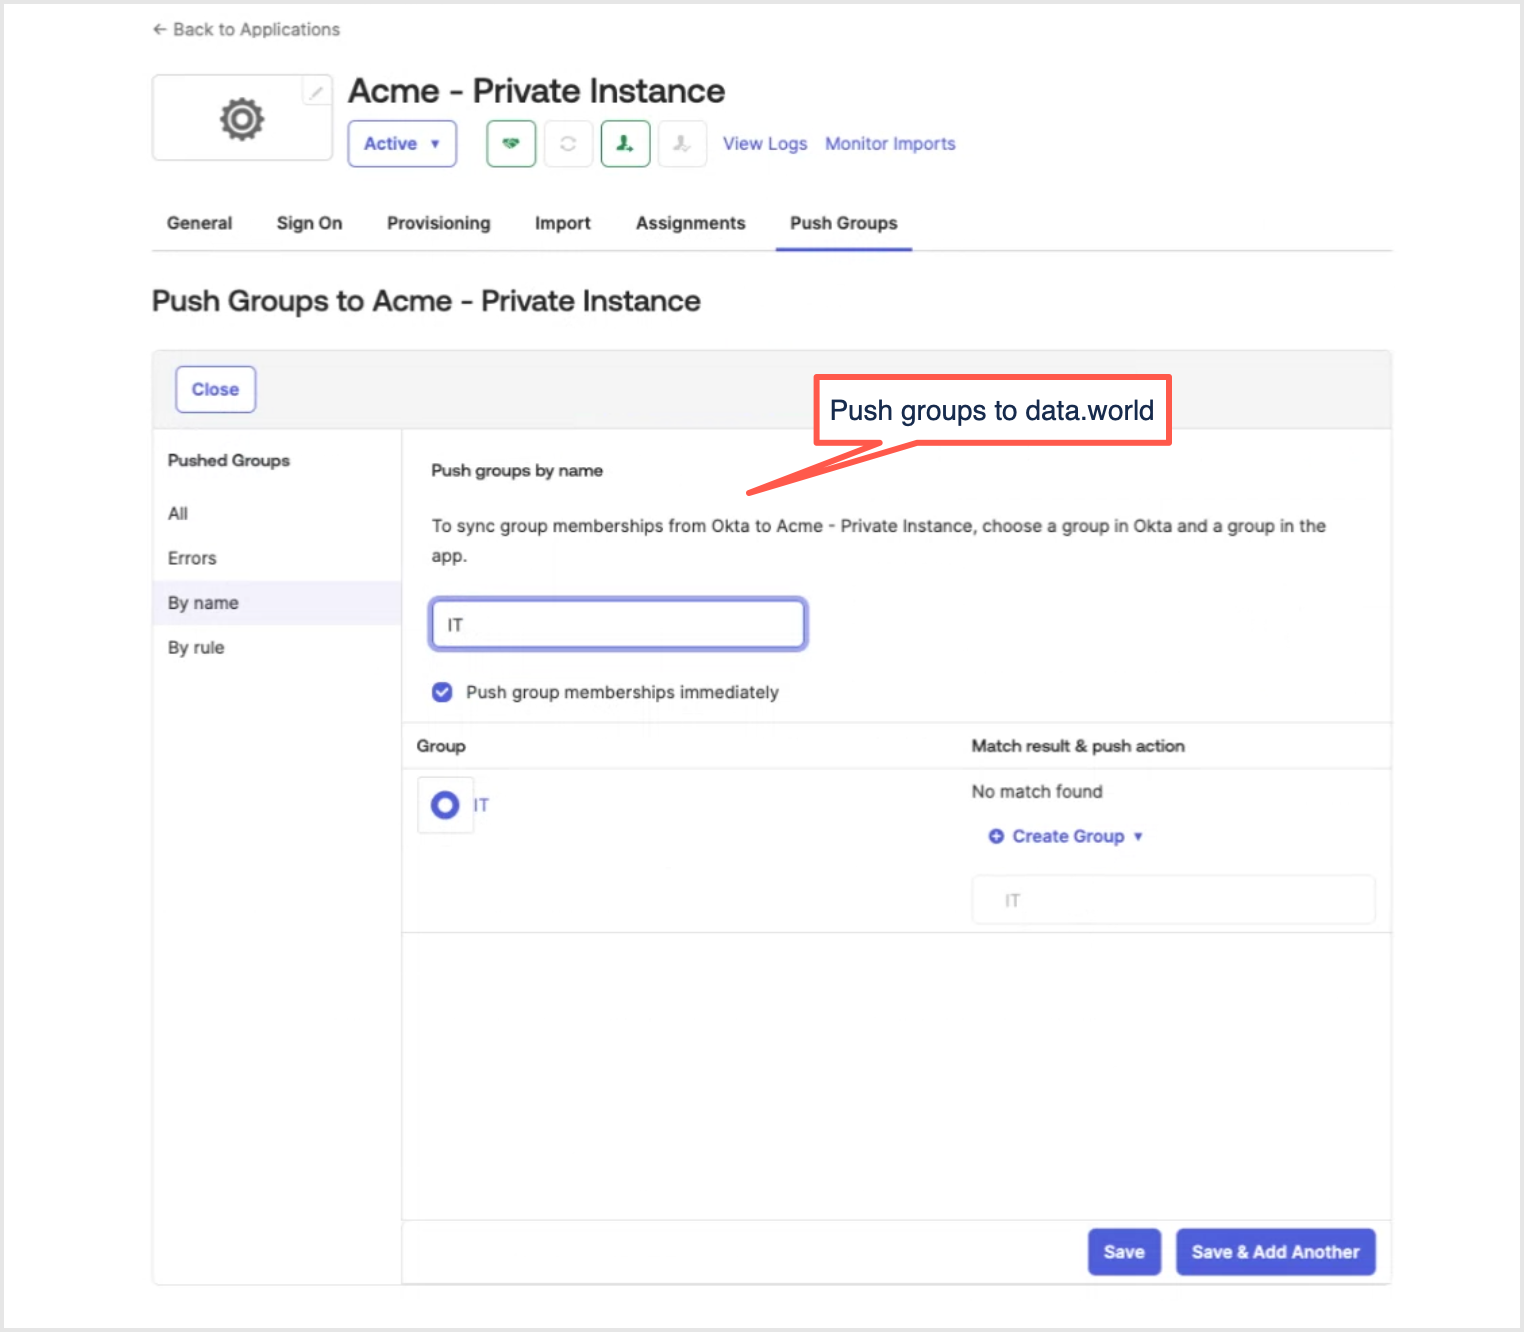
Next, go to Push Groups tab. In the toolbar, select Push groups > Push group by name option. Push the users you provisioned in the previous step. Select the Push group membership option to immediately create and sync the user group in data.world.
This creates the teams in data.world. You can next go to data.world and add these teams to organizations and set up their permissions in data.world.
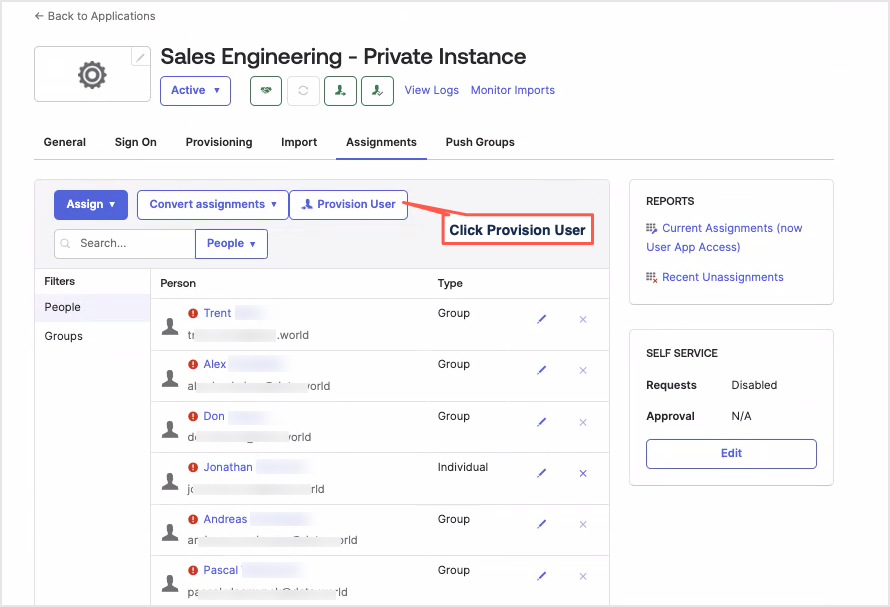
Next, go back to the Assignments tab and see if there are still users that need to be provision via SCIM. Click on Provision User.
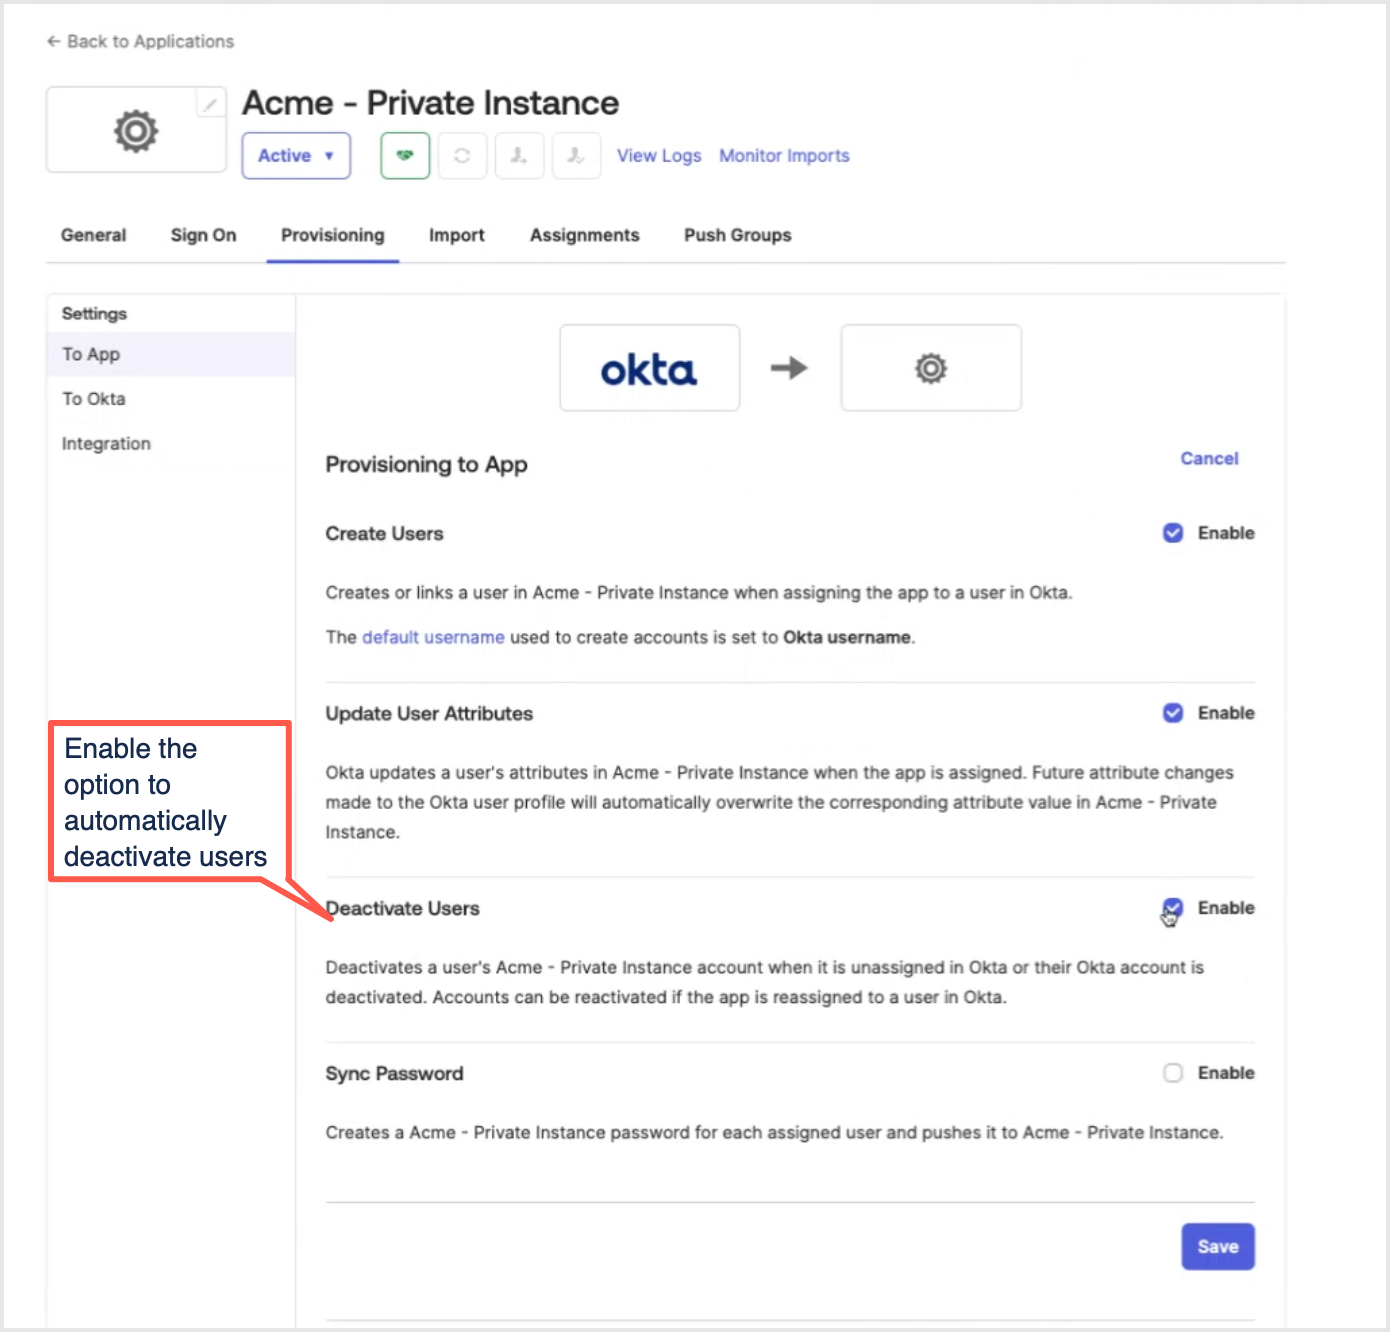
After users have been successfully provisioned for the first time after enabling SCIM, enable the Deactivate users option.
In the Provisioning tab go to the To App section. Click the Edit button and select the Deactivate users option. Click Save.
