Create select fields (CTK)
Types of select fields
You can create three types of select field:
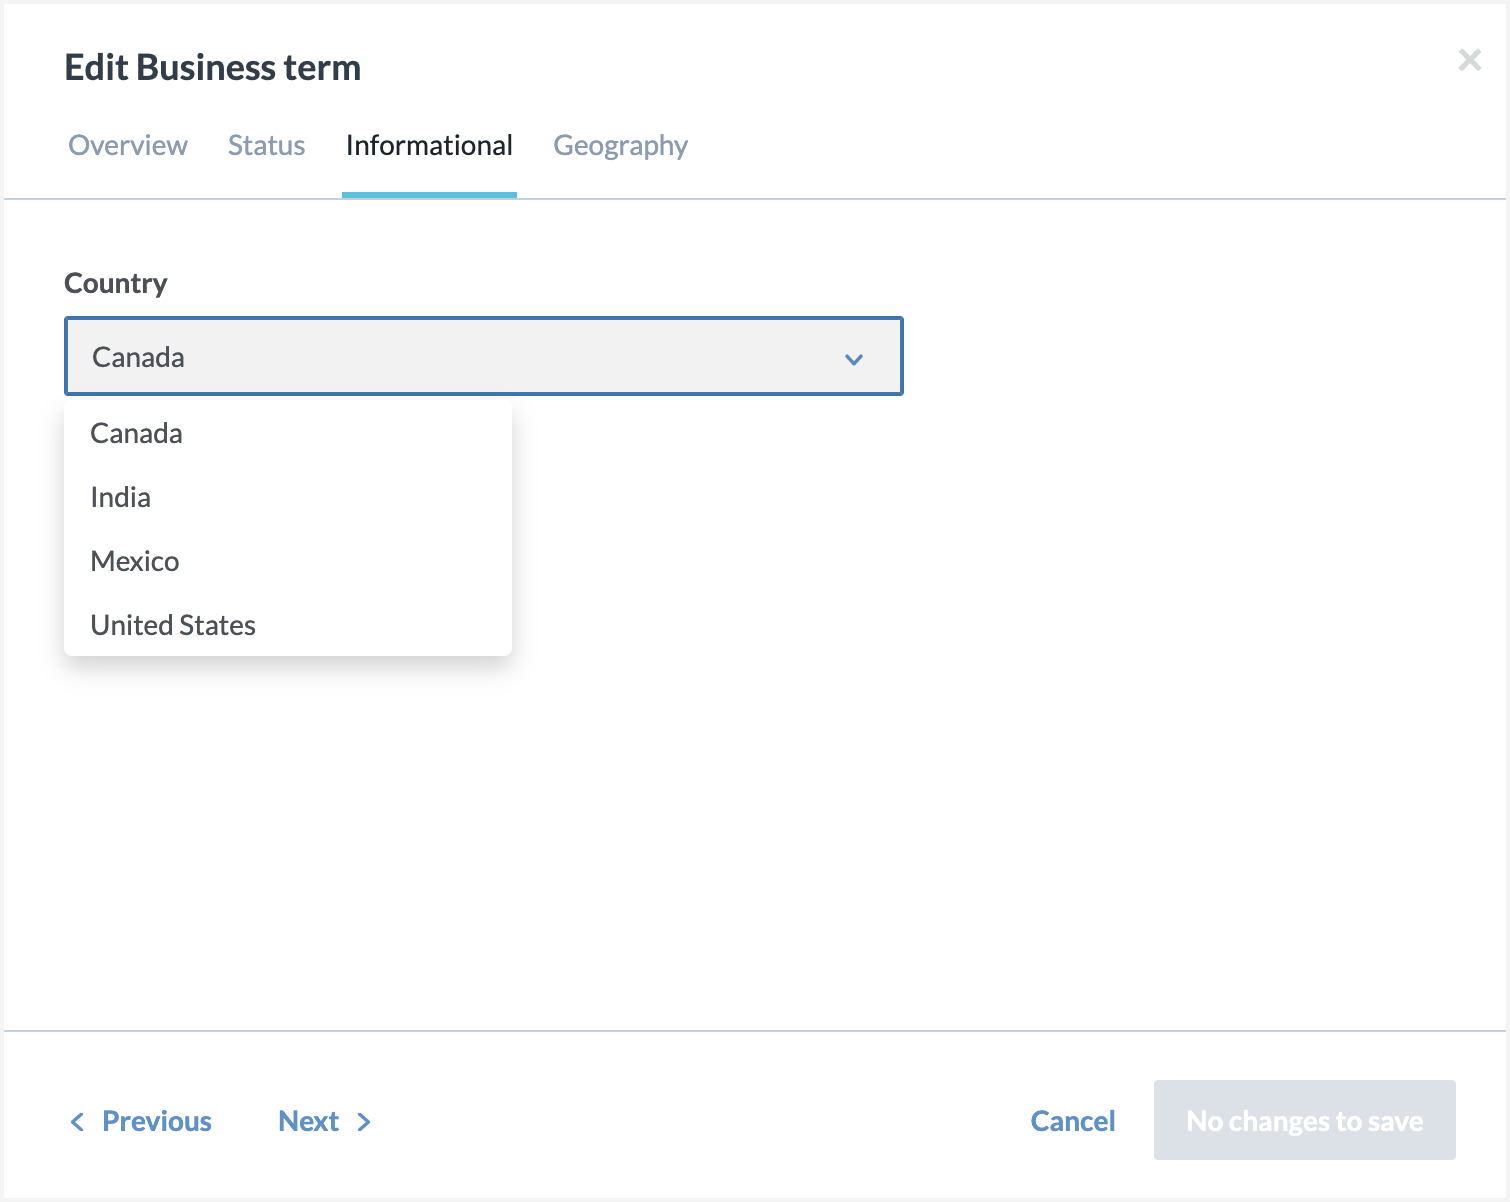
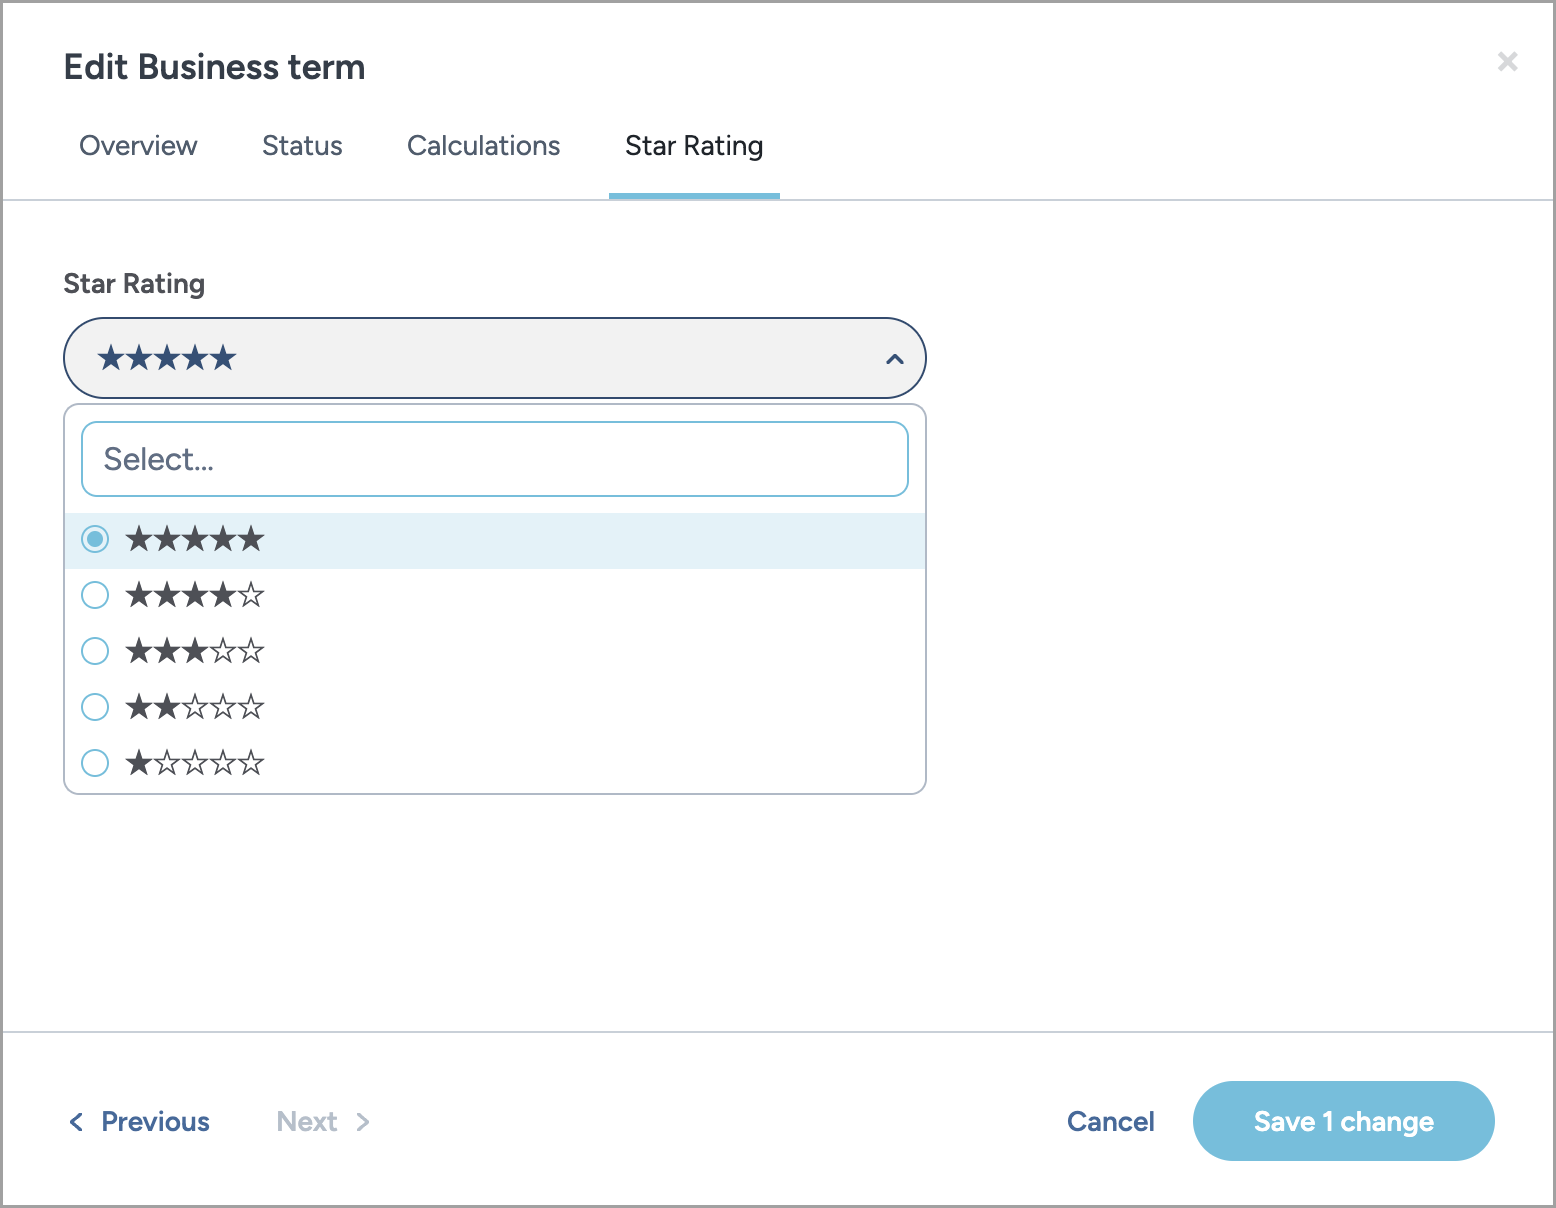
Single select field: where you can only select one option from the available options.
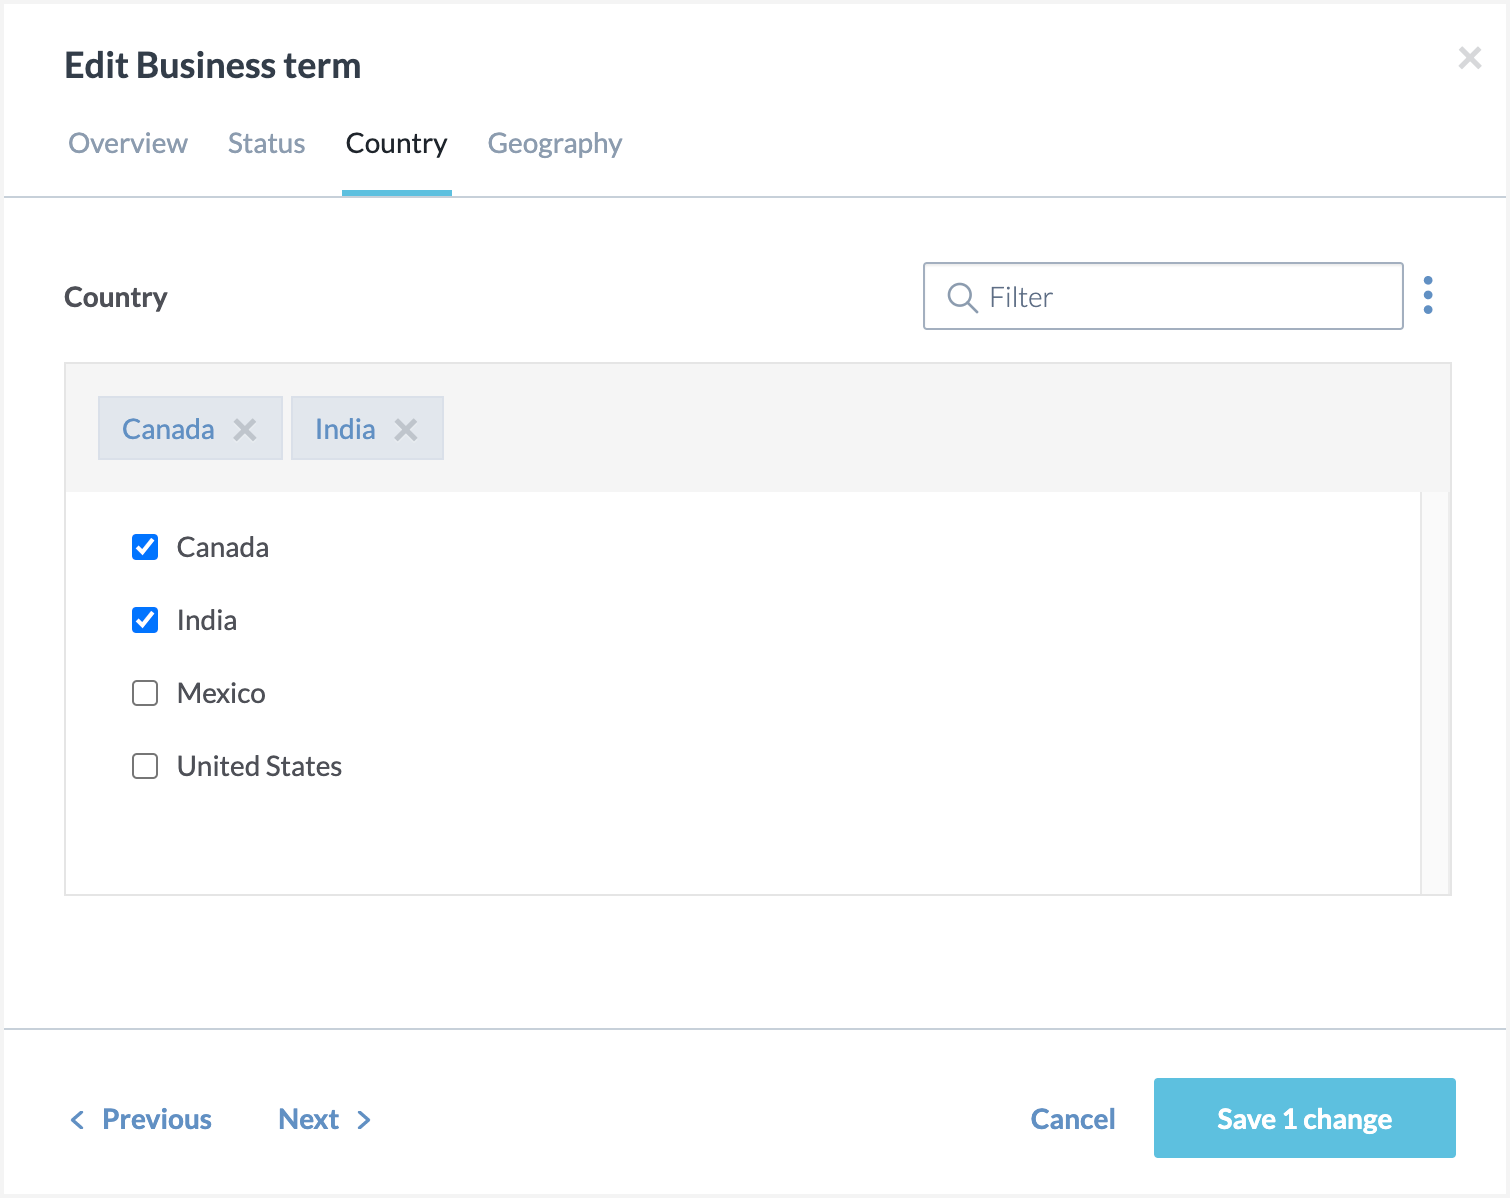
Multi select field: Where you can select more than one option from the available options.
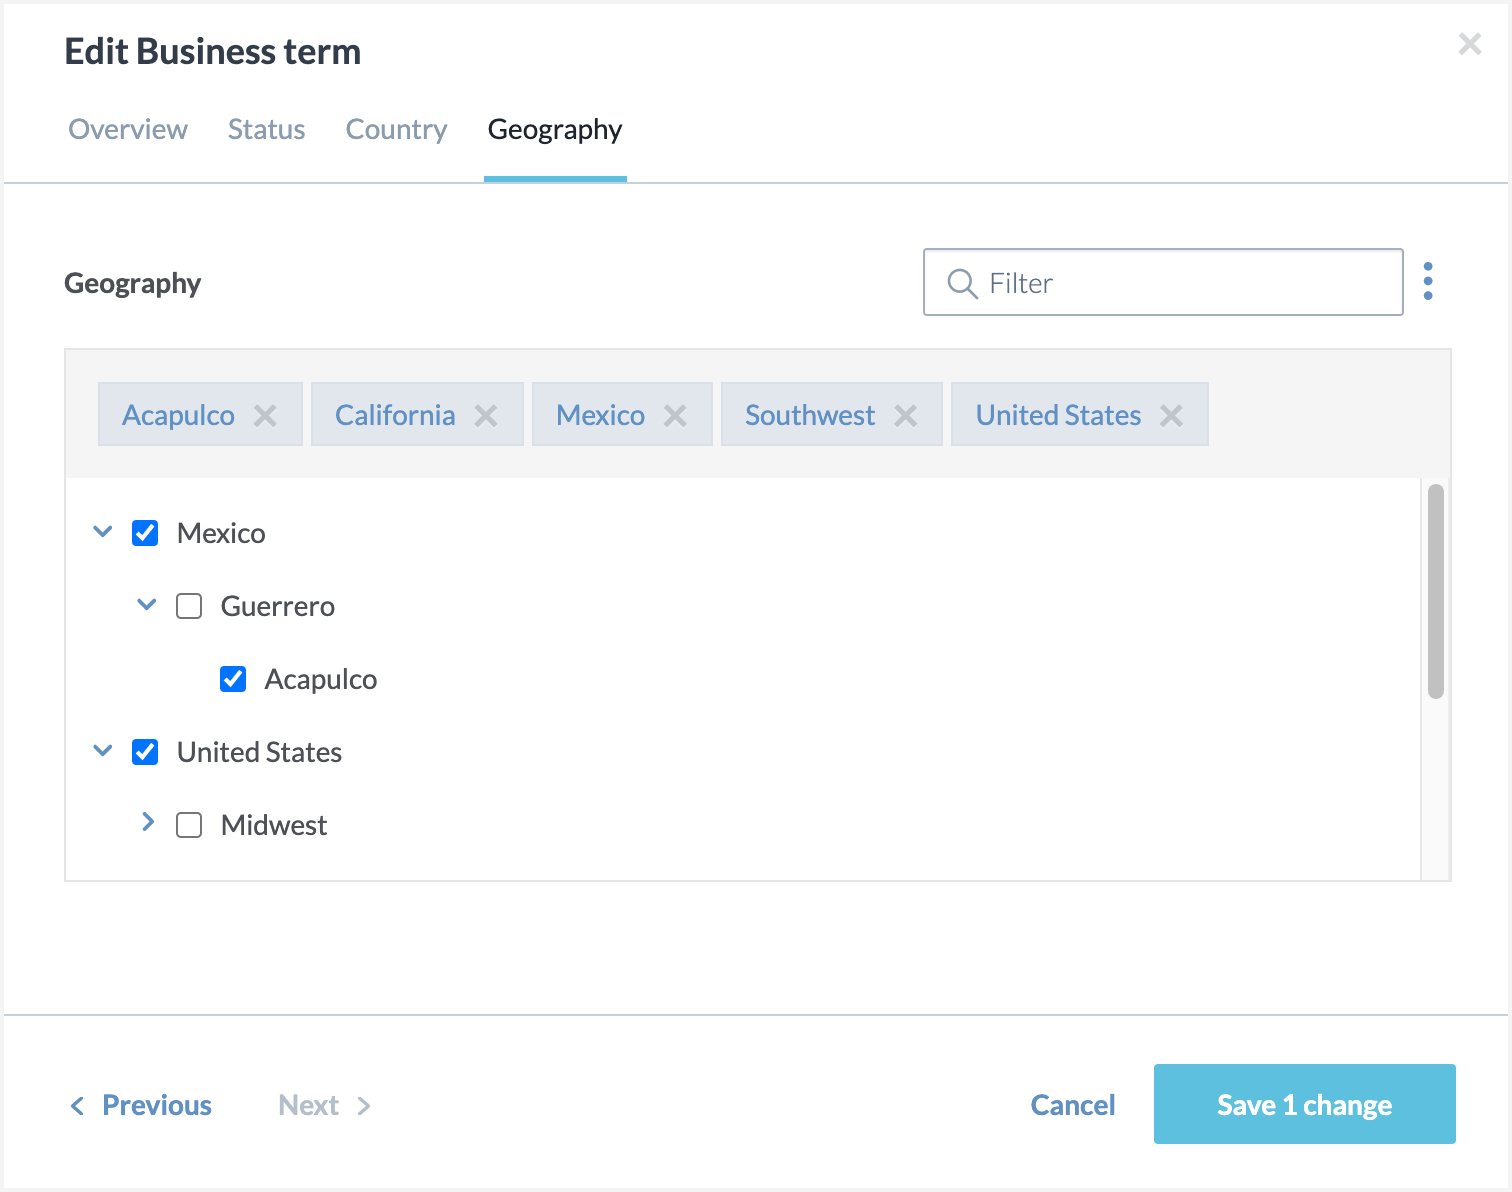
Multi select field with multiple levels of options: Where you can select more than one option from the available options at multiple levels.
Select fields with special characters.
Create the select field
To create a select field:
In the Catalog experience, go to the Resources page and click the New button.
On the Create a new resource page, in the Select type tab, select Metadata field - select. Click the Continue to configure fields button.
The Create a new Metadata field - select page opens.
In the Configure fields tab, set the following in the About section.
In the Title field, provide a name of the field you want to add. For example, let us add a field called Review date.
Important
If you change the title of the field after it is in use in the destination organizations, you must setup the IRI override to maintain seamless object visibility and functionality across all systems.
From the Collections dropdown, select the Metadata profile collection.
In the Configure fields tab, set the following in the More information section.
Resource types: Select the resource types for which you want to make the field available.
Collection types: Select the collection types for which you want to make the field available.
Sections: Specify the section in which the field should appear. If you don't select one, the filed automatically appears in the Informational Metadata section.
Display order: Set the order for the field as a number. For example, provide 1.
Page visibility: Select if the field should be always displayed on the resource page or if should be hidden when it is empty.
Edit modal visibility: For fields that are used less often, define them as additional properties so that they show as secondary field under an Add new field dropdown on the page where the field values are defined and edited.
Edit permissions: Select Can edit if users should be able to edit the value from the UI. Otherwise, set it to Read only.
Hover hint: Provide a help text to give context to your users about the field when they are viewing the field values.
Filter by this field in search: This allows you to make the field available as a filter on the search results page.
Type: Select from single-select or multi-select.
In the Configure fields tab, set the following in the Technical details section.
External access: Select Access through API if you want the field to be available for use by APIs. This setting is used for creating API Bindings for deprecated legacy API endpoints and is not required for current API endpoints. It remains accessible for those still using legacy endpoints.
Click Continue to review Metadata field - select.
In the Review Metadata field - select tab, check the configuration details for any possible errors before saving it. If adjustments are needed, click Back to edit the configuration.
Configure options for the select field dropdown
To configure the options for the select field dropdown:
After setting up the field, we will set up the value of the field using a spreadsheet and add it to the dataset.
In the Catalog Configuration organization, in the Workbench experience, browse to the DDW Template Files dataset.
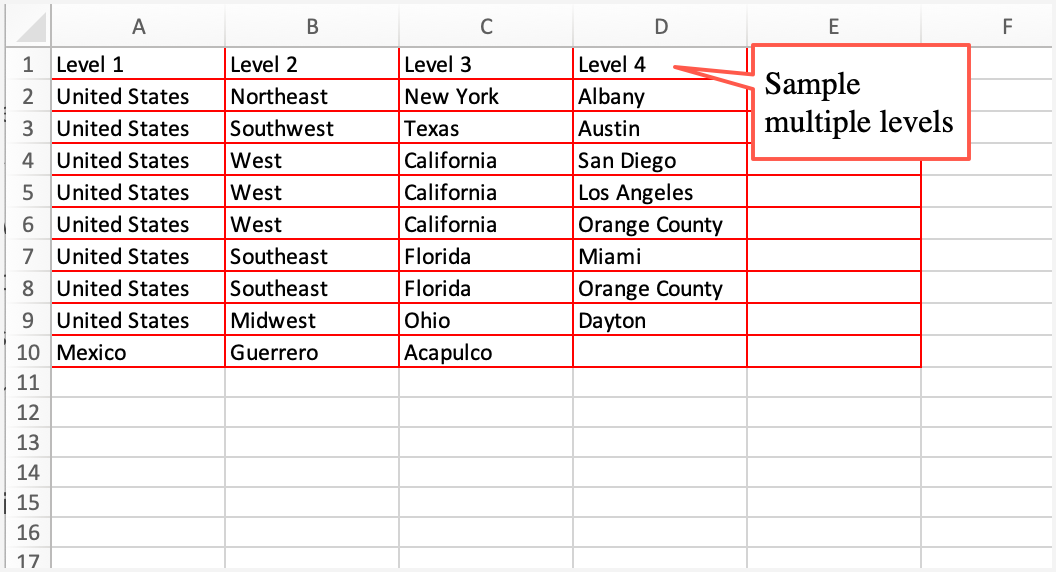
Download the sample Select_metadata_fields.xlsx file. You will notice that it shows how to create values for a Geography field with multiple levels.
In the same file or a new Excel file, add a new sheet. Name the sheet exactly what you named the field.
Caution
You can name the file anything you want but the names of the sheet should exactly match the names of the fields you have created. However, if the field name contains special characters, you can omit the special characters from the name. For example, for a field named Enabled?, name the sheet Enabled.
In the sheet, add a column called Level 1 and under it add the values for the field. You can use variations such as Level 1, level 1, or level_1 for the column header.
Important
If you change the labels of the field options after it is in use in the destination organizations, you must setup the IRI override to maintain seamless object visibility and functionality across all systems.
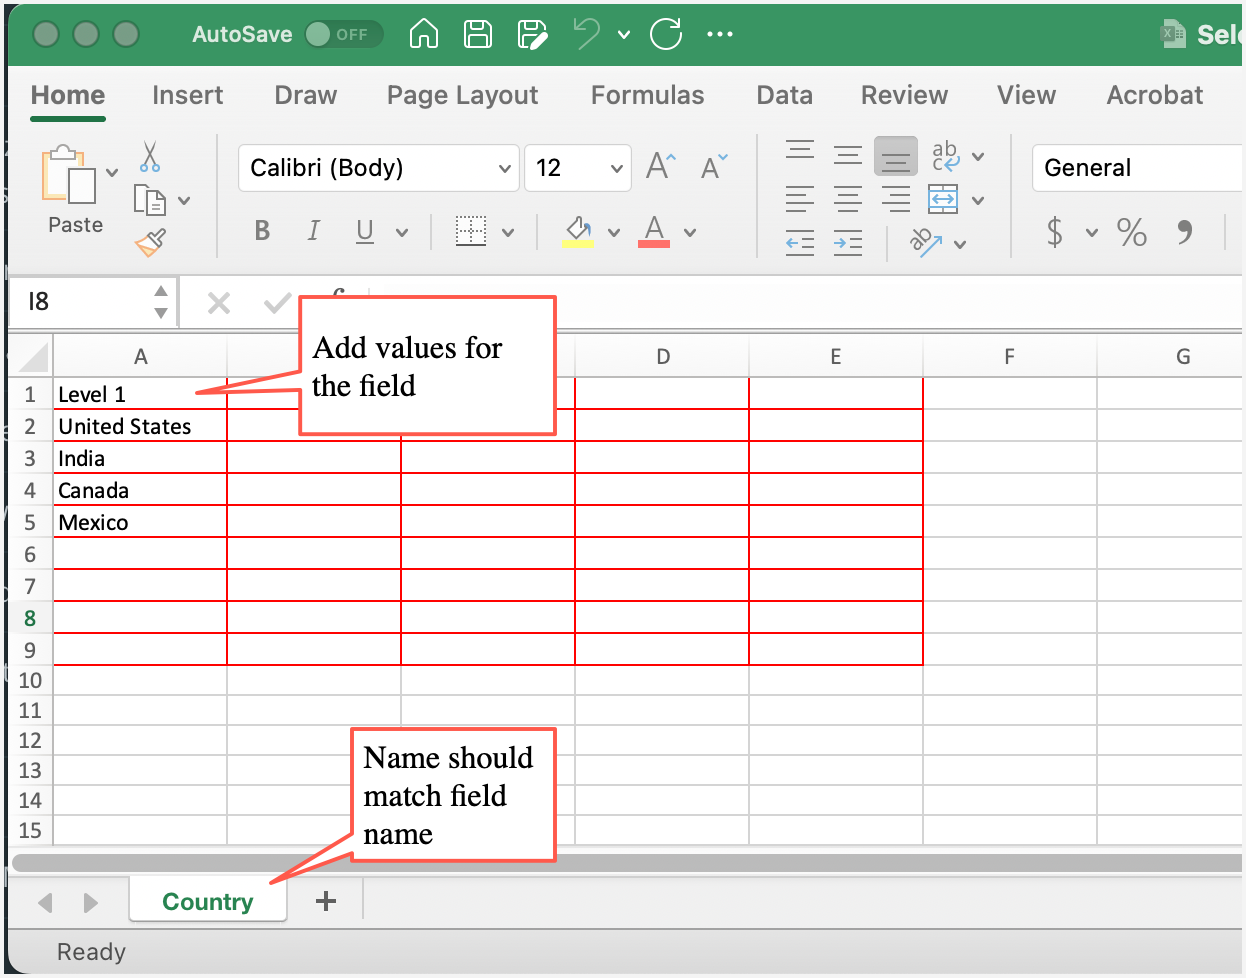
Likewise, to add a multi level field values, add Level 2, Level 3, etc.
After you are done, add the Excel file to the Select metadata fields dataset. Excel files are limited to 50 tabs. If more tabs are needed, split the content across multiple files.
In the Sandbox organization, go to the resource page for which you added the select field. You can now use the select field options to define the value of the field.