Make fields and resources read-only (CTK)
Why would I do this?
Sometimes, the information in your catalog may have an outside source, and you should not change it on data.world. If you want to stop changes to specific property or entire categories of resources on the data.world website, you can set up a source of record and define what specific fields (both custom and out-of-the-box) or resources cannot be edited within data.world.
What can I make read-only?
Using this feature you can make the following objects read-only:
Resources pages
Glossary pages
Custom fields
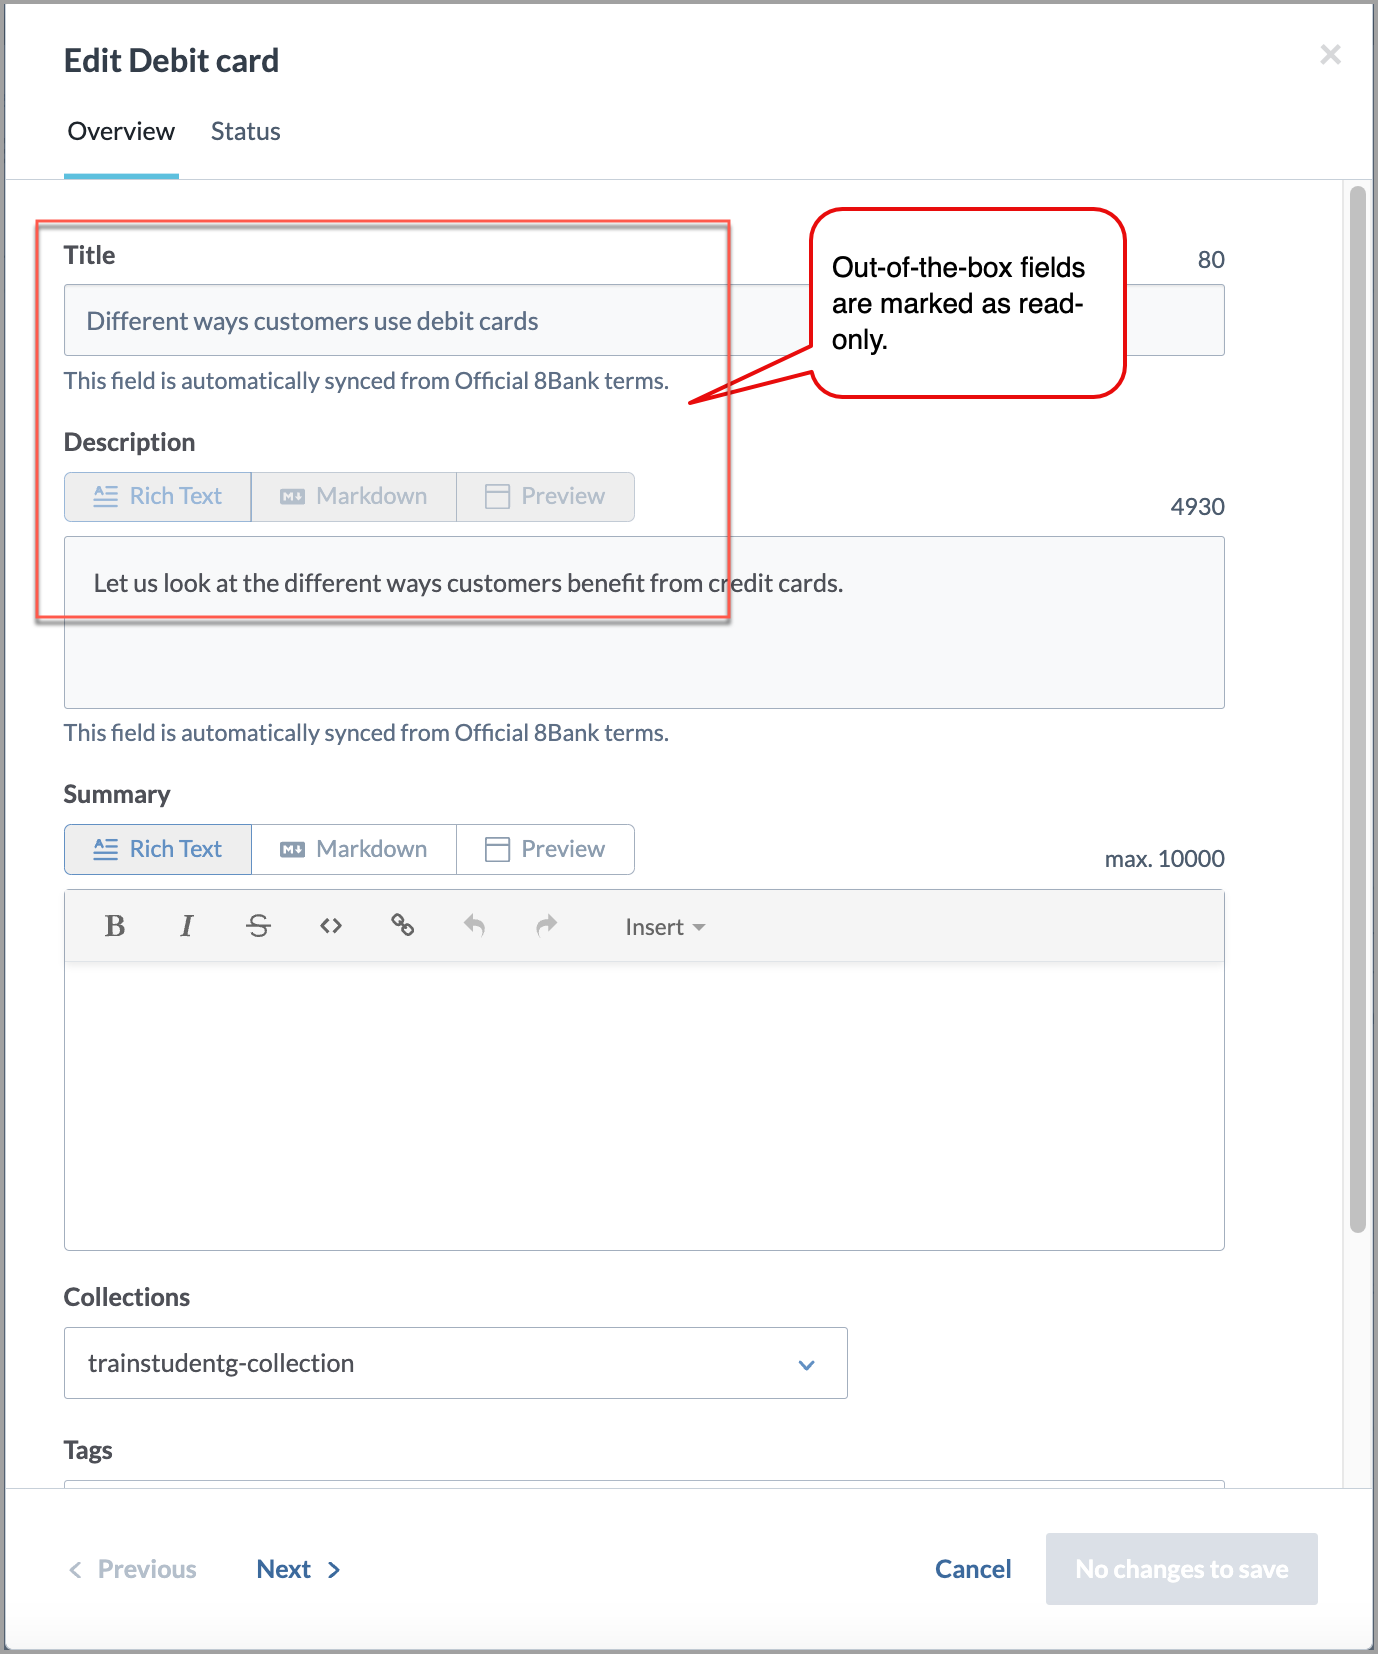
Out-of-the-box fields - Title, Description, Summary, Status, Tags, and Source System.
What is not supported?
You cannot use this feature to make Relationships and Collections field read-only.
Example for read-only out-of-the-box fields:
 |
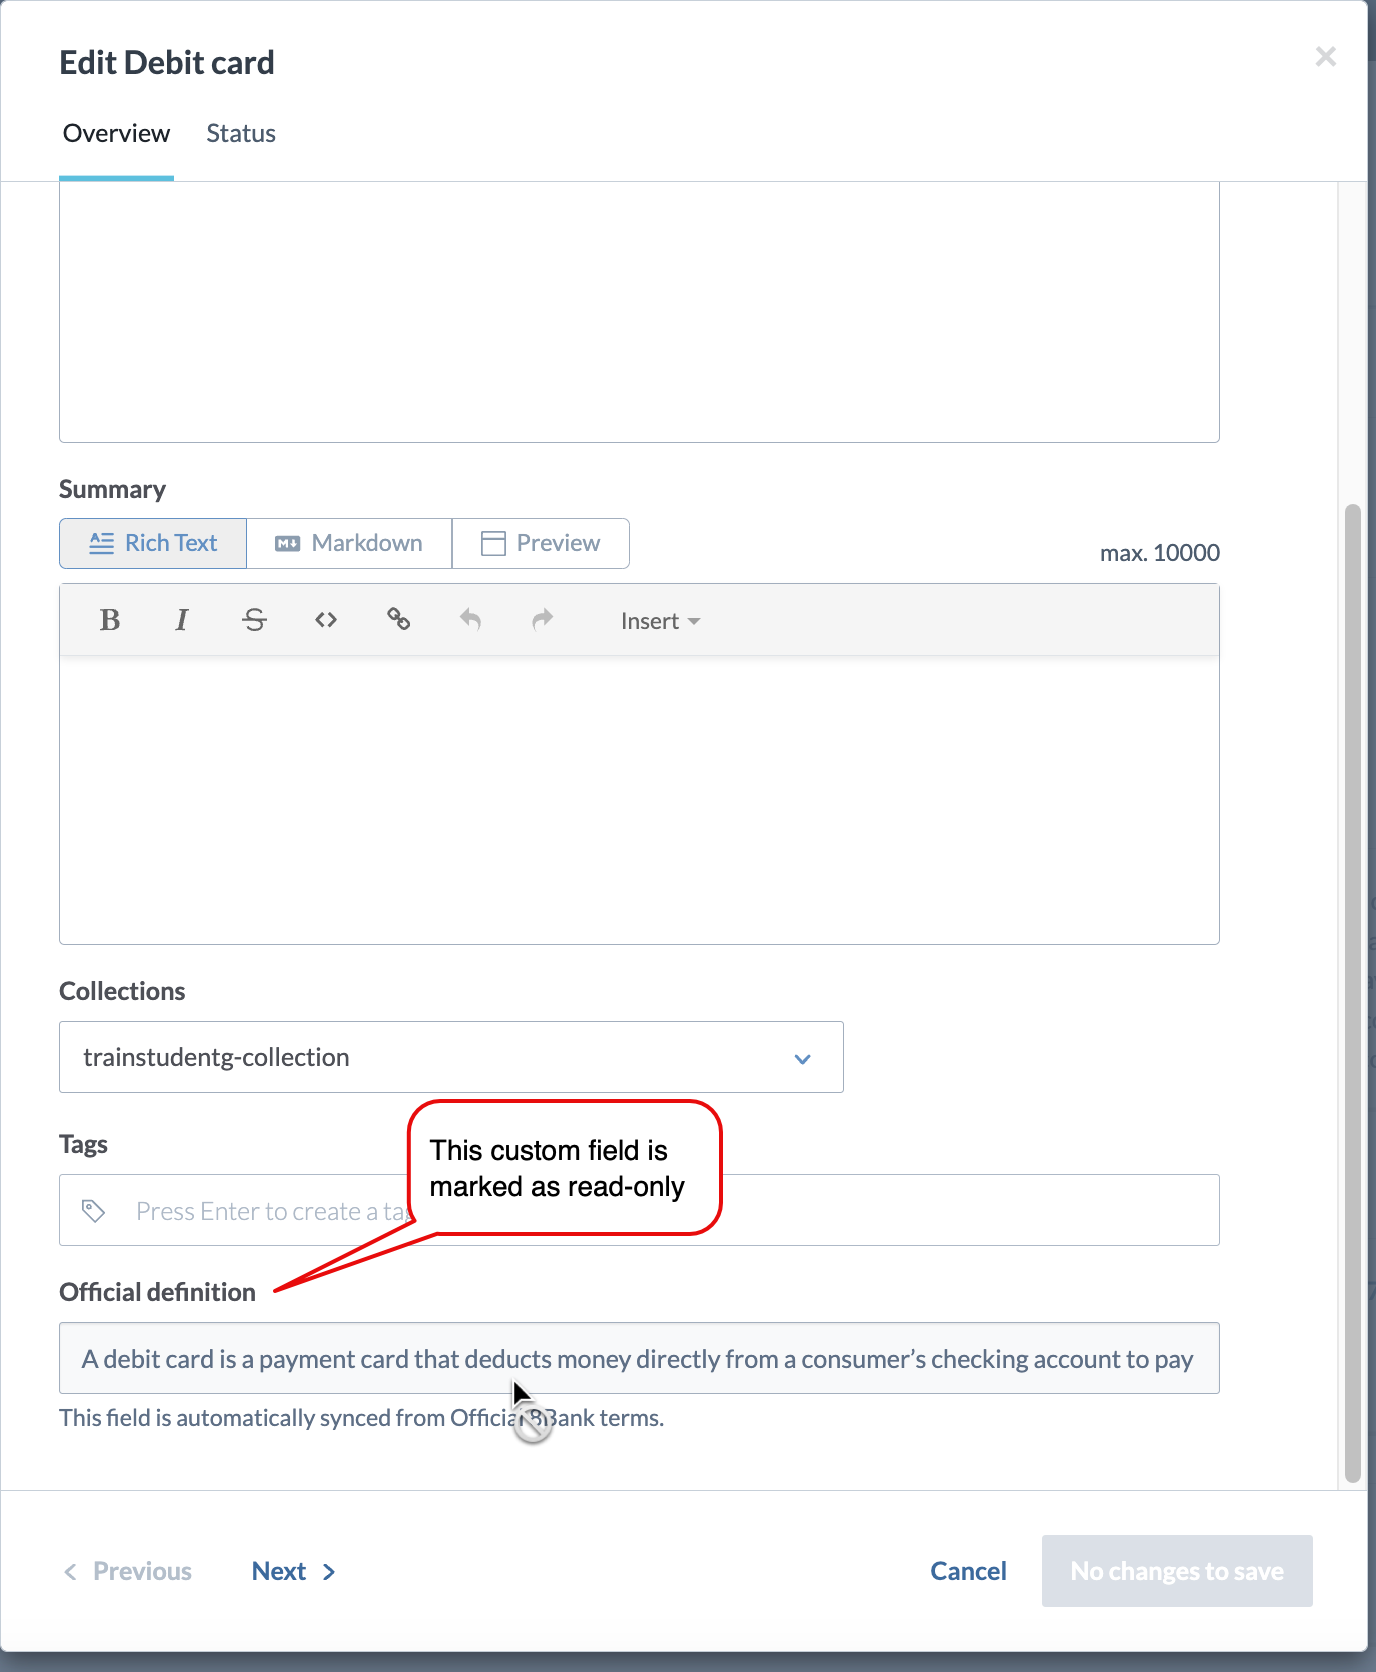
Example for read-only custom fields:
 |
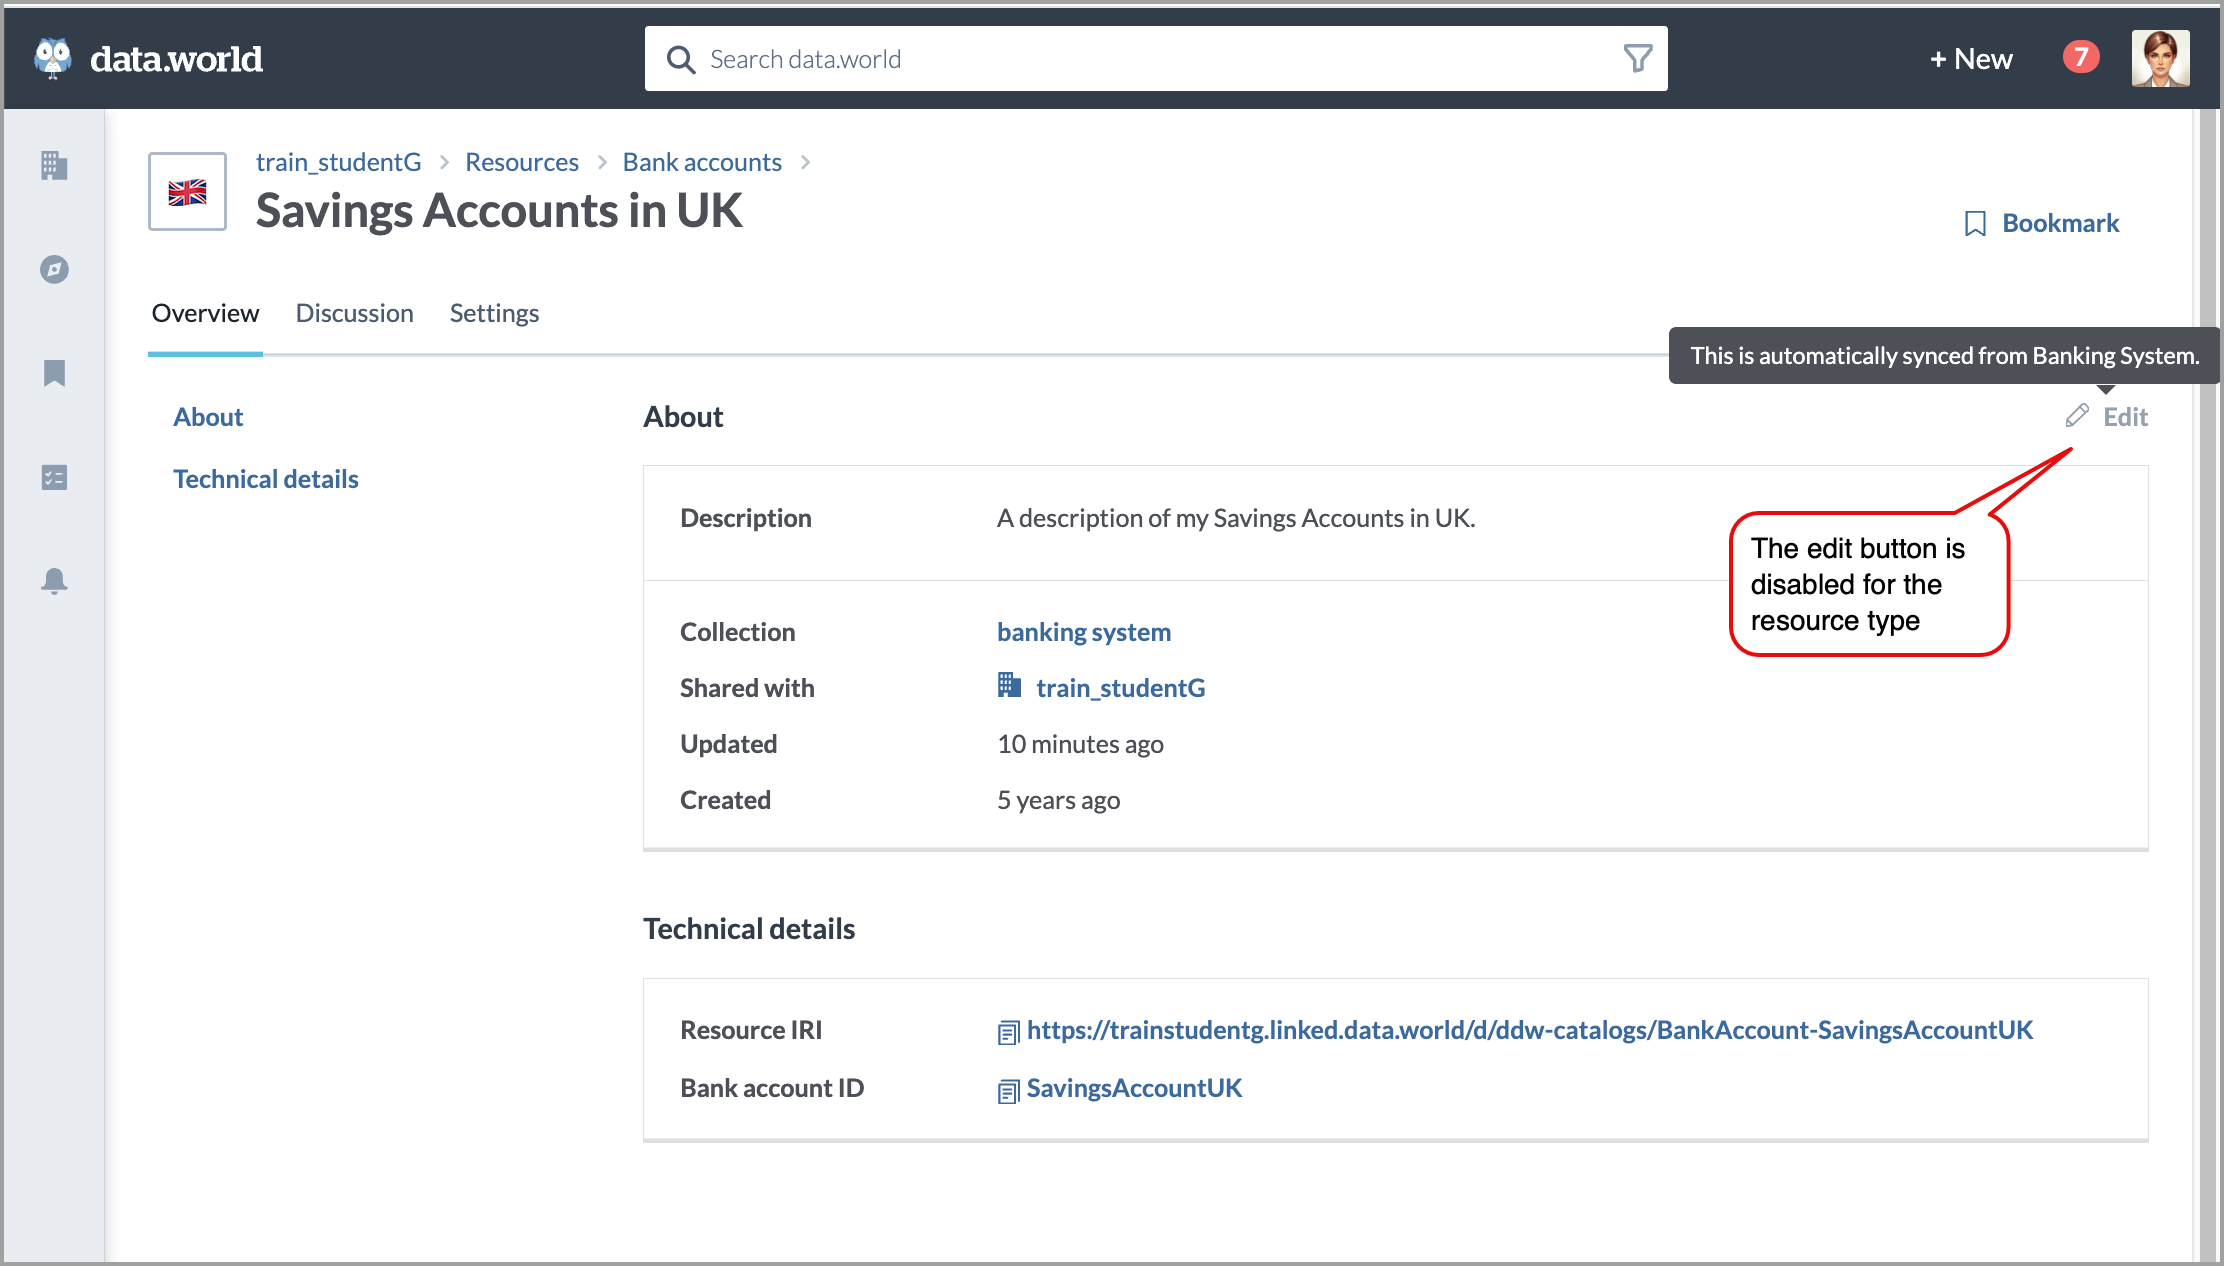
Example of read-only resource page:
STEP 1: Create a source of record
To create a source of record:
In the Catalog experience, go to the Resources page and click the New button.
On the Create a new resource page, in the Select type tab, select Read-only source. Click the Continue to configure fields button.
The Create a new Read-only source page opens.
In the Configure fields tab, set the following in the About section.
In the Title field, provide a name for the source of record.
From the Collections dropdown, select the Metadata profile collection.
Click Continue to review Read-only source.
In the Review Read-only source tab, check the configuration details for any possible errors before saving it. If adjustments are needed, click Back to edit the configuration.
Click the Create Read-only source button. The new source of record is ready for use.
Step 1: Make custom fields read-only and set a source of record
Important
Make sure the fields you are making read-only have data populated from another data source.
Follow these steps to create custom fields. In the Edit permissions field make sure to set the value as Read only.
Optionally, assign a Source of record for the field. By default, the system shows the text This field is automatically synced from an automation or source. You can change the last part of the sentence an automation or source to say something like Official 8Bank terms . The value will look like This field is automatically synced from an Official 8Bank terms
Publish your changes. See: Publishing changes.
View the results
The read-only custom field appears in the UI.
|
STEP 2: Make out-of-the-box fields read-only
Follow these instructions to make an out-of-the-box field read-only. You can make the following out-of-the-box fields read-only - Title, Description, Summary, Status, Tags.
To make out-of-the-box fields read-only:
In the Catalog Configuration organization, locate the resource type for which you want to make the out-of-the-box fields read-only. This can be a custom resource or an out-of-the-box resource. You can also do this while creating new custom resource types.
On the resource page, click the Edit button.
In The Edit Type window, go to the Read-only fields section. Select the out-of-the-box fields that should be read-only for end users.
Click Update.
Optionally, assign a Source of record for the field. By default, the system shows the text This field is automatically synced from an automation or source. You can change the last part of the sentence an automation or source to say something like Official 8Bank terms . The value will look like This field is automatically synced from an Official 8Bank terms
Click Save changes.
Publish the changes. See: Publishing changes.
View the results
The read-only out-of-the-box fields appear in the UI.
|
STEP 3: Make entire resources read-only
Follow these instructions to make an an entire resource page read-only. You can do this for out-of-the-box or custom resource pages.
To make an entire resource read-only:
In the Catalog Configuration organization, locate the resource you want to make read-only. This can be a custom resource or an out-of-the-box resource. You can also do this while creating new custom resource types.
On the resource page, click the Edit button.
In the Edit Type window, locate the Edit permissions field. Select the Read-only option to make the resource read-only.
Click Update.
Optionally, assign a Source of record for the resource. By default, the system shows the text This resource is automatically synced from an automation or source. You can change the last part of the sentence an automation or source to say something like Official 8Bank system . The value will look like This resource is automatically synced from an Official 8Bank system
Publish the changes. See: Publishing changes.
View the results
The read-only resource will appear in the UI.