Creating SQL queries
Best practices for optimizing your queries
The federation capabilities and the query optimizer available in the application make it possible to join tables from disparate data sources without having to worry about the source data formats. Use the following guidelines for joins to make your queries more efficient.
Be careful when creating joins to ensure that all applicable join conditions are specified.
Use inner joins rather than outer joins, where possible.
Be wary of joins on calculated conditions, including especially joins which require casting.
When possible, group together joined tables that are virtualized from the same sources.
To create a SQL query:
Start by creating a query from one of the following places in the application:
On the Project details page, on the Overview tab, click the New Query button.
From the Project workspace, click the Add button and select SQL Query.
On the Datasets details page, on the Overview tab, click the Three dot menu next to a dataset file that allows query creation and click the Query option.
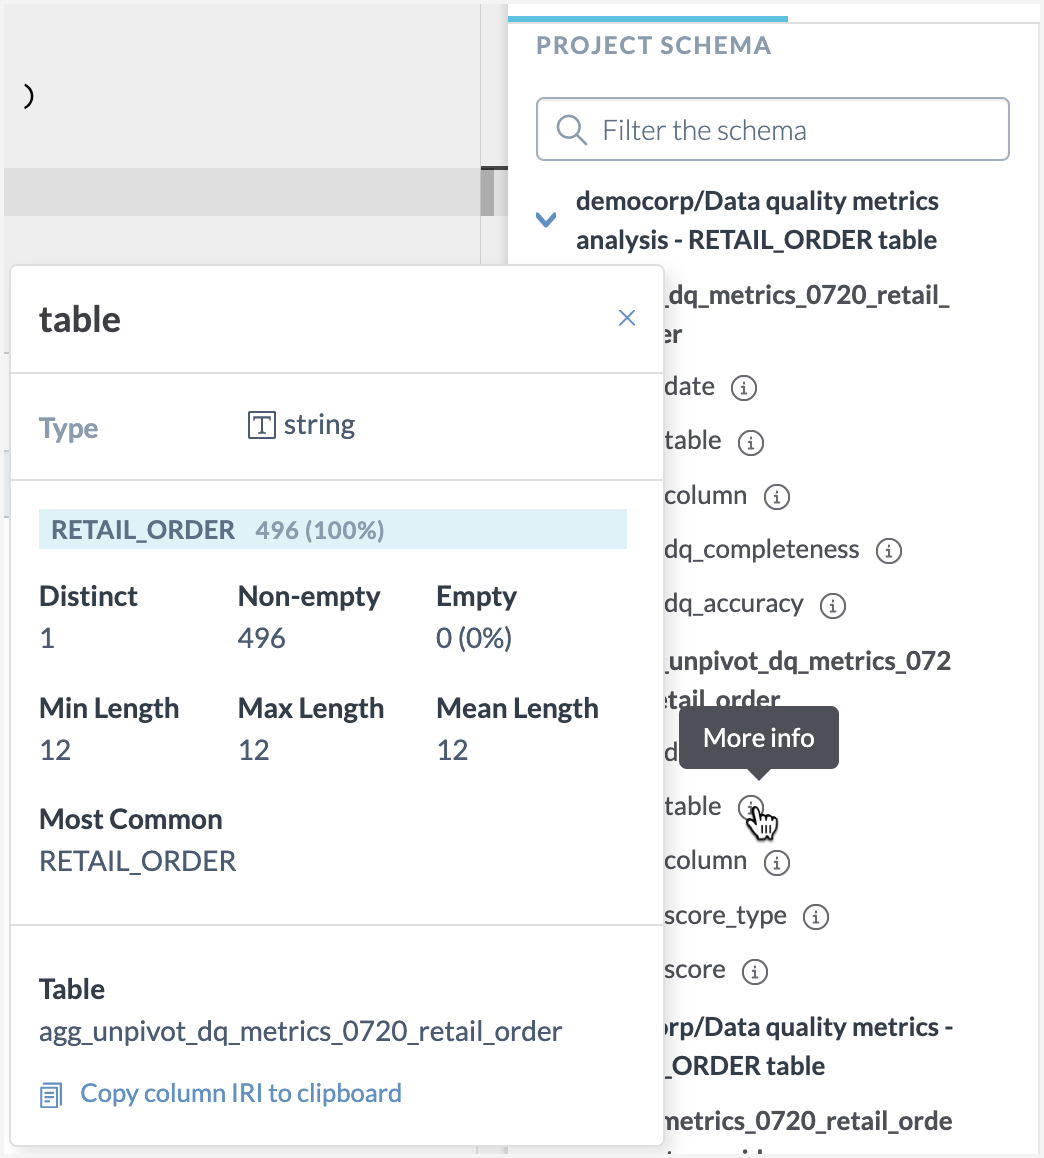
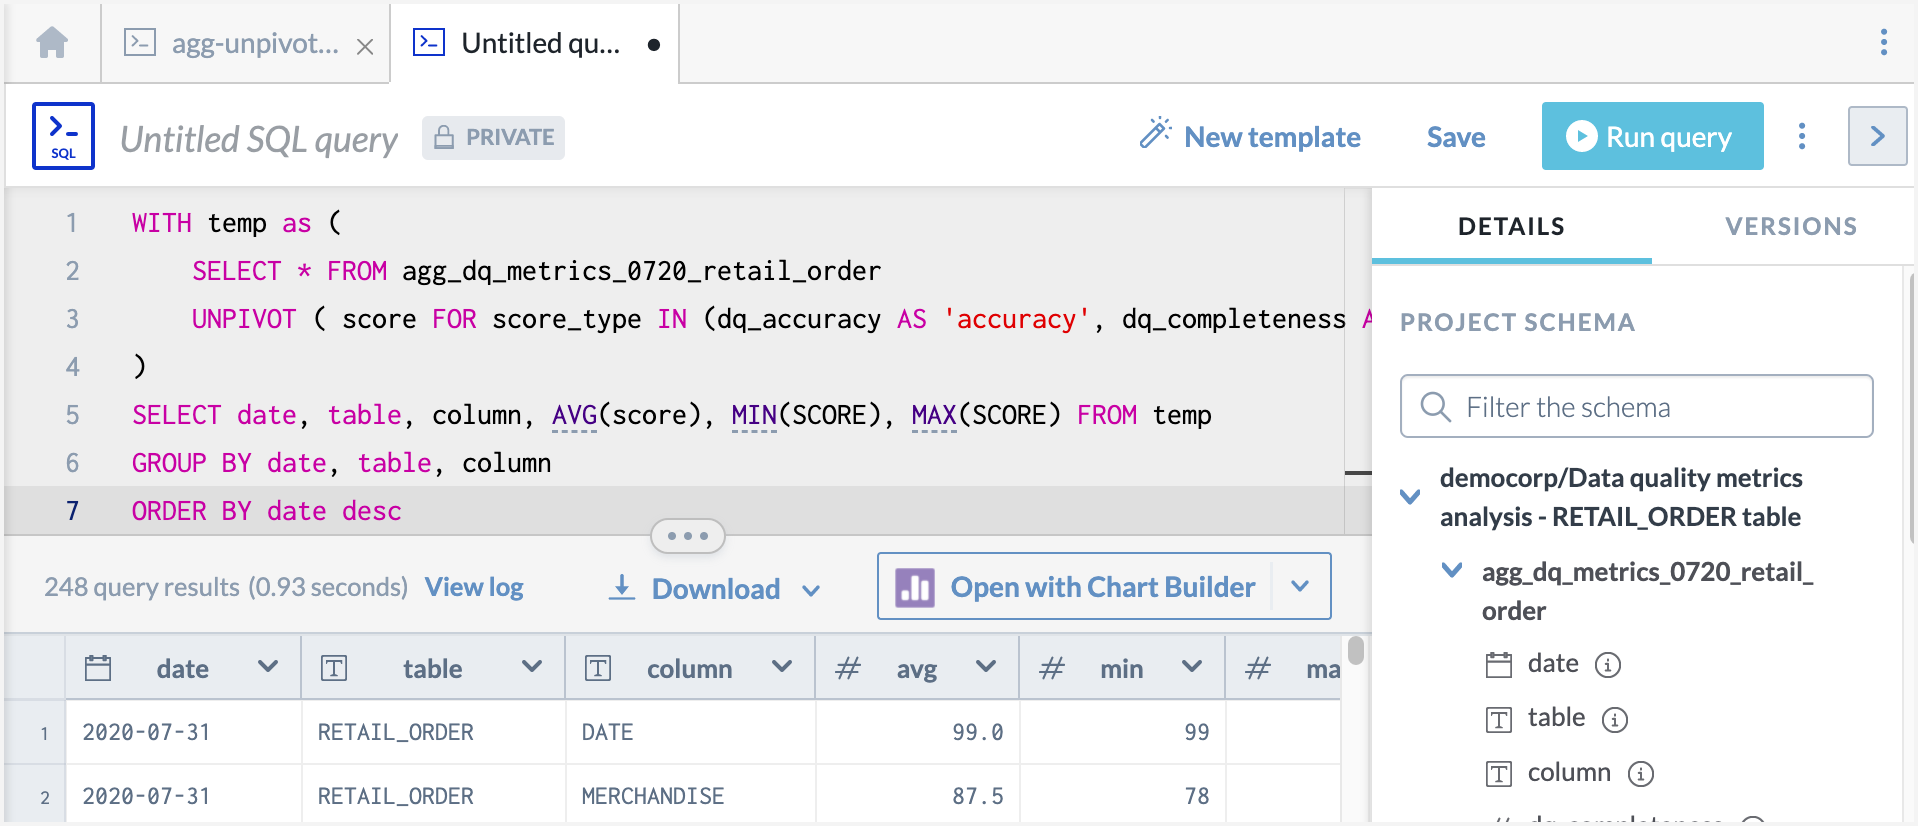
The query editor opens with the Project schema available on the right side for reference. If the project schema is not visible, click the Show sidebar button to open it. Use the Project schema available on the page to refer to more details about the available columns. Click the More info icon to view the details and click the column name or table name to copy it and paste in the Query editor.
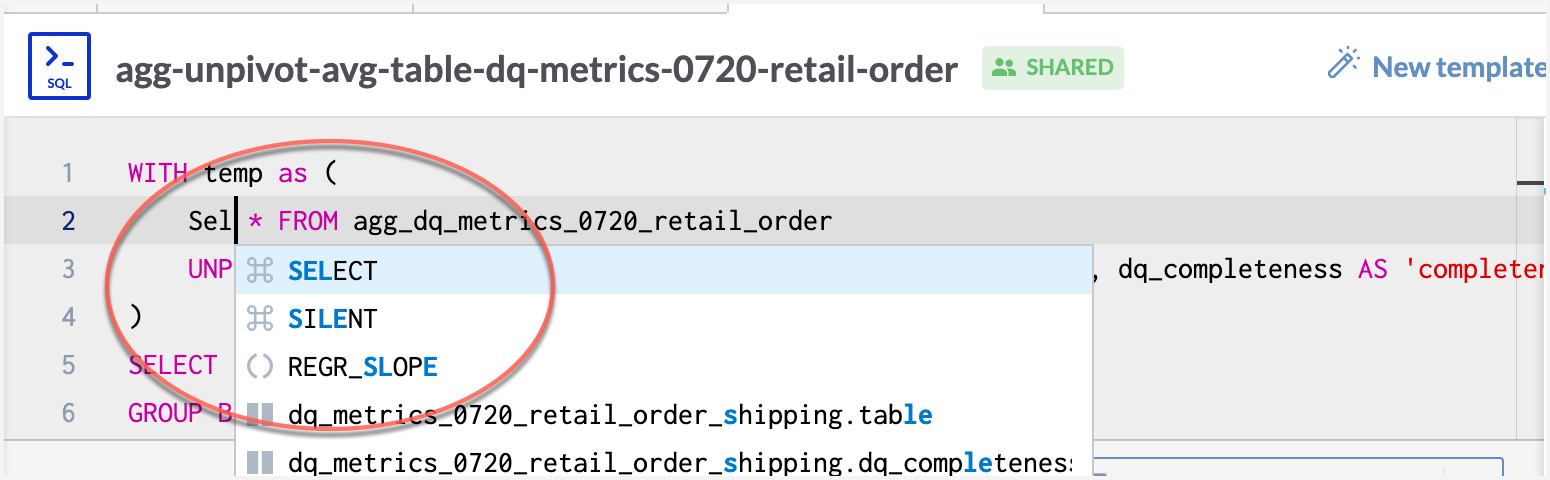
Start typing the query in the Query editor. As you type your query, the editor suggests SQL terms--operators, aggregations, and functions--for you. Press Enter to auto-complete the highlighted suggestion in the list and use the Up and Down arrows to choose another option.
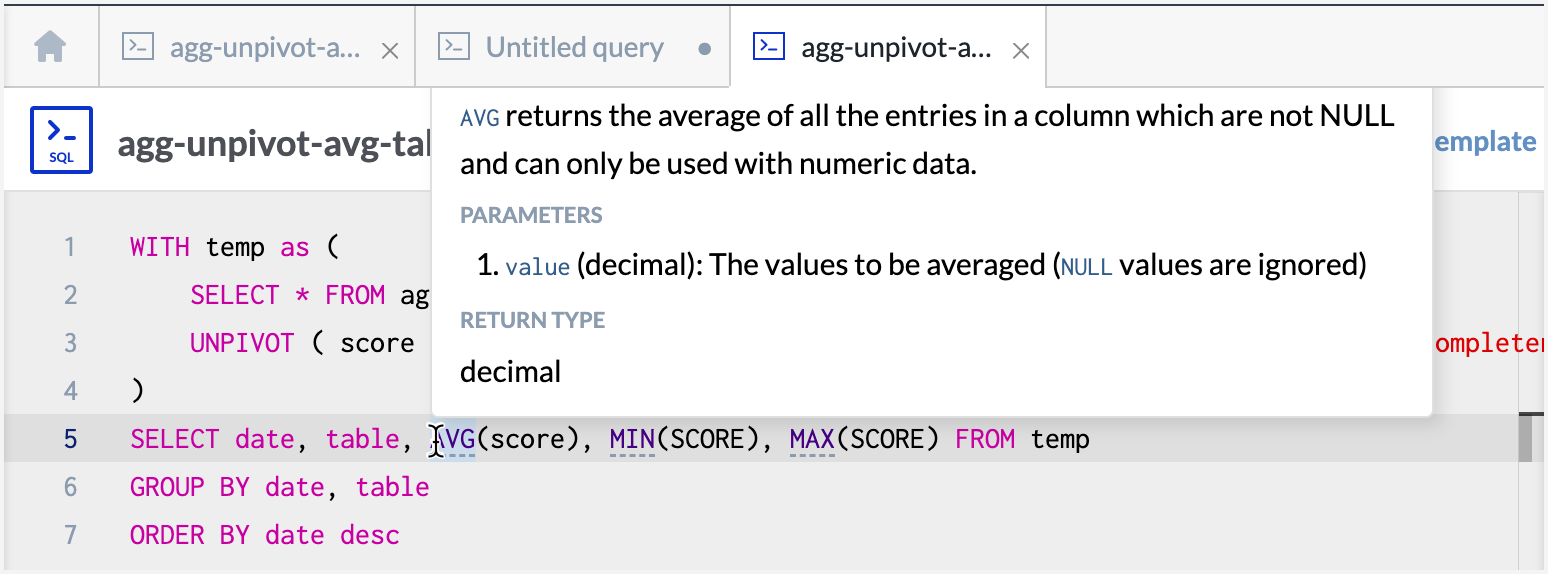
As you type the Function names, you can hover over them to view the available help text for the SQL functions and aggregations.
Once you have written a query, it is best practice to format the query to make it more readable. Use the keyboard shortcut to auto-format the query - on Mac - Command + Option + L , on Windows - Ctrl + Alt + L.
Note
To access the list of all available shortcuts, use the following shortcut - on Mac -Cmd + Option + /, on Windows - Ctrl + Alt + /
Click the Run query button to run the query. If the query runs successfully, the results are displayed. If an error occurs, the details of the error are displayed. For details, see troubleshooting query errors.
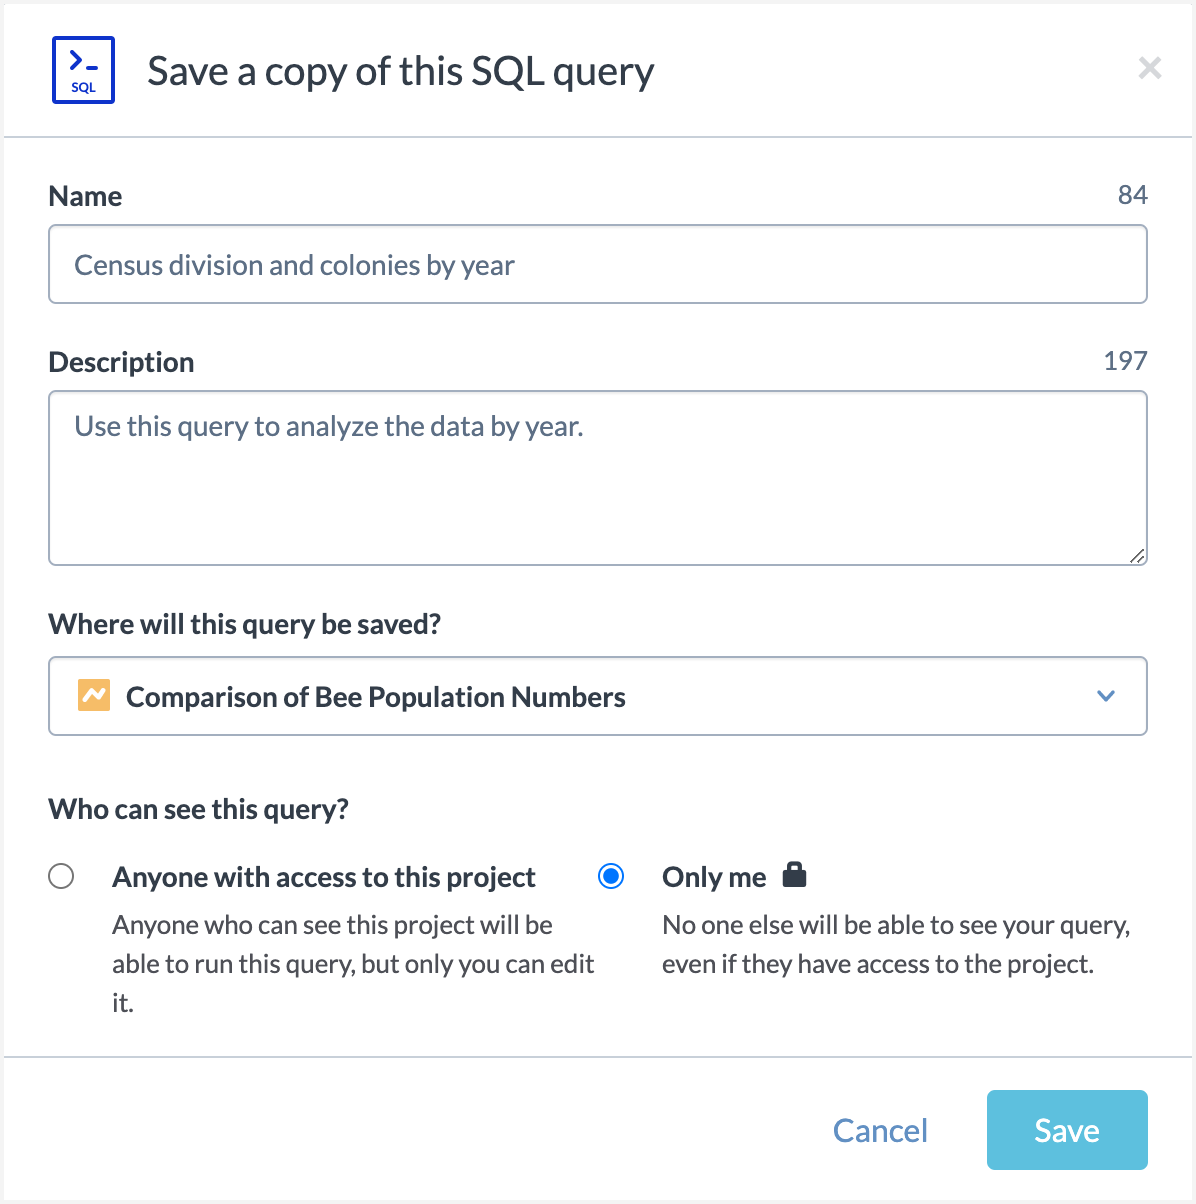
Click the Save button to save the query. In the Save a copy of this SQL query window, set the following and click the Save button.
Name: Provide a name of the query.
Description: Provide a brief description.
Where will this query be saved: If you started creating a query from a project page, it shows the name of the project. If you started from a dataset page, you get to either save the query to a new project or to the dataset itself.
Save queries to datasets if you want to clean up the data, join tables and preserve the lineage of the original tables for reference, or just use the query in multiple projects without having to rewrite it. Note that queries saved to a dataset do not show up in the queries list of any project the dataset is used in. Instead they display under the connected dataset when the dataset is opened in the project workspace.
Who can see this query: Specify if the query is available to everyone who has access to the project or only the user creating the project. This option is only available while saving queries to projects.