Creating user groups
Each organization comes with three out-of-the-box user groups. Create new user groups to set up the organization members with different levels of access to the organization resources.
To create new custom user groups:
Go to the organization where you want to create user groups.
In the Catalog experience, open the Users page.
Browse to the Groups section.
Click the Add group button. The Create a new group window opens.
In the Create a new group window, provide the name of the group and a brief description. Click Submit. The user group is added to the list of groups.
Click the user group from the list view to assign access permissions.
On the Groups details page, click the Access summary button.
On the Access summary page, click the Edit button to adjust the access level for the user group.
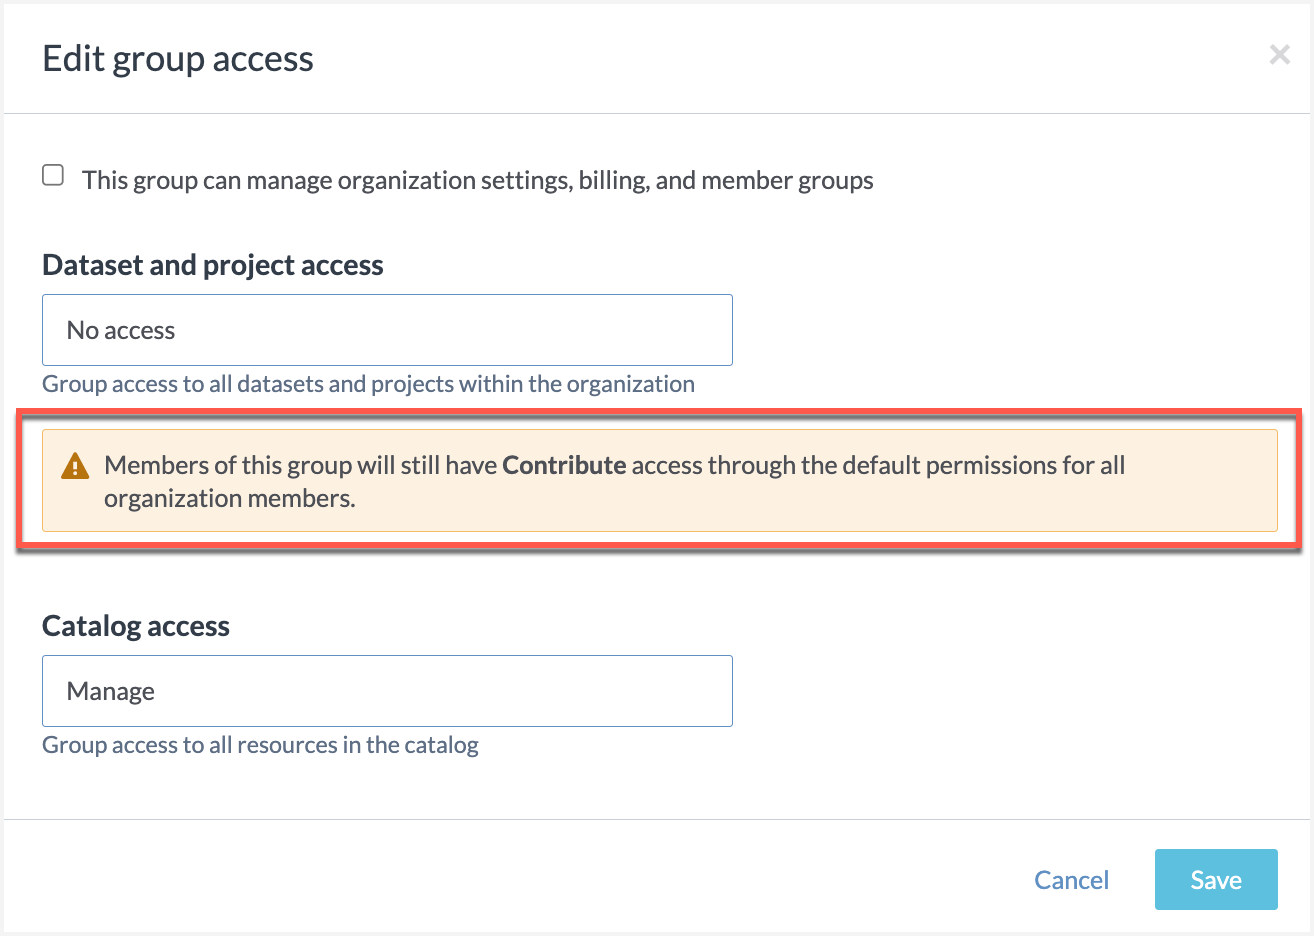
In the Edit group access window, set the following. For details about these access levels see Planning user groups and their access levels
Select the This group can manage organization settings, billing, and member groups option to allow the users to be organization administrators.
Give No access, Contribute, Manage access to datasets and projects
Give No access,, Discover, View, Edit, Manage access to catalog resources.
Note that when you try to set permissions that are lower than the All members group, the system notifies you about it.
Next, from the Access summary page, give access to the group to specific datasets, projects, or collections by clicking the Grant accessbutton. In the window that opens, select the resource or collection to which you want to give access and select the permissions. Click Save.
Add members to the user group and click Save.