Configure the browse card using the UI
Important
Only users with the Instance administrator permission can do this task. Please contact your instance administrator if you are not authorized to do this task.
This topic provides a walk through for configuring the browse card on the application home page using the UI. The process involves navigating to the browse card settings, adding tabs and sections, linking resources, and finalizing your changes.
Configuring the browse card
To configure the browse card:
Click your Profile icon on the right side of the top navigation. From the menu, select Admin portal.
On the Admin portal, from the Settings page, select Browse card.
On the Browse card page, you will find a starting tab labeled Featured. You can start the browse card configuration by editing this tab. Alternatively, to add a new tab to the browse card, click the Add tab button.
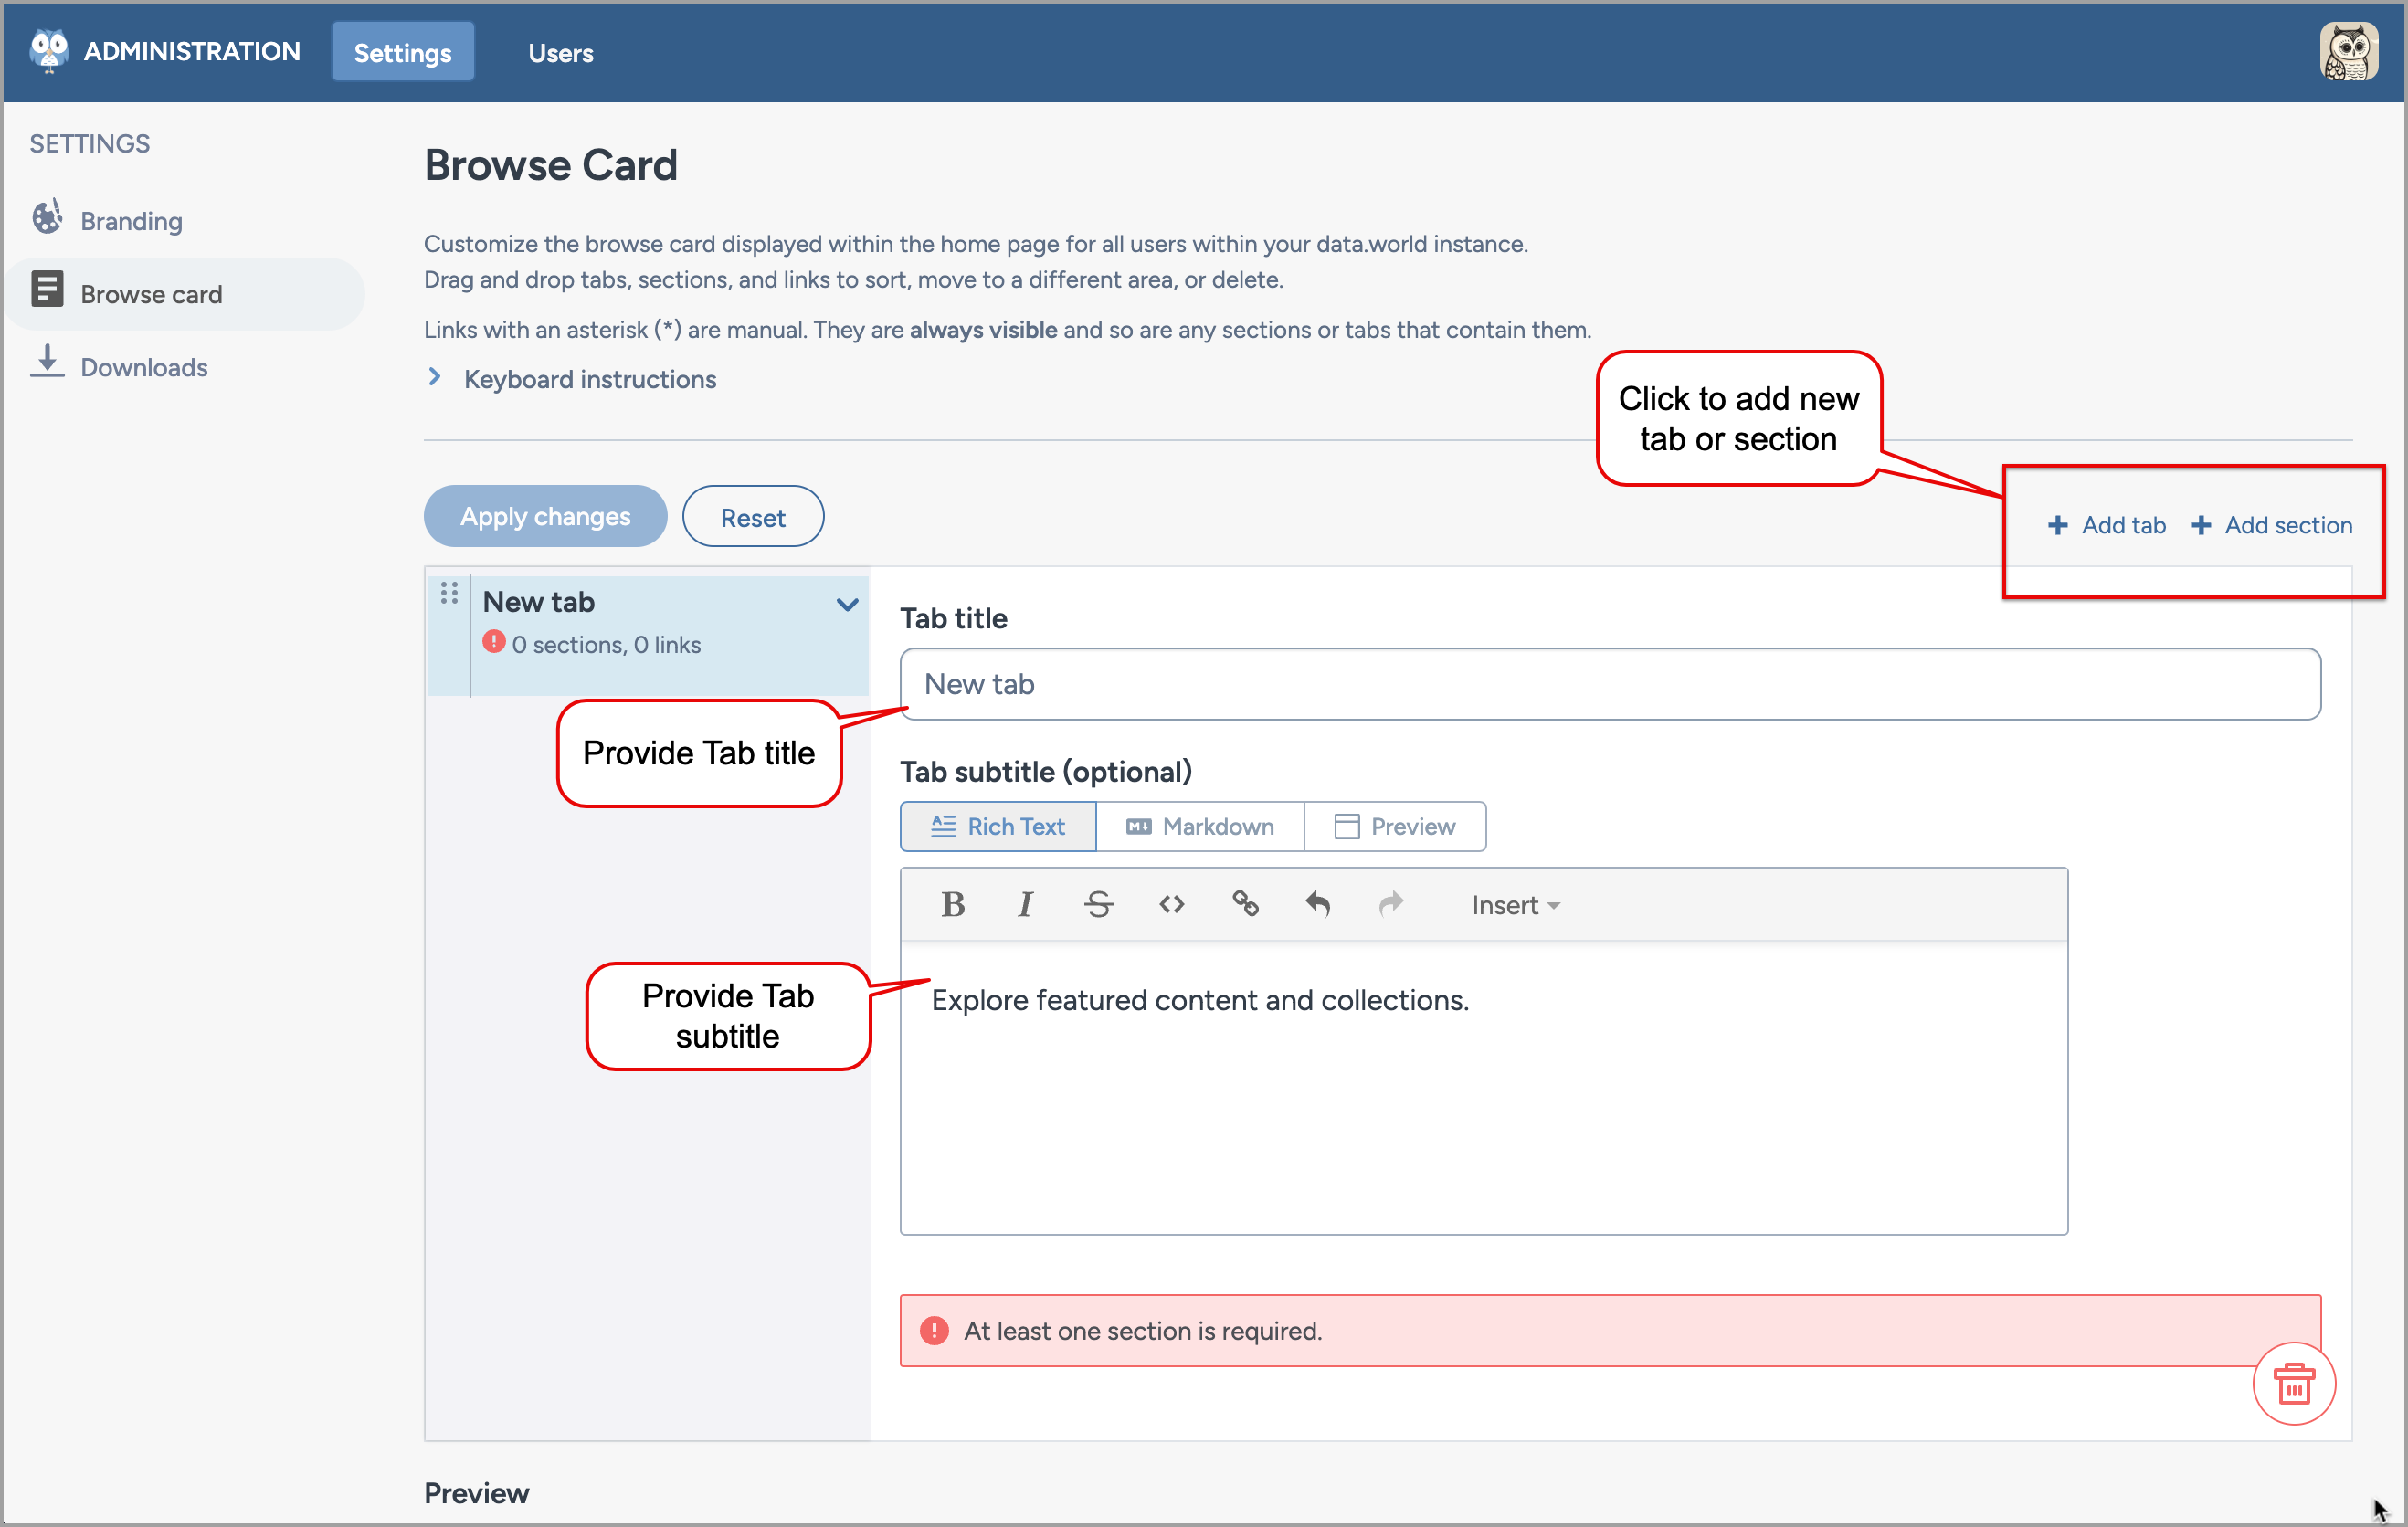
In the Tab title and Tab subtitle fields, provide a title and optional subtitle. For subtitles, you can use the rich content editor for rich text descriptions.
Important
You cannot save empty tabs as they require at least one section with a configured link to be saved.
Next, click the Add section button to add a section to the tab.
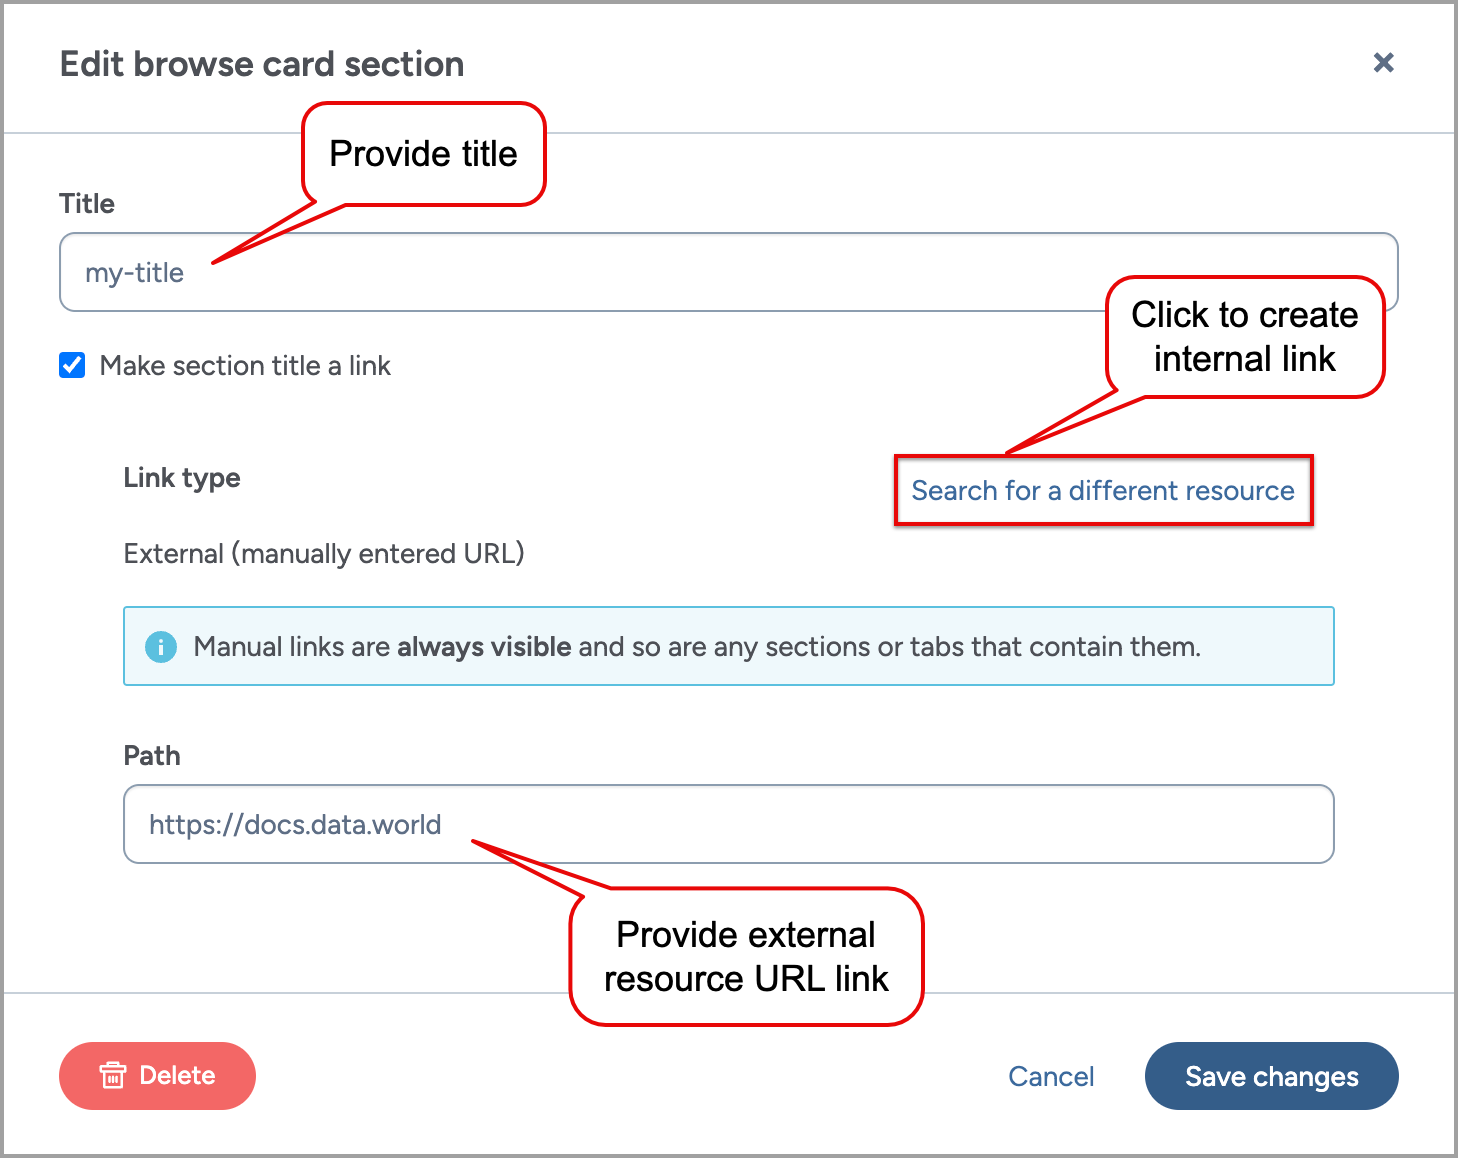
In the Section title field, provide a title for the section. If you want to make your title as a link to the resource, click the Make selection title a link option. Do one of the following:
To link external resources, in the Path field, provide the URL link of the external resource. Click Save changes.
Tip
Use this field to add links to saved searches. This feature allows you to include dynamic lists of resources. For example, add parameters such as updated:{last 7 days} to view resources updated in the last week, or use updated:yesterday to see resources created on or before yesterday.
To link internal resource, click Search for a different resource. Search your resource in the Resource field. The field shows search results as you type in it. Locate the resource from the dropdown menu. Click Save changes.
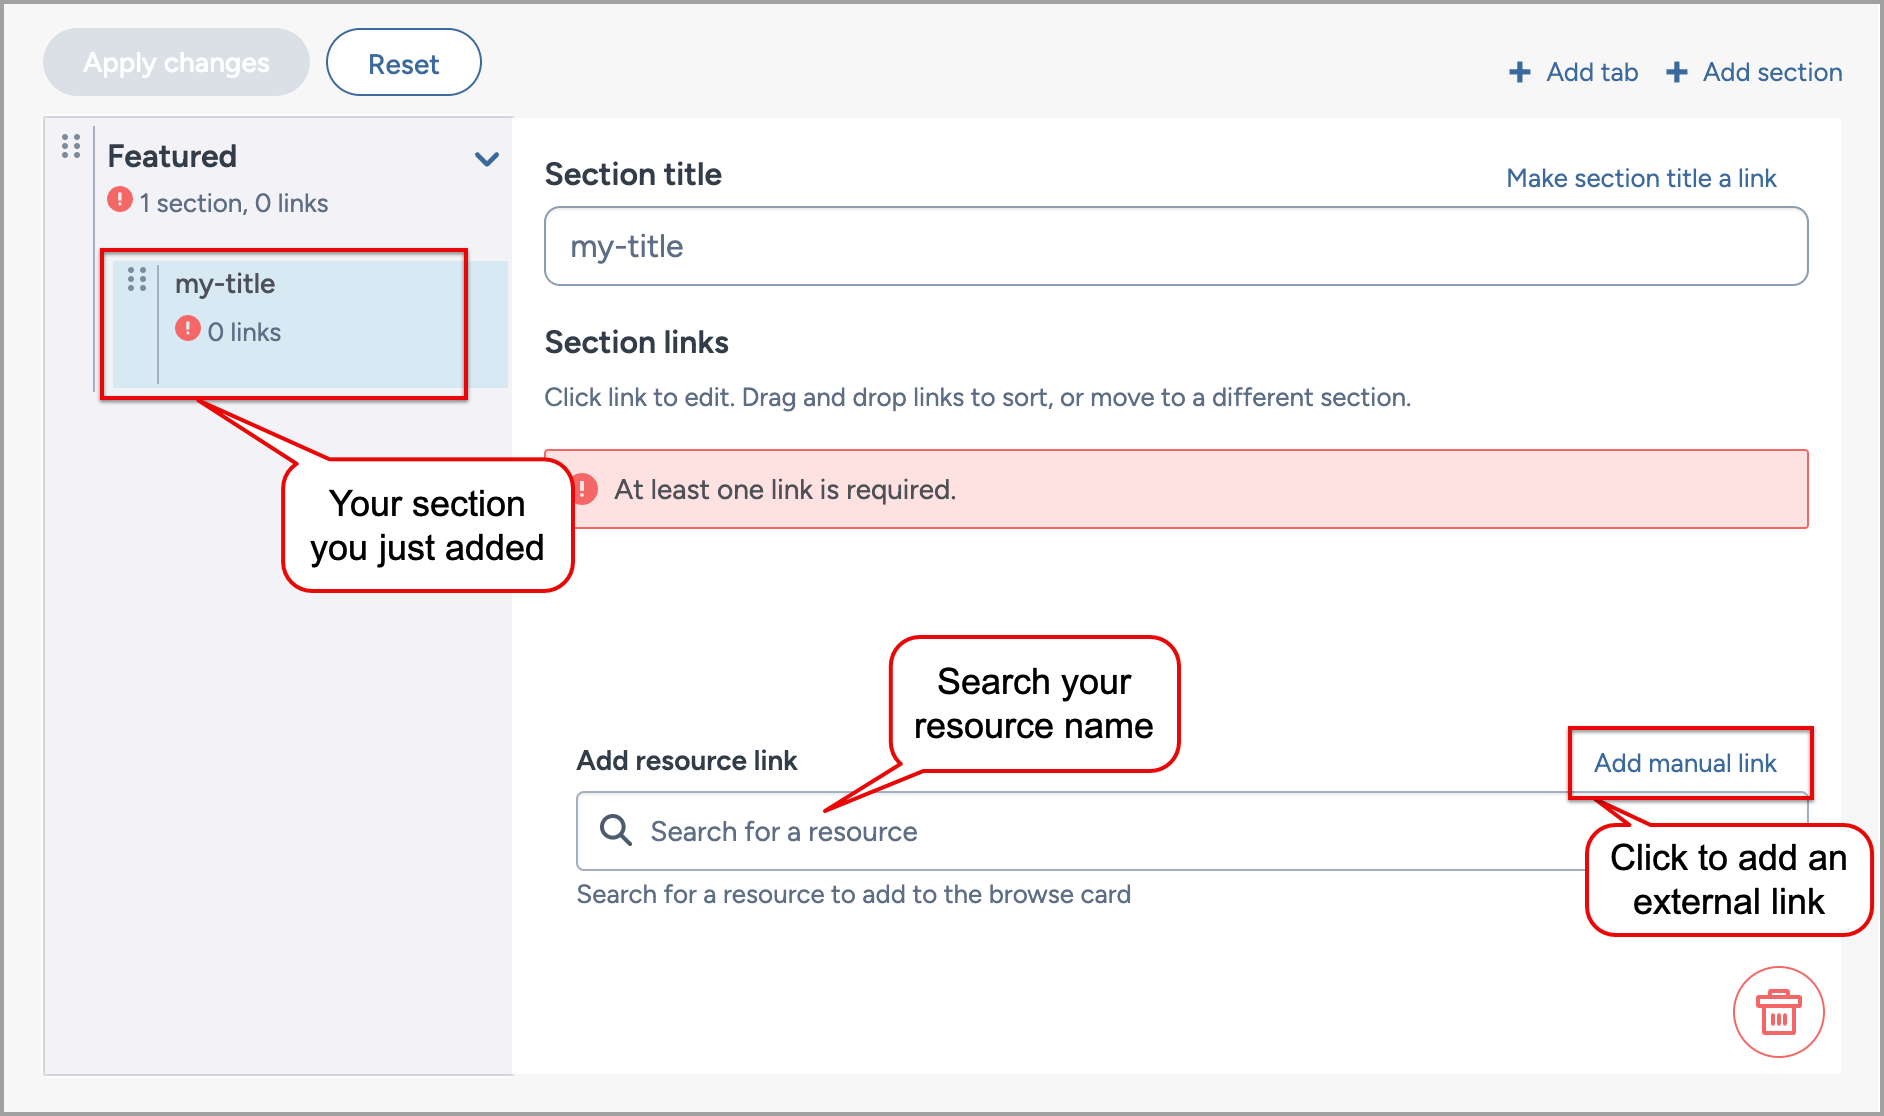
Next, add links to the section.
On the section page, use the Add resource link field to add links to the section. Do one of the following:
To link internal resource, search your resource in the Add resource link field. The field shows search results as you type in it. Select the resource from the dropdown list.
To link external resources, click the Add manual link link. In the Add browse card link window, provide the title and in the Path field, provide the URL link of the external resource. Click Done.
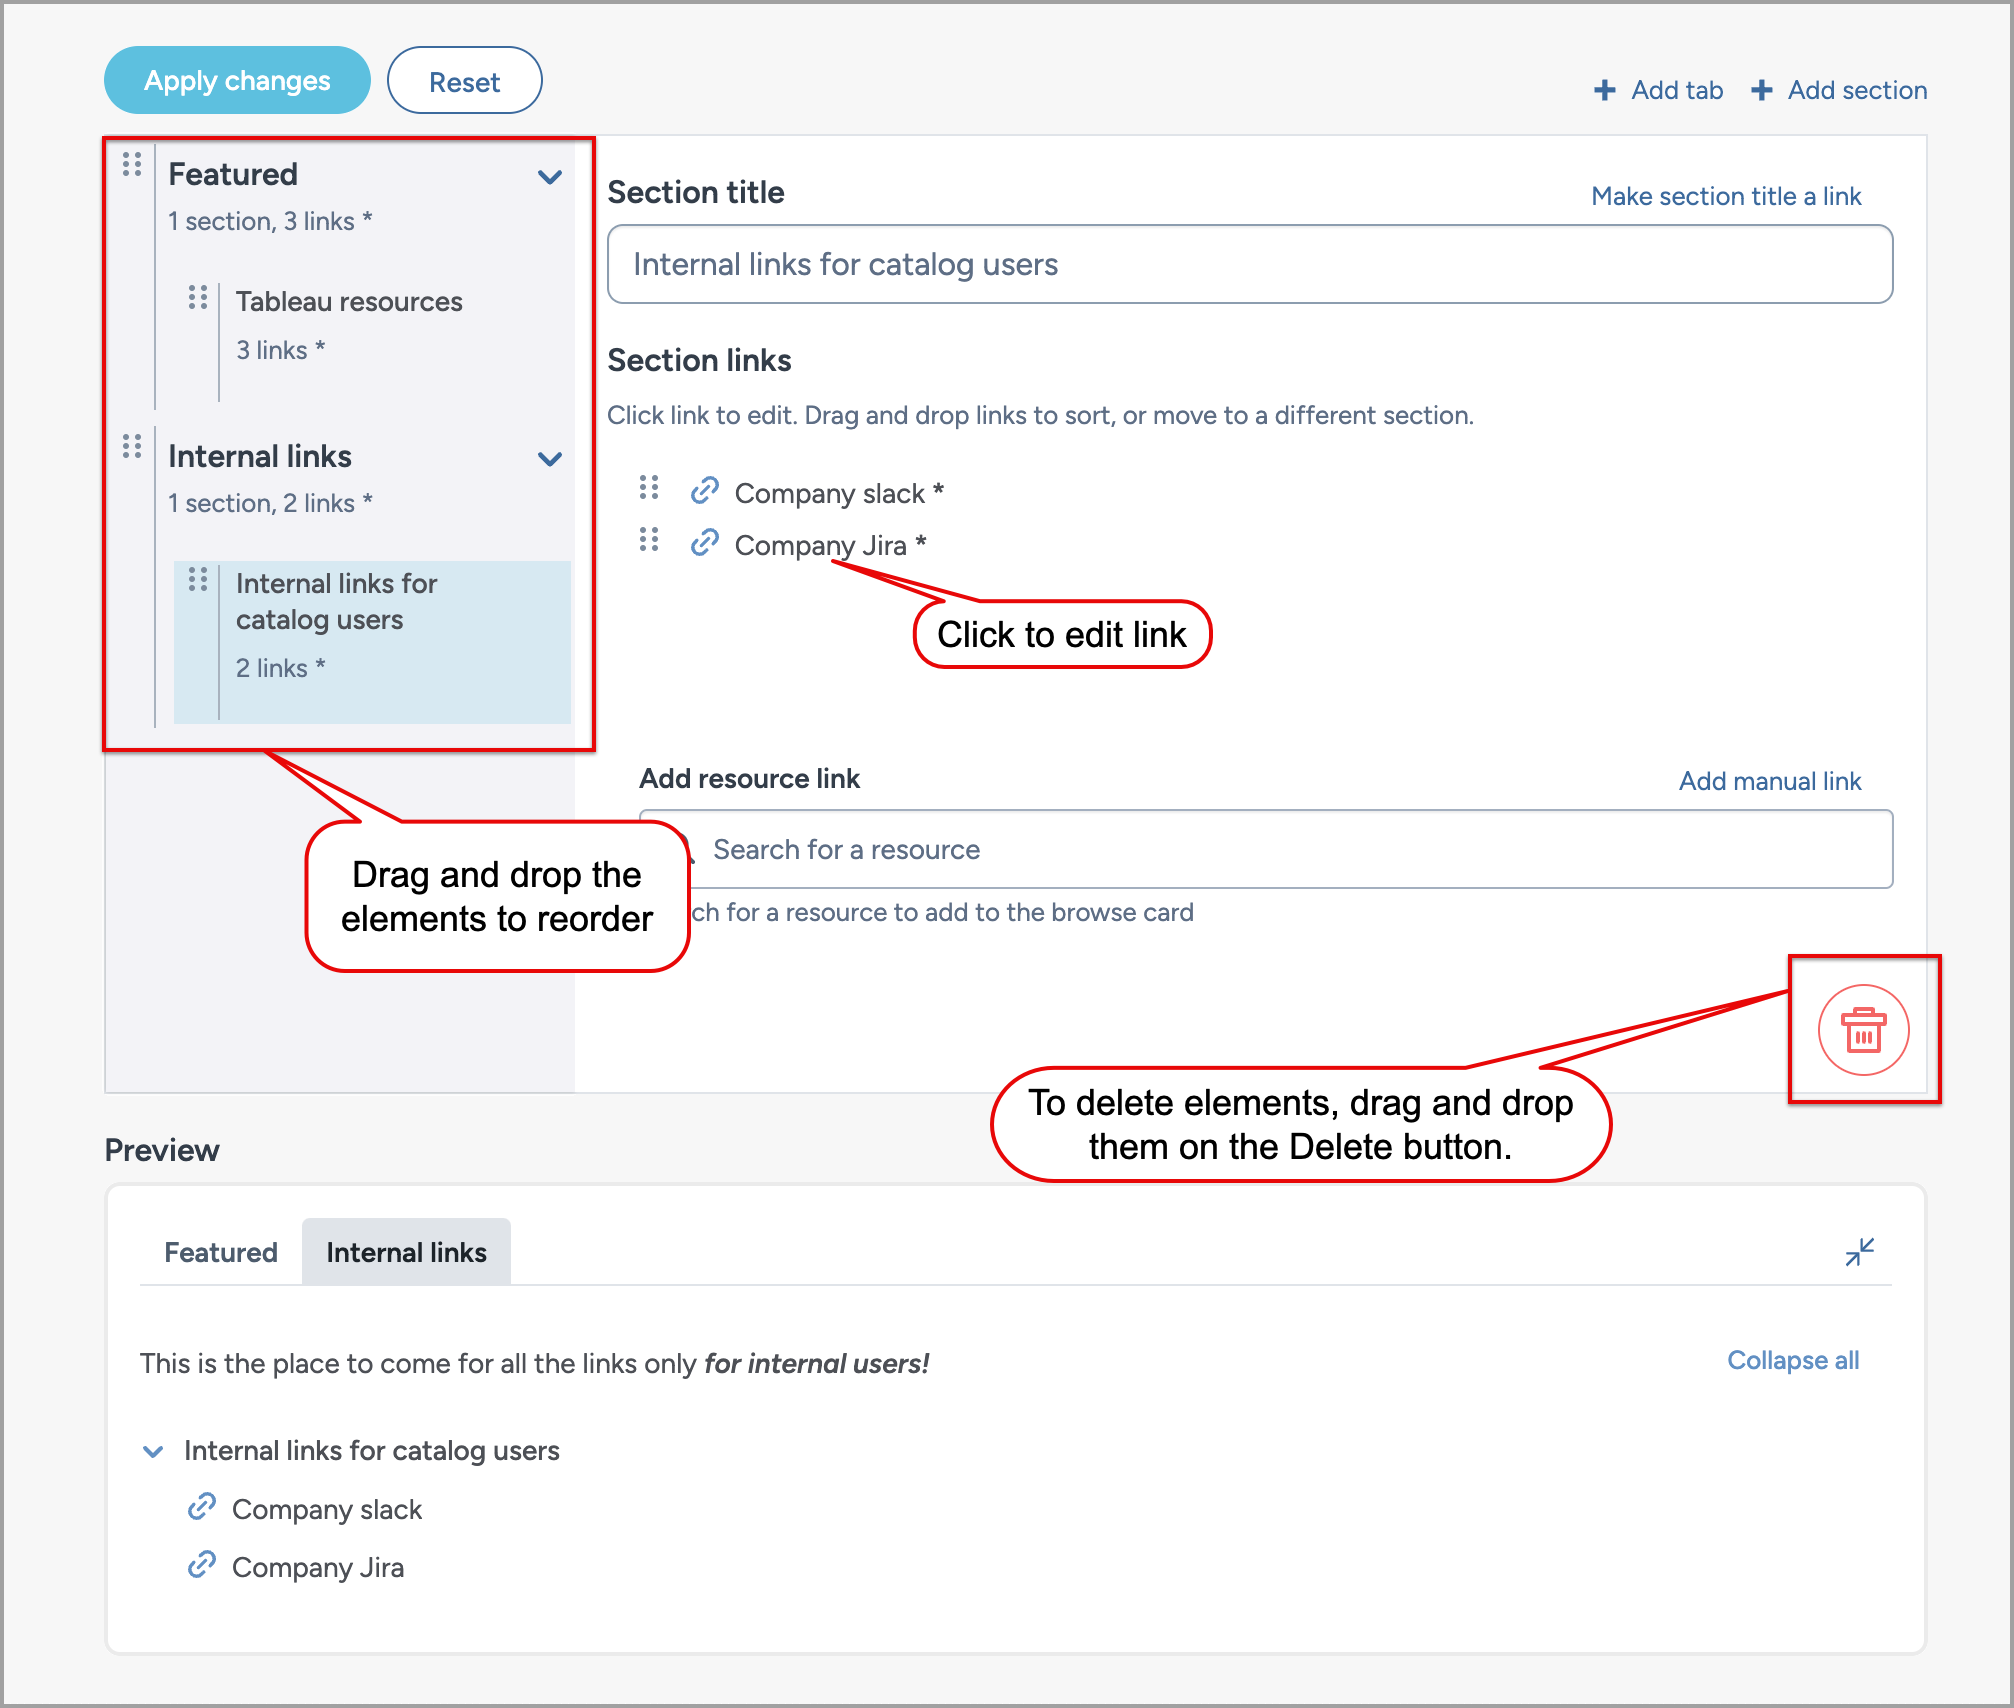
As you add links, they start getting showing in the Section links section of the configuration page. To reorder links in a section, drag and drop the links to their new position.
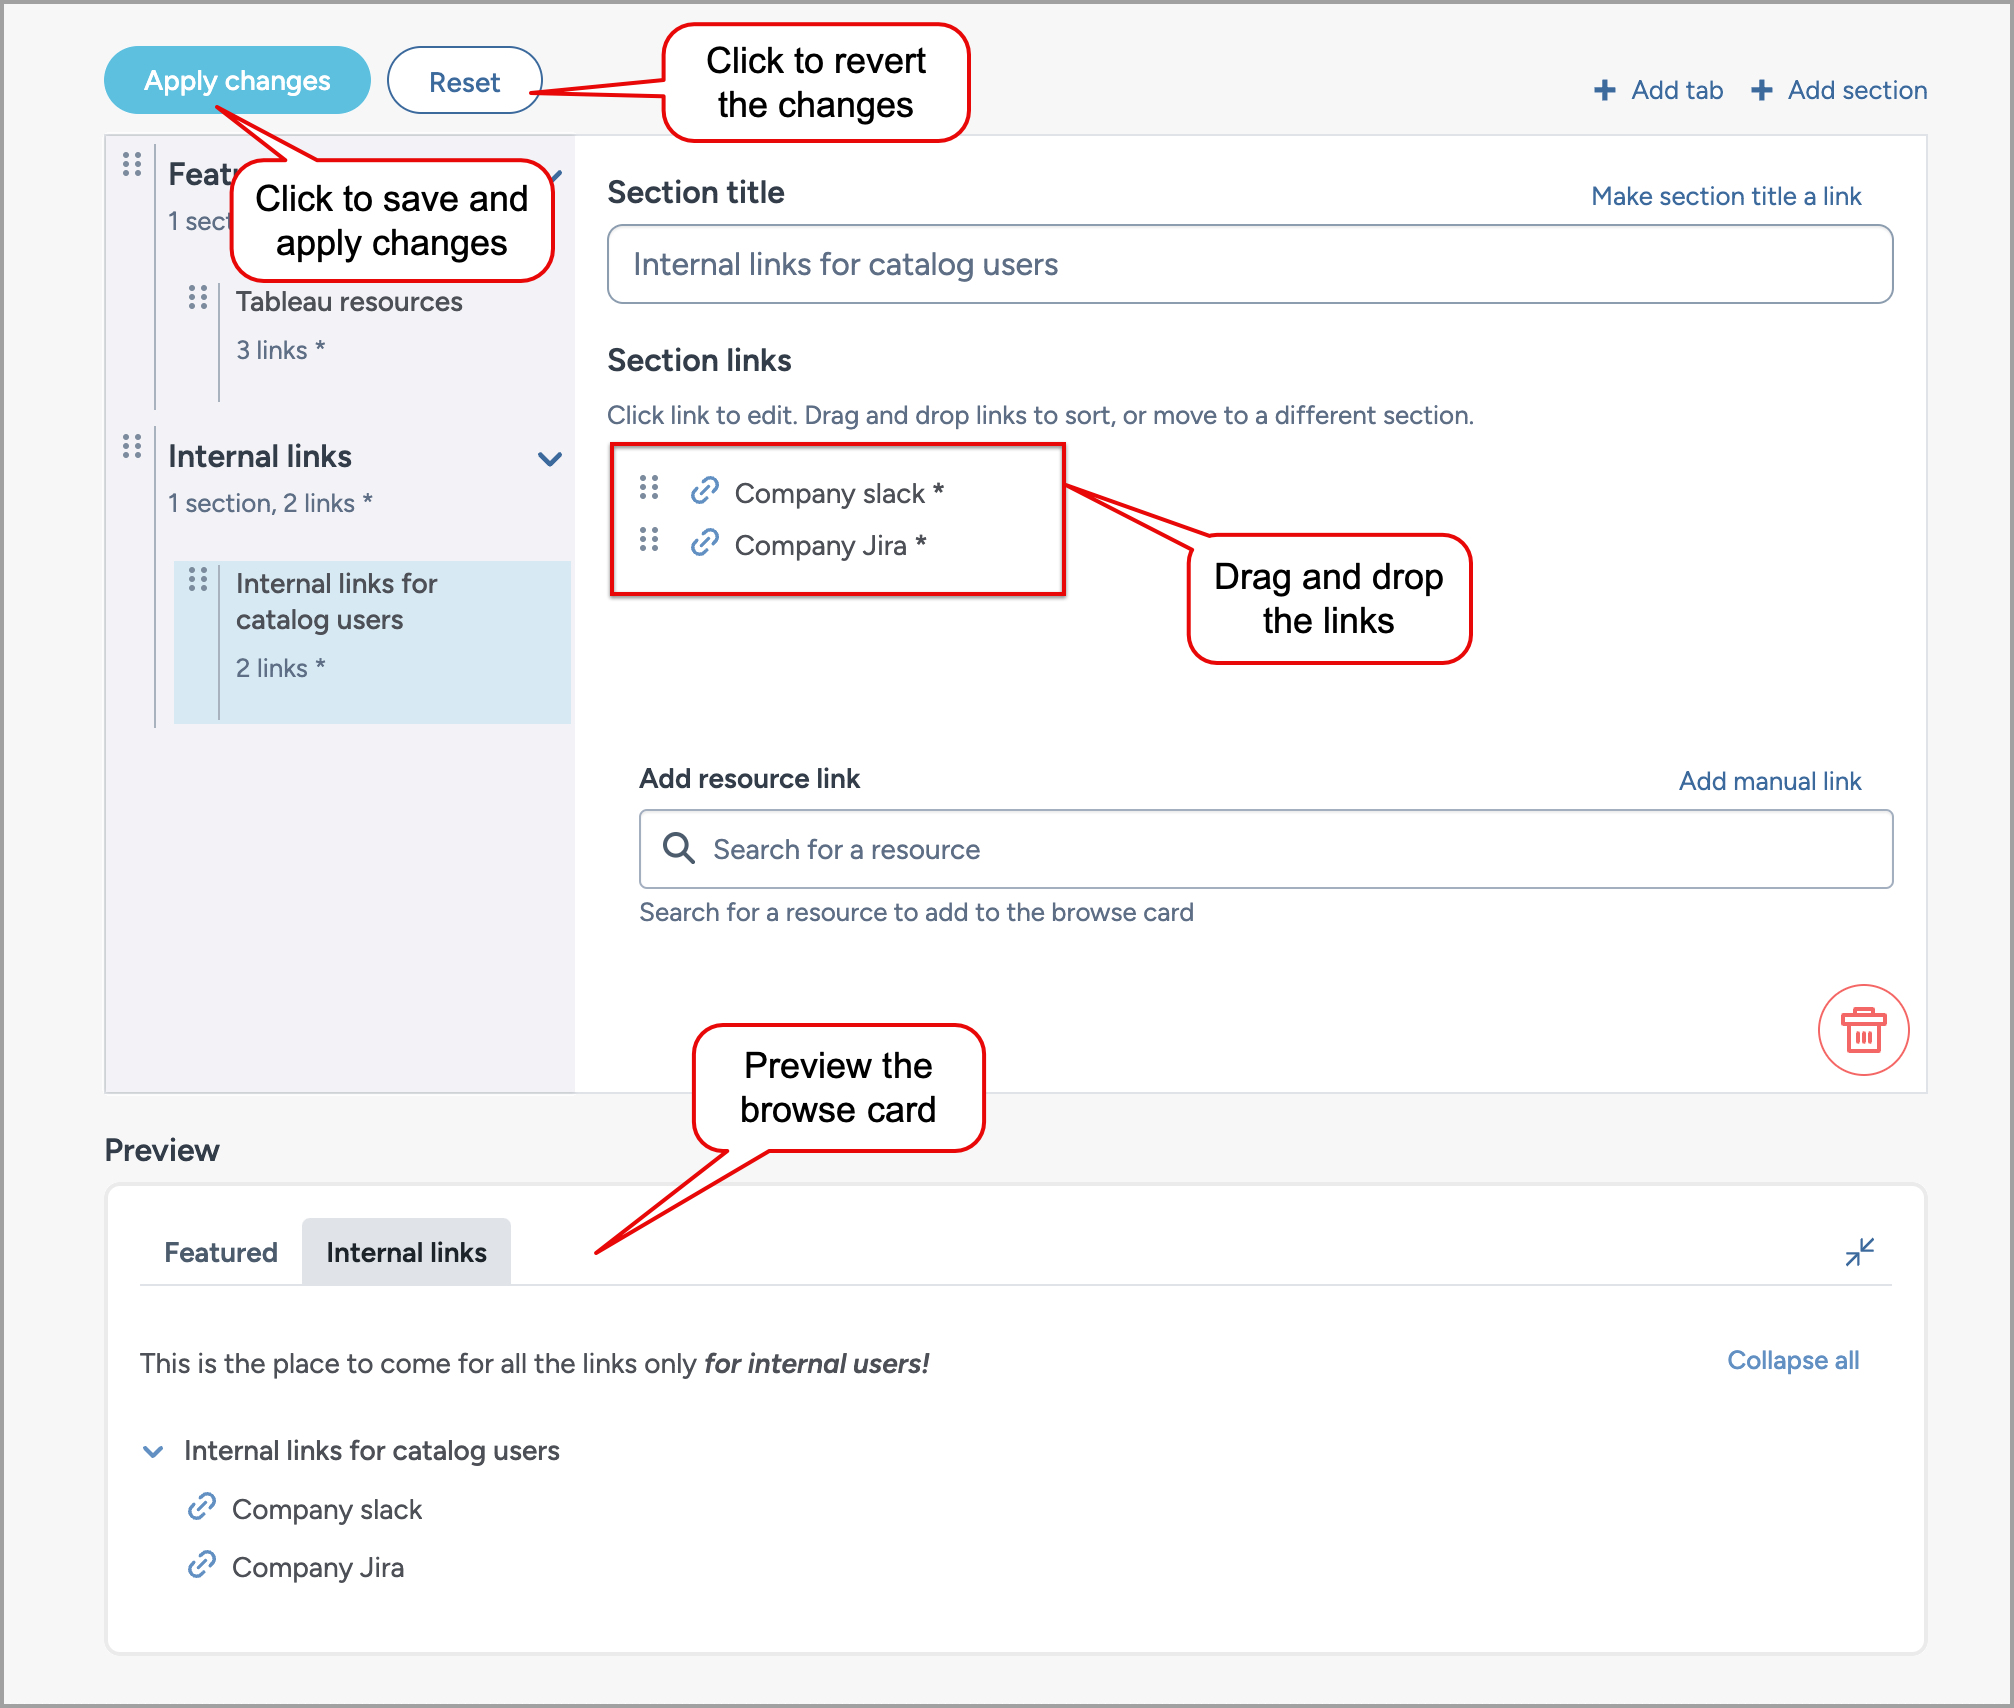
In the Preview section of the page, you can see the preview of your Browse card even before saving it.
Click the Apply changes button. Changes will be applied immediately for all users of the application.
Click the Reset button to reset the browse card to the previous saved state.
Editing the browse card
To edit the browse card:
To edit a link, simply click the link in the browse card. It opens the Edit browse card link window where you can provide details about the new link.
To delete a link, drag and drop the link on the Delete button. When prompted, confirm the deletion to complete the process. You can also delete links by clicking the Delete button in the Edit browse card link window.
To reorder links in a section, drag and drop the links to their new position.
To move the link to a different section, drag and drop the link to a section. This moves the link to the new section. You can now go to the section and reorder the links to place the new link at the correct place.
To delete a tab or section, drag and drop the section or tab on the Delete button. When prompted, confirm the deletion to complete the process.
Click the Reset button to reset the browse card to the previous saved state. All the changes made to the browse card in the session are reverted.
Click the Apply changes button to save the changes.
To remove the browse card, simply delete all the tabs from the browse card and save it.
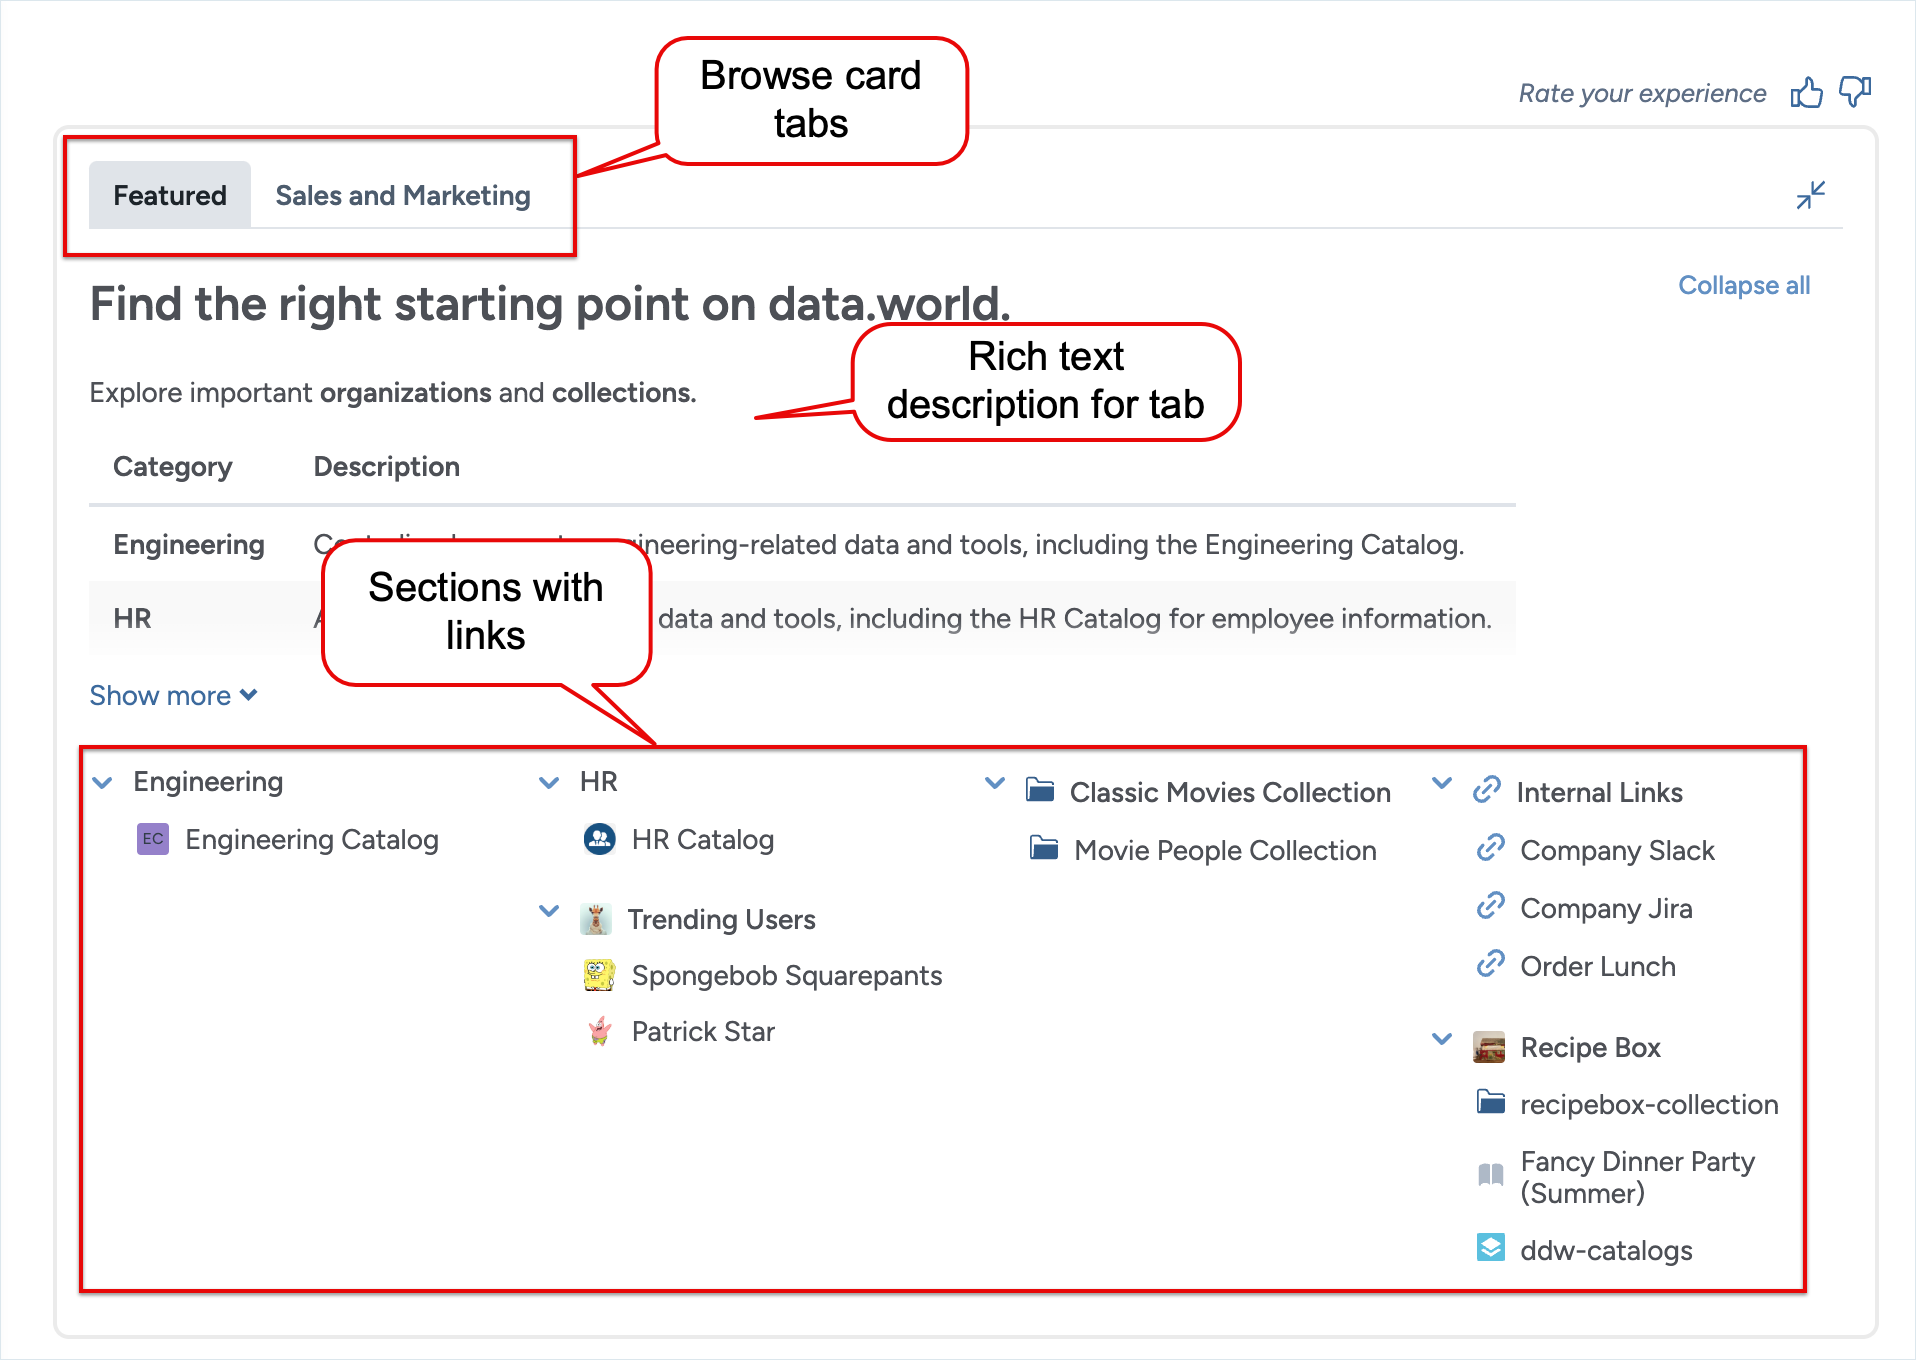
View the results 🥳
Once configured, go to the Application home page to view the updated browse card. Click through the tabs and sections to access the various collections and organization profile pages.
Important
If users have access to resources in the browse card and are not seeing the browse card, Contact the support team for help.