Set up the system for deploying collectors output & MDP (CTK)
In this section we will walk you through the process of getting your system setup for processing and showing the collector output and the related UI elements (MDP) to your end users. In this example, we will use the Tableau collector. You can follow the same process for the other collectors in system.
STEP 1: Check availability of datasets and projects for the data source
First, we will check to make sure that the datasets and project for the data source are available and ready for use.
Note
This task is performed in the Catalog sources organization.
In the Catalog Sources organization, browse to the Workbench experience.
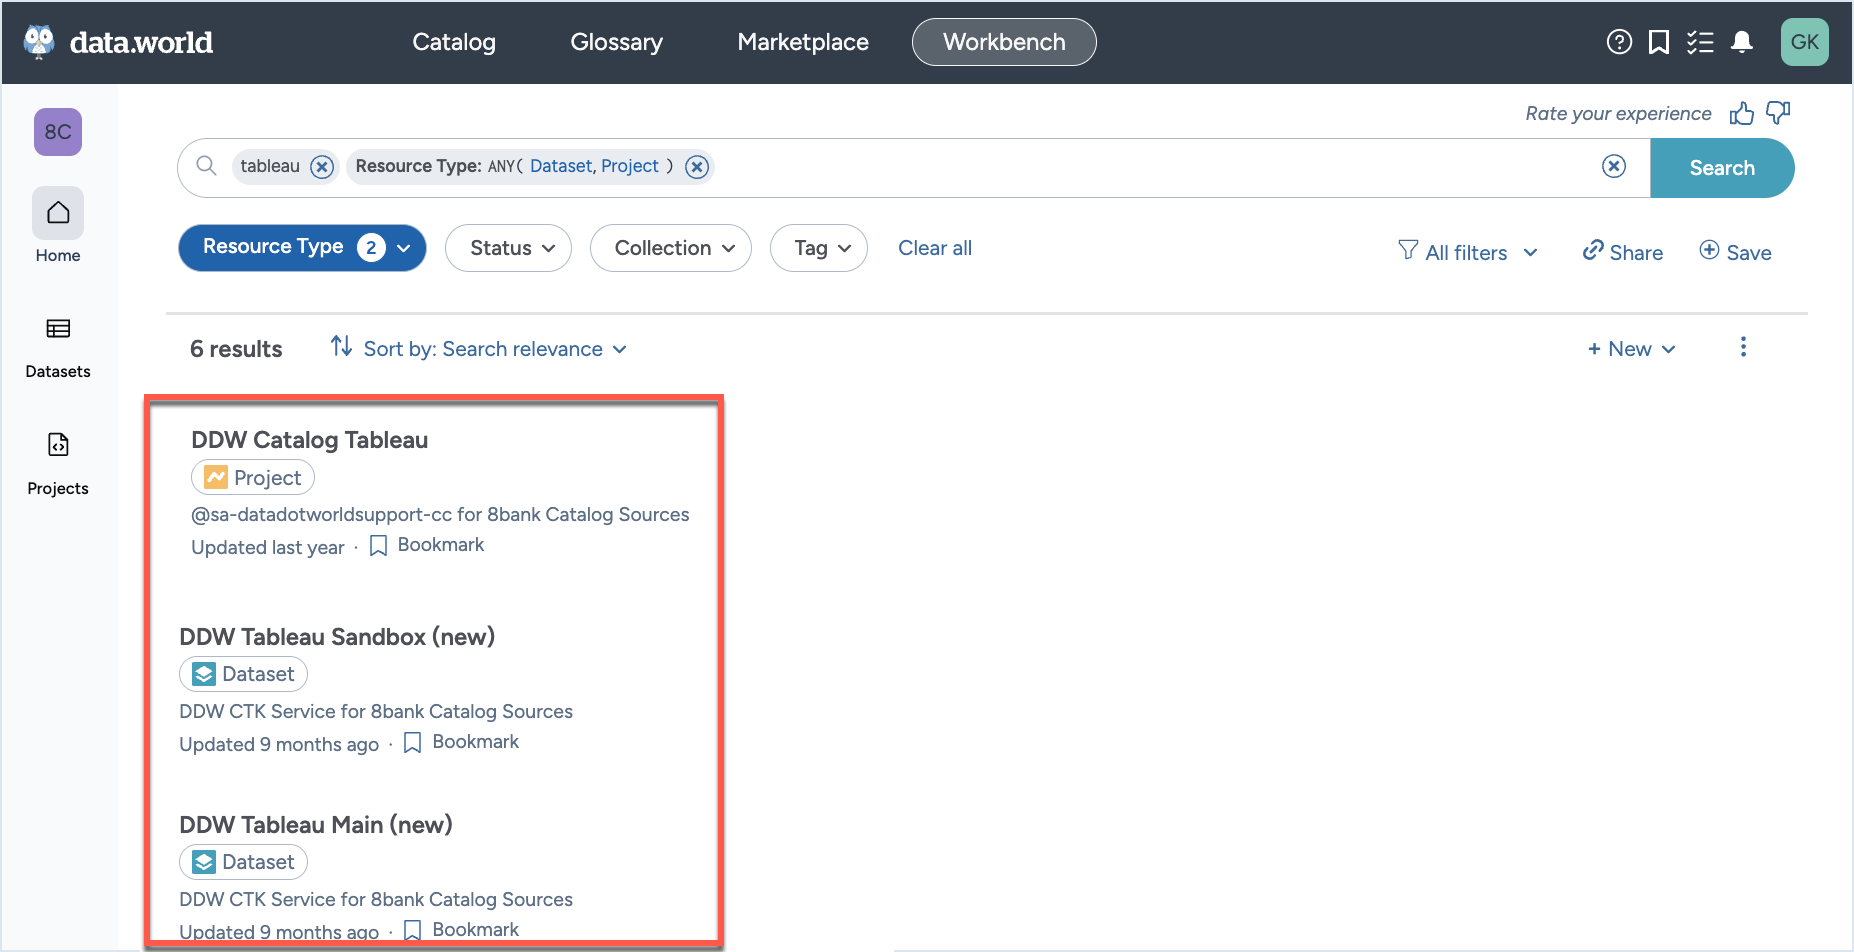
From the Home page, check and verify that the following datasets and projects are available to you:
Project: DDW Catalog Tableau
Dataset for the Sandbox organization: DDW Tableau Sandbox
Dataset for the Main organization: DDW Tableau Main
Important
Organizations with different names! If your organizations are named differently, the datasets will be named accordingly. For example, if the organization is named Global, the dataset name will be DDW Tableau Global.
STEP 2: Run the collector
Note
This task is performed in the Catalog sources organization.
Run the collector.
If you are running the collector using CLI or YAML files, make sure:
--site:The name for the data.world site into which you will load this catalog. For example, for https://YourSiteName.app.data.world/orgName, use --site="YourSiteName". This parameter should not be used for the multi-tenant or VPC instances.
--account: Is set to point to the Catalog sources organization.
--upload-location: Is set to the corresponding dataset for the collector available in the Catalog Sources organization. For example, for Tableau, it will be ddw-tableau-catalog-sandbox for the DDW Tableau Sandbox dataset or ddw-tableau-main for the DDW Tableau Main dataset depending on which organization you want the output to show in.
If you are running the collector using the Cloud collectors, make sure:
Make sure you run the Cloud collector in the Catalog sources organization.
In the Configure the collector window, set the Automatic upload location as the corresponding dataset for the collector available in the Catalog Sources organization. For example, for Tableau, it will be ddw-tableau-catalog-sandbox for the DDW Tableau Sandbox dataset or ddw-tableau-main for the DDW Tableau Main dataset depending on which organization you want the output to show in.
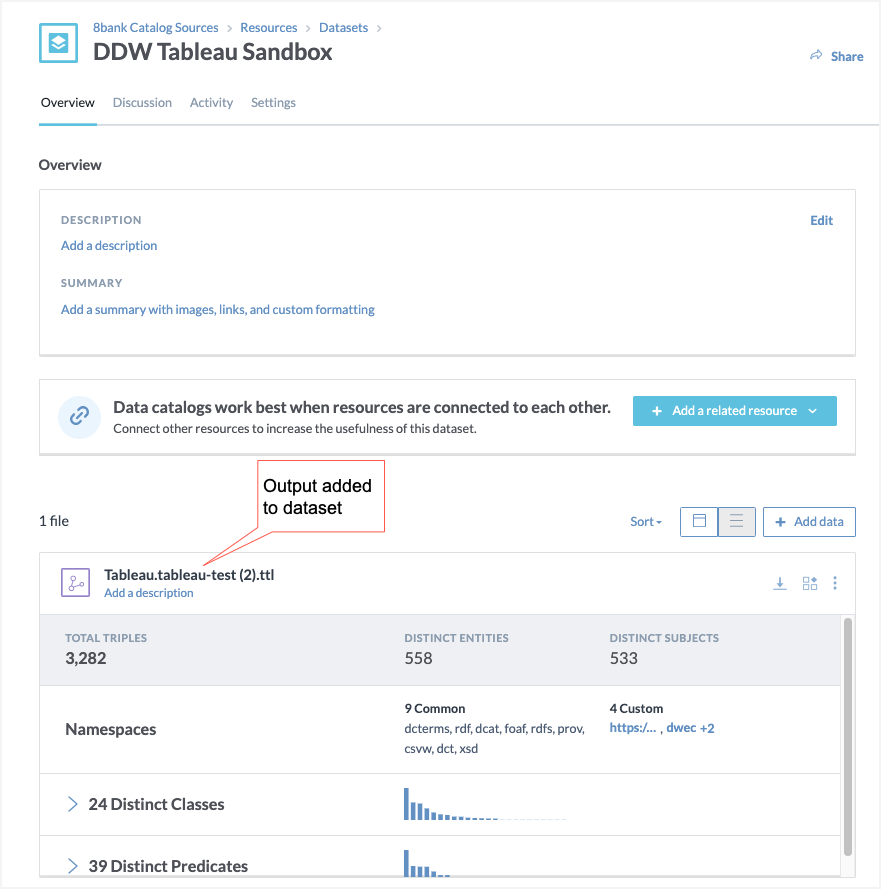
Once the collector has run successfully, browse to the collector specific dataset in the Catalog Sources organization. In this example, it is the DDW Tableau Sandbox dataset or DDW Tableau Main dataset. Verify that the output of the collector has been added to the dataset.
STEP 3: Add the metadata profile for the collector
Note
This task is performed in the Catalog configuration organization.
In the Catalog Configuration organization, from the Catalog experience, go to the Metadata profiles collection.
On the Overview tab, click the Edit button and in the Source Modules field, select Tableau. Click Update.
Some important things to note:
For Snowflake collector, if you plan to use specific features, make sure you select the corresponding modules for it from the Source Modules tab:
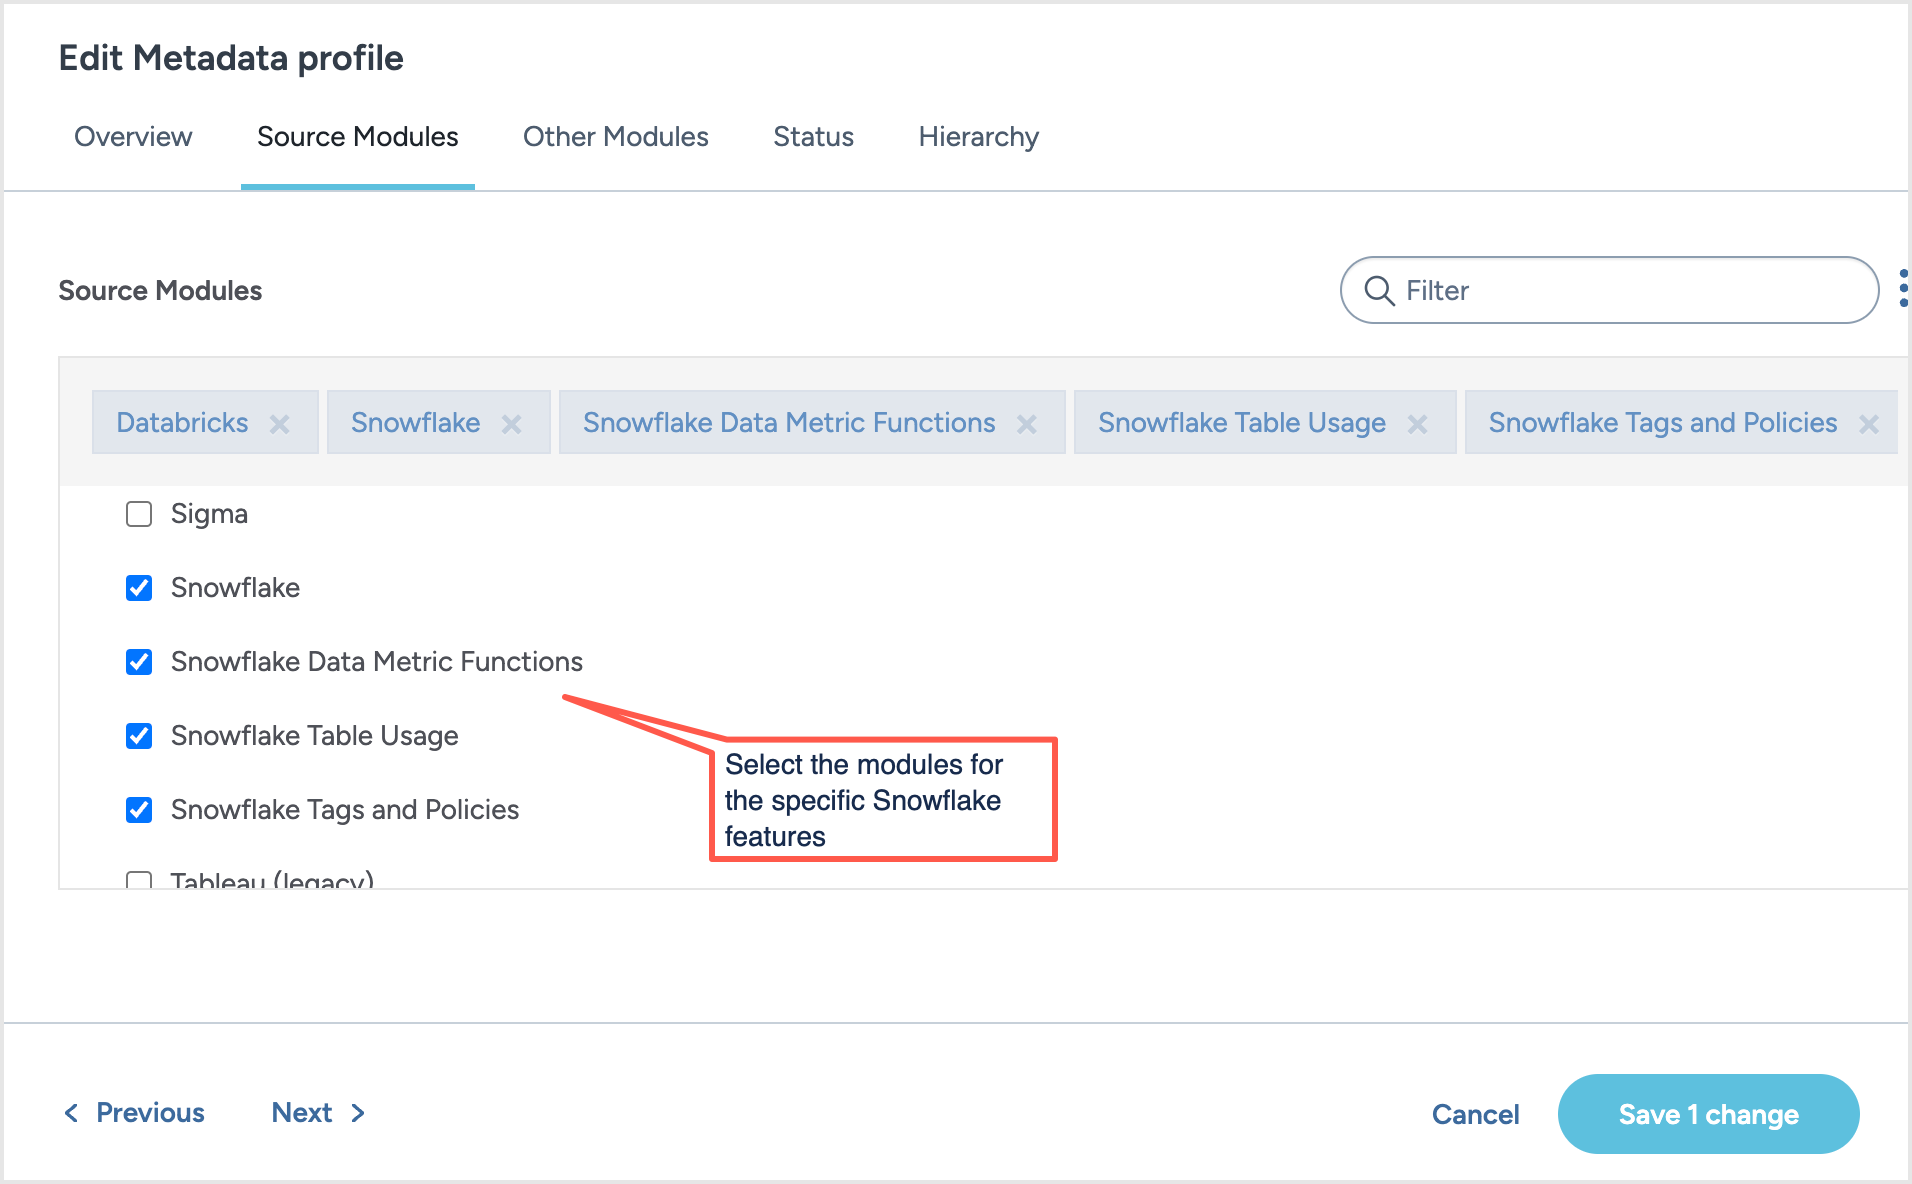 Table 1.
Feature/collector setting
Module needed
Collect Snowflake tag information
Collect Snowflake policy information
Snowflake Tags and Policies
Collect Snowflake table usage information
Snowflake Table Usage
Collect data metric function information
Snowflake Data Metric Funtions
For collectors that support data profiling, if you plan to use the feautre, make sure you select the corresponding module from the Other Modules field:
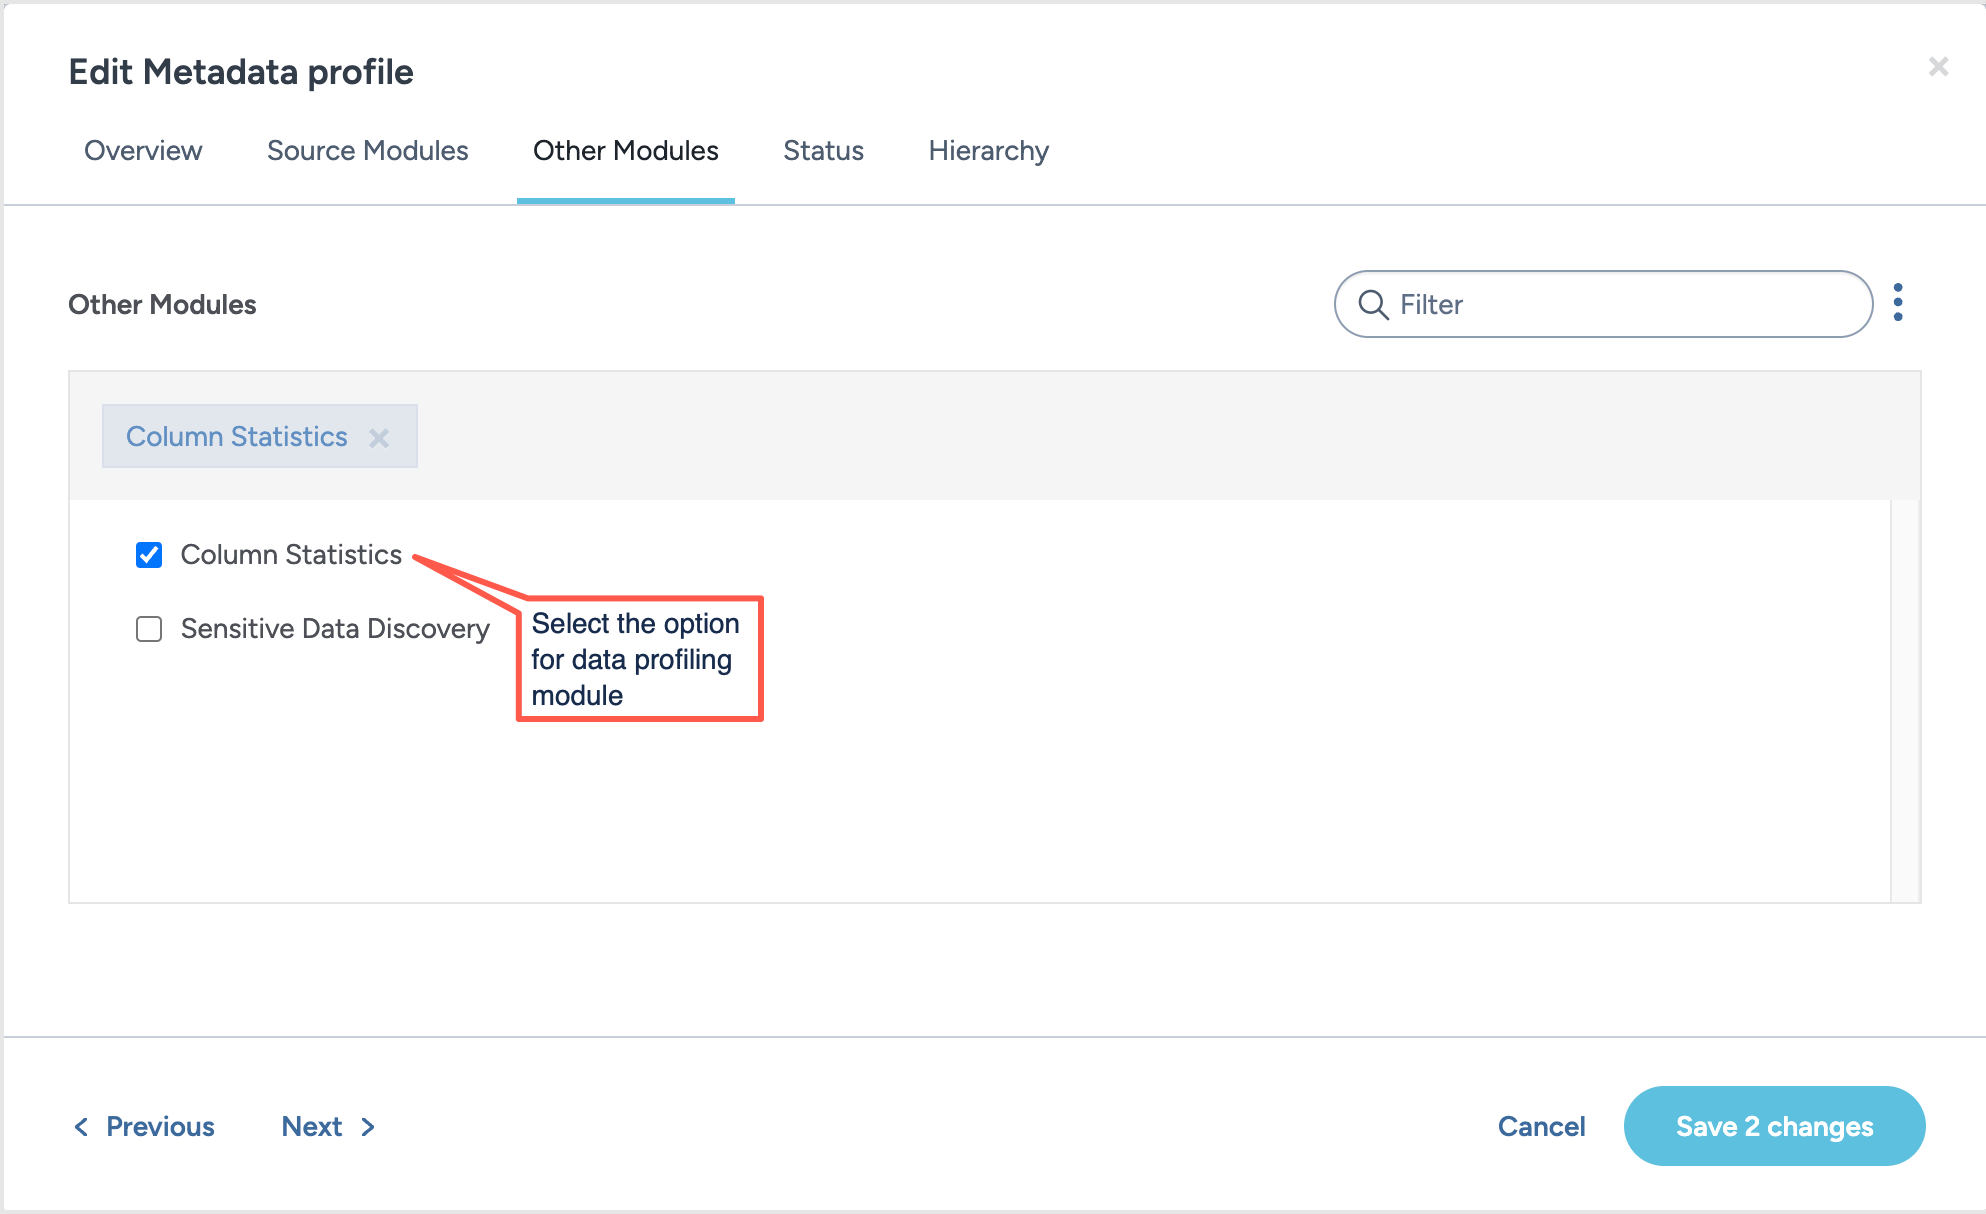 Table 2.
Feature/collector setting
Module needed
Enable Sample String Values collection
Enable column statistics collection
Target sample size for column statistics
Column Statistics
Next, in the Catalog Configuration organization, go to the ddw-catalogs dataset. Locate the sync source-modules.ttl file in the dataset and click the Sync now button. This will load your selected source modules into Catalog Config.
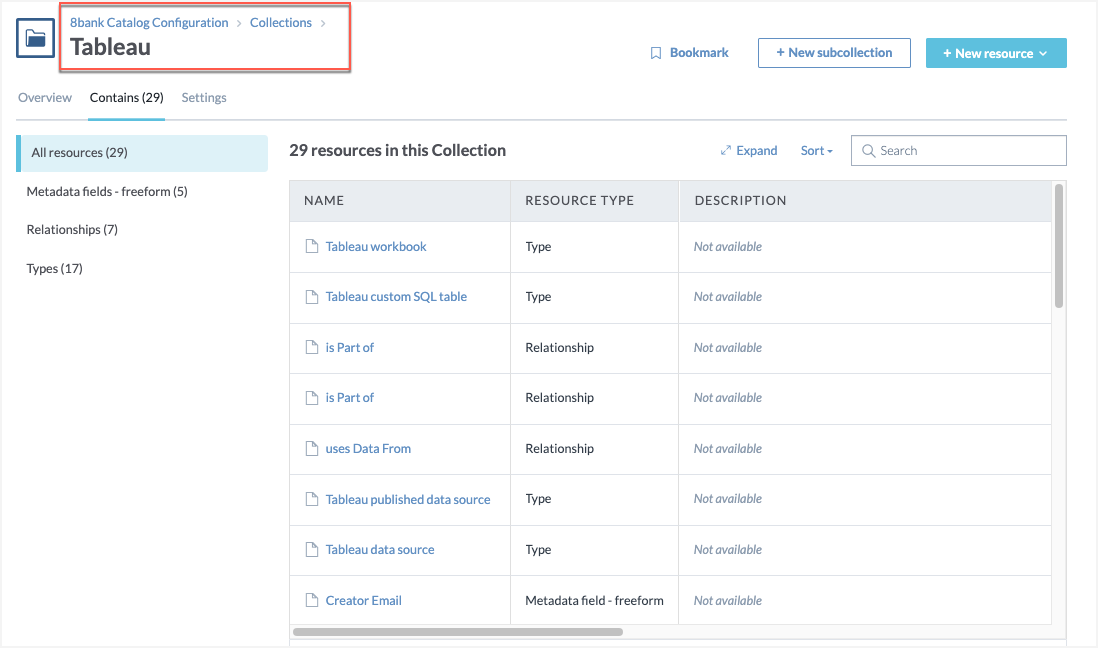
You will see a collection with the name of the data source (in this case Tableau) which has all the MDP configurations related to the data source is added to the organization.
STEP 4: Adjust the Collector metadata profile for your business needs
Note
This task is performed in the Catalog configuration organization.
Now we will review the contents of the Metadata profile to see if you want to make any changes. When you complete STEP 4, the MDP for the collector are added to 2 places in the organization.
The collection specific for the collector, for example, Tableau collection: This collection is created to preserve a pristine copy of the MDP related to the collector and it should be only used for reference and not edited.
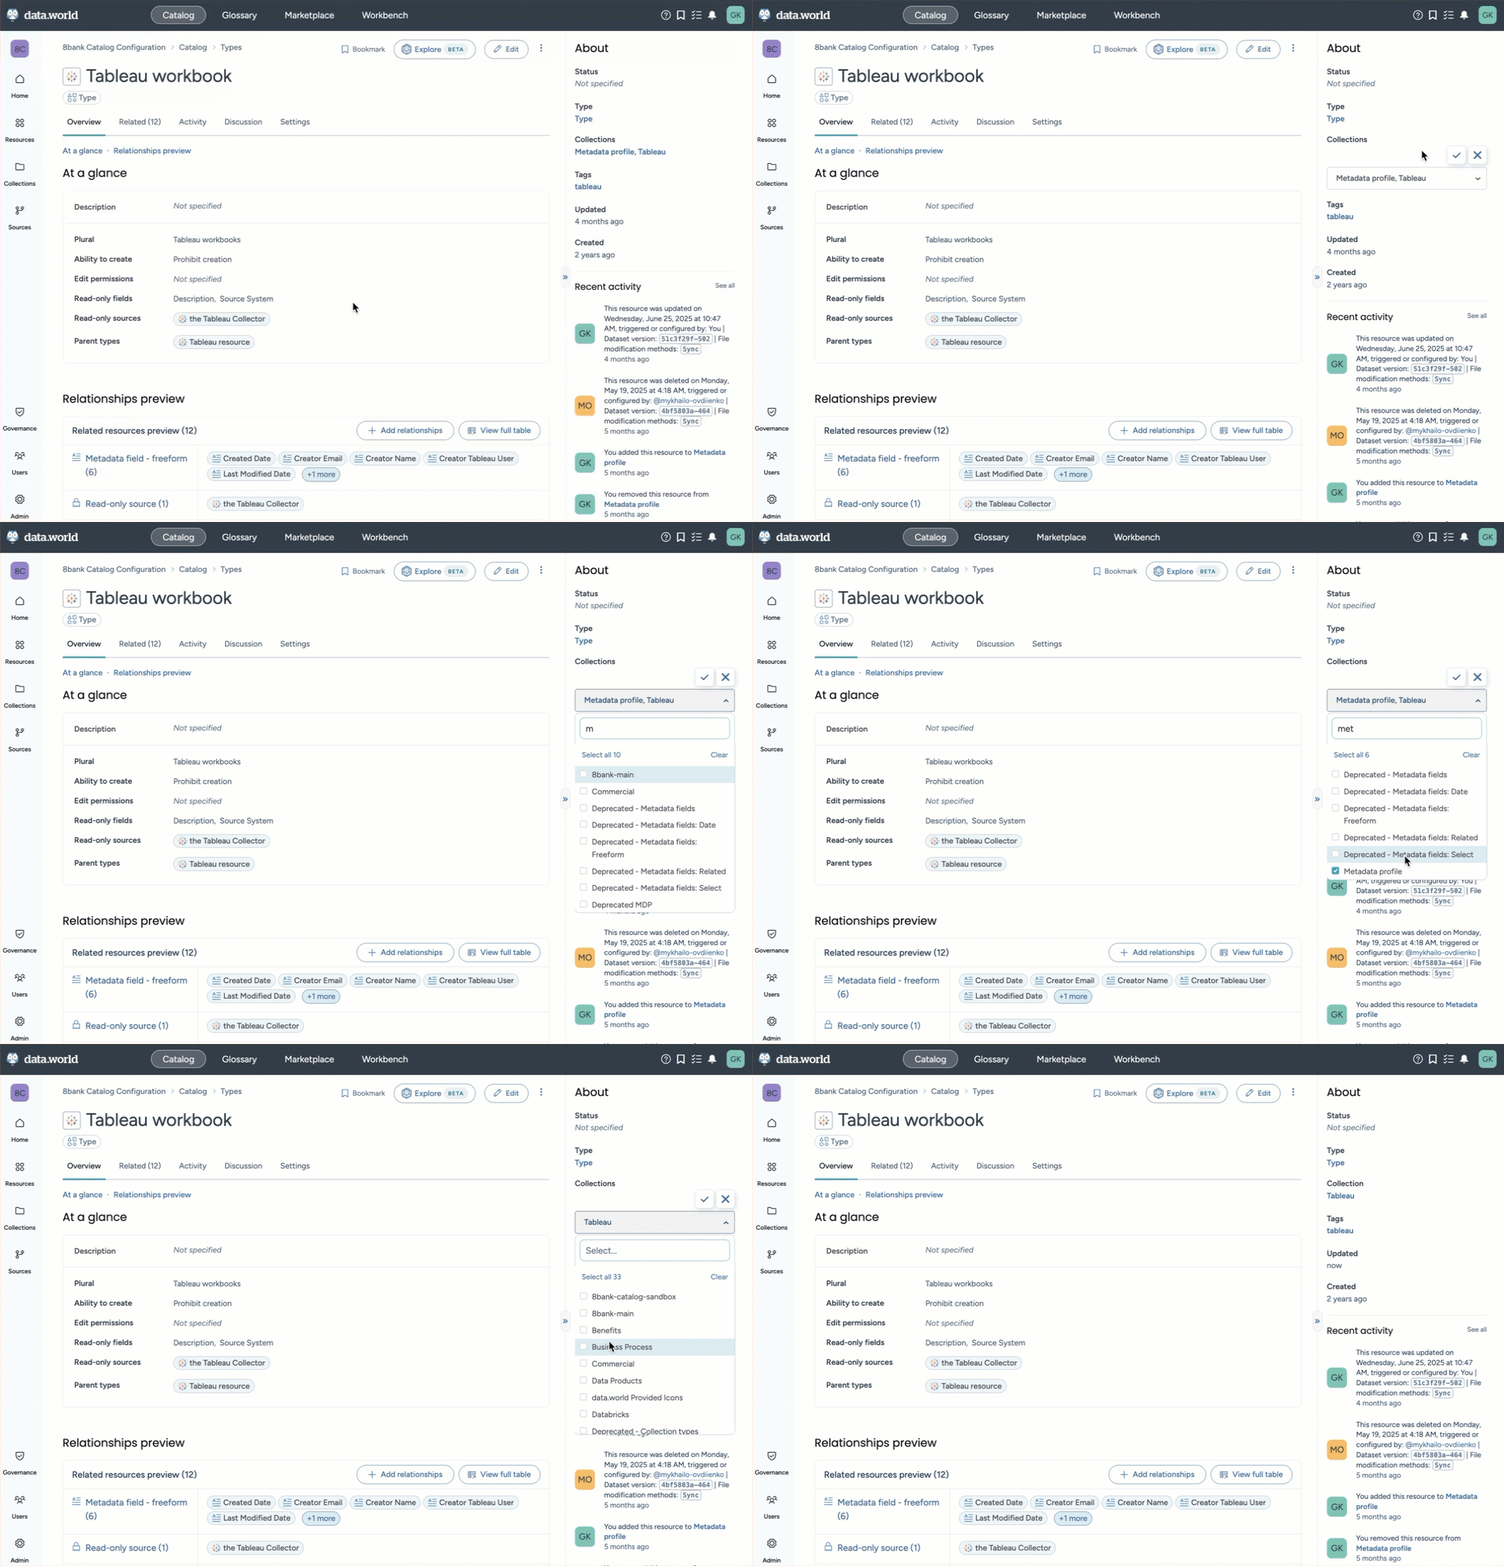
The Metadata profiles collection: An entity must be in the Metadata profile collection in order for it to sync to your destination organizations for the collector outputs. Therefore, if you want to hide an entity or relationship in your destination organization without deleting it, it can simply be removed from this Metadata profile collection.
STEP 5: Publish the MDP and collected metadata to end users
Note
This task is performed in the Main or Sandbox organization.
In the Main or Sandbox organization, from the Workbench experience, go to the ddw-catalogs dataset.
In the dataset, find the matching file for the collector, and click Sync now.
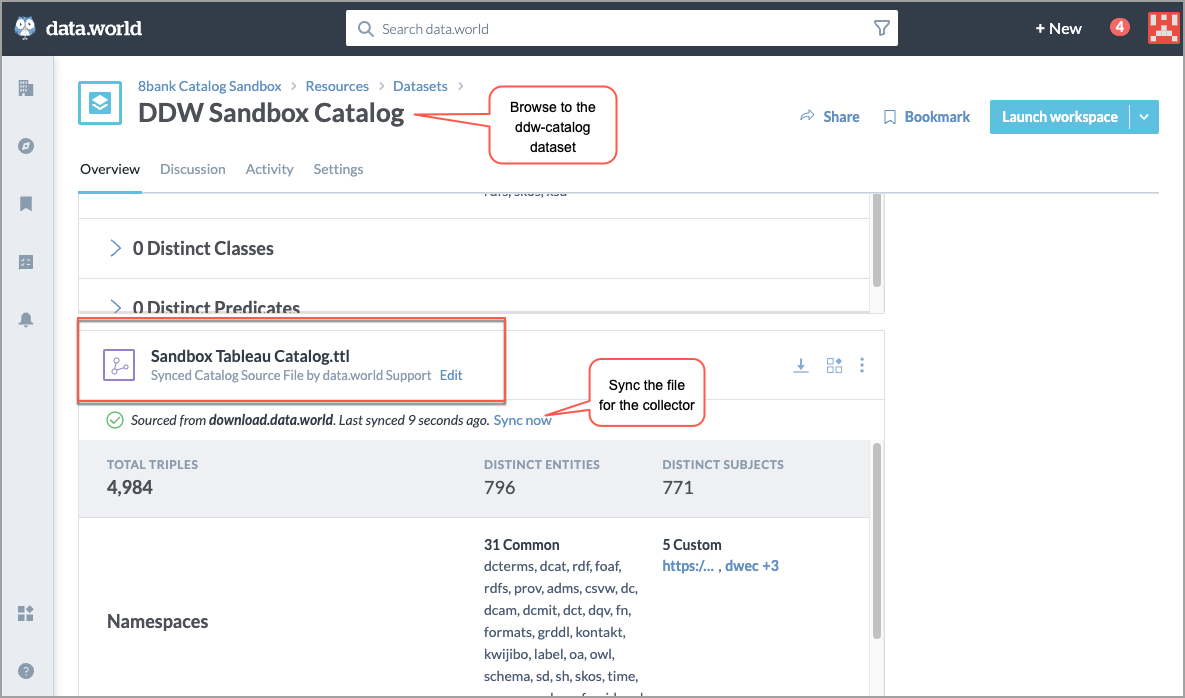
In the dataset, locate the Sandbox/Main Metadata Profile.ttl file, click the Sync now button.
View the results🎉
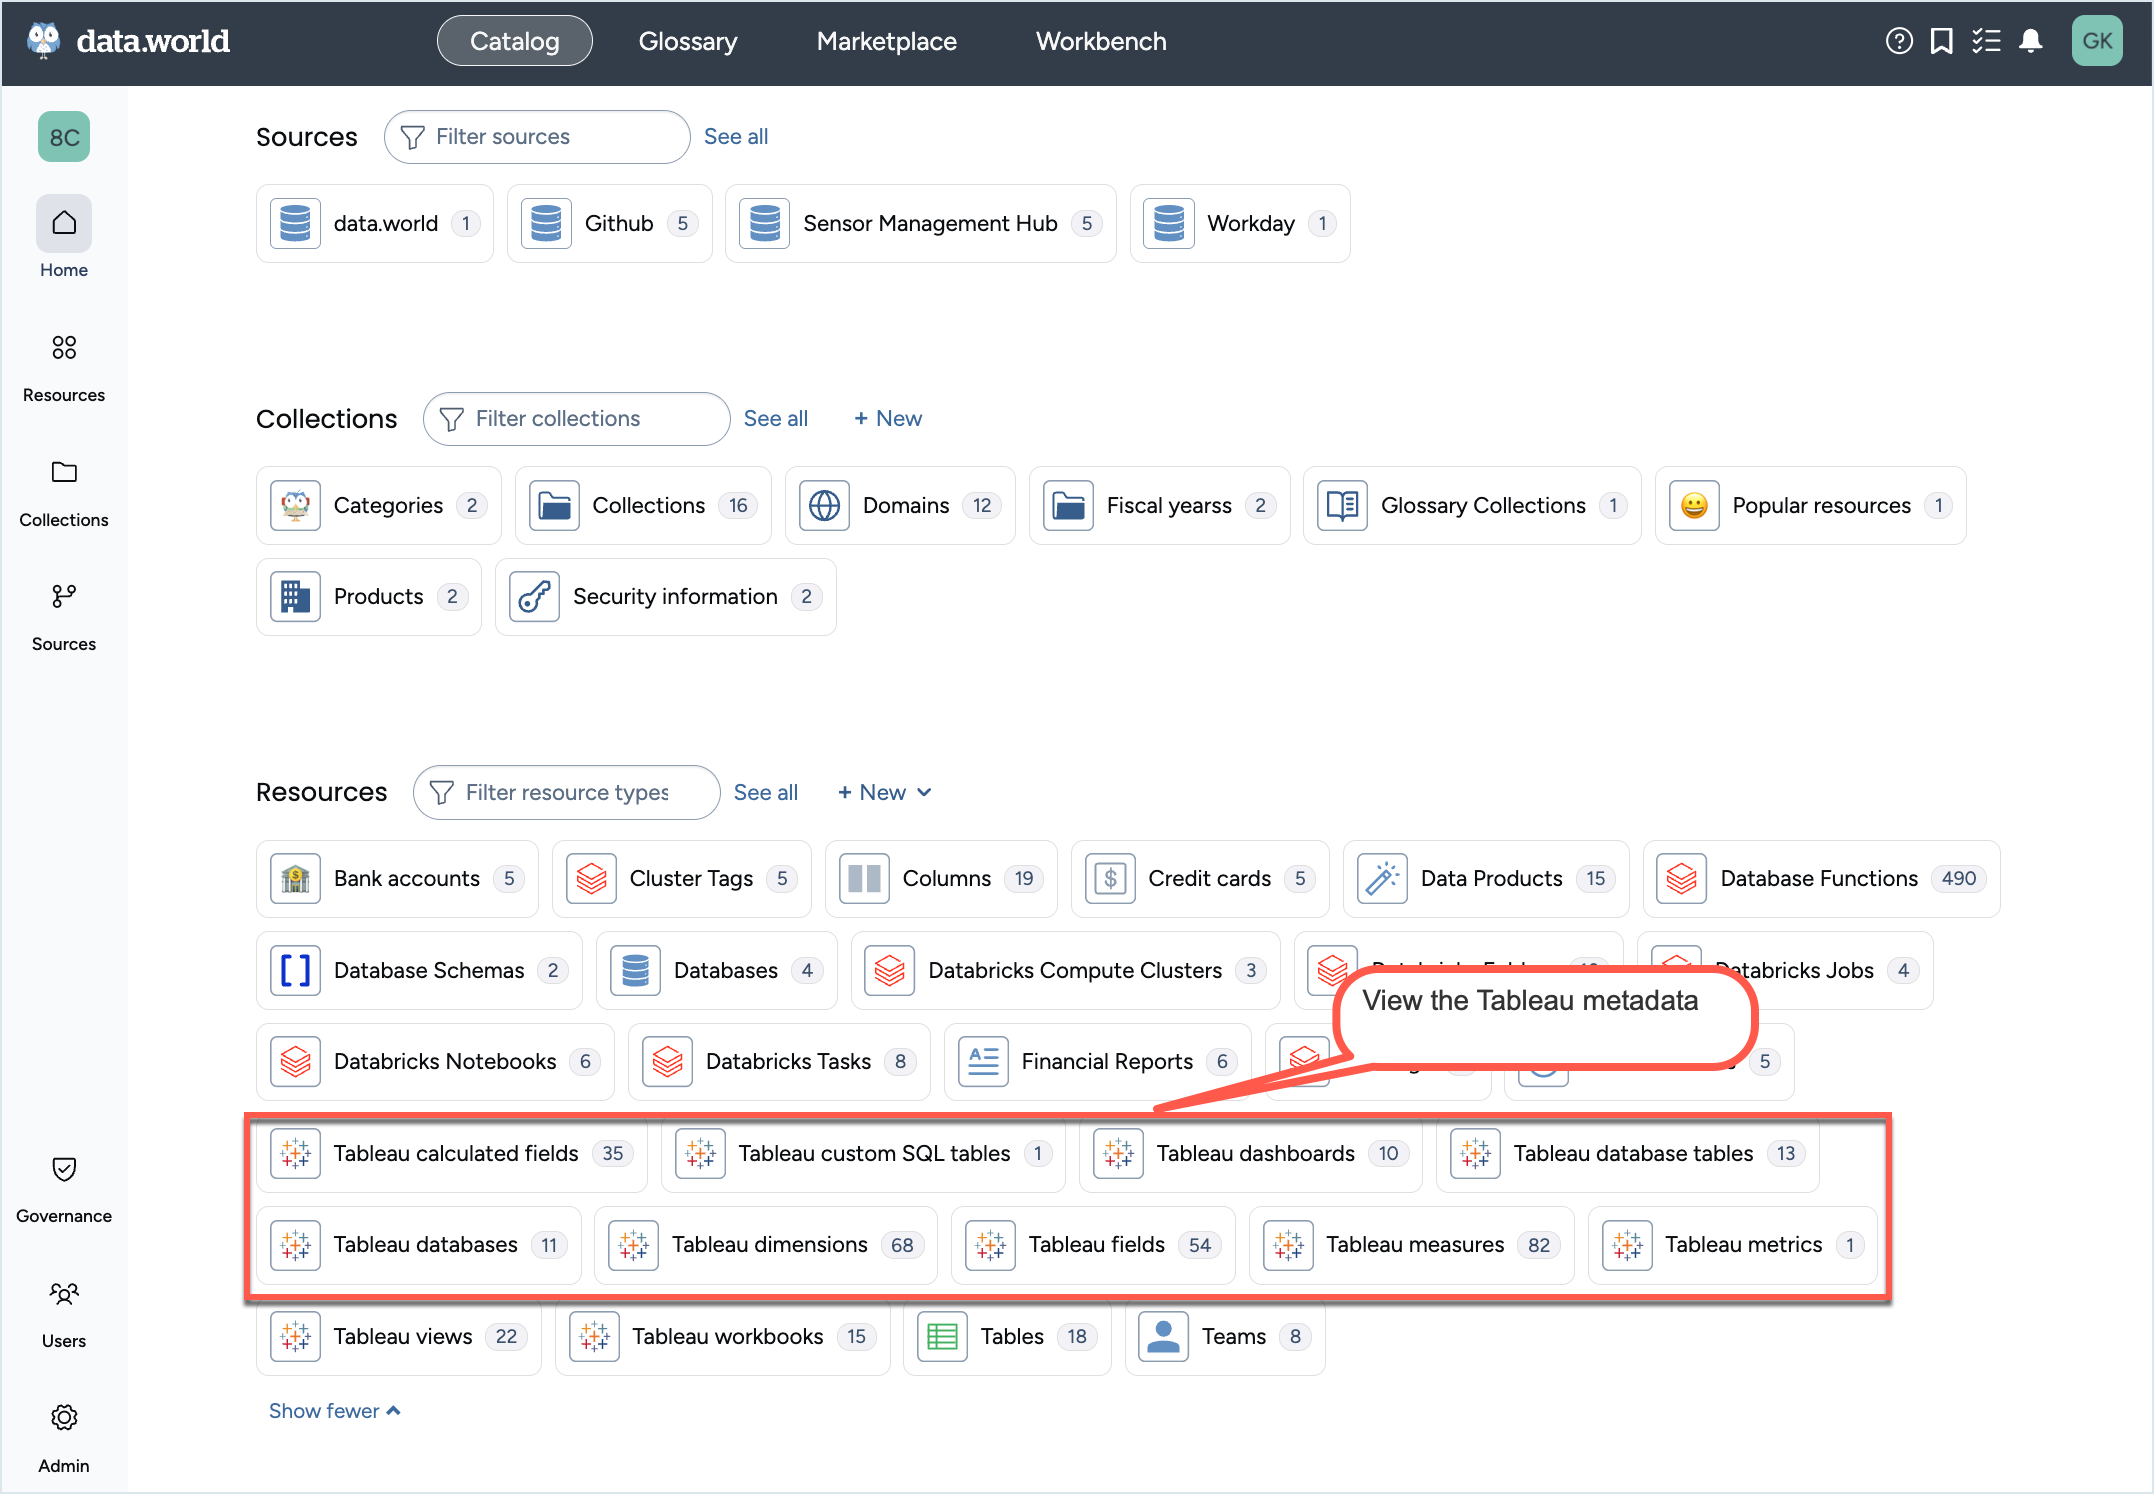
You can now browse to the Sandbox or Main organization and view the metadata collected by the Tableau collector.
