Creating rich content using the rich text editor
Make use of the available rich text editing features for multiline fields to provide users with an enhanced content experience.
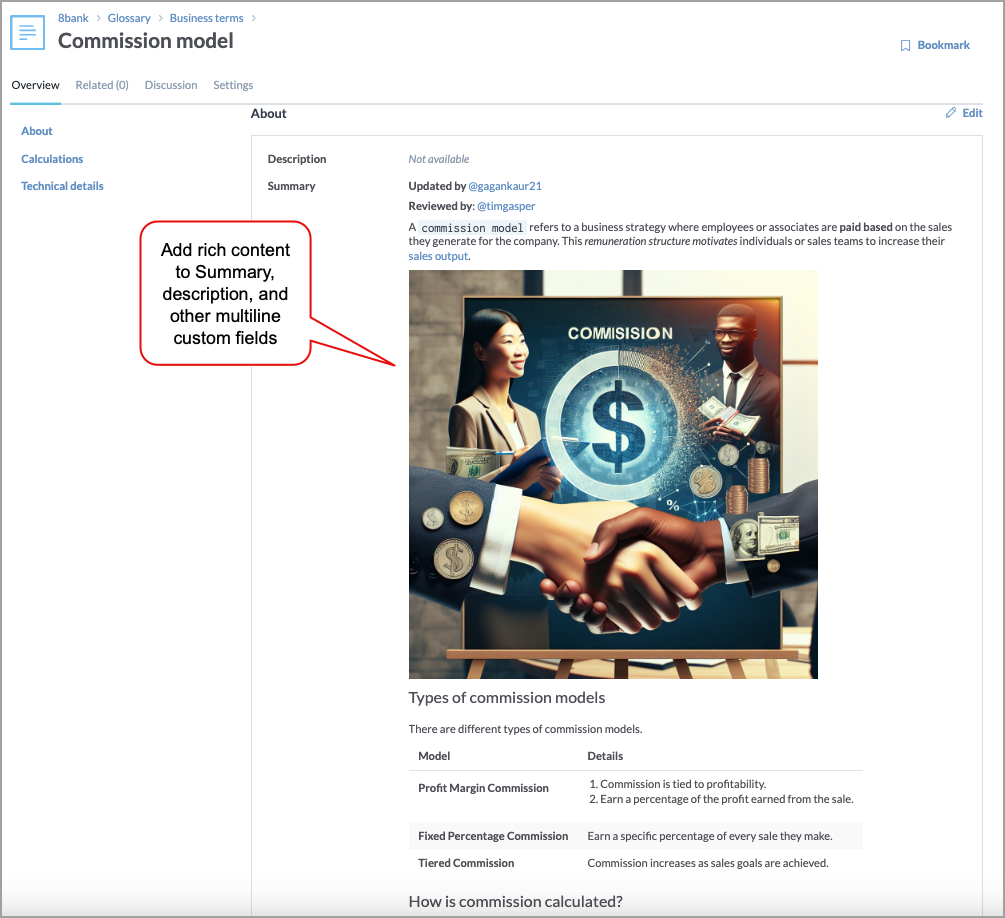
This feature can be utilized for catalog resources, glossary terms, analysis, and collections. However, it is not applicable for projects and datasets. It is readily accessible for out-of-the-box summary and description fields, as well as any custom multiline fields added to the resource pages.
The following features are available:
Adding headers
Bold, italic, and code formatting
Adding lists
Adding links
Adding images
Adding tables
Adding math equations
Adding code blocks
Tagging users
Creating rich content
To create rich content:
Browse to the resource where you want to add rich content in the multiline field.
In the Description, Summary, or custom field add your content and use the toolbar to format the content. Use the following sections for detailed steps on adding and formatting content.
Once you are done, preview and save your changes.
Adding headers
To add headers:
Position the cursor where you want to add a heading.
In the toolbar, from the Insert dropdown, hover over Headings, then select the desired heading level (For example, Heading 1, Heading 2, etc.)
Enter the text for your heading.
Bold, italic, and code formatting
To format your text:
Add bold text: Select the text you want to bold, then click the B icon in the toolbar.
Add italic text: Select the text you want to bold, then click the I icon in the toolbar.
Format text as code: To format text as code, select the text and click the code icon <> in the toolbar.
Adding lists
To add lists:
Position the cursor where you want to add a list.
In the toolbar, from the Insert dropdown, hover over Lists, then choose from Checklist, Bulleted list, Ordered list.
Enter the text for your list items. Use the Enter key to append a new list item.
To create nested lists, use the Tab key to indent an item.
Adding links
To add links:
Select the text you want to turn into a hyperlink.
Click the Link icon (🔗) in the toolbar.
In the pop-up window, provide the URL in the Link address field.
Click OK to apply the link.
Adding images
To add images:
Position the cursor where you want to add an image.
In the toolbar, from the Insert dropdown, select Image. Click Choose file, then select the image from your file system.
Alternatively, simply drag and drop an image directly into the editor.
Adding tables
To add tables:
Position the cursor where you want to insert a table.
In the toolbar, from the Insert dropdown, select Table. You get a standard 2x2 size table.
To add and delete table rows and columns, position the cursor on the table, then from the Table dropdown select a desired option.
Adding math equations
To add math equations:
Position the cursor where you want the equation.
In the toolbar, from the Insert dropdown, hover over Math, then choose from Inline math, Block math.
Enter your equation in the editor that appears, and press Enter.
Adding code blocks
To add code blocks:
Position the cursor where you want to insert a code block.
In the toolbar, from the Insert dropdown, select Code block.
Enter your code in the block that appears.
Tagging users
To tag a user:
To tag a user, type @ followed by the username. (For example, @johndoe)
Select the username from the dropdown. Tagged users are added to the content.