Starting a data project
To create a project:
In the Workbench experience, click the New button. From the dropdown, select Project.
In the Create a new window, click Create new project.
Other places from where you can start a project:
If you are working on a dataset, click the arrow next to Launch workspace button to start creating a new project for the dataset. Alternatively, add the dataset to an existing project.
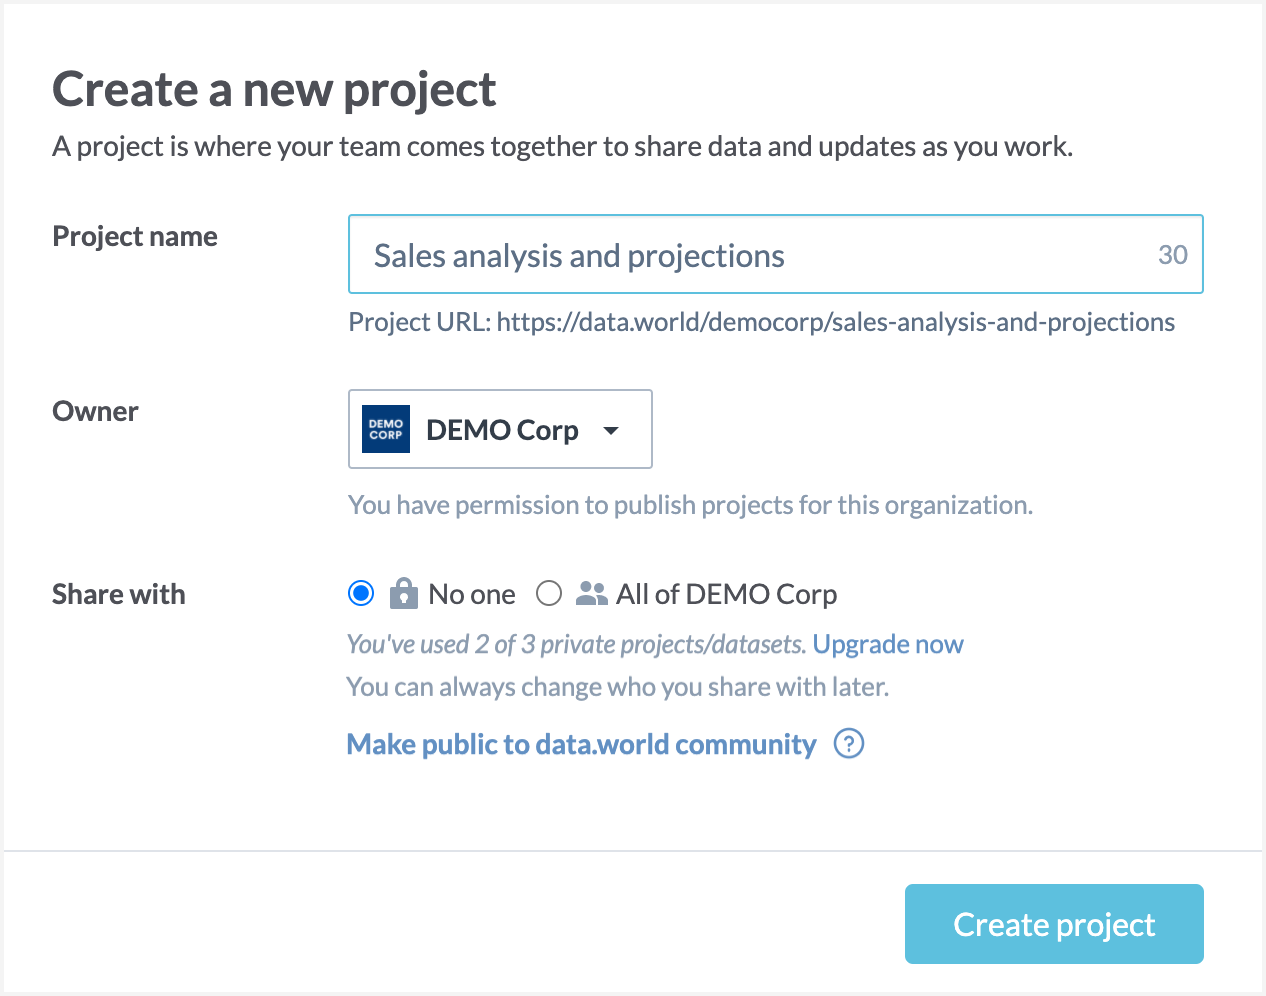
On the Create a new project page, set the following:
Owner: Select the owner of the project. By default, if you are in an organization your organization is set as the owner of the project. You can choose another organization from the dropdown or you can switch to personal account if you wish to be the owner as well as the creator of the project.
Project name: Provide a project name.
Share with: Specify who can see the project. Permission options to the project are either no one, other members of your team (if the team is set to be the owner), or public to the data.world community.
If you started creating the project from a dataset page, you will see the dataset that is getting added to the project.
Click Create project.
Once the project is created the main page is refreshed to show the workspace of the project. Go to the Project Summary section and add a detailed summary for the project. Use markdown to add rich content to the summary. Click Done to save the changes.
Click the name of the project in the title bar to go back to the Project details page.
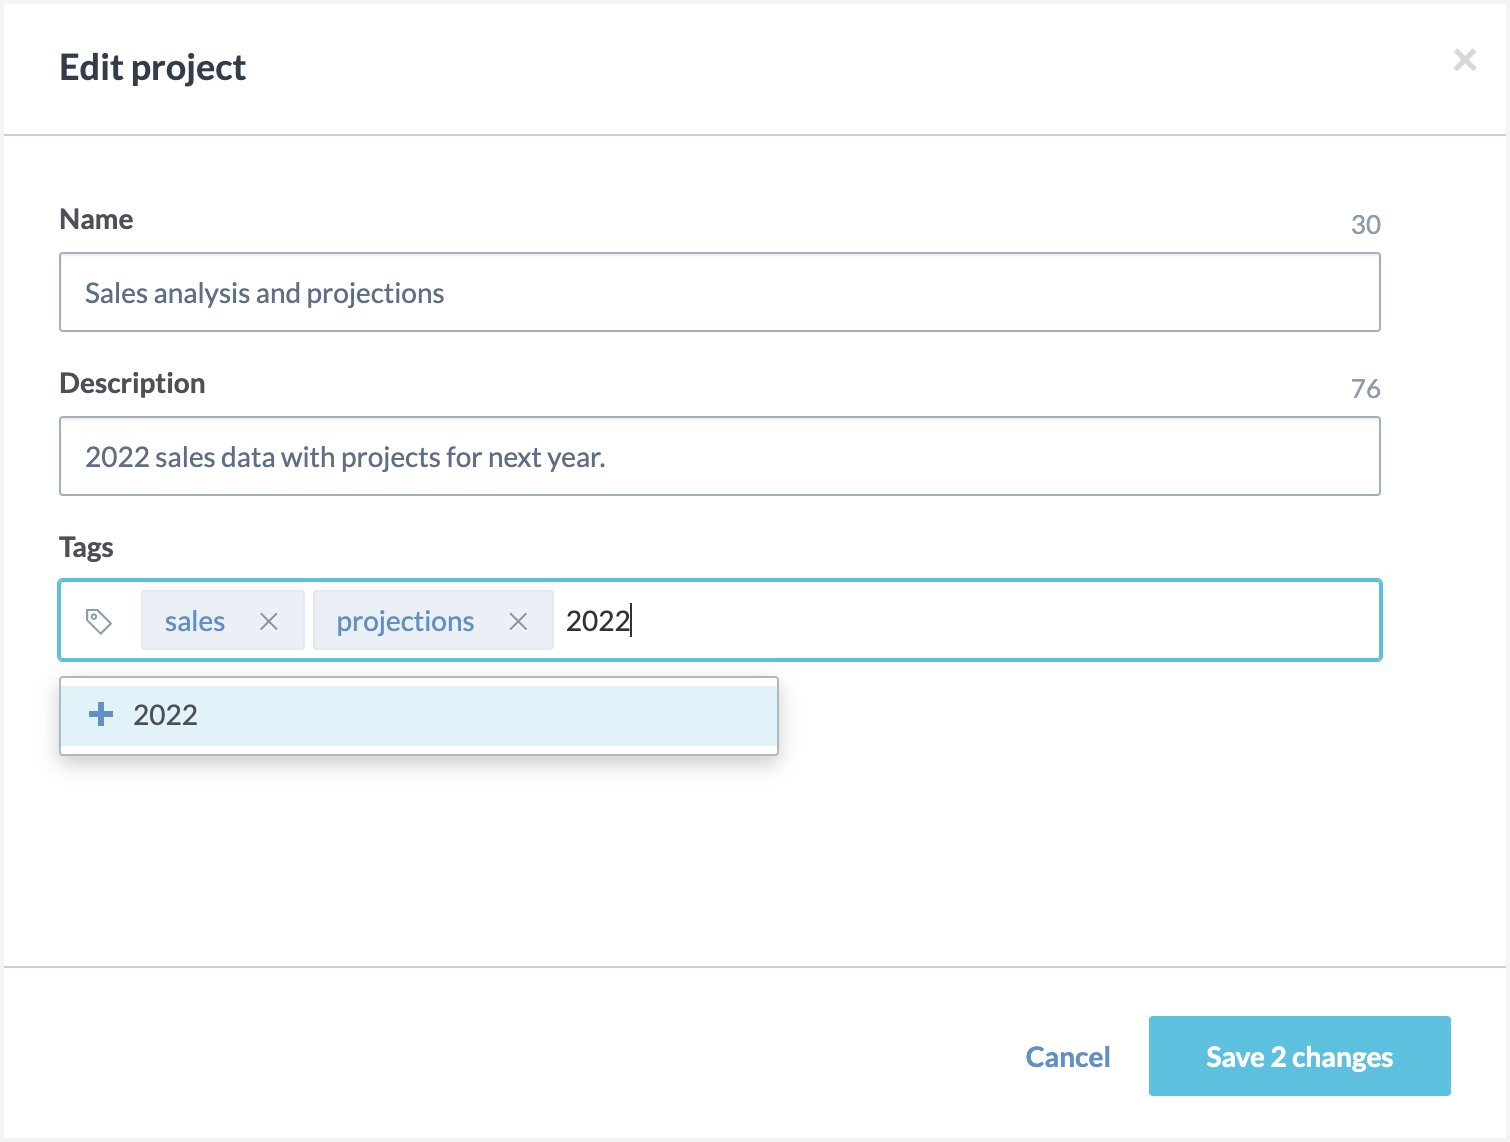
On the Overview tab, in the Overview section, click the Edit button to add a description for the project and to add Tags to the project. Tagging projects help search projects later. In the Tags field, start typing the tag. If it already exists, it will show in as a suggestion with the number of times it is used. Click on the tag to add it or press Enter to create a new tag and add to the project.
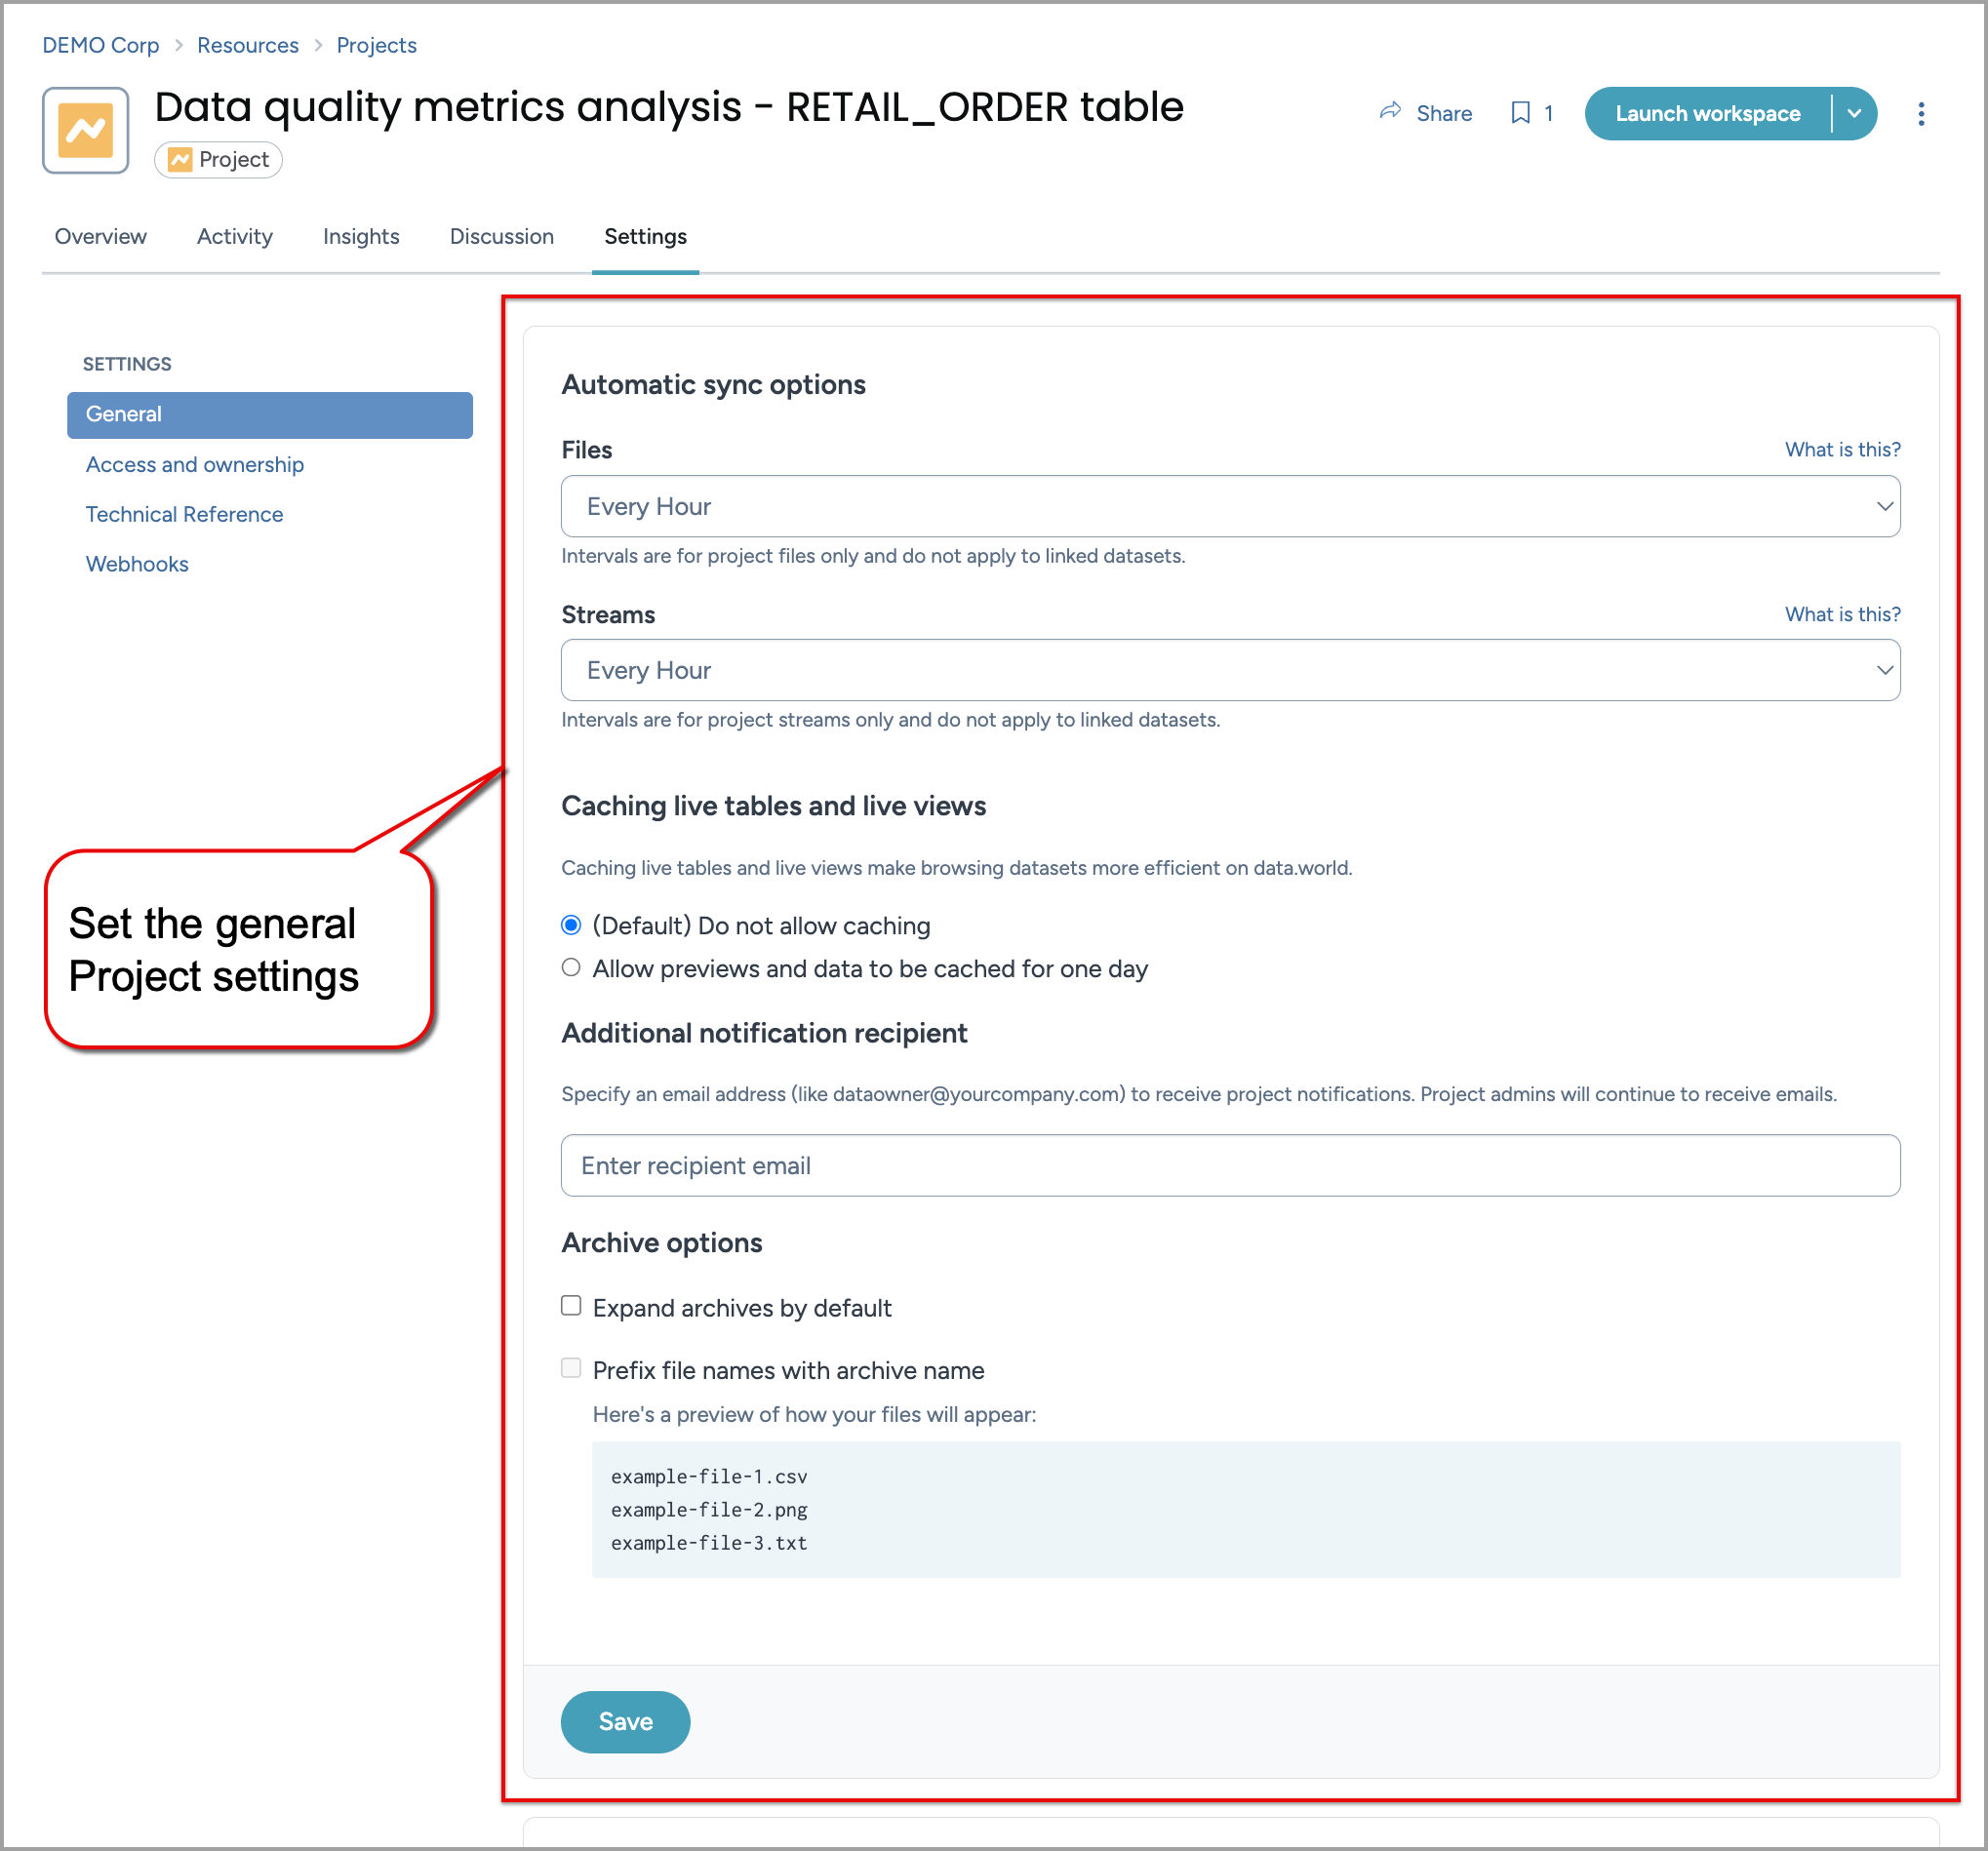
Next, go to the Settings tab and set the following options for the project in the General section and click Save.
Automatic sync options: For details see Configuring sync options for projects.
Caching live tables and live views: Select the Allow previews and data to be cached for one day option to enable caching of live tables and live views to make browsing of data more efficient. By default caching is disabled.
Additional notification recipient: Various notifications for projects are sent to users contributing to projects. If you want an additional email address to get notifications for the activities on a project, provide those email addresses in this field. Only one email address can be provided here.
Archive options: Select the Expand archives by default to automatically expand all files in an archive file (for example, zip files) added to the project. Select the Prefix file name with archive name option to add the name of the archive file to the file names extracted from the archive file. This helps easily identify the source of the file.
For example, when these settings are enabled and a user adds a file latest_orders.zip with two files in it (california_orders.xlsx and austin_orders.xlsx), the system automatically extracts them and add the files as - latest_orders/austin_orders.xlsx and latest_orders/california_orders.xlsx to the project.
Once you are done setting the basics of a project, add files and connect the project to data sources. For information about adding data to your project see Connect data to your project.
Note that as you edit your project, a record is created of the changes being made and versions of projects are created for download.