Running the Manta collector in Cloud
Configuring the cloud collector for Manta
To configure the cloud collector for Manta:
In the Catalog experience, go to the Admin page > Metadata collectors section.
Click the Add a collector button.

On the Choose metadata collector screen, select the correct metadata source. Click Next.
On the Choose where the collector will run screen, in the Cloud section, select data.world. Click Next.

On the Configure a cloud Manta Collector screen, set the following:
On the next screen, set the following properties and click Next.
Table 2.Field name
Description
Required?
Authentication
Select from:
Authentication using a MANTA Token
Authentication using username and password
Yes
Authentication using MANTA Token
MANTA Token URL
URL to obtain a jwt token to authenticate with manta.
Example:
http://localhost:9090/auth/realms/manta/protocol/openid-connect/token.
MANTA ClientId
Client ID name for the oauth connection.
MANTA Client Secret
Client secret used to obtain a jwt authentication token.
Authentication using Username and Password
MANTA Username
MANTA user to use for API authentication
MANTA Password
Password to use for API authentication
MANTA Admin API URL (applies to both types of authentication)
URL of MANTA Admin API, for example: http://host:8181/manta-admin-gui/public/process-manager/v1/
Yes
On the next screen, set the following advanced properties and click Next.
Table 3.Field name
Description
Required?
Perform Manta Analysis Scan
If present, have MANTA perform an analysis scan to refresh the MANTA graph prior to exporting (default is to catalog existing repository contents without a new MANTA scan)
No
MANTA viewer URL
URL of MANTA Viewer UI, for example: http://host/manta-dataflow-server/viewer
No
Manta max parallel scenarios
Maximum number of scenarios to extract from the MANTA graph at once to optimize performance. Specifying this option and passing an integer value will configure the MANTA API to export the specified number of scenarios in the MANTA graph in parallel. The default value is 4; adjusting this up or down can improve performance.
No
MANTA database ID mappings
Mappings of the form [server]/[database name]=[database-id], used to associate a database-id with a database found in the MANTA graph that has the specified server and database names. (You only need provide to this if the database name in the MANTA graph is not sufficiently unique to completely identify the database.)
No
MANTA port mappings
Mappings of the form [server]/[database name]=[port], used to associate a port with a database found in the MANTA graph that has the specified server and database names. (You only need provide to this if the database listens on a port other than the default port for that type of database.)
No
On the next screen, provide the Collector configuration name and an optional Configuration description, and set the run schedule. You can also set the schedule at a later point.
Click Save and View to go the collector details page.
Scheduling collector runs
Important things to note:
Different collectors can be scheduled to run at the same time, but one collector can only run once a day.
It is recommended that you schedule the runs in off-peak hours.
The collector runs in the timezone in which the scheduler is located. For example, if the scheduler sets the collector runs from PST timezone, the collectors will follow the PST timezone.
Runs may start up to one hour after the scheduled time.
Cloud collectors are designed to automatically run against the latest version of the collector supported by the UI.
To schedule collector runs:
On the Configured collectors page, locate the collector you want to run on a schedule.
Click the Edit configurations button.
Go to the screen where you can set the schedule for the collector and set the following:
Enable the Scheduled runs option.
From the Frequency dropdown, select from Daily, Weekly, or Monthly.
For Weekly and Monthly options, select the day when the collector should run.
Select the time for running the collector.
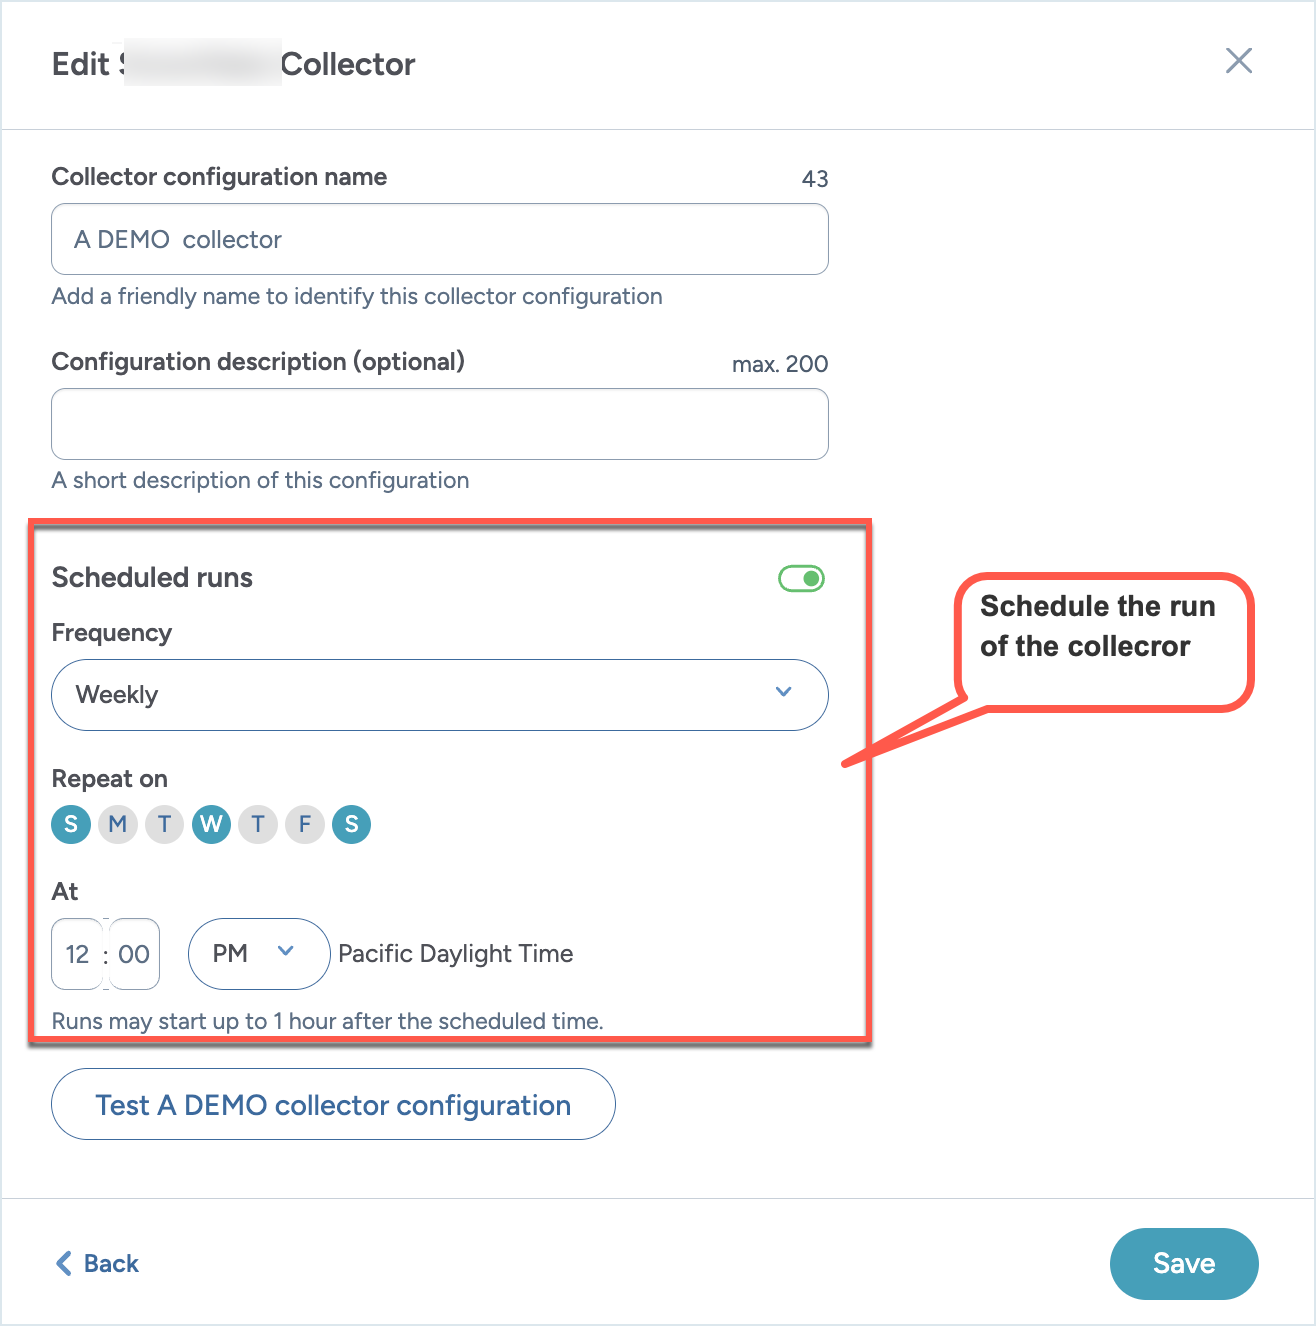
Click Save and view. The schedule and next run date and time are displayed on the collector details page.
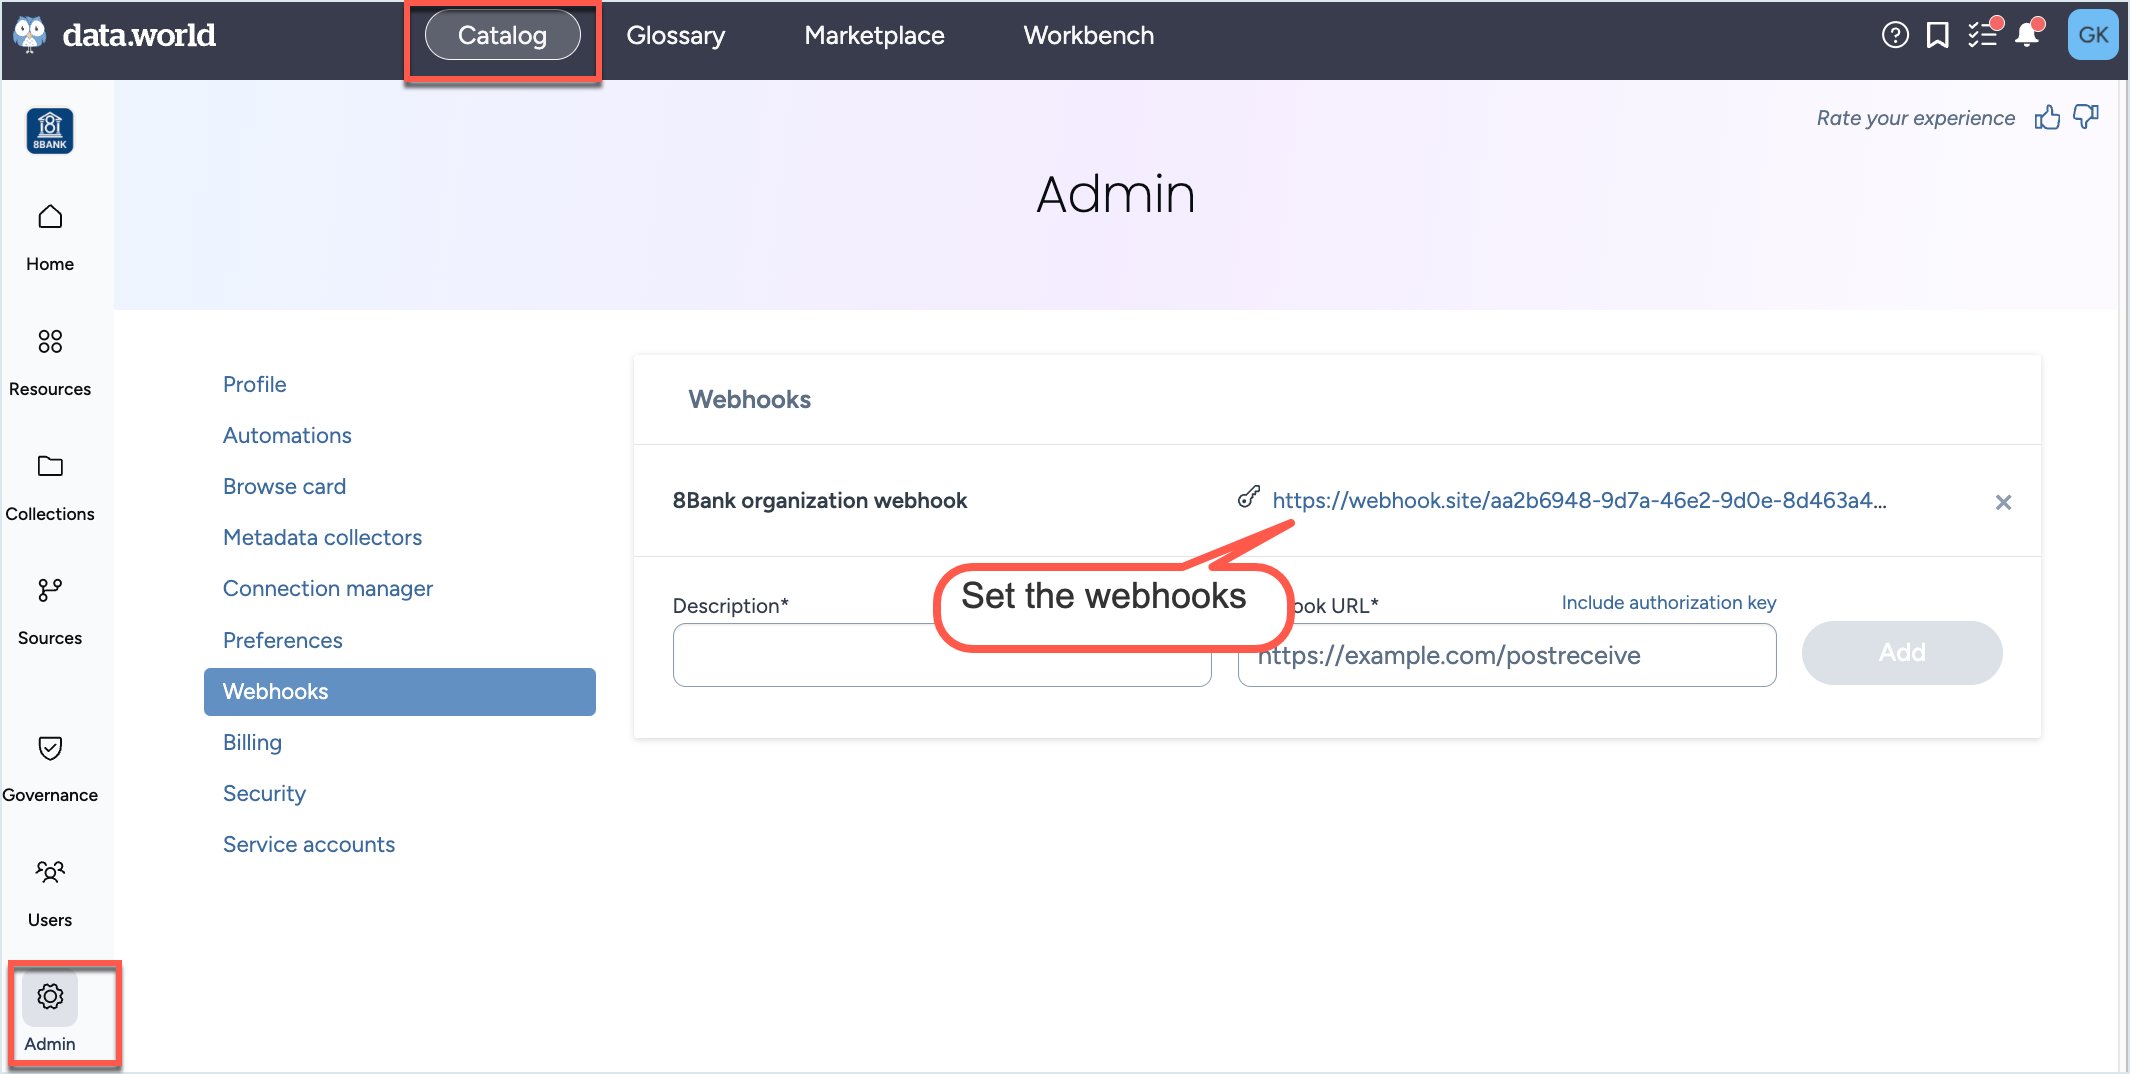
To get notifications about the collector runs, simply setup web hooks at the Organization level from the Catalog experience> Admin page. The Webhooks will automatically start capturing the Status events (Pending, Provisioning, Running, Completed, Error, Cancelled) for the collector runs.
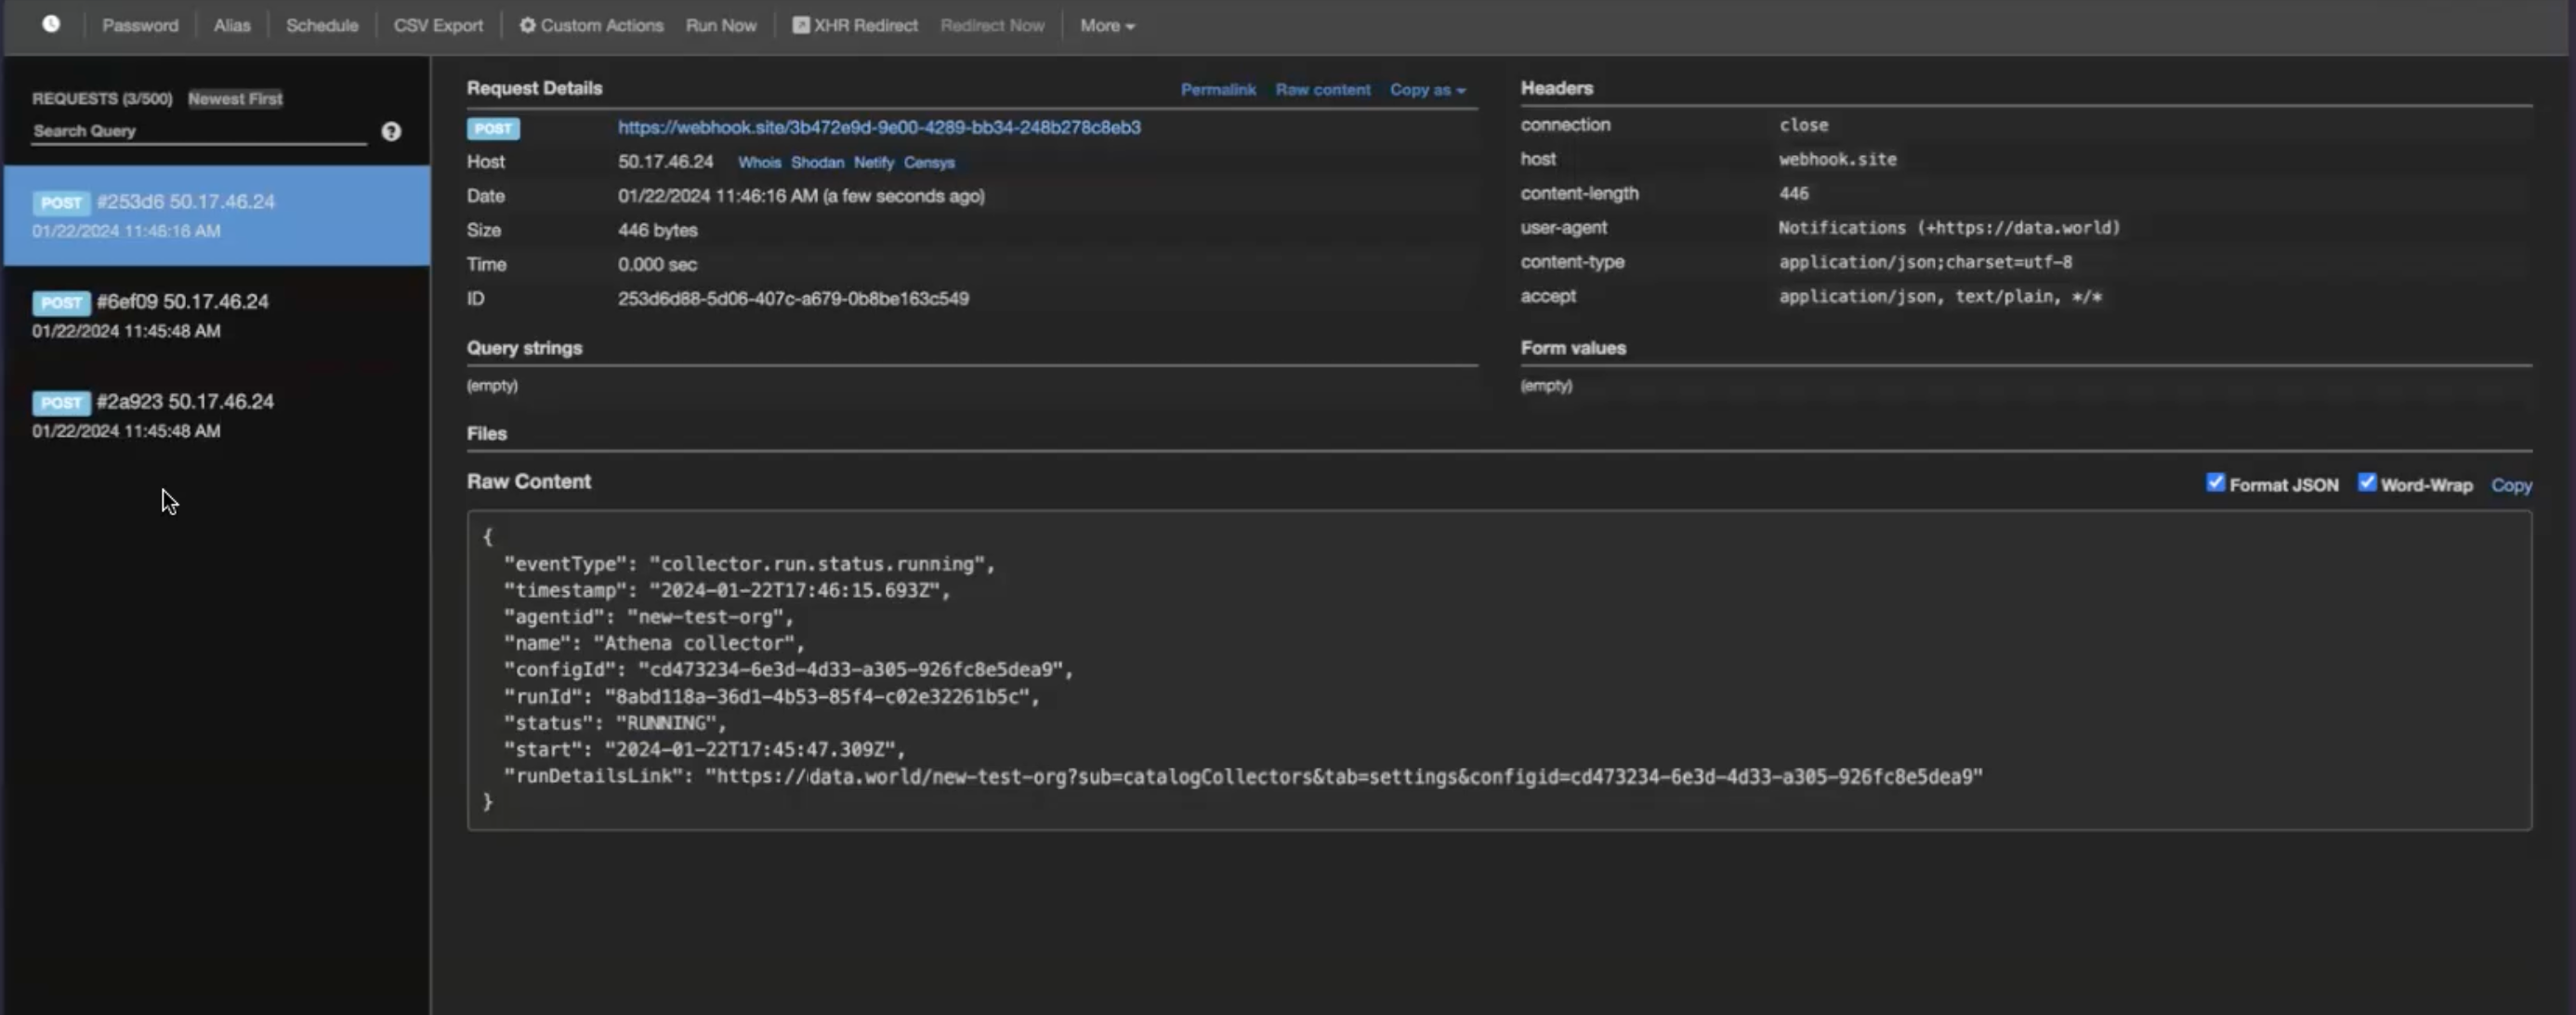
Sample data captured by the webhook.
Running collectors manually
After setting up the collector configuration, it's recommended to manually execute it once to confirm everything is set up correctly. Even for collectors scheduled to run automatically, you can initiate them manually at any time. Cloud collectors are designed to automatically run against the latest version of the collector supported by the UI.
To run the collectors manually:
On the Configured collectors page, locate the collector you want to run.
On the collector configuration details page, click the Run now button. Alternatively, on the Configured collectors page, click the Three dot menu and click Run/Sync now button.
On both pages, the Status field shows the status as Running with information about time elapsed since the run was started.
The collector starts running in the background and you can navigate away from the page at any time. If a collector run errors out, the Status section and the Status field update to an Error state.
After the collector has completed the required pre-configuration steps and starts harvesting the metadata, you get an option to Cancel the harvesting process, if you want. The Status section and the Status field update to Canceled.
After the collector run has completed, the Status section of the collector configuration details page updates to show the successful status. The Last run summary page also updates to show the total number of resource collected and total number of types of resources collected. The Resources collected by type gives granular level information about the number of resources collected for each type of resource.
Browse to the Collection and Dataset specified while running the collector to view the collector output.
To get notifications about the collector runs, simply setup web hooks at the Organization level from the Catalog experience > Admin page. The Webhooks will automatically start capturing the Status events (Pending, Provisioning, Running, Completed, Error, Cancelled) for the collector runs.
Sample data captured by the webhook.
Canceling a collector run
After starting a collector run, you can cancel it if needed.
Important things to note:
Logs generate only after the collector starts up (about 5 minutes). No logs are available if the collector is canceled before this period.
After canceling a run, the collector produces the logs within 5 minutes
To stop a running collector:
Locate the running collector you want to stop. After the collector has completed the required pre-configuration steps and starts harvesting the metadata, you get an option to Cancel it.
On the collector configuration details page, click the Cancel run button. Alternatively, on the Configured collectors page, click the Three dot menu and click Cancel run button.
The collector stops running. On both pages, the Status field shows the status as Canceled with information about time elapsed since the run was canceled.
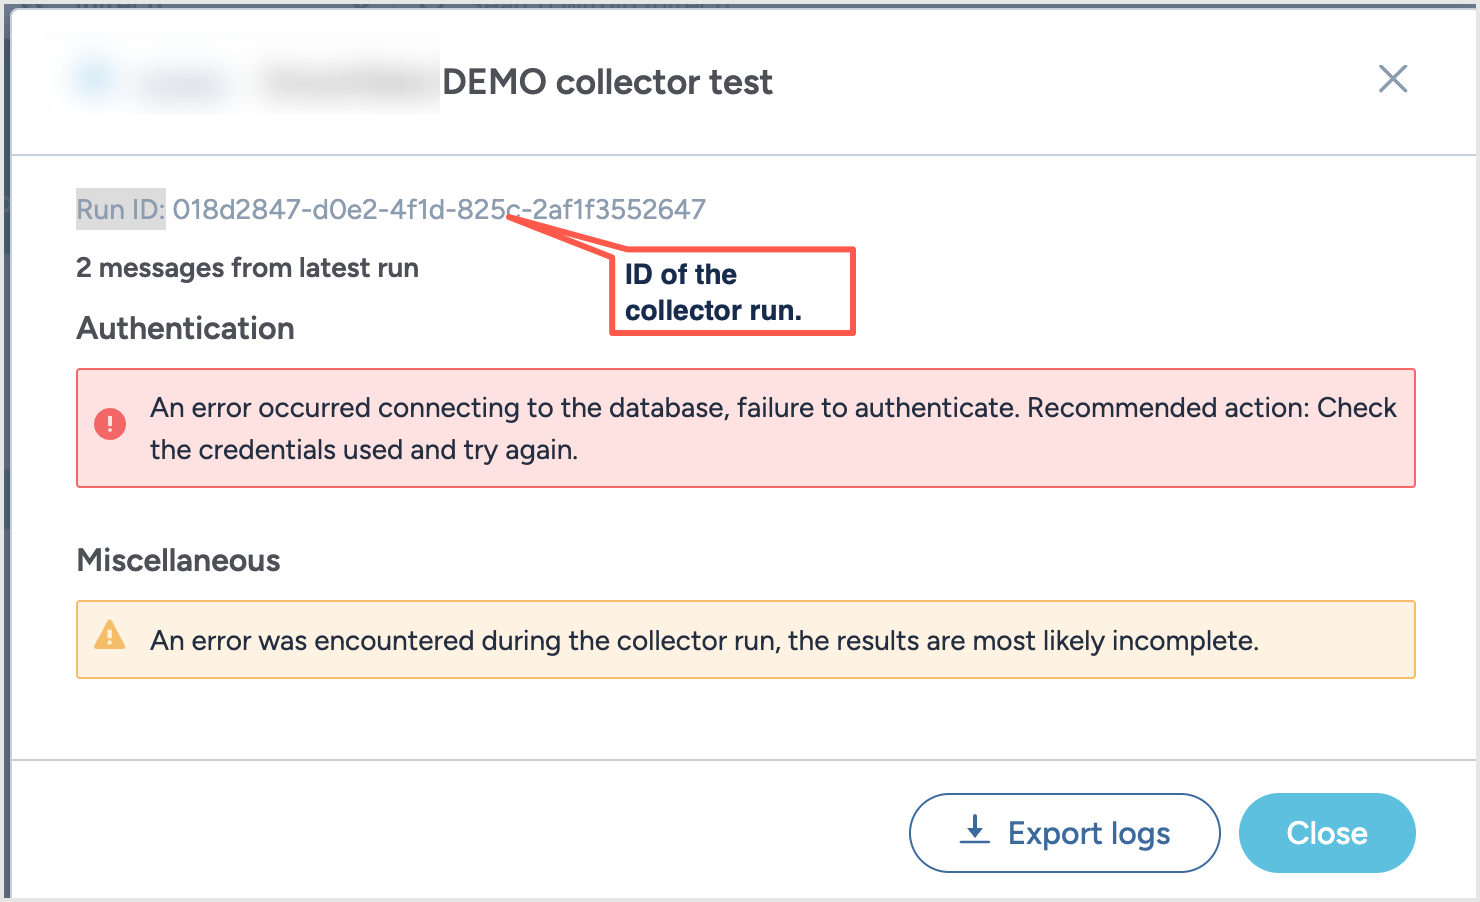
The collector produces a log file in 5 minutes after stop running. To download a logs, click the View debugging info link. A pop-up window opens.
In the pop-up window, click Export logs to download the log file. The window also includes the Run ID of the collector run that failed. While reporting this issue to data.world support team, include this Run ID to help expedite the troubleshooting process.
Copying collector configurations
After you have configured a collector for a source system, you can easily create a copy of the configuration to configure another collector for the same source system but for different parameters.
To copy collector configurations:
On the Configured collectors page, locate the collector configuration you want to copy.
From the Three dot menu, click Duplicate configuration.
In the Edit Collector window, provide a new name for the collector configuration. Optionally, set a schedule. Click Save and view.
You are taken to the copied collector configuration page. Click the Edit Configuration button to adjust the details of the configuration.
Deleting configurations
Important things to note:
Deleting the configuration will not affect the resources that were collected from previous runs.
Any scheduled future runs for the collector are suspended.
To delete a configuration:
On the Configured collectors page, locate the collector configuration you want to delete.
From the Three dot menu, click the Delete configuration button.
Confirm the deletion. The configuration is deleted and removed from the Configured collectors page.