Bulk uploading collections (CTK)
This topic provides a walk-through for creating collections in bulk using the Bulk_collections.xlsx file. This process involves downloading a template, editing it to include collections metadata, and uploading it back to data.world to enrich your catalog.
Why would I do this?
Bulk uploading collections using an Excel template offers the following advantages.
Advantage | Description |
|---|---|
Efficiency | Bulk uploading allows you to add or modify multiple collections at once, saving time compared to entering them individually through a web interface. |
Consistency | A standardized template ensures that all collections follow the same format and structure. This consistency is crucial for maintaining a clean, navigable, and user-friendly catalog. |
Error reduction | Editing in Excel allows for easy review and correction of data before uploading. This can reduce the errors that might occur when manually entering data directly into the catalog. |
Scalability | As your catalog grows, the ability to efficiently manage collections becomes important. Bulk uploading provides a scalable solution that can accommodate your organization expanding needs. |
STEP 1: Download the Bulk_collections.xlsx file
Note
Perform this task in the Catalog Sources organization.
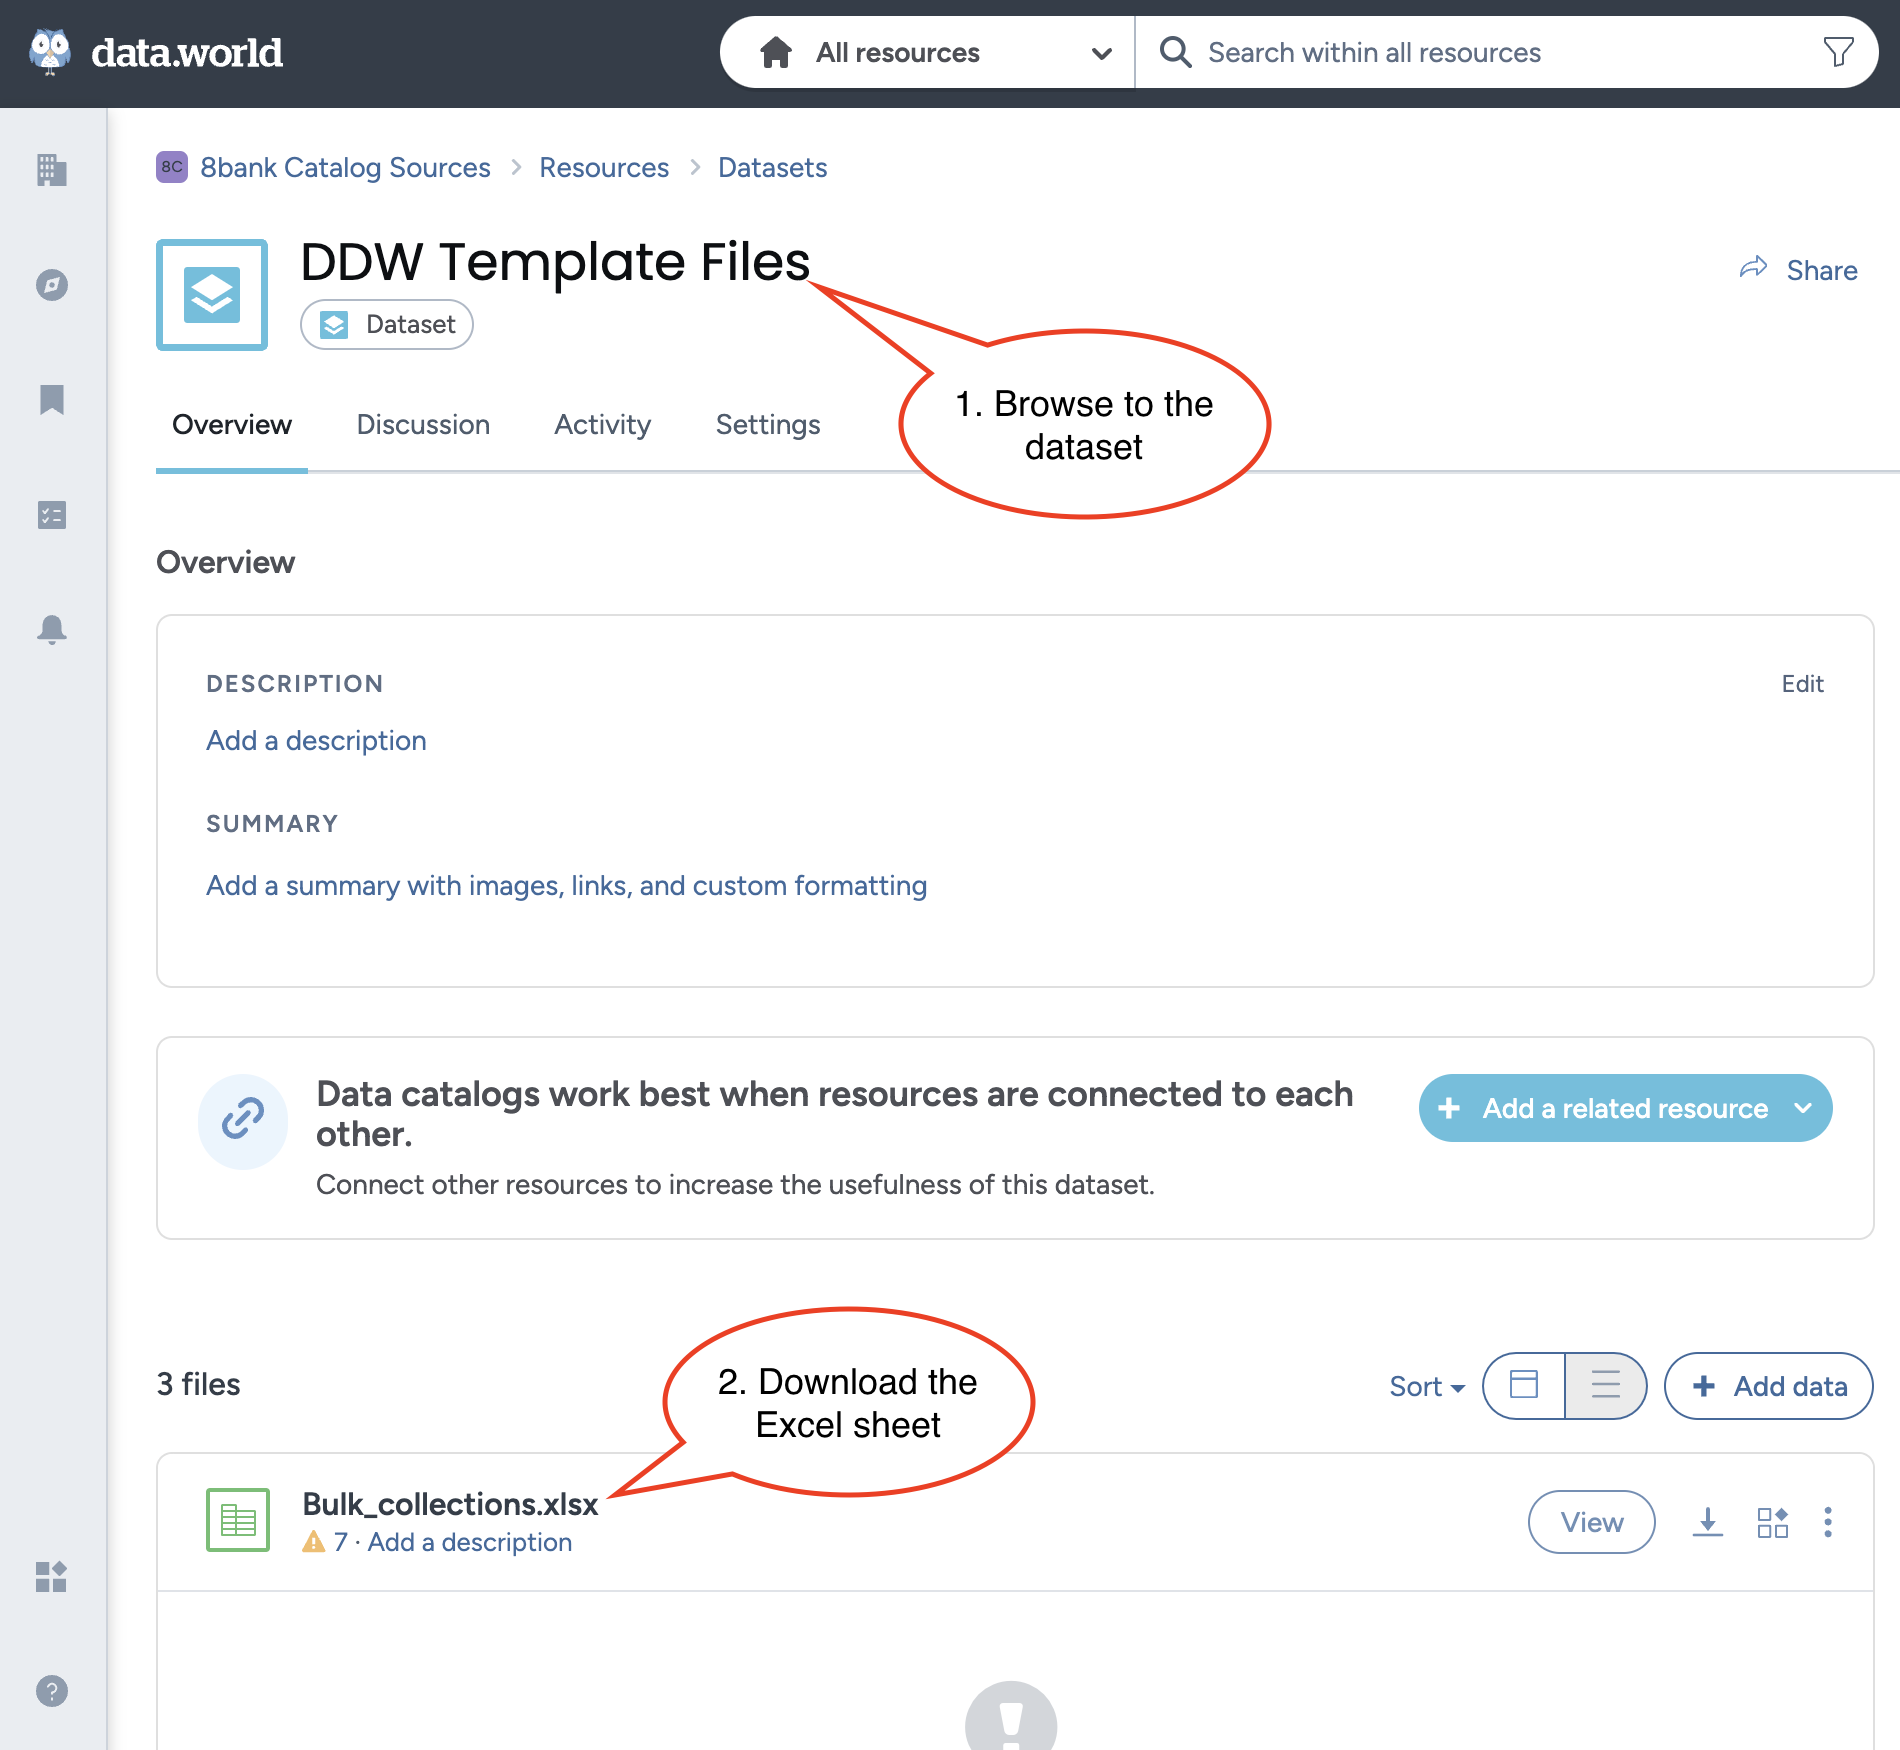
In the Catalog Sources organization, from the Workbench experience, browse to the DDW Template Files (ddw-template-files) dataset.
Download the Bulk_collections.xlsx spreadsheet template file.

STEP 2: Update the spreadsheet file
Open the template using an Excel spreadsheet editor.
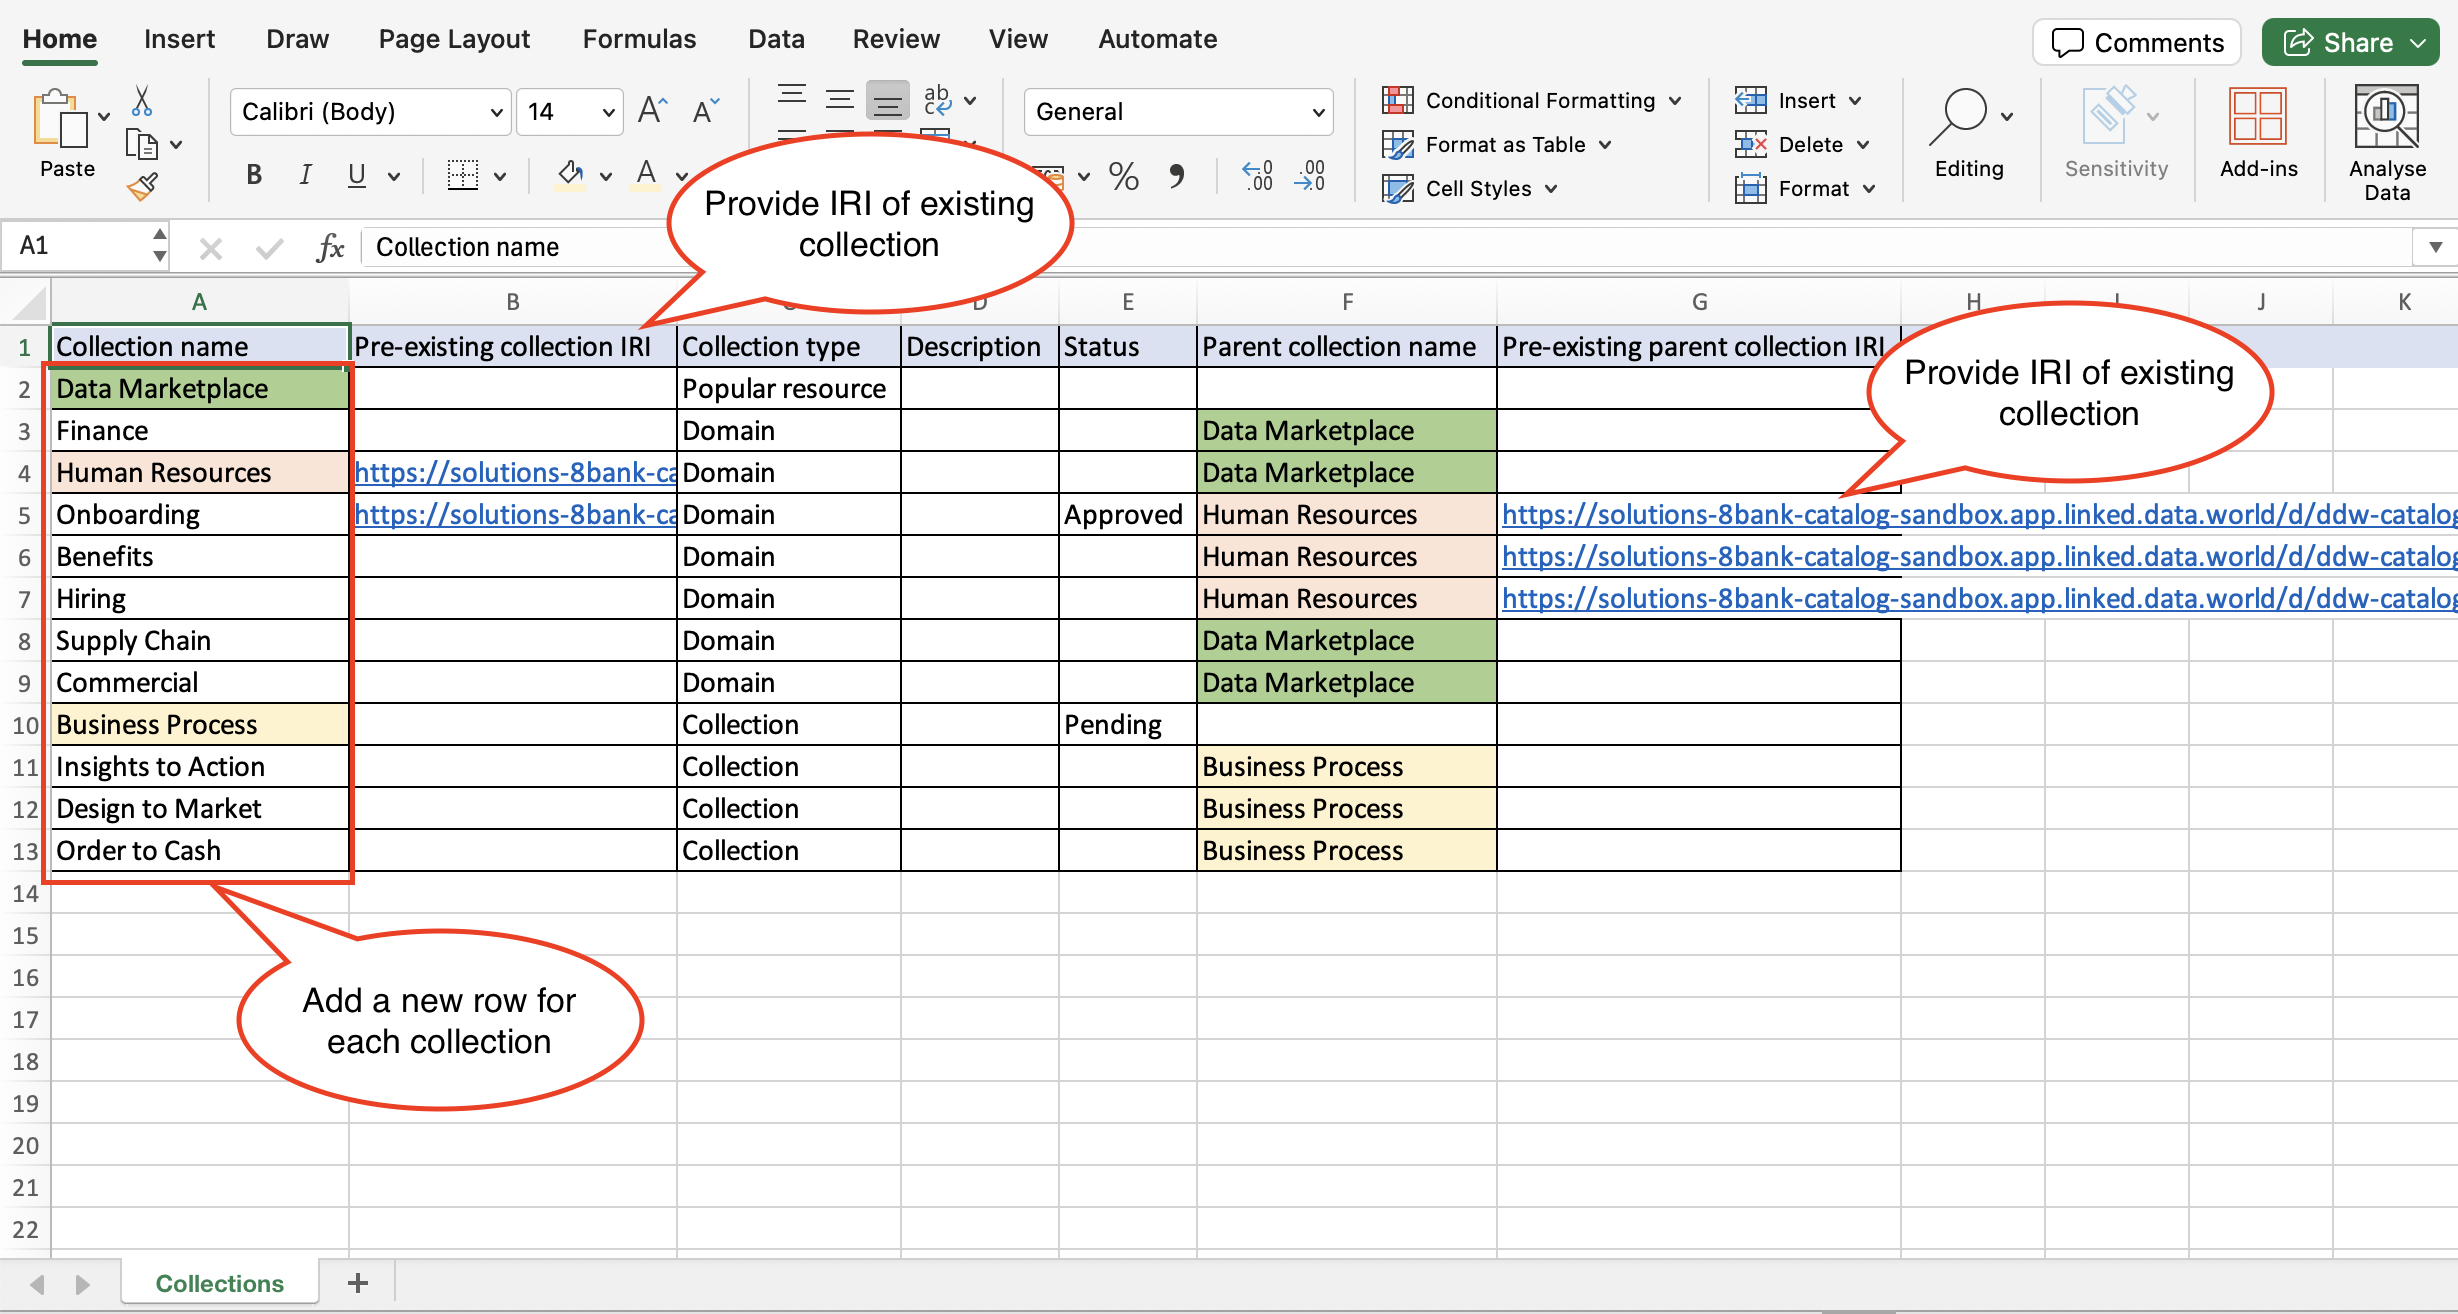
When you open the spreadsheet, you will see several predefined columns, each corresponding to a field for configuring your collections.
Important notes:
You can manage only those metadata fields that are available in the Excel template. Custom metadata fields cannot be added.
Each row in the spreadsheet represents a single collection that will be created or updated in the catalog.
Collection hierarchy established via the UI takes precedence over the hierarchy set in the spreadsheet.
Metadata established via the UI takes precedence over the data entered in the spreadsheet. For example, if metadata has been added via the UI, any updates via Excel will not overwrite it. The UI is the source of truth for metadata.
To add new metadata to an existing collection, reference the collection name and its IRI in the spreadsheet, and ensure the metadata you are adding has not already been defined via the UI.
Make the following changes in the spreadsheet.
Table 2.Field name
Description
Required
Collection name
Name of the collection.
Yes
Pre-existing collection IRI
IRI of an existing collection. This is used to reference an already existing collection in your catalog. Leave blank if this is a new collection.
NOTE: Copy the Resource IRI from the Technical reference tab on the collection Settings page.
Optional
Collection type
Type of the collection. This should match with the configured types in your catalog. For example, Collection, Domain.
Yes
Description
Brief description of the collection.
Optional
Status
Validation status of the collection. This should match with the statuses in your catalog. For example, Approved, Pending.
Optional
Parent collection name
Name of the parent collection.
Optional
Pre-existing parent collection IRI
IRI of an existing collection. This is used to reference an already existing collection in your catalog. Leave blank if this is a new collection.
NOTE: Copy the Resource IRI from the Technical reference tab on the collection Settings page.
Optional

Save your Excel file with any name you prefer.
STEP 3: Upload the spreadsheet file to the dataset
Note
Perform this task in the Catalog Sources organization.
In the Catalog Sources organization, from the Workbench experience, browse to the DDW Collections Organization_Name dataset.
Add the Excel file with your configuration to the dataset.
Important
If you delete the spreadsheet file from the dataset, it will result in the removal of the created collections in your Catalog Sandbox/Main organization. To avoid this, do not delete the file if you wish to keep the created collections.
STEP 4: Sync the spreadsheet file with your catalog
Note
Perform this task in the Catalog Sources organization.
In the Catalog Sources organization, from the Workbench experience, browse to the DDW Catalog Collections project.
Click Launch workspace.
In the Connected datasets section, locate the DDW Organization_Name Catalog dataset for the Catalog Organization_Name organization.
For the Sandbox organization, open the Sandbox Collections Catalog.ttl file in the dataset, and click the Sync now button.
For the Main Organization, open the Main Collections Catalog.ttl file in the dataset, and click the Sync now button.
View the results
Note
Perform this task in the Catalog Sandbox/Main organization.
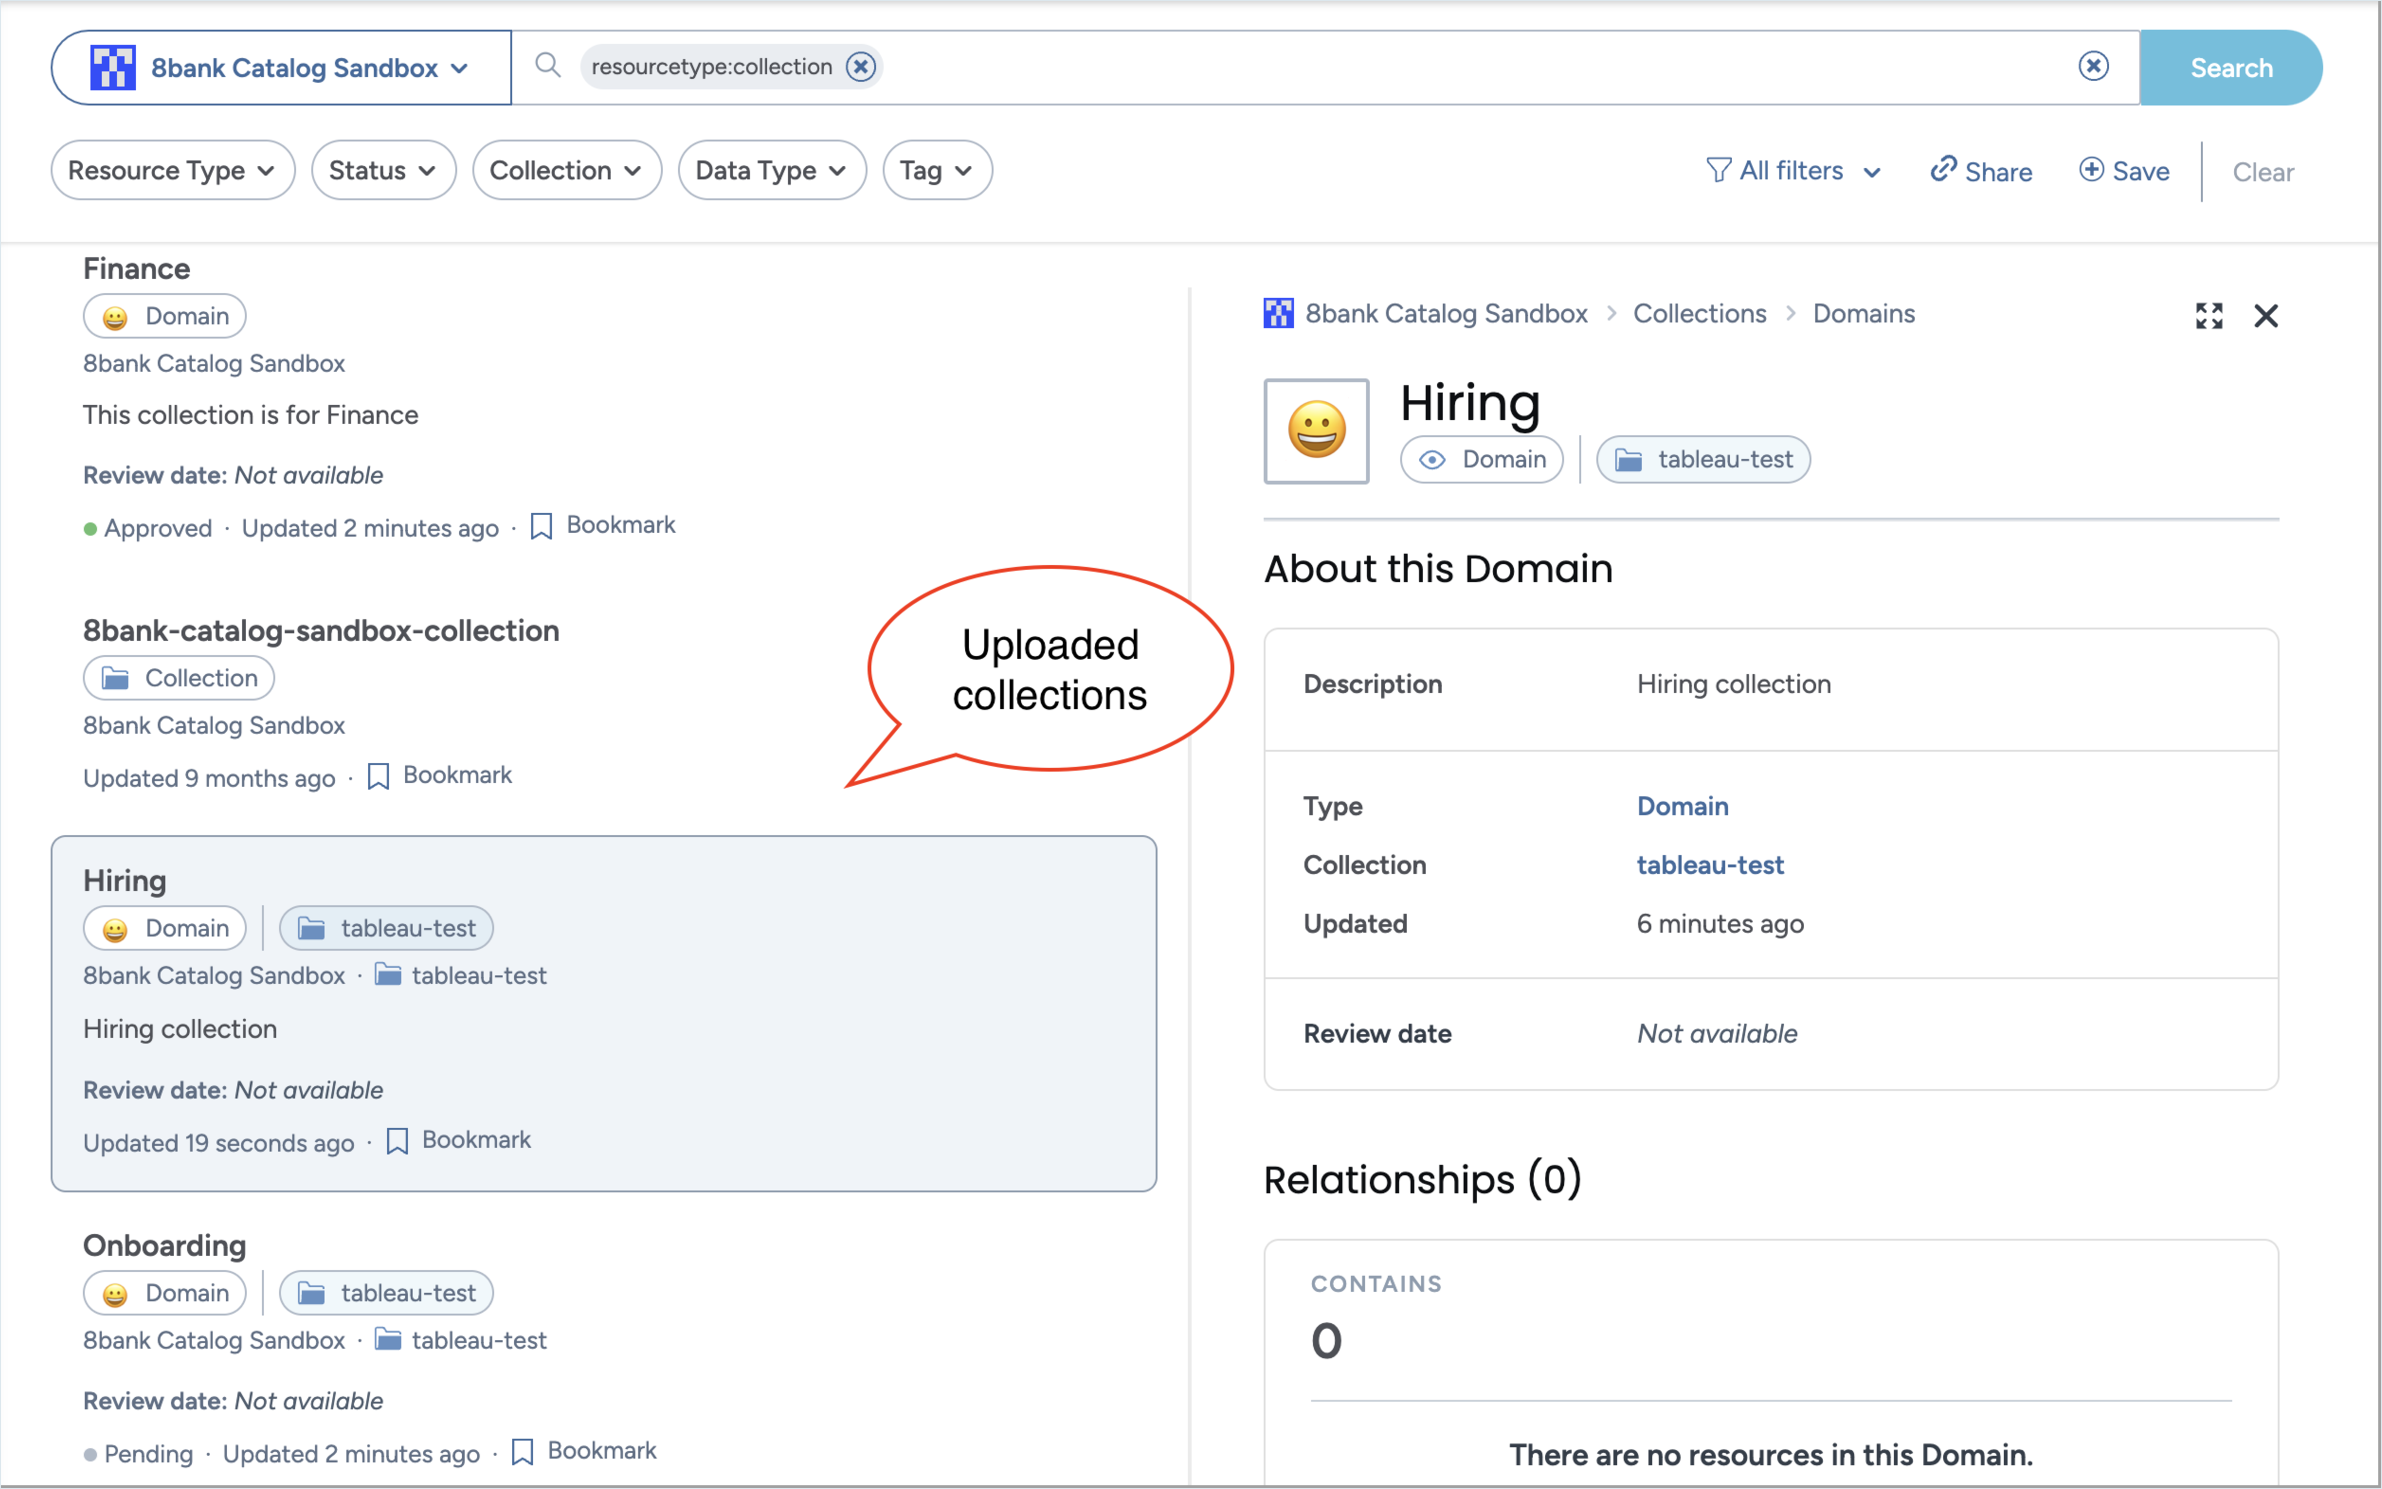
Browse to the collections you just added. They will reflect the structure you defined in the spreadsheet.
The Collections page shows all collections in your organization, including the ones you created or updated during the bulk upload.
Review the updated collections for accuracy. Check their names, descriptions, and hierarchy to ensure they match the data in your spreadsheet.
Remember that the hierarchy and metadata set in the UI take priority over the data from the spreadsheet.
