Uploading Data
If you have found open data elsewhere that meets your needs but isn't on the data.world platform, you can upload it to the platform. You can either upload the data resource directly to your personal account or to your classroom. The process is the same.
Either way, you'll want to click on the +New button located on the header bar right beside your profile picture.
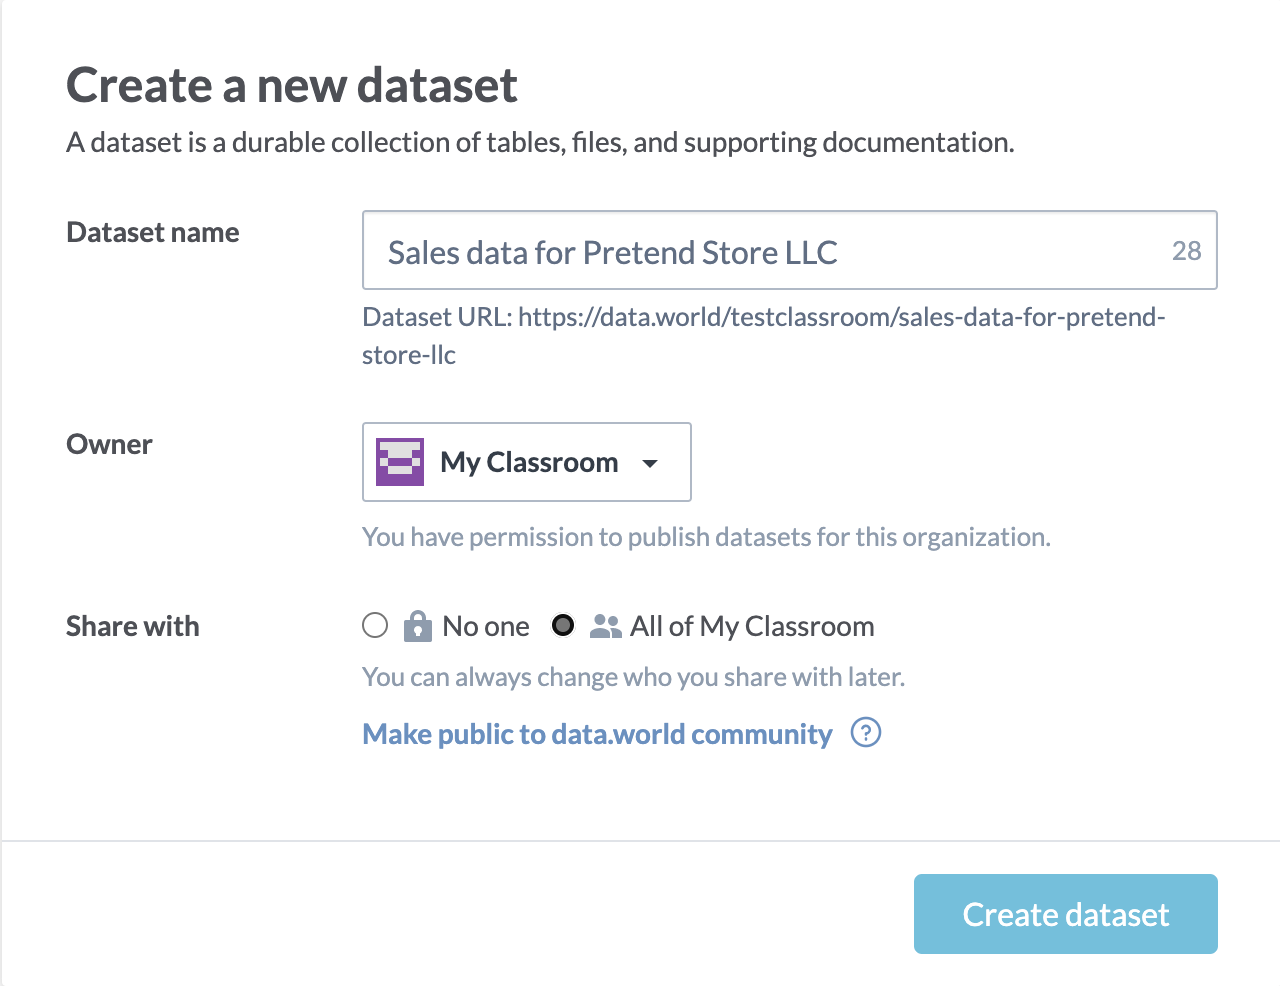
Select "Create new dataset"
Give your dataset a name. This should be "human readable", meaning that it doesn't have to match the file name or omit spaces. Name your dataset something descriptive so that other users know what it's about, particularly if you plan to share this openly on the platform. Keep in mind that datasets can be connected to several projects, so instead of naming a dataset "Assignment 1", it's better practice to name your dataset something based on the contents of the data.
Decide whether you want your classroom organization to be the "owner" of this dataset, or your personal account. If you plan to use the dataset with multiple classes, it may be better to make your personal account the "owner."
Decide who to share the resource with:
If you don't want to share this resource with anyone, select "No One"
If you want to only share this resource with the students in your data.world classroom, make sure the classroom is the owner of the resource and select "All of _____" (where the ____ is the name of your classroom)
If you want to share your dataset with the larger data.world community, click "Make public to data.world community"

Then click "Create dataset". Refer to our Creating Datasets documentation for more information.
Next, add a brief description of this dataset. What data is included? What is the goal? Why would someone want to explore your dataset? This description and the title of your dataset will be visible when people on the open platform find your dataset in their searches.
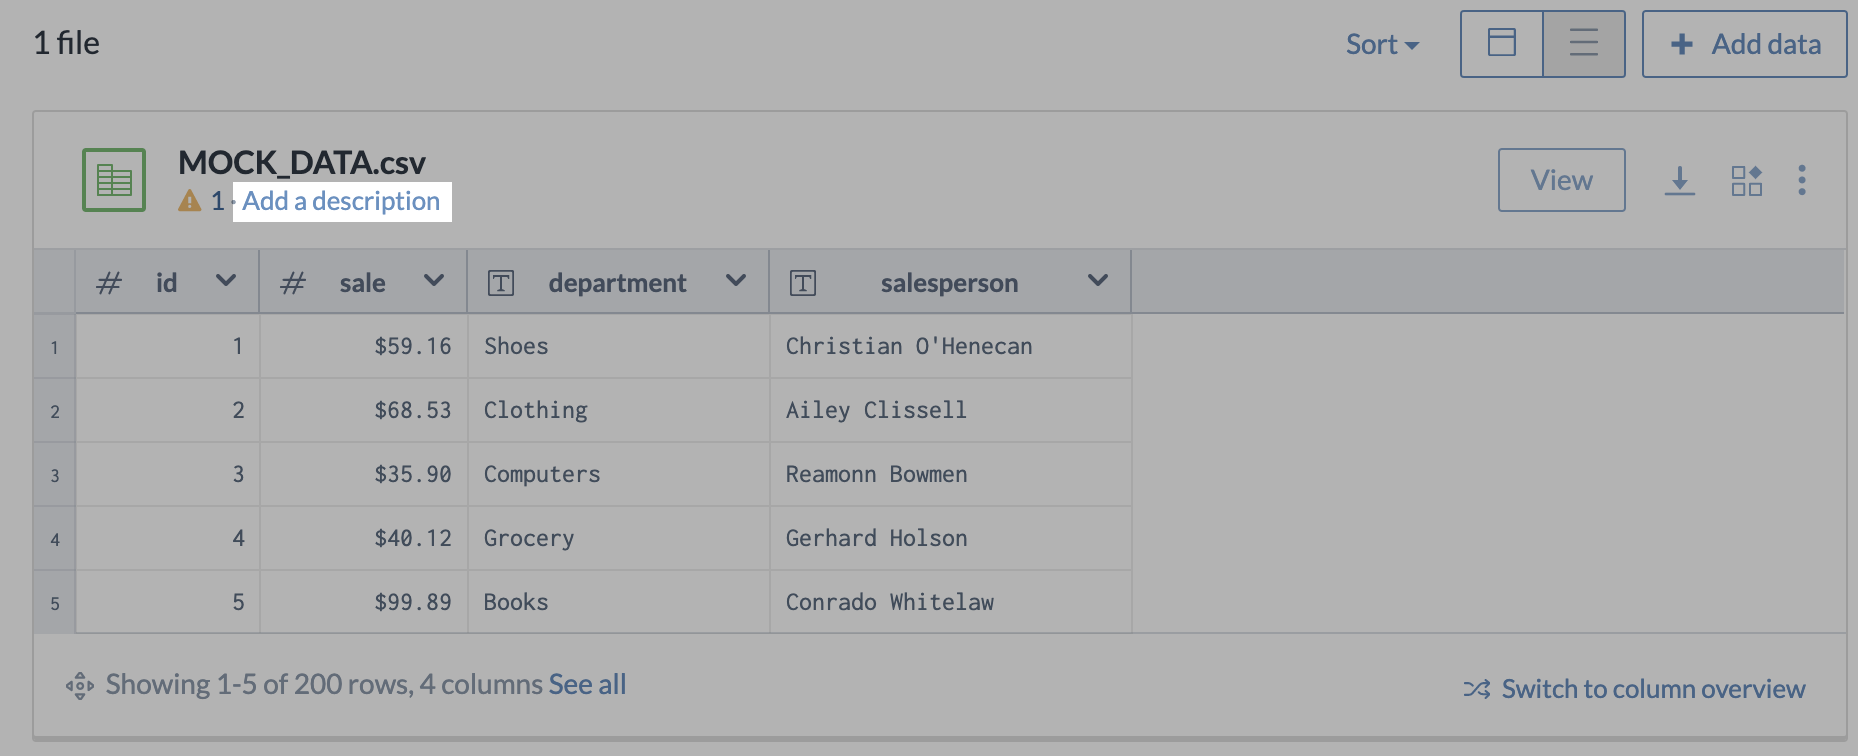
Then, upload your data by clicking the "Add data" button. You will be given several ways to add a data resource, including uploading from your computer, syncing from a URL, or integrating with other tools like Google Drive. When you're done, click "Continue".
Now, add your documentation. Use the "Summary" area to provide any additional information or materials about where the data came from, how it was collected, any caveats involved etc. The dataset Summary area can be edited using Markdown syntax or our Simple Text Editor. Refer to our Document your data documentation for more information on data dictionaries, tagging, setting license types and more.
For each file that you've uploaded to a single dataset, you can select "Add description" to add a brief description to each file. You can also add labels to indicate whether the data you've uploaded is "raw" or "clean".

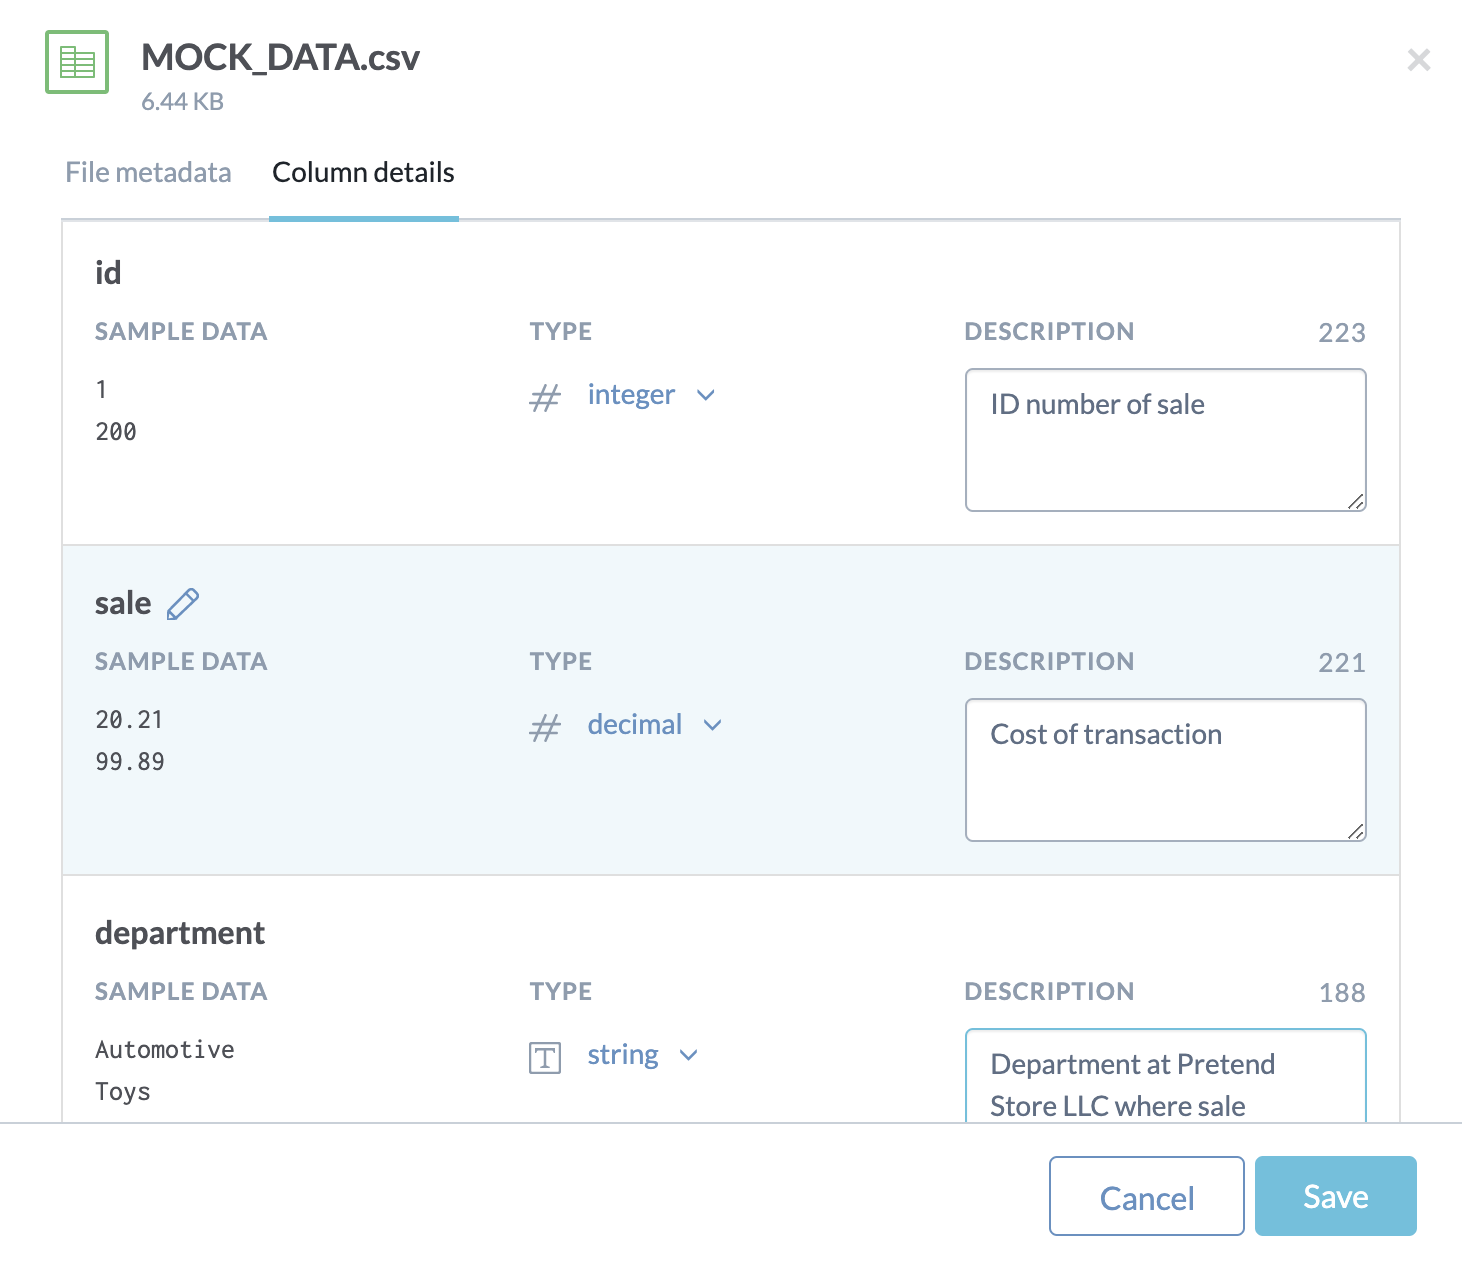
If your file is tabular (e.g., a spreadsheet), you can provide information about how to interpret each column of data in the data dictionary. You can access the data dictionary in the "Add a description" menu, under the "Column details" tab.

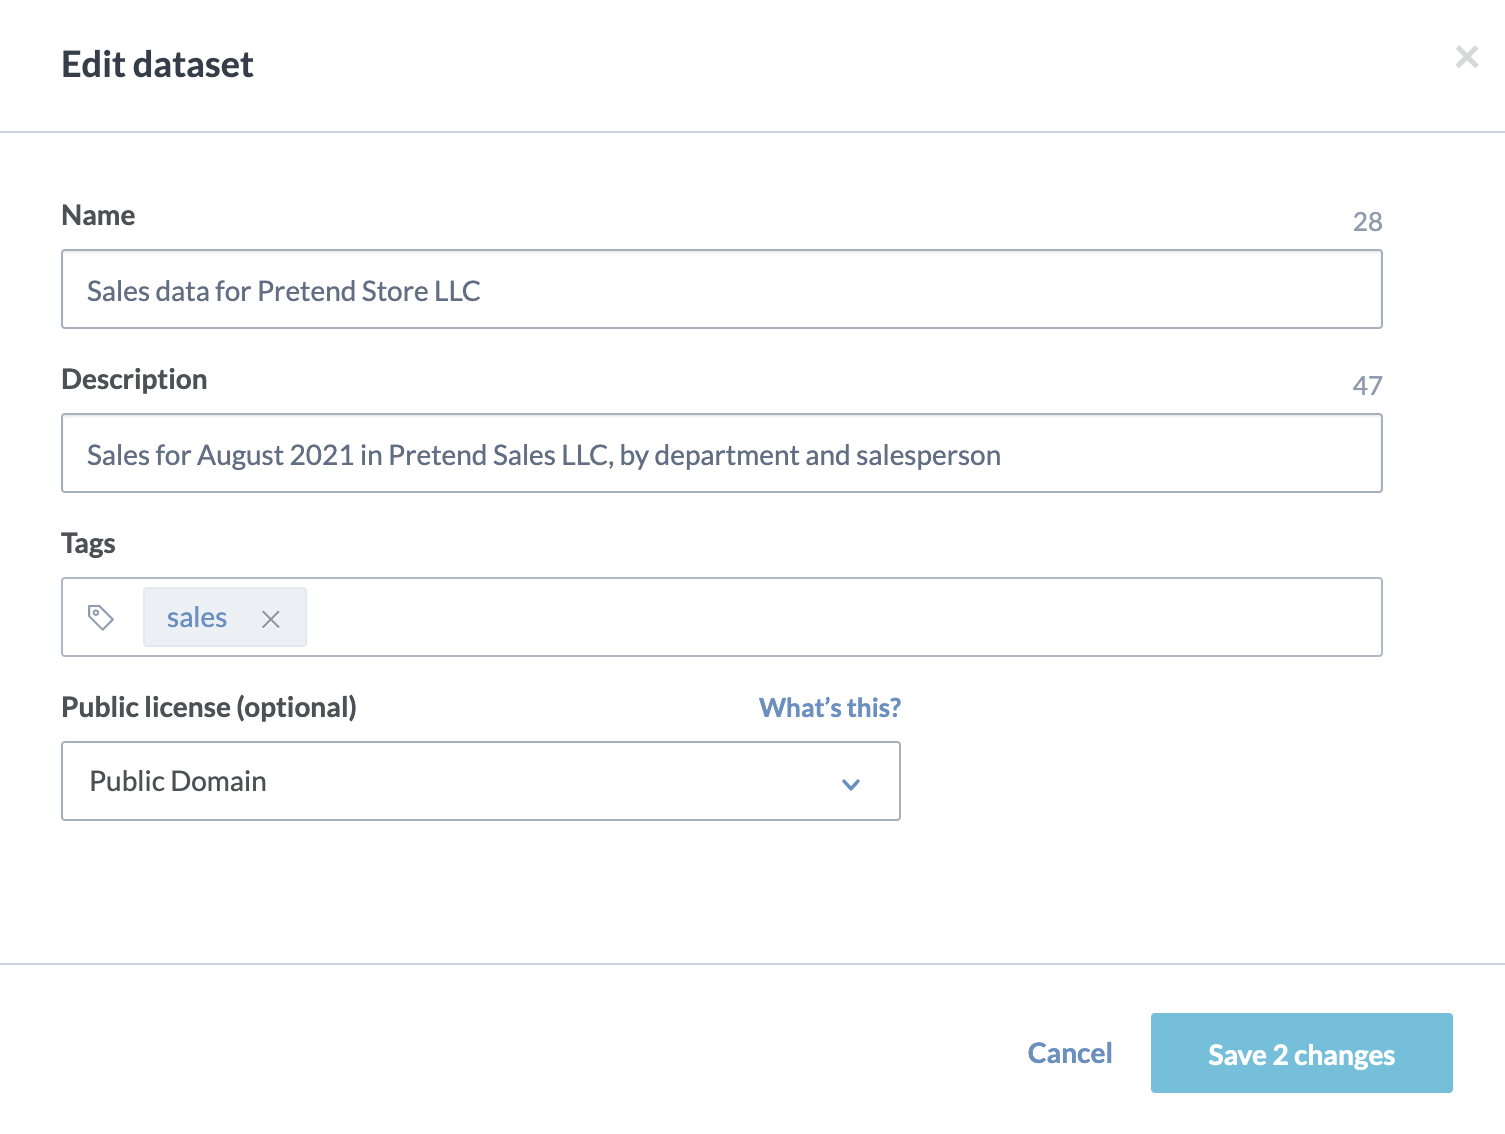
If your dataset is open to the public, you'll want to make sure that you add both Tags and a License. You can do that by clicking "Edit" next to "About this dataset". Tags make your dataset easier to find when users are searching for it, and licenses let other users know what they are allowed to do with your dataset. Refer to the "Setting a license type" and "Tagging" sections of our Document your data documentation for more information.
