Connect to Tableau for Windows using Postgres-Proxy
Note
This page walks you through the Postgres Proxy setup for Tableau for Windows. For Tableau for Mac, refer to Connect to Tableau using Postgres Proxy.
Create an ODBC data source
Before you connect Tableau Desktop for Windows to data.world with Postgres Proxy, you will first need to create an OBDC Data source.
To create the data source:
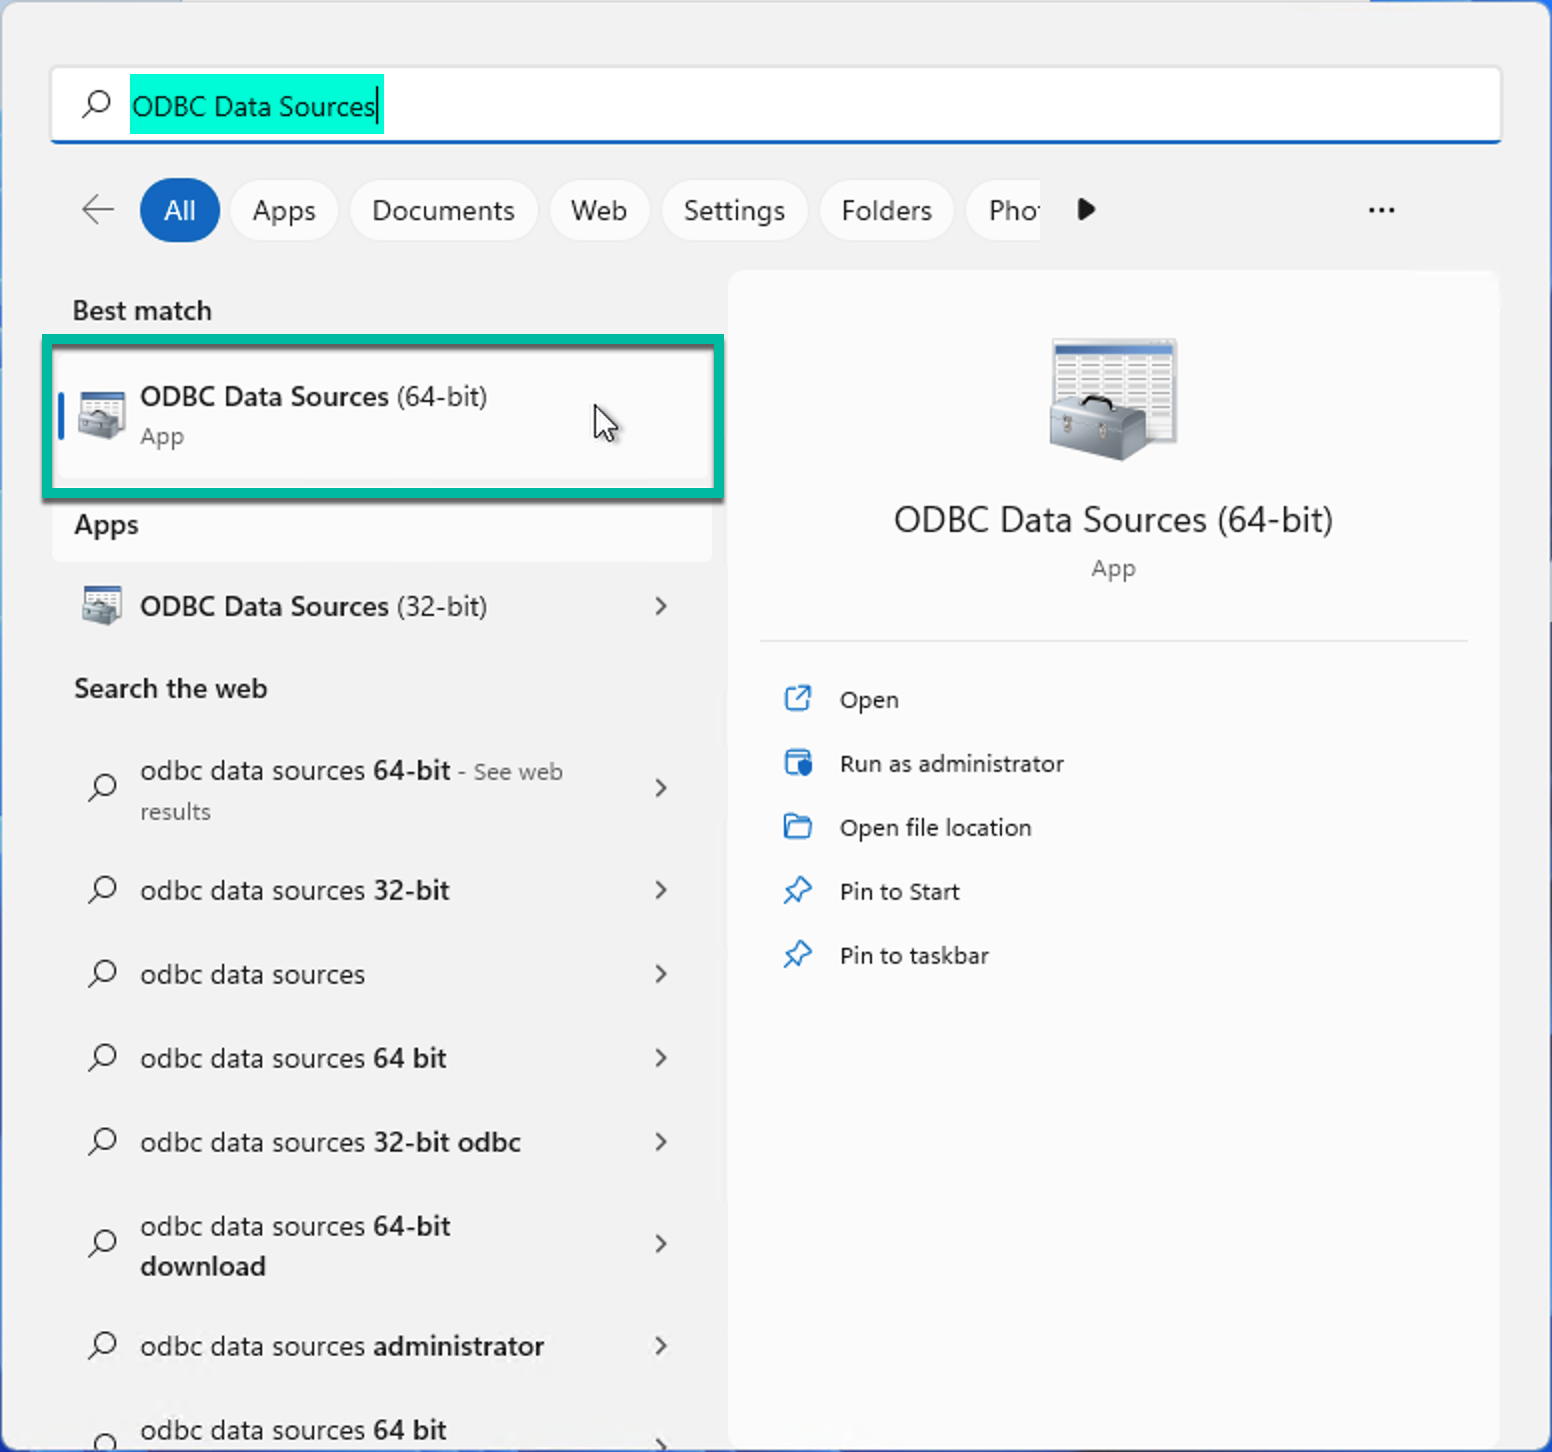
In your Windows search bar, search for ODBC Data Sources and select ODBC Data Sources (64-bit). The ODBC Data Source Administrator window opens.
In the ODBC Data Source Administrator window, go to the User DSN tab.
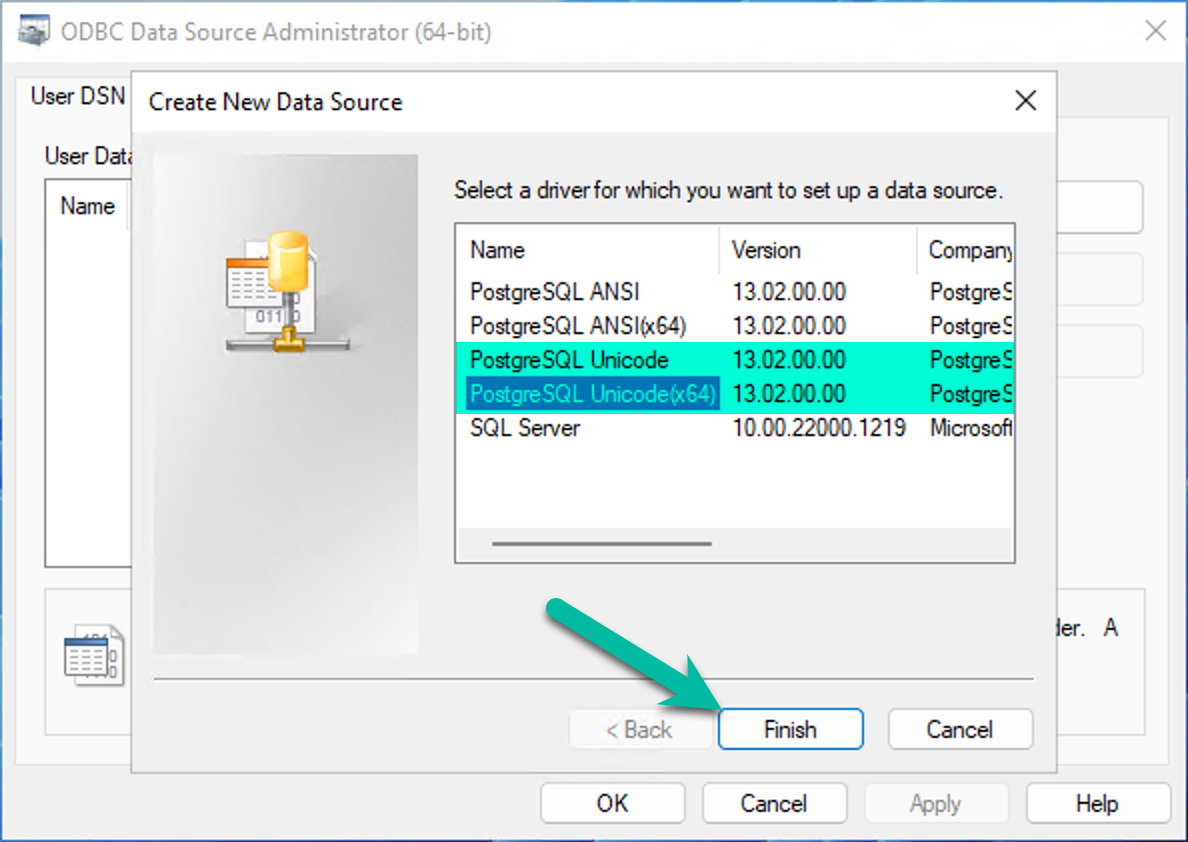
On the User DSN tab, click Add. The Create New Data Source window opens.

In the Create New Data Source window, select a PostgreSQL ODBC drive option. We recommend to select a Unicode option to prevent issues with international characters.
Click Finish. The PostgreSQL ODBC Driver (psqlODBC) Setup window opens.
In the ODBC Driver Setup window, set the following:
Table 1.Field
Required
Details
Data Source
Yes
Enter a descriptive name for the data source.
Database
Yes
Specify the data.world owner and dataset in the format owner/dataset. The owner can be an organization or an individual. You can find this value in the dataset URL.
Server
Yes
Enter the data.world server address to establish connection with.
Multi-tenant users: postgres.data.world.
Private Instance users: postgres.data.world.
Single-tenant or VPC users: postgres.{organization-site}.data.world.
Replace {organization-site} with the subdomain value of your data.world URL, <https://{organization-site}.data.world>.
User Name
Yes
Enter the data.world username that has access to the dataset. This is either your personal account or a service account.
SSL Mode
Yes
Set the SSL connection type to Allow.
Port
Yes
Use port 5432. This is the port used in the connection to the host server.
Description
No
(Optional) Provide a description of the ODBC data source.
Password
No
Leave this field blank.
Once you have completed all fields, click Datasource. The Advanced Options window opens.

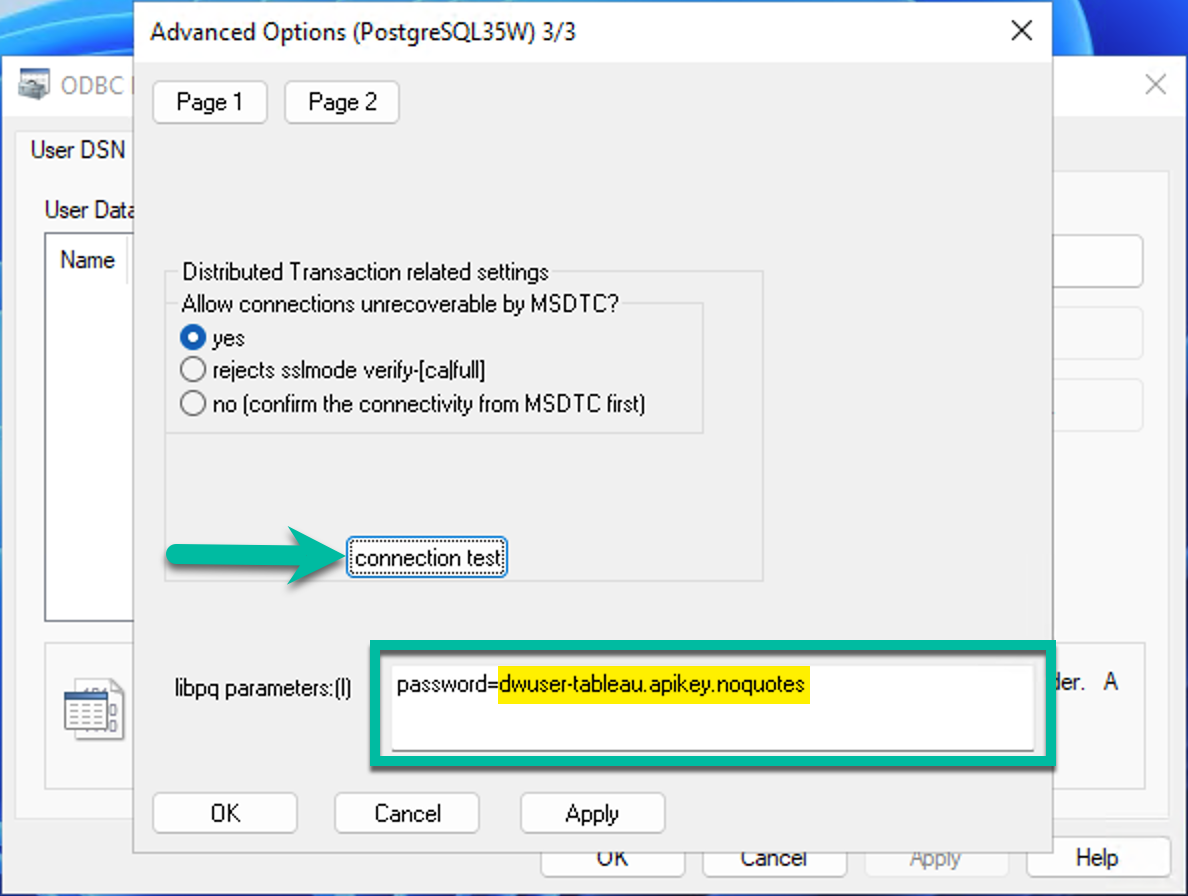
In the Advanced Options window, click Page 3.
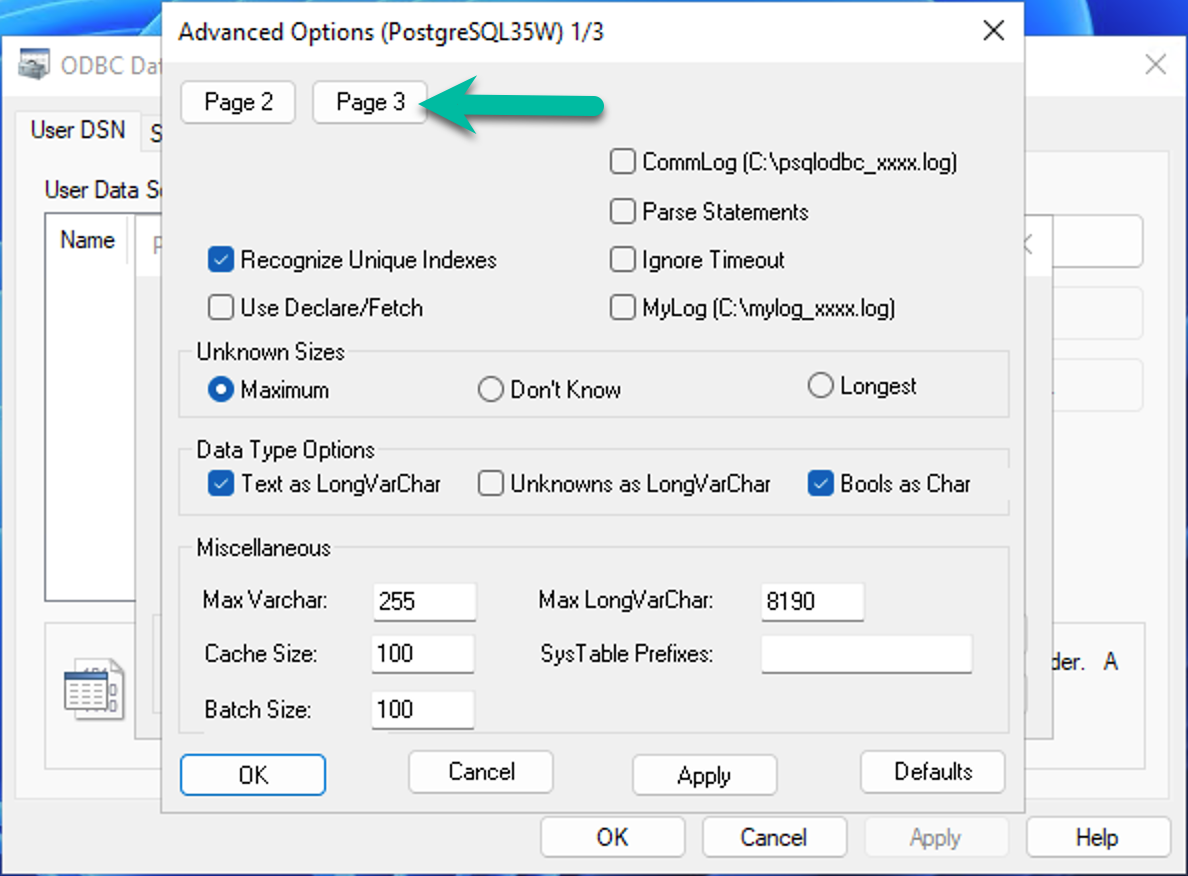
In the libpq parameters field, provide the API token of your user account as password=<api-token>. For example, password=dwuser-tableau.apikey.noquotes.
Click Connection test.
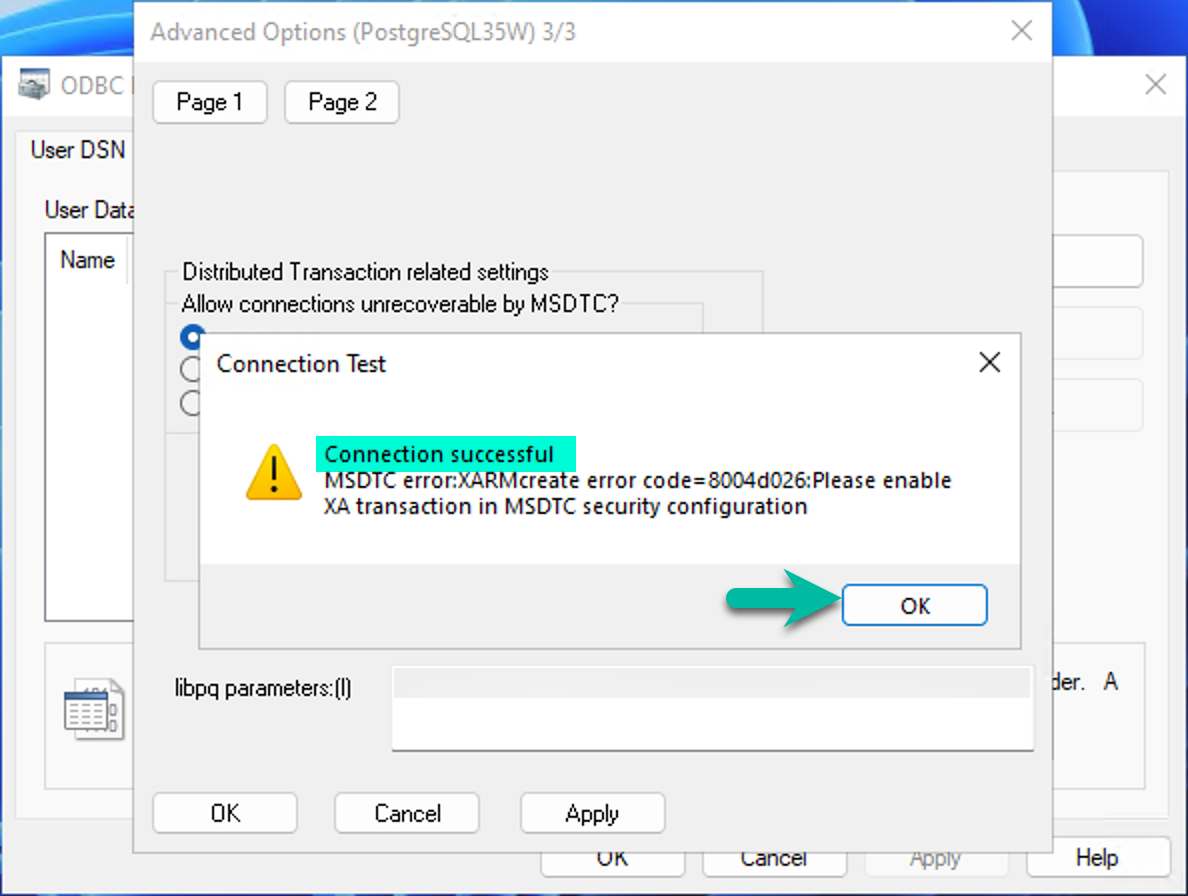
In the Connection test message, click OK. If an MSDTC error appears, you can ignore it, as it will not affect connectivity.
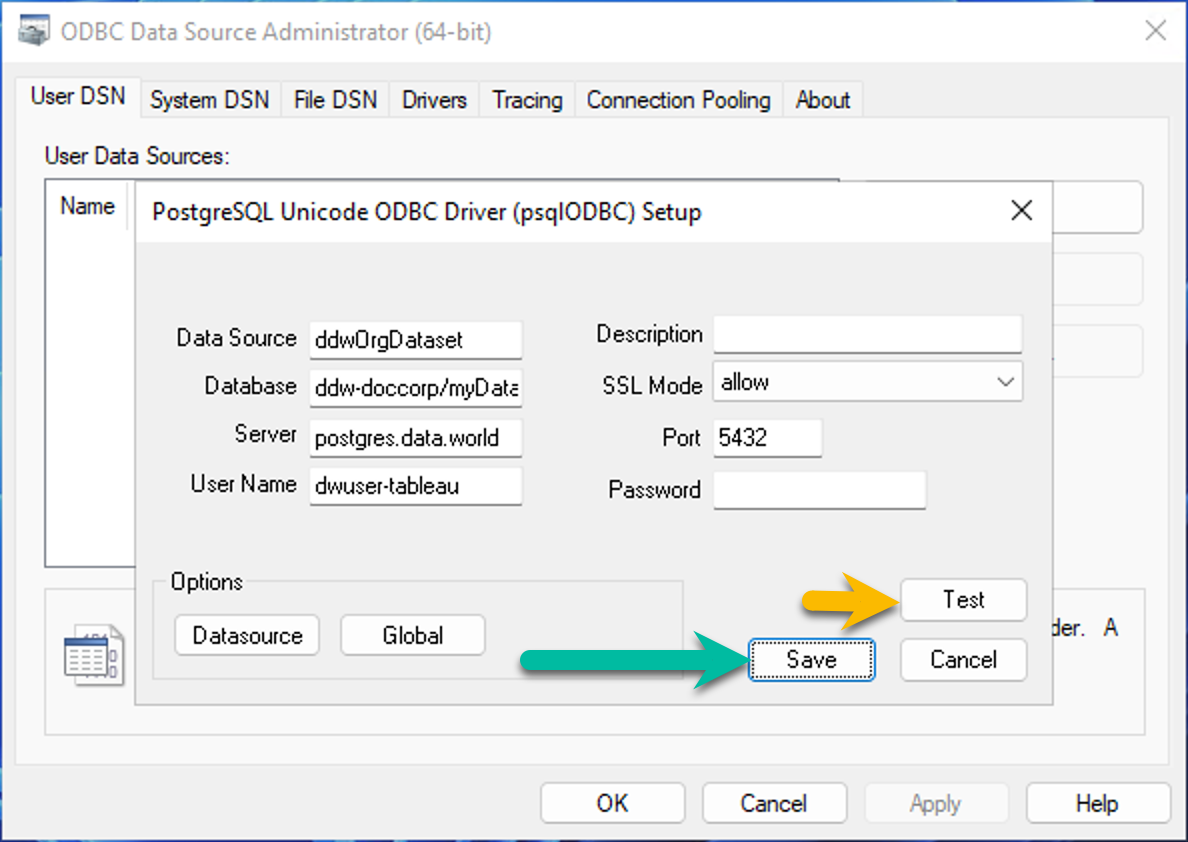
Click OK to close the Advanced Options window.
Return to the PostgreSQL ODBC Driver Setup window and click Save. If you need to change any values, update them now and click Test to verify connectivity.
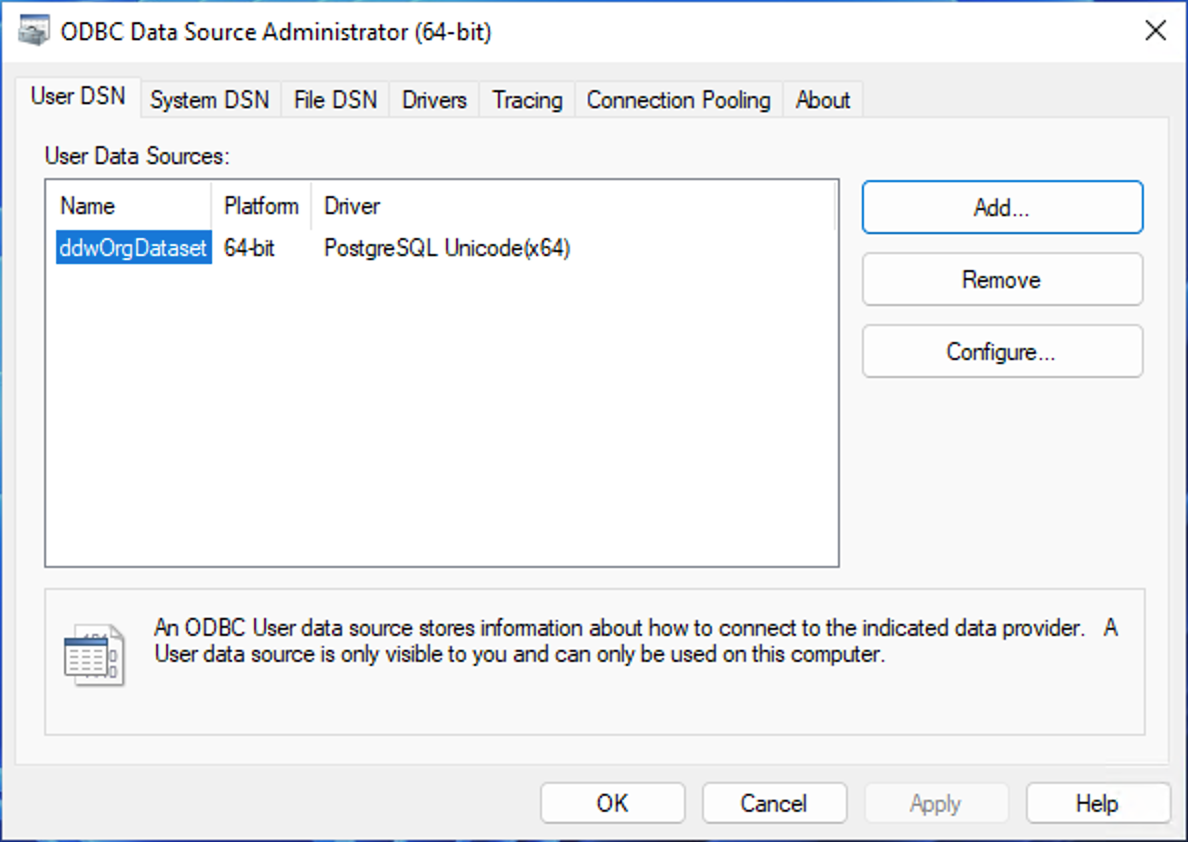
The newly created ODBC Data Source should now appear in the User DSN tab.
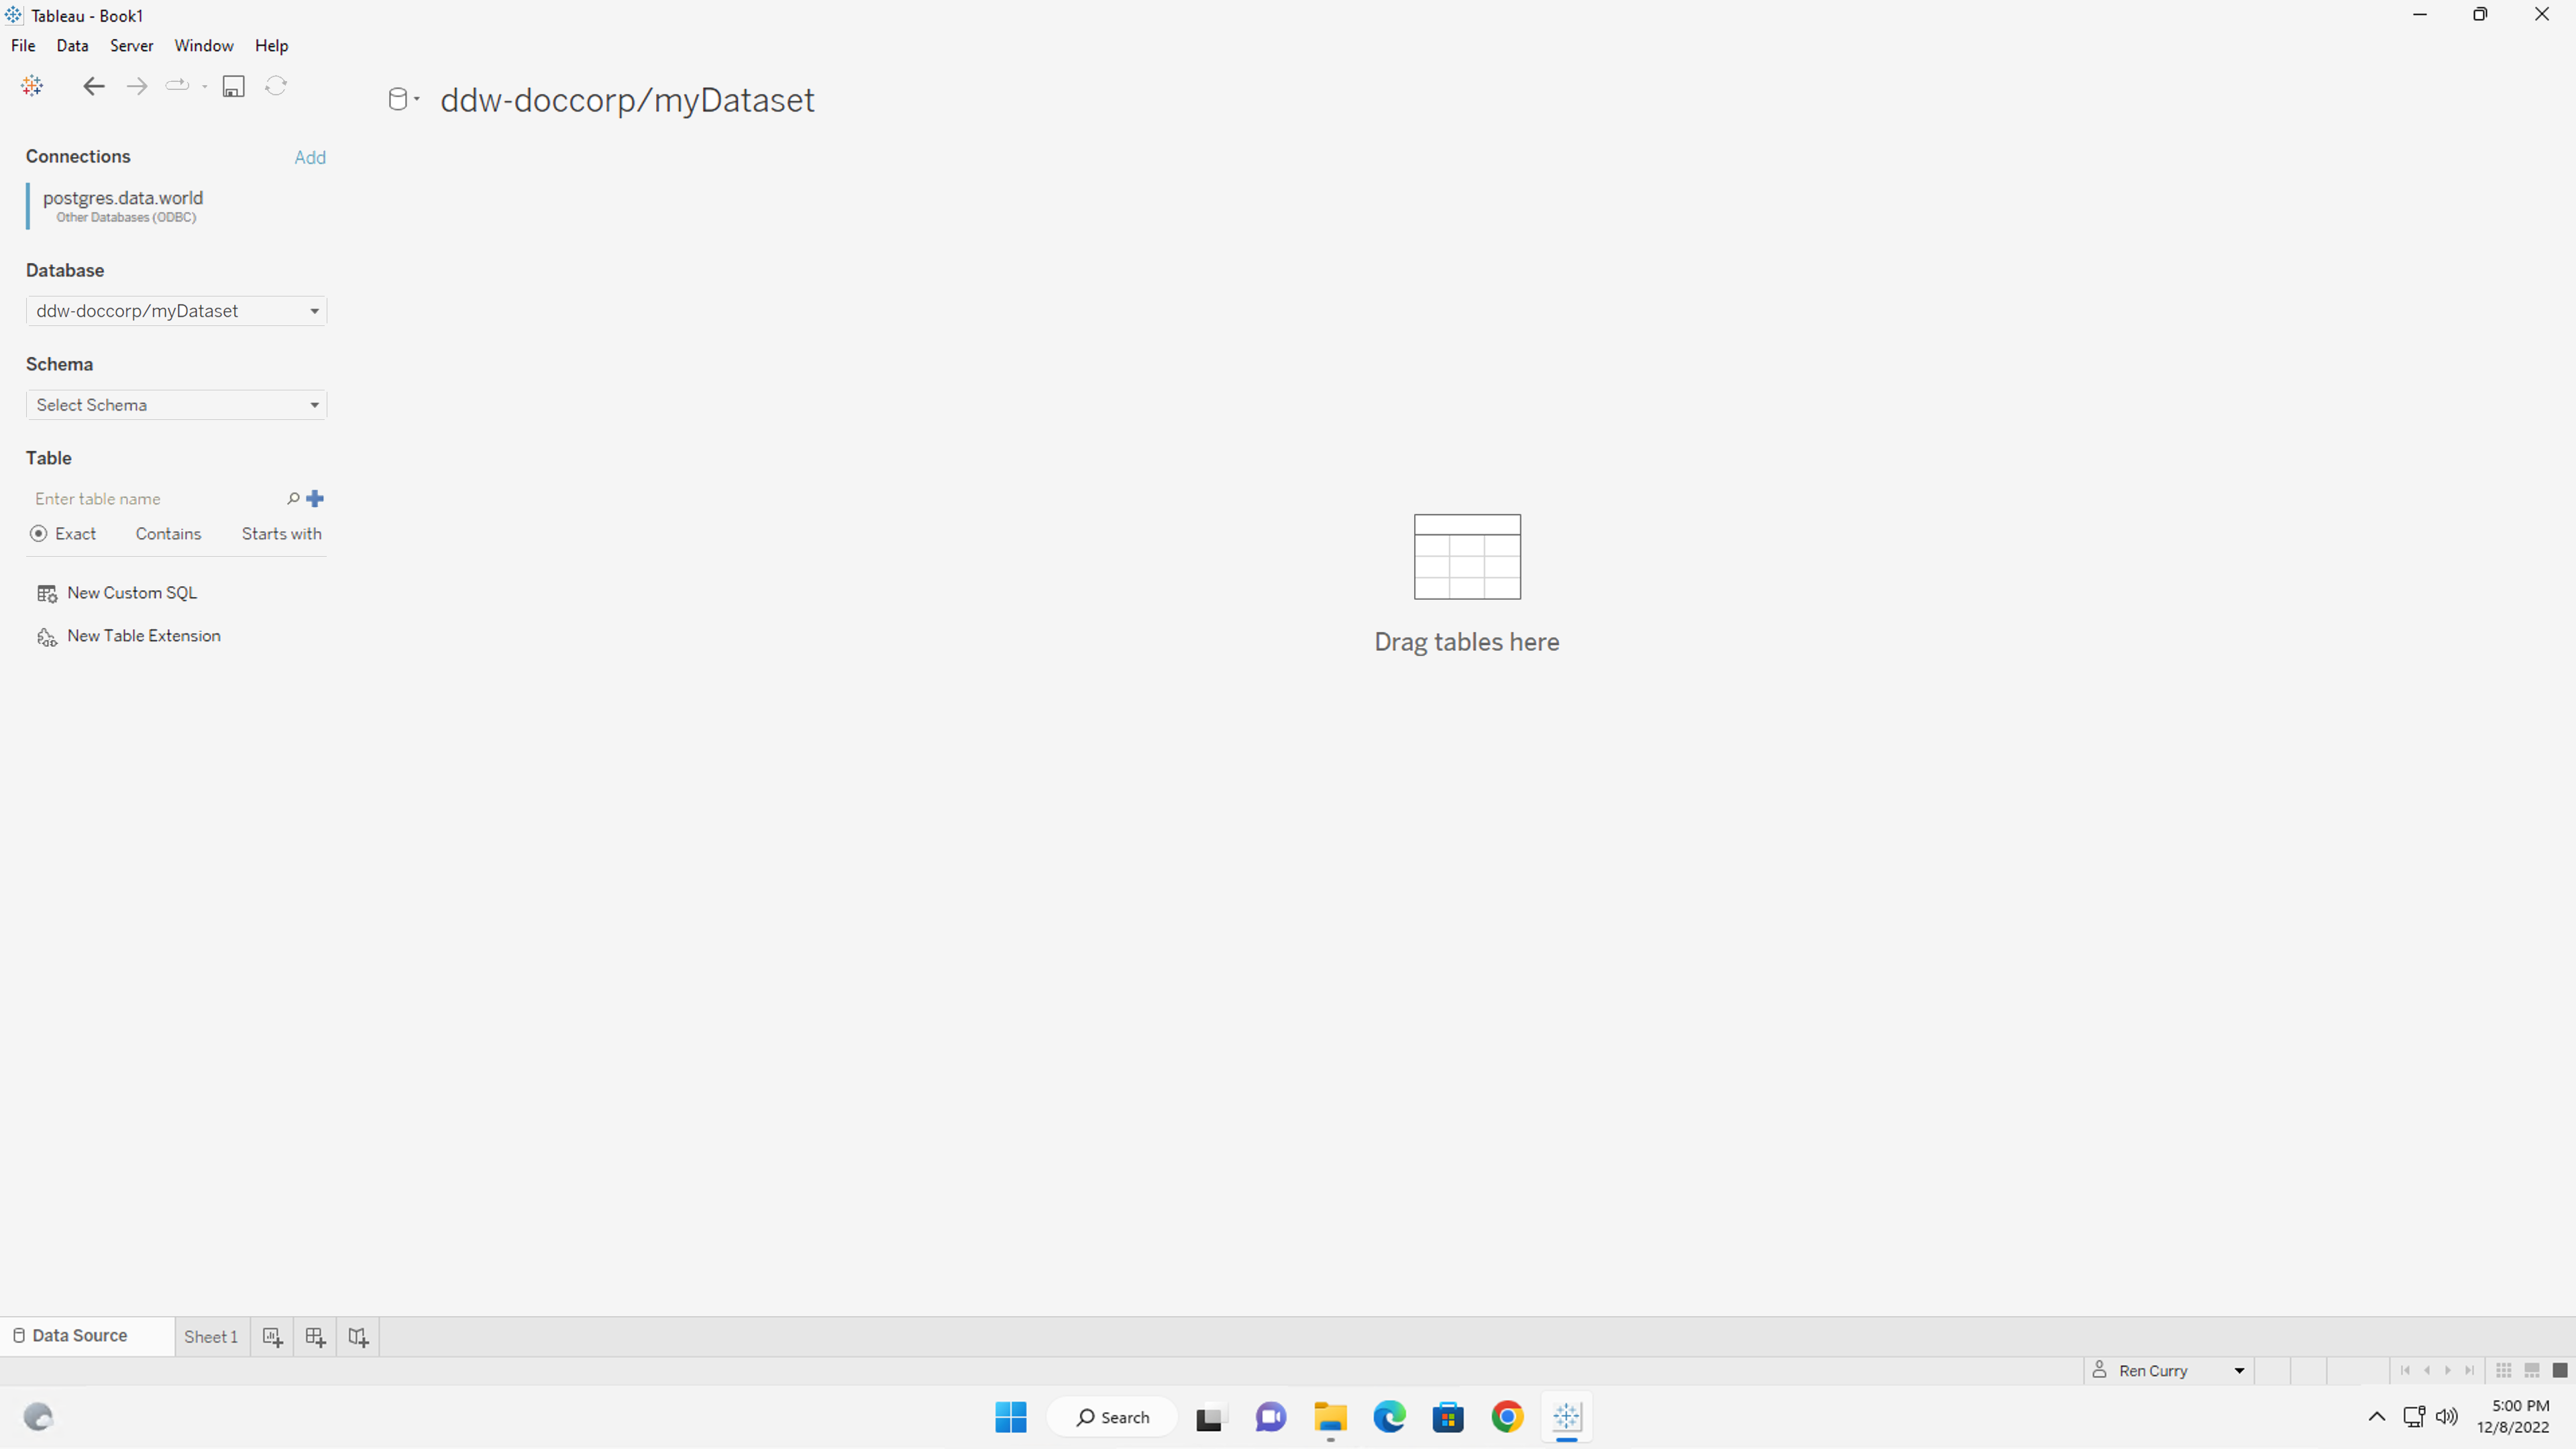
Connect Tableau Desktop to your data.world dataset
Once you have created the PostgreSQL ODBC Data Source, you can use it to connect Tableau Desktop to your data.world dataset.
To complete the connection:
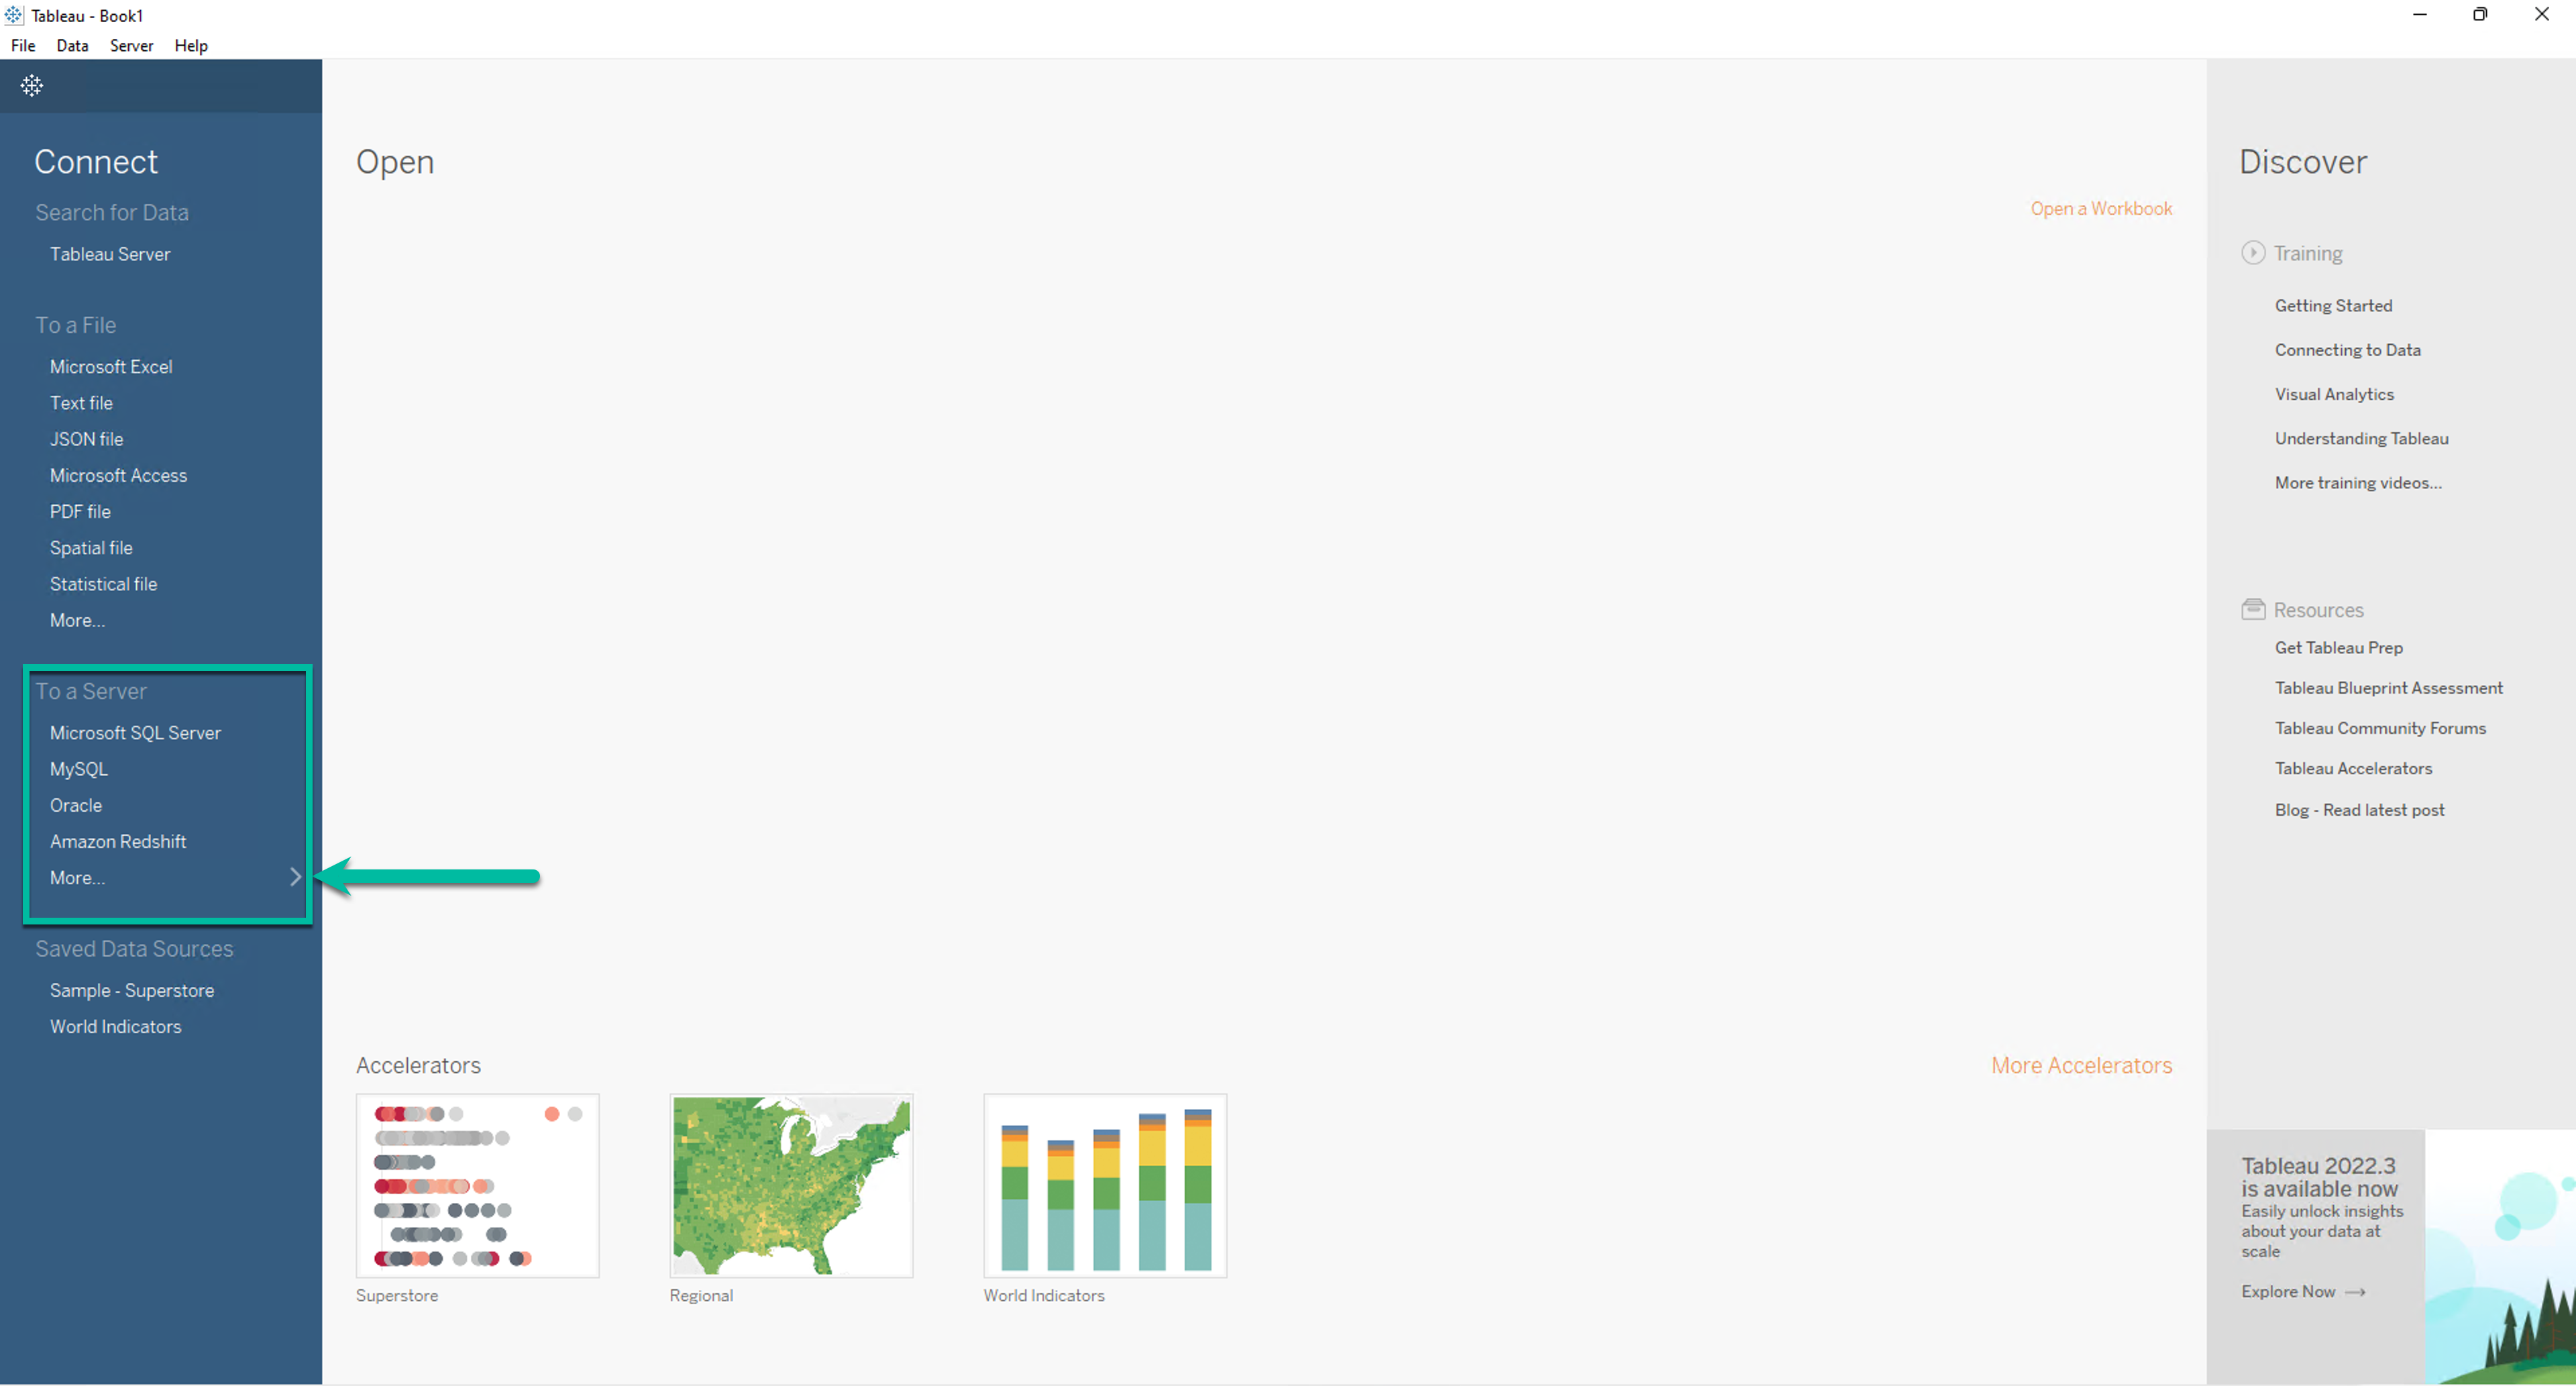
In Tableau Desktop, select Connect to a server > Other Databases (ODBC). If you do not see this option, click More under To a Server in the left-side Connect panel.
In the Other Databases (ODBC) window, select the PostgreSQL ODBC User Data Source you created earlier from the DSN dropdown.
Click Connect.
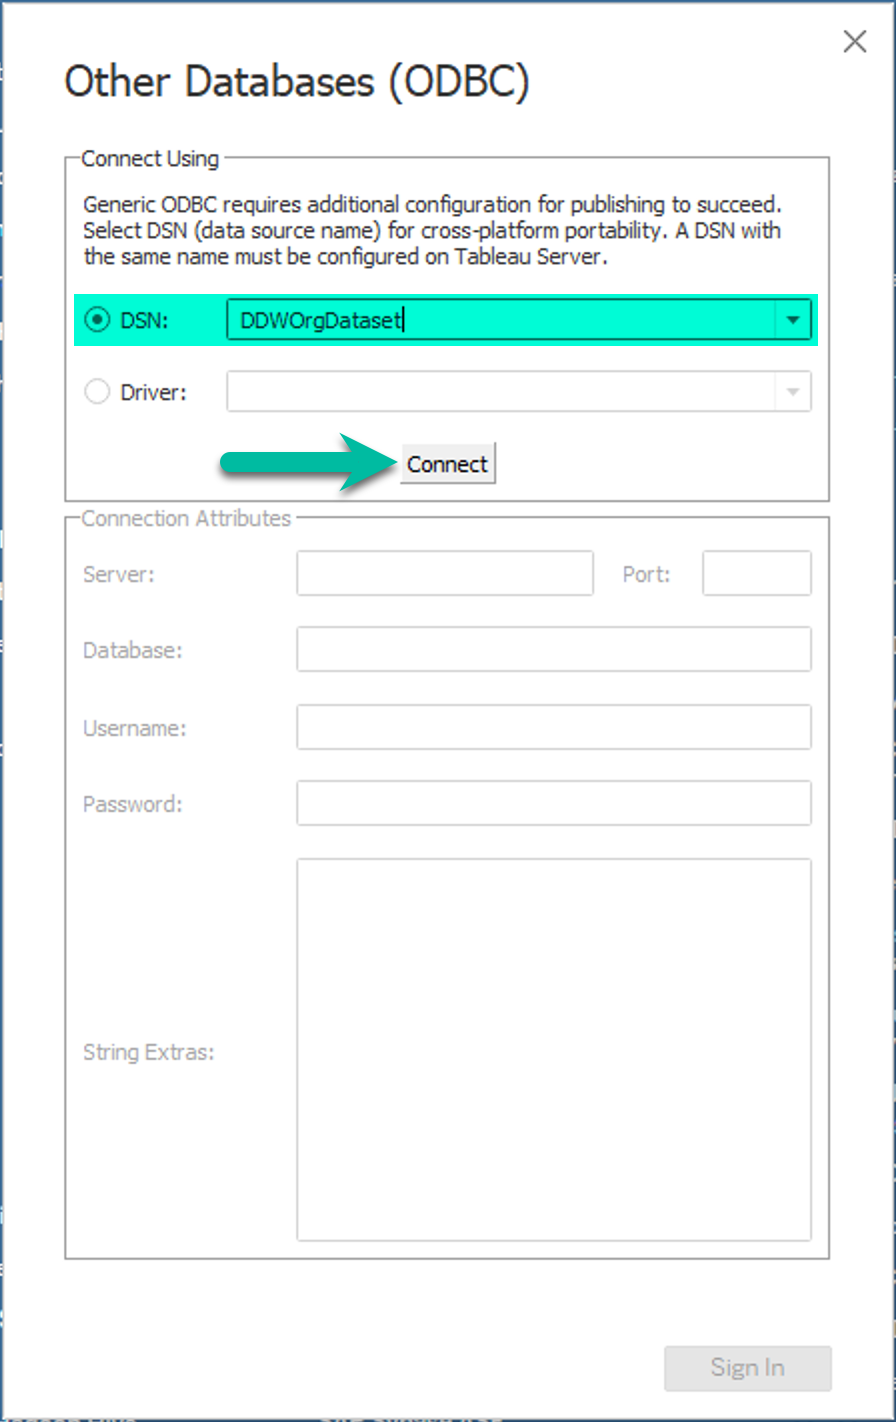
Tableau processes the connection and populates the Connection Attributes section with values. Leave the values unchanged, then click Sign In.
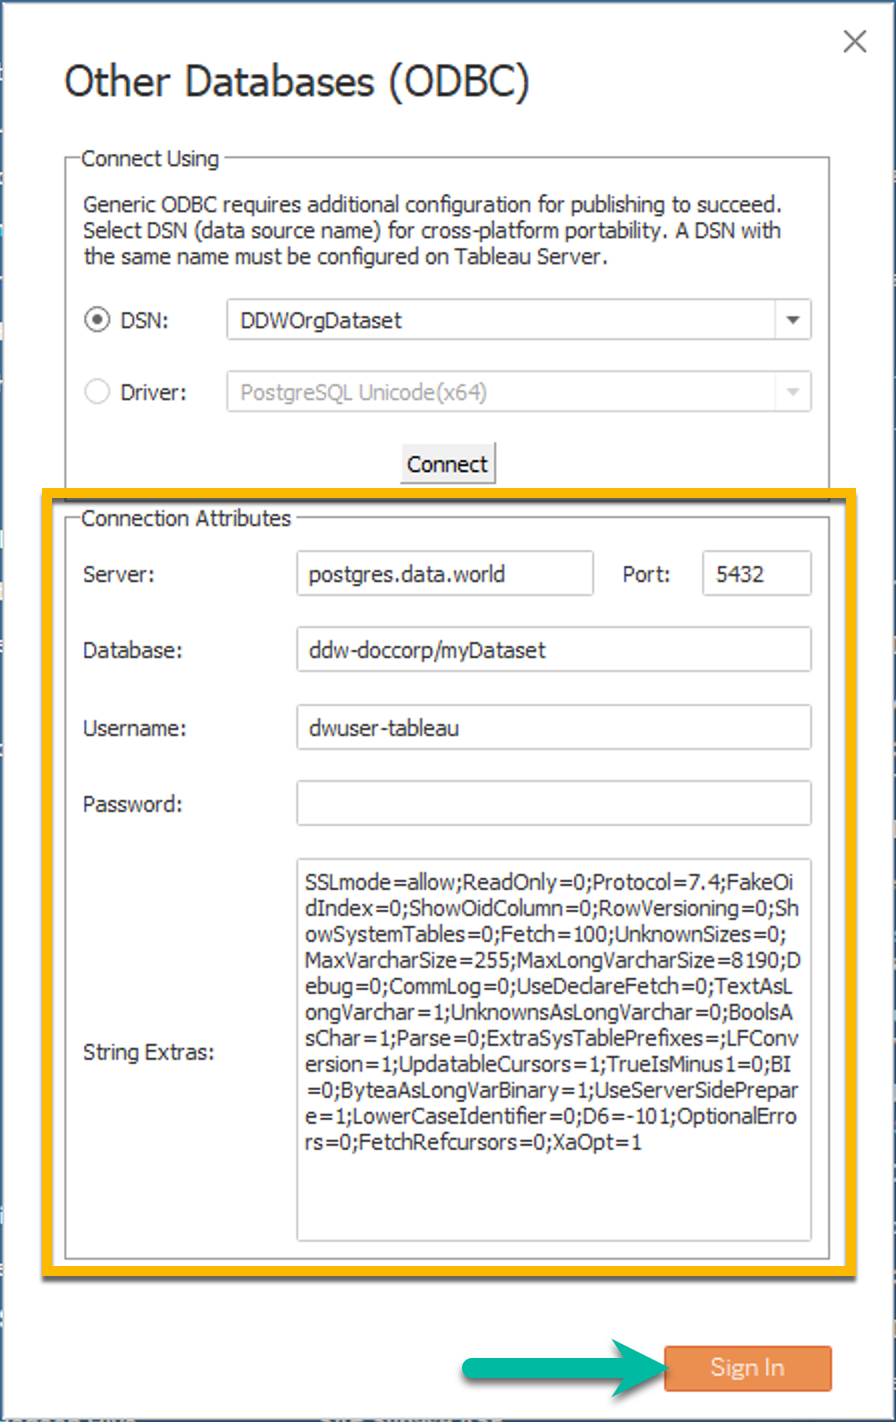
Tableau will sign you in and establish a connection to the data.world dataset. Your connection is now set up, and you can start working with your data in Tableau.