Creating Suggest Changes Premium Automation
Important
Only Organization administrators can view, configure, and run automations.
Configuring the automation
To create the automation:
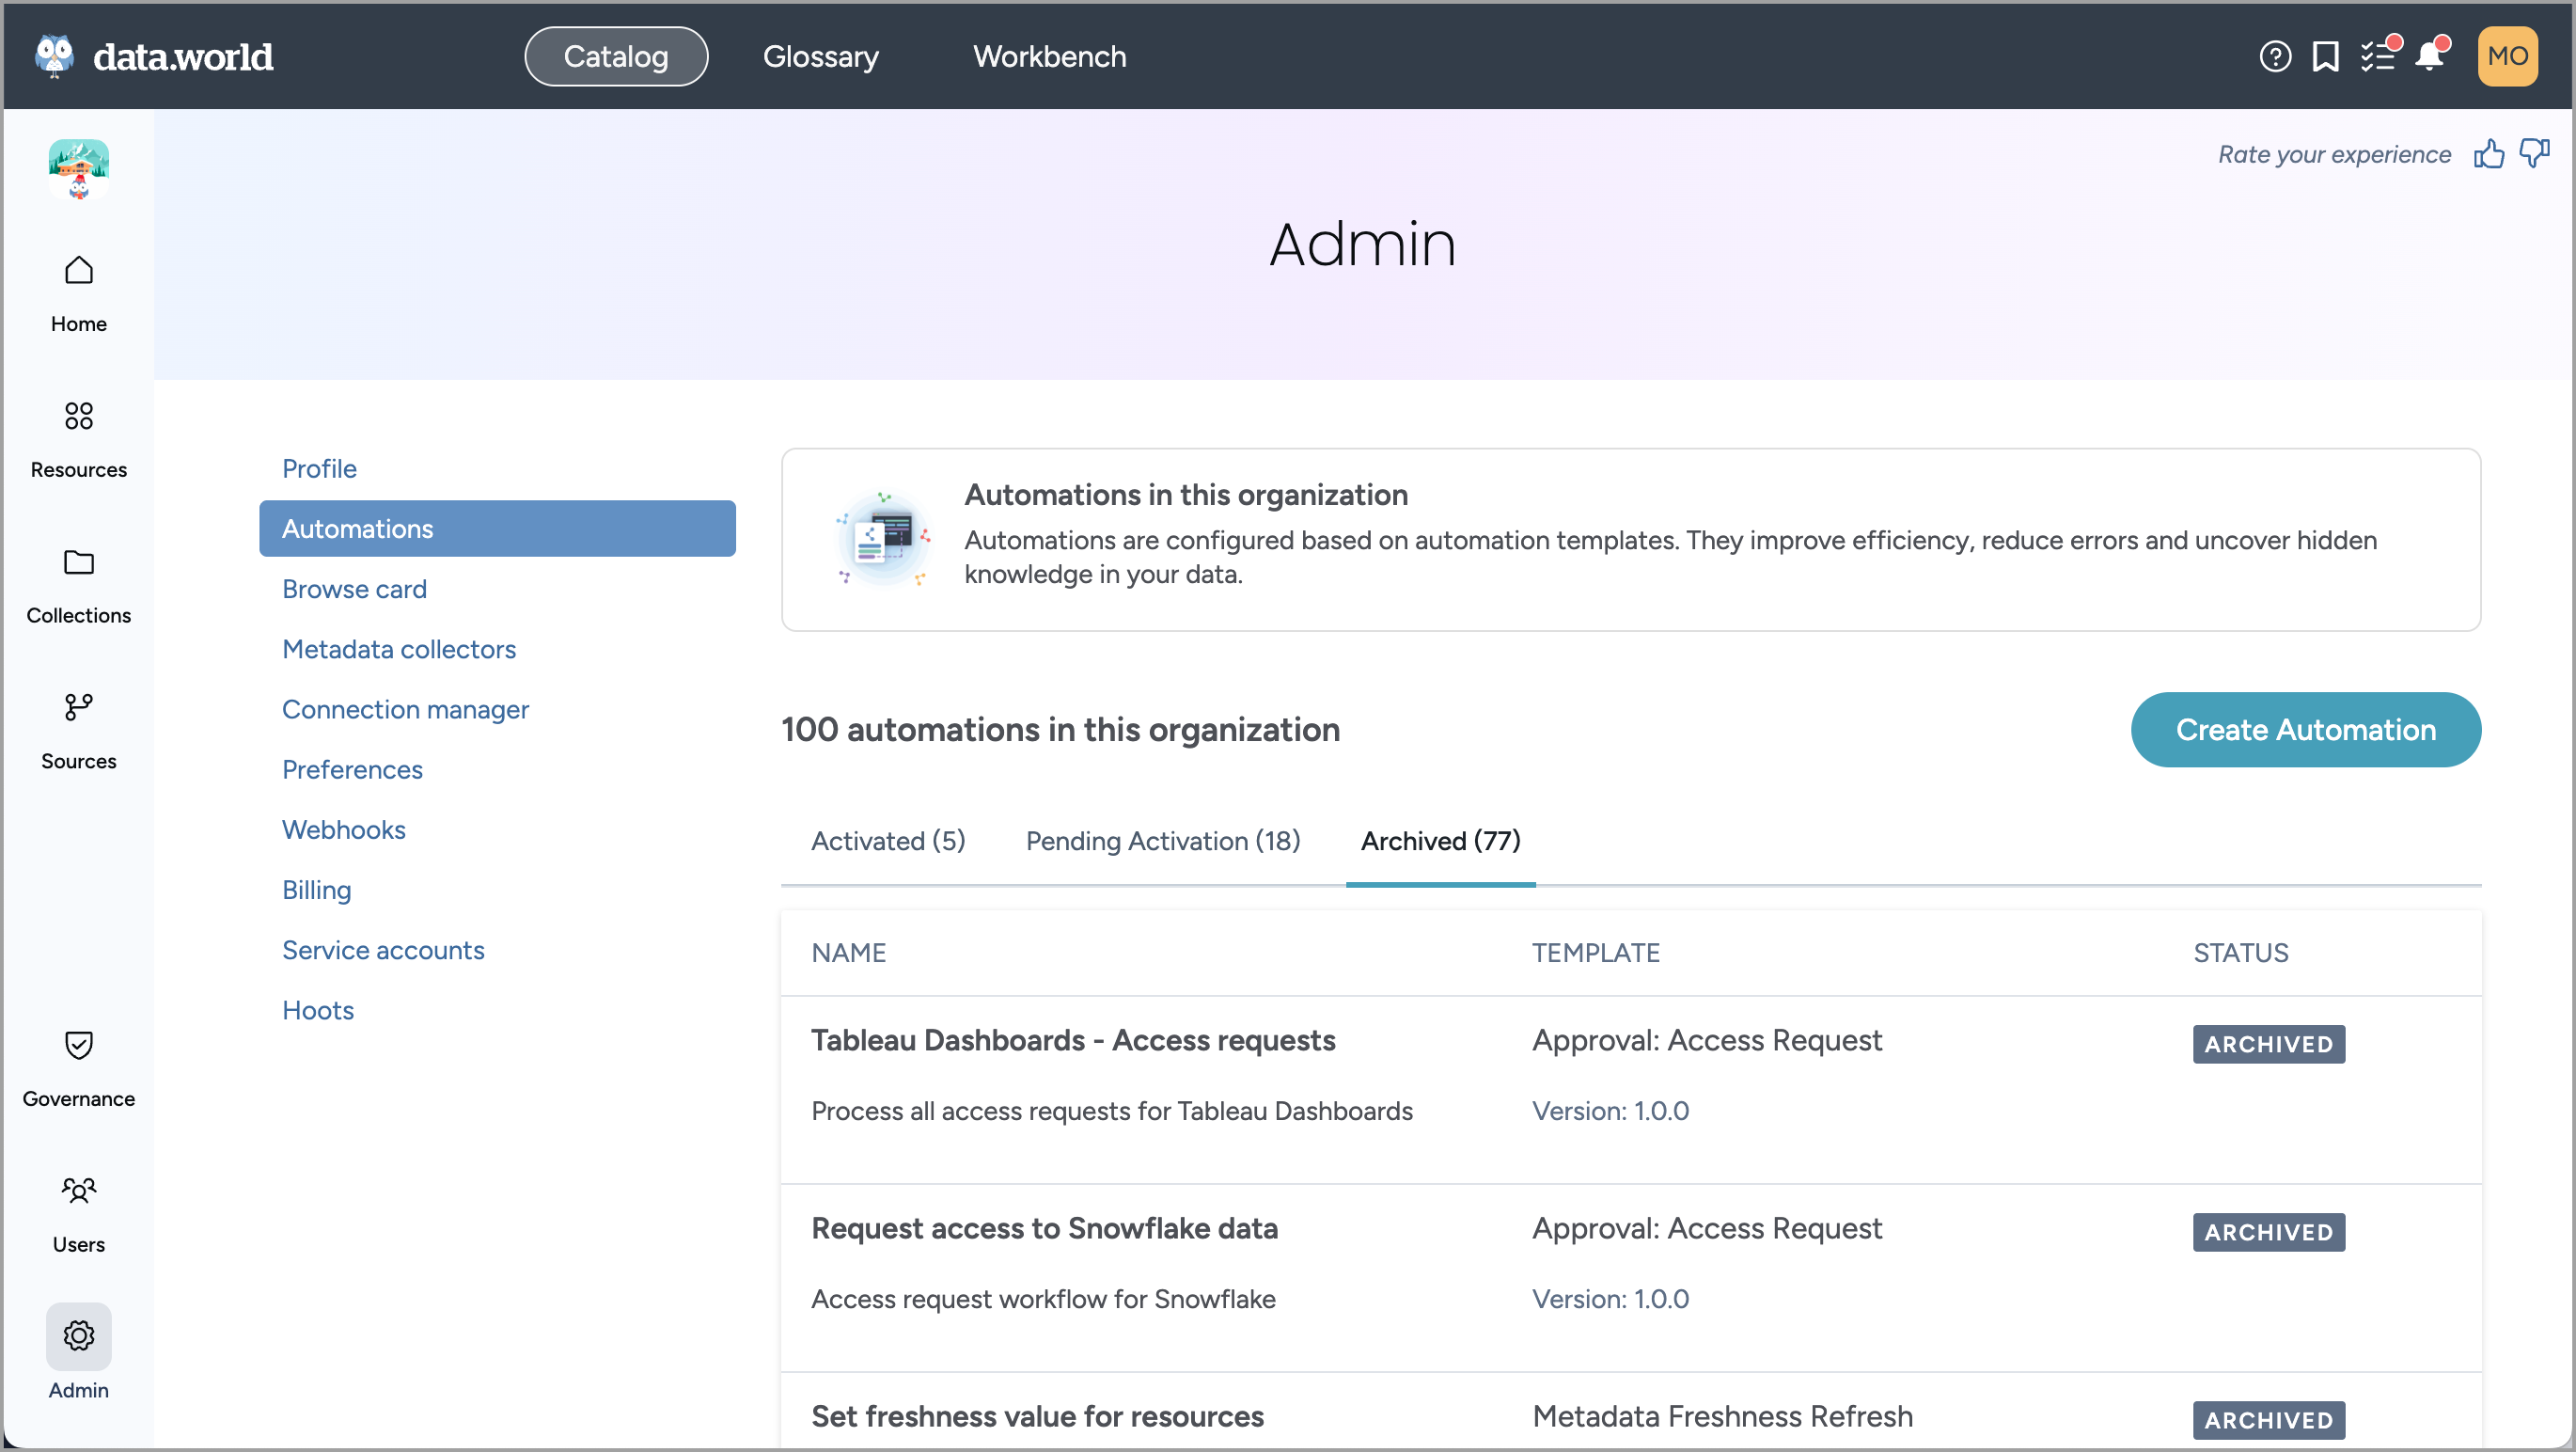
In the Catalog experience, go to the Admin page > Automations section.
Click Create Automation. Locate the Suggest Changes Premium template. Click the Configure button.
In the Configure Suggest Changes Premium window, on the first screen set the following and click Next.
Automation name: A name for the automation.
Automation description: A brief description.
In the Configure Suggest Changes Premium window, on the next screen set the following and click Next.
Collections: Select the collections the automation applies to. Users will only be able to suggest changes to resources in these collections.
Resource Types: Select the types of resources the automation applies to.
Important
This automation is not available for datasets and projects.
Suggest changes label: Provide a name of the button. For example, Suggest changes.
Enable source of record metadata field changes: Check the box to allow suggestions on source of record metadata fields. Source of record fields are not editable in data.world, but you can enable this option to allow users to make suggestions to such fields.
Status: When all suggestions for a resource are completed, the system automatically sets the resource status to the selected value. Leave empty to skip status update. The status of the resource changes once all of the suggestions are approved. The resource status does not change when suggestions are submitted, only when approved.
In the Configure Suggest Changes Premium window, on the next screen set the following and click Next.
Approval group: Specify the group of users that can approve the suggested changes. You can specify 5 levels of approvers and each level can have one designated user group. Any user from that group can approve the changes.
In the Configure Suggest Changes Premium window, set the following:
Connection (optional): From the dropdown list select a ServiceNow connection you configured earlier. This is where the notifications for approved content changes for Source record fields are sent. If you do not wish to integrate with ServiceNow, don't select anything.
Notification email address (optional): Provide an email address for sending notifications about approved suggested changes for Source record fields. You can provide a single email address in this field.
Click Save and continue.
Enabling automations
Once you have setup the automation, enable it so that the access requests can start going through the process.
To enable an automation:
In the Catalog experience, go to the Admin page > Automations section.
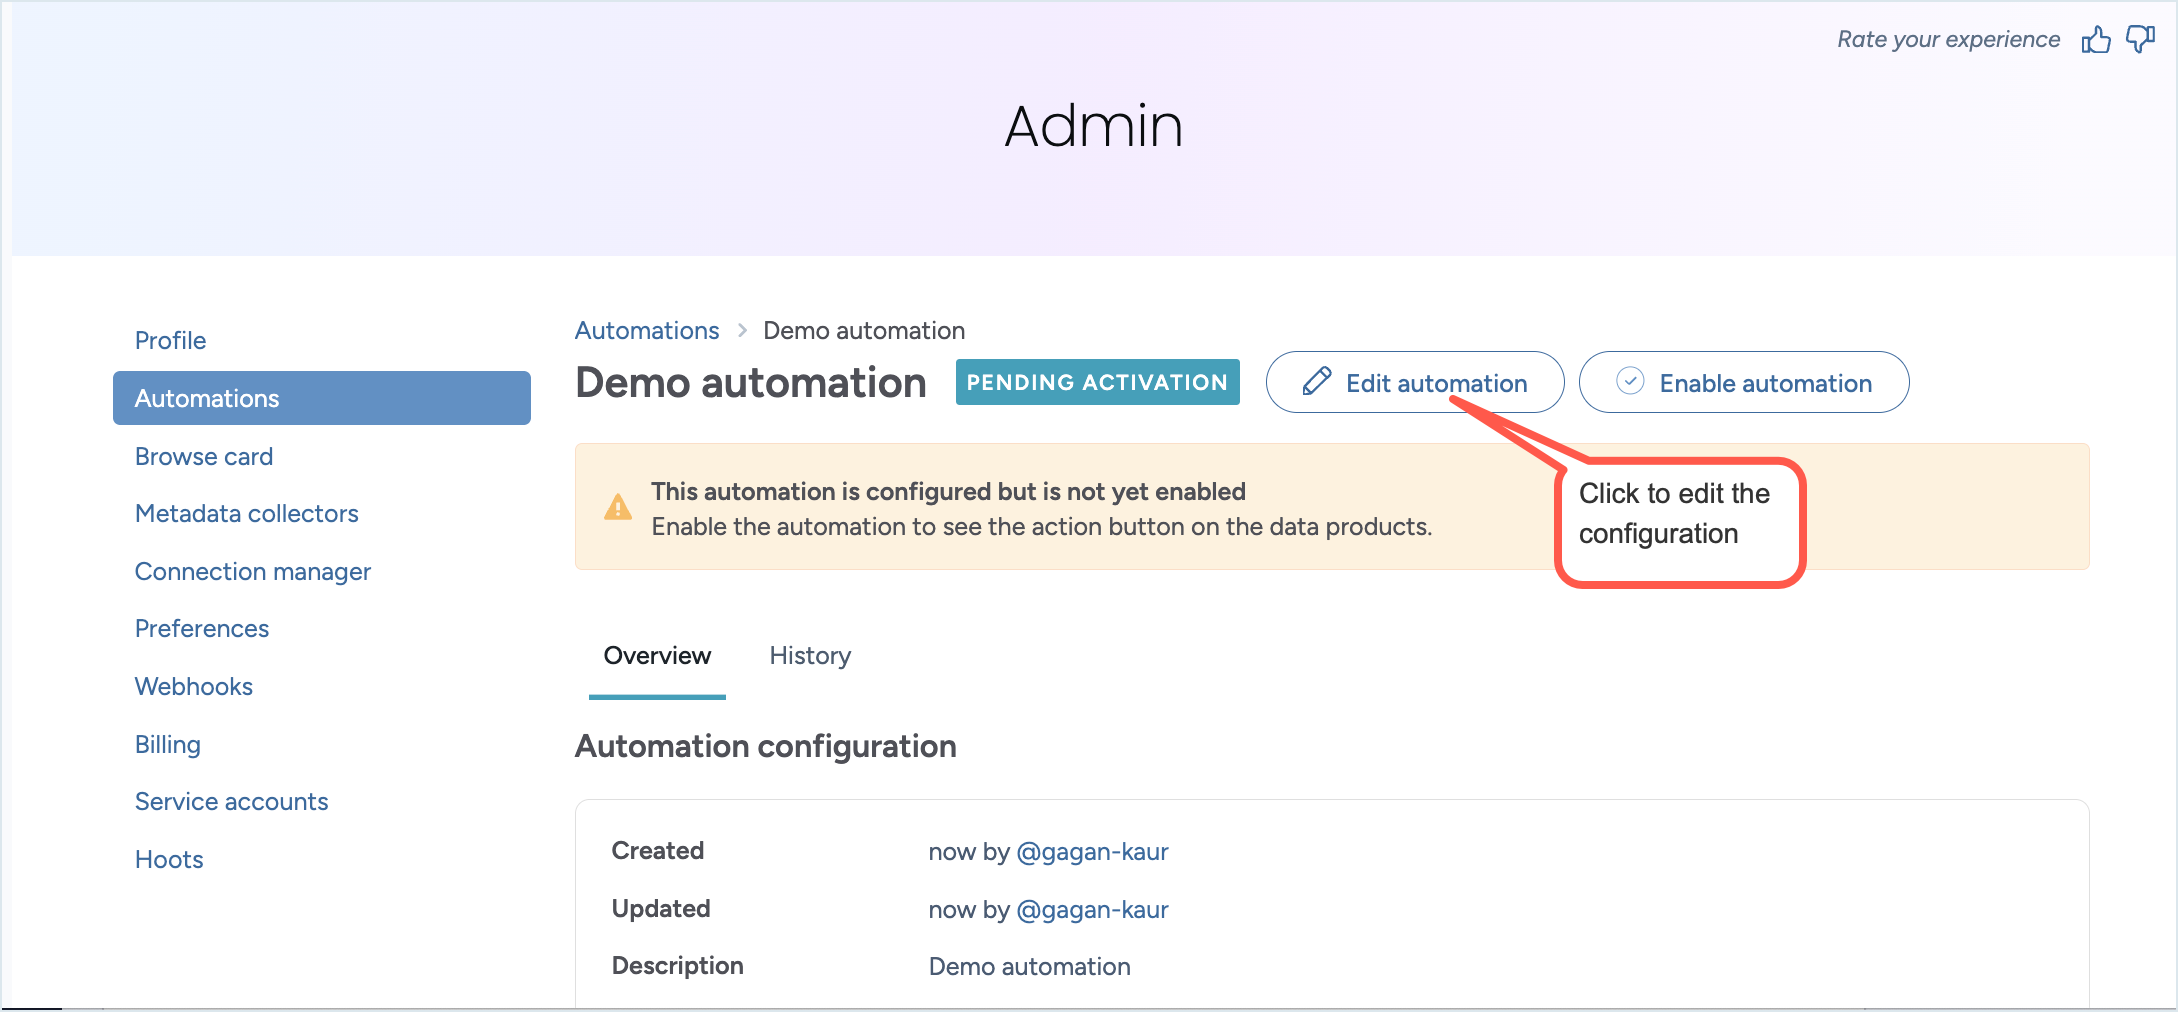
In the Pending Activation tab, locate the automation you want to enable and open it by clicking it.
Click the Enable automation link. This option is available only for automations that have never been enabled. If you enable an automation and then disable it, it cannot be enabled again.
Viewing automation run history
Important
If the automation history is missing in the History tab, simply edit and resave the automation. This action triggers a version upgrade for the automation, prompting the system to begin capturing the automation history.
To view the automation run history:
In the Catalog experience, go to the Admin page > Automations section.
From the list of Activated or Archived automations, select the automation for which you want to view the automation history.
On the History tab of the automation, you can view the following details.
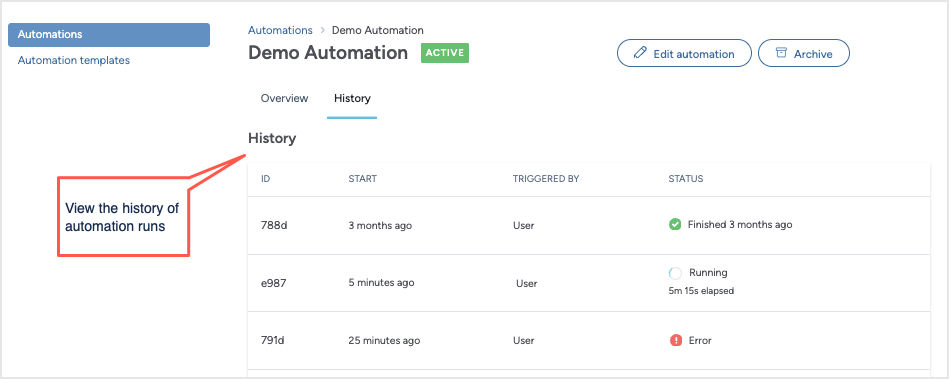 Table 1.
Item
Details
ID
A unique identifier for the automation run.
Start
Relative time when the run of the automation was started. For example, 5 minutes ago, 3 months ago, etc. Hover over the field value to see the exact date and time.
Triggered by
Recorded every time a user suggests a change to a resource. Possible values:
User: When user clicks the Suggest change button on a resource page.
Status
The current status of the automation. Possible values:
Running: The moment user clicks the Suggest change button on the resource page.
Waiting for Task Completion: The task associated with the suggested change is not yet completed.
Success: The task associated with the suggested change is completed successfully. The change could be either accepted or rejected. If ServiceNow integration is enabled, success status is recorded only when a ticket in ServiceNow is created successfully.
Error: An error occurred in the execution of the automation.
Editing automations
Any existing tasks that are in progress will not be impacted by the edits made to the automation configuration. The new configurations will take effect only for new tasks.
To edit an automation:
In the Catalog experience, go to the Admin page > Automations section.
From the Activated or Pending Activation tabs, select the automation you want to edit. Note that Archived automations cannot be edited.
Click the Edit Automations button. Follow the wizard to make any necessary adjustments to the automation configuration.
Duplicating automations
The duplication feature lets you copy existing automations with all their configurations intact, streamlining the setup process for similar automation workflows. Click Duplicate on any automation to instantly create a new automation with the exact same configuration — eliminating repetitive manual setup and reducing configuration errors. This allows catalog administrators who need to set up multiple automations at once or create variations of existing automation configurations without starting from scratch.
To duplicate an automation:
Browse to the Admin page > Automations section.
In the Activated or Pending Activation tab, locate the automation you want to duplicate and open it by clicking it.
Important
Archived automations cannot be duplicated.
Click the Duplicate button.
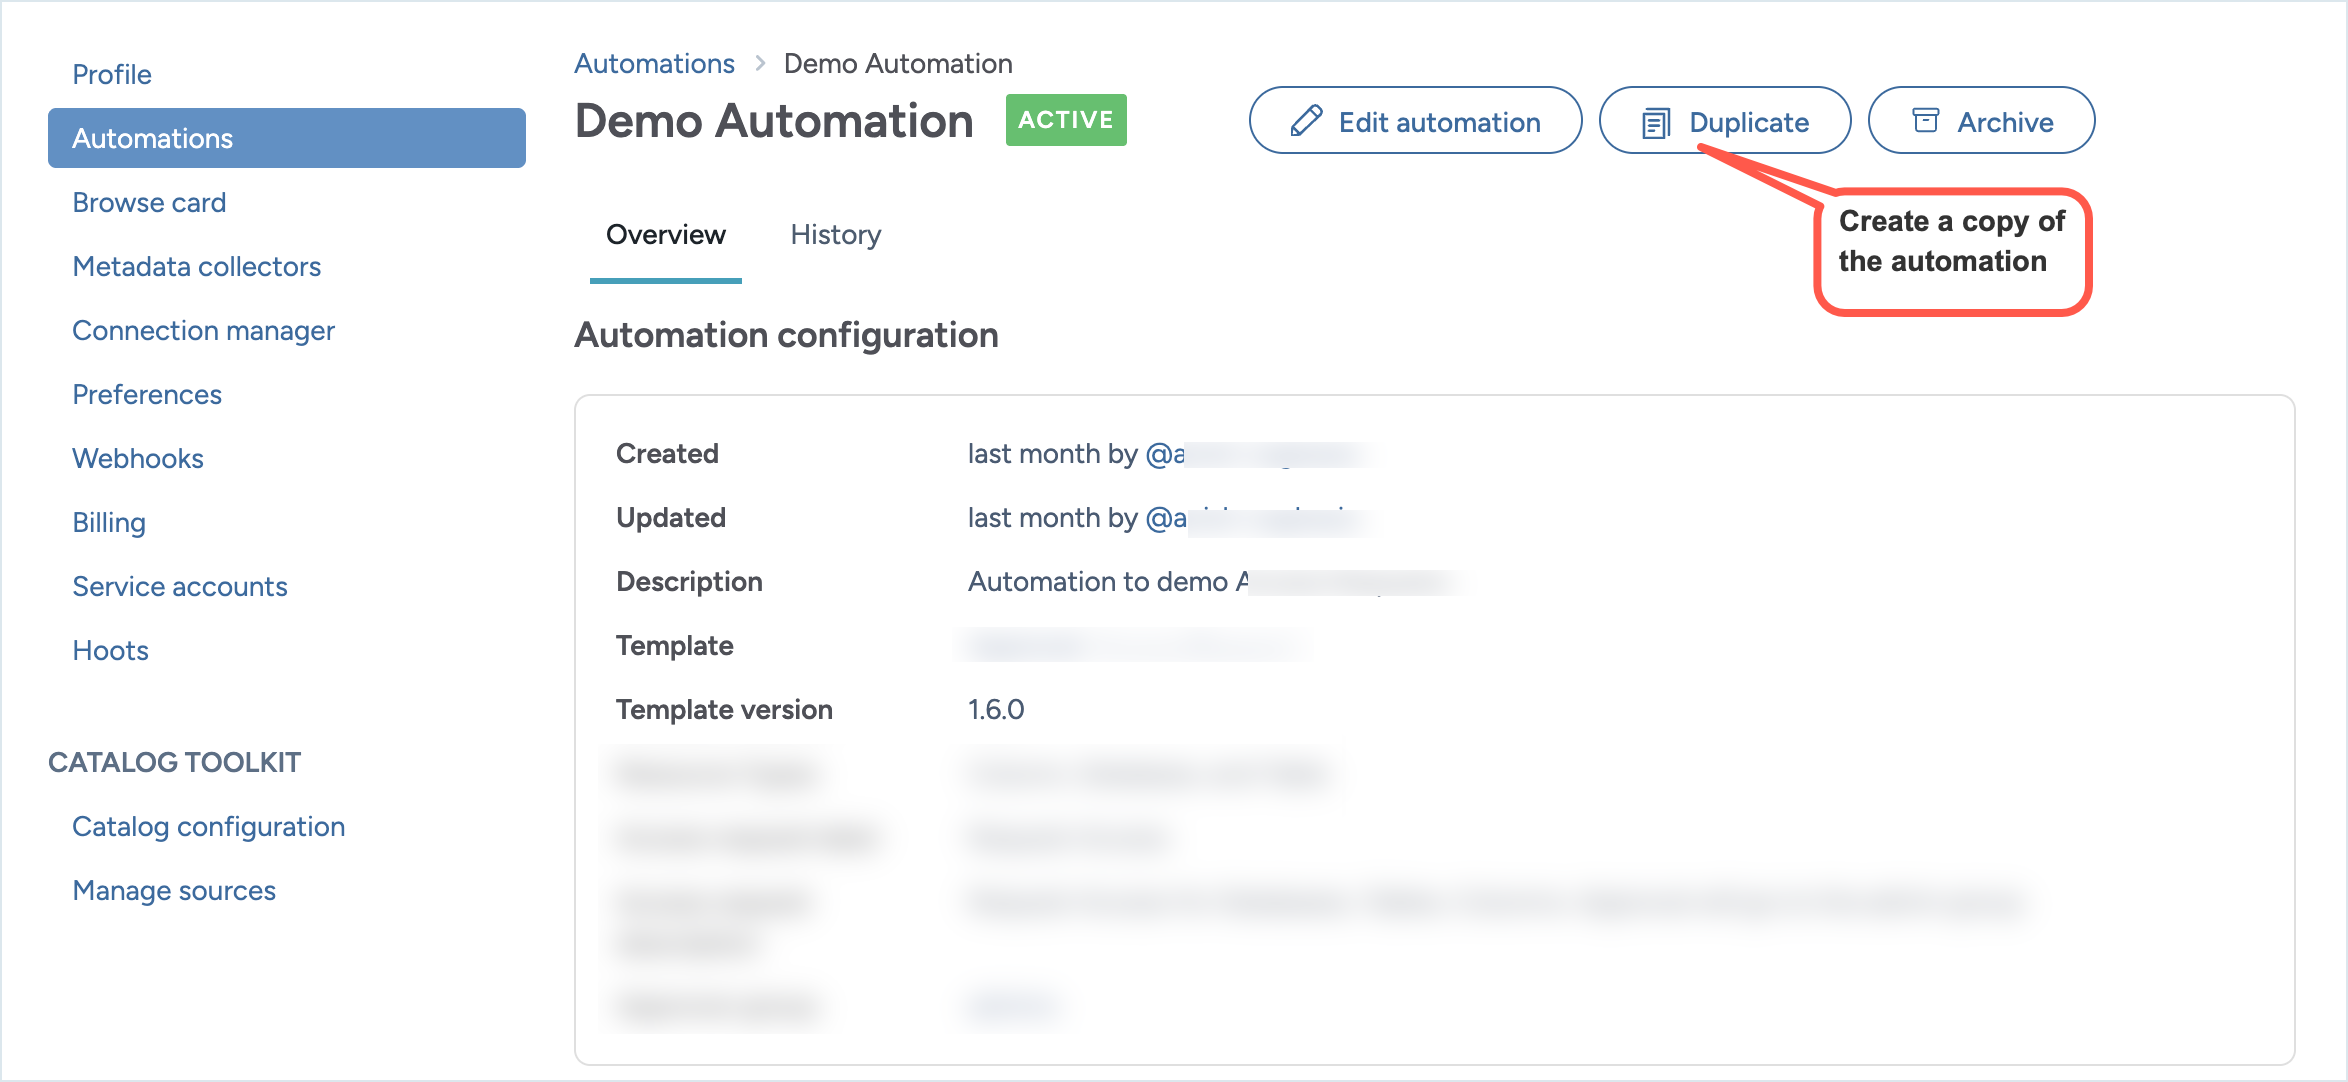
A copy of the automation is created. Rename the automation and other properties to meet your needs.
When an automation is duplicated, it is not in active state. You must enable the automation to start using it.
Archiving automations
Important
Once you archive an automation it cannot be enabled again. Any requests that are in progress will not be available for any further action. Only active automations can be archived.
To archive an automation:
In the Catalog experience, go to the Admin page > Automations section.
From the Activated tab, locate the automation you want to archive and open it.
Click the Archive automation link. The archived automation is moved to the Archived tab.