Setting AWS Elastic Container Service (ECS) to automate collector runs
This page provides the steps for setting up data.world collectors on AWS Elastic Container Service (ECS). It guides you through creating a custom collector Docker image, deploying it to AWS Elastic Container Repository (ECR), and defining and running an ECS task. While this serves as a starting point, it does not cover every aspect of potential use cases, leaving room for customization and orchestration according to your specific needs and preferences.
Important
As a pre-requisite you should have the following configured and ready for use:
Docker Engine/CLI.
AWS CLI. The configured user must be able to deploy images to AWS Elastic Container Repository.
STEP 1: Set up the collectors
To manage configurations for on-premise collectors:
Follow the instructions on managing configurations for on-premise collectors. For parameters that you want to set as environment variables, set the values as variables instead of real values.
Note down the environment variables and directories to be created for the collector.
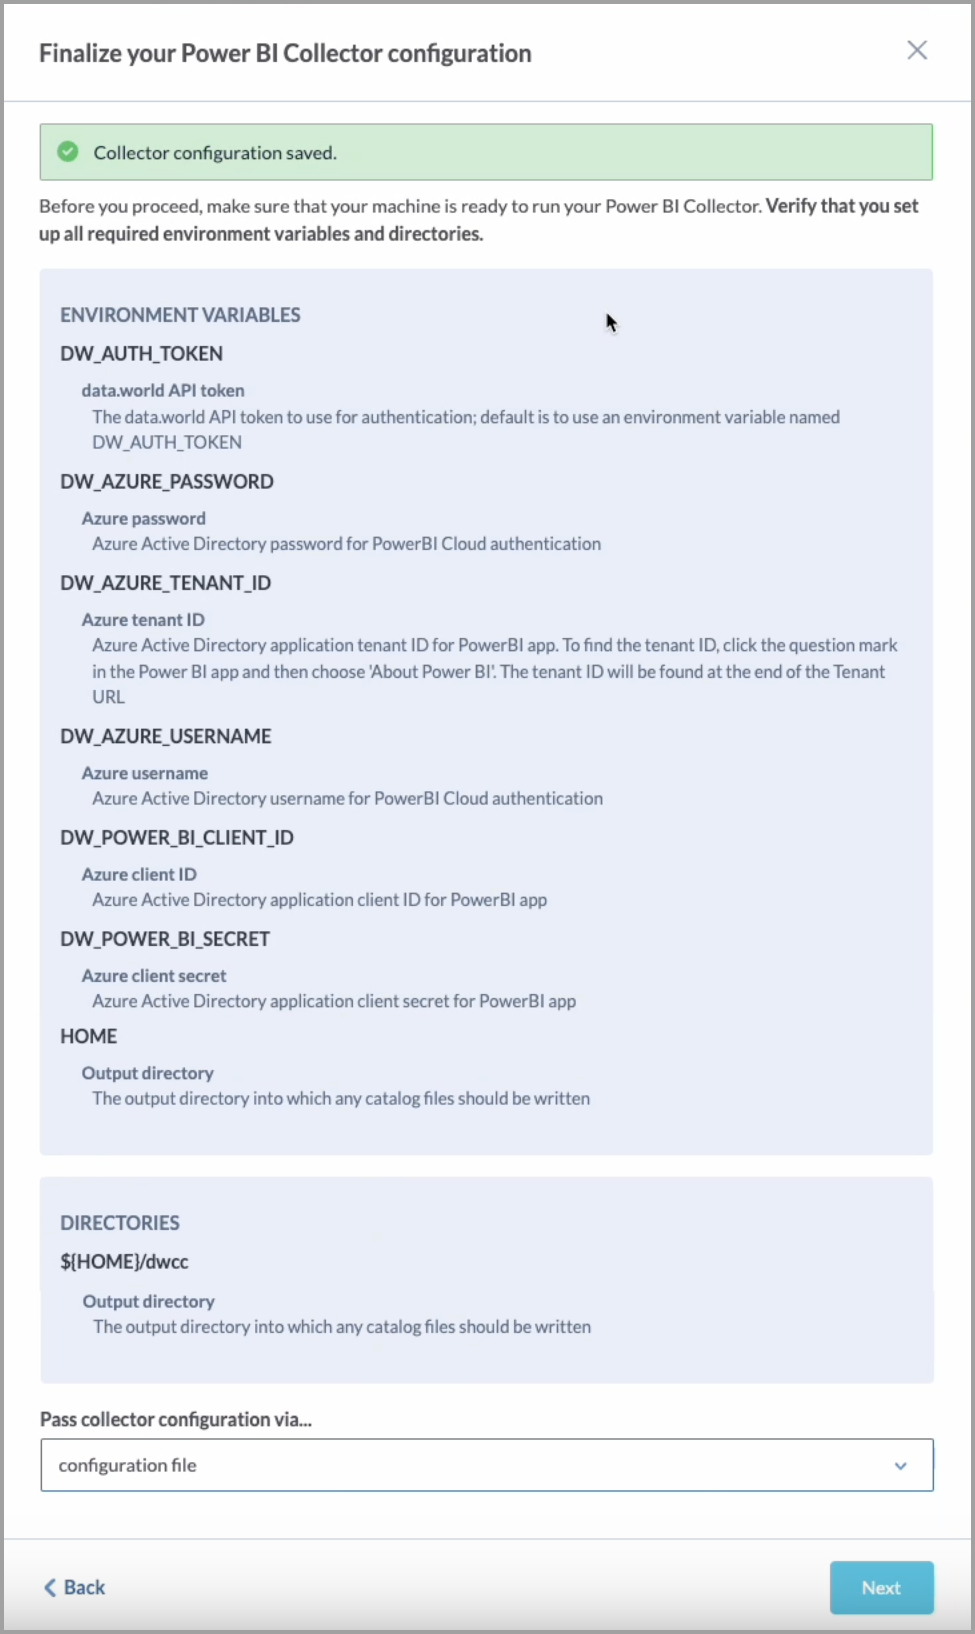
Download the YAML file for running the collector.
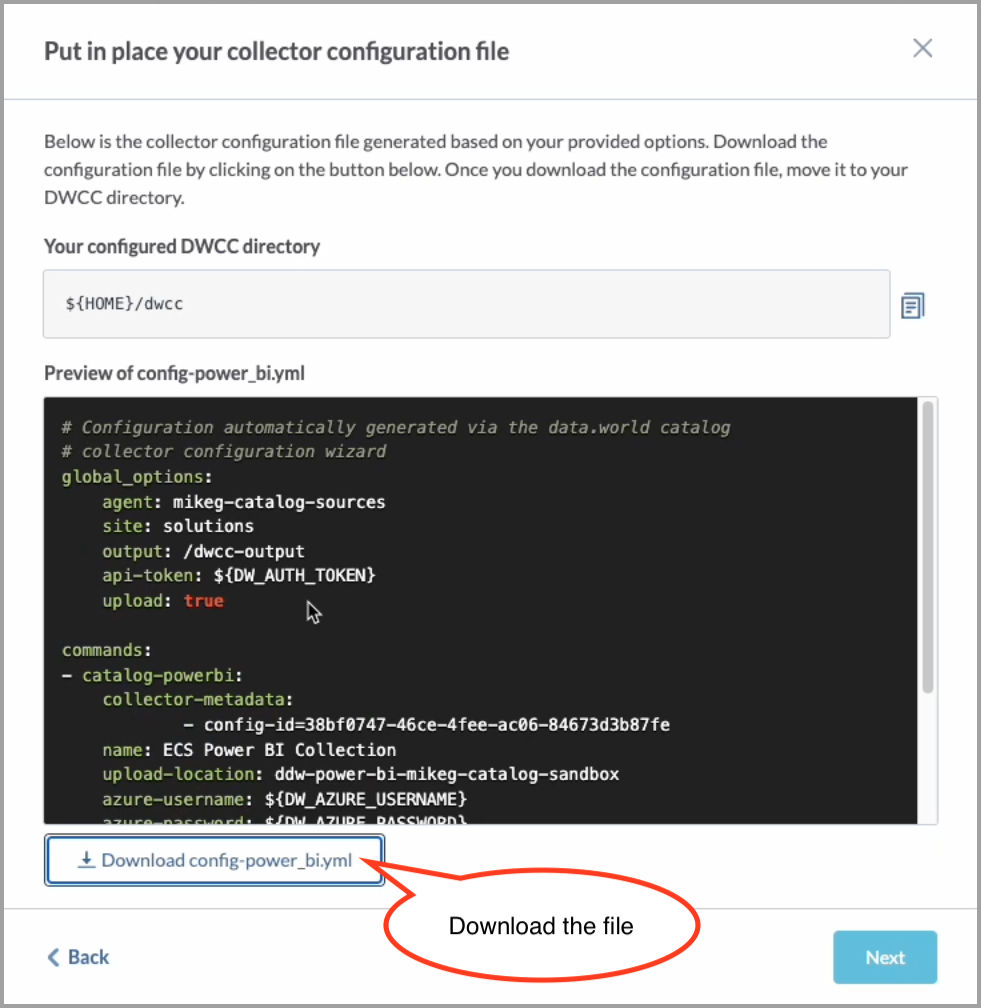
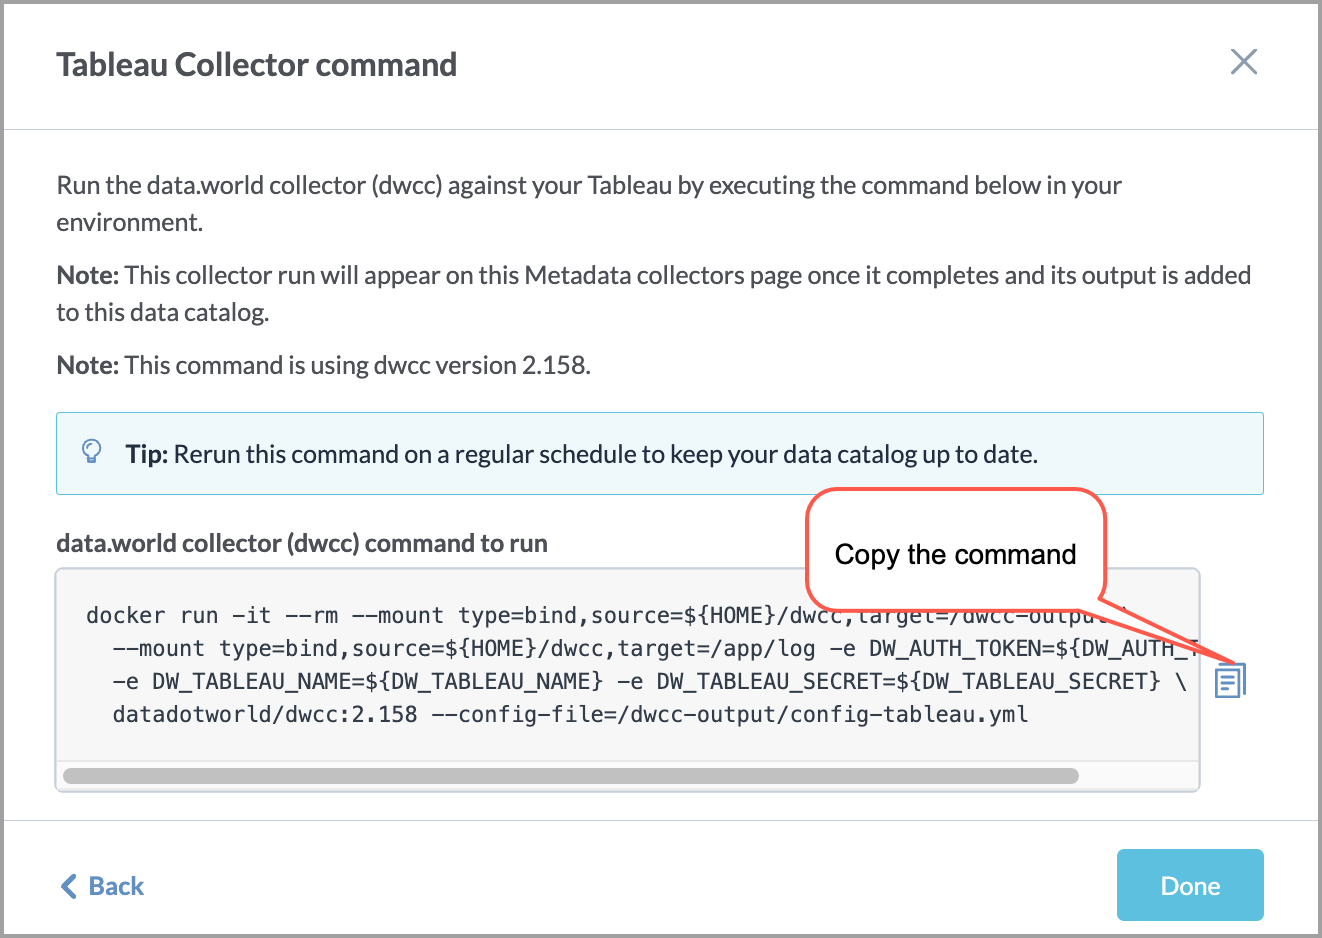
At the end, note the command for running the YAML file.
STEP 2: Extend the collectors Docker image to include the configuration file
To include the configuration file in your custom collector Docker image:
Locate the downloaded configuration YAML file and create a Dockerfile in the same directory with the following contents:
FROM datadotworld/dwcc:<collector_version>
ADD <config-file-name> /dwcc-output/
For example:
FROM datadotworld/dwcc:2.186
ADD config-snowflake.yml /dwcc-output/
If you want to add multiple configuration files or specific JDBC drivers/other artifacts, use additional ADD lines. For example:
FROM datadotworld/dwcc:2.186
ADD config-snowflake.yml /dwcc-output/
ADD config-oracle.yml /dwcc-output/
ADD ojdbc11.jar /usr/src/dwcc-config/lib/
In a terminal, navigate to the directory containing the Dockerfile and run the following command to build the custom Docker image for collectors:
docker build -t <desired-image-name> .
For example:
docker build -t dwcc-ecs .
Optionally, you may add a version tag with the base collector version number:
docker build -t dwcc-ecs:2.186 .
STEP 3: Deploy the custom Docker image to an AWS Elastic Container Repository (ECR)
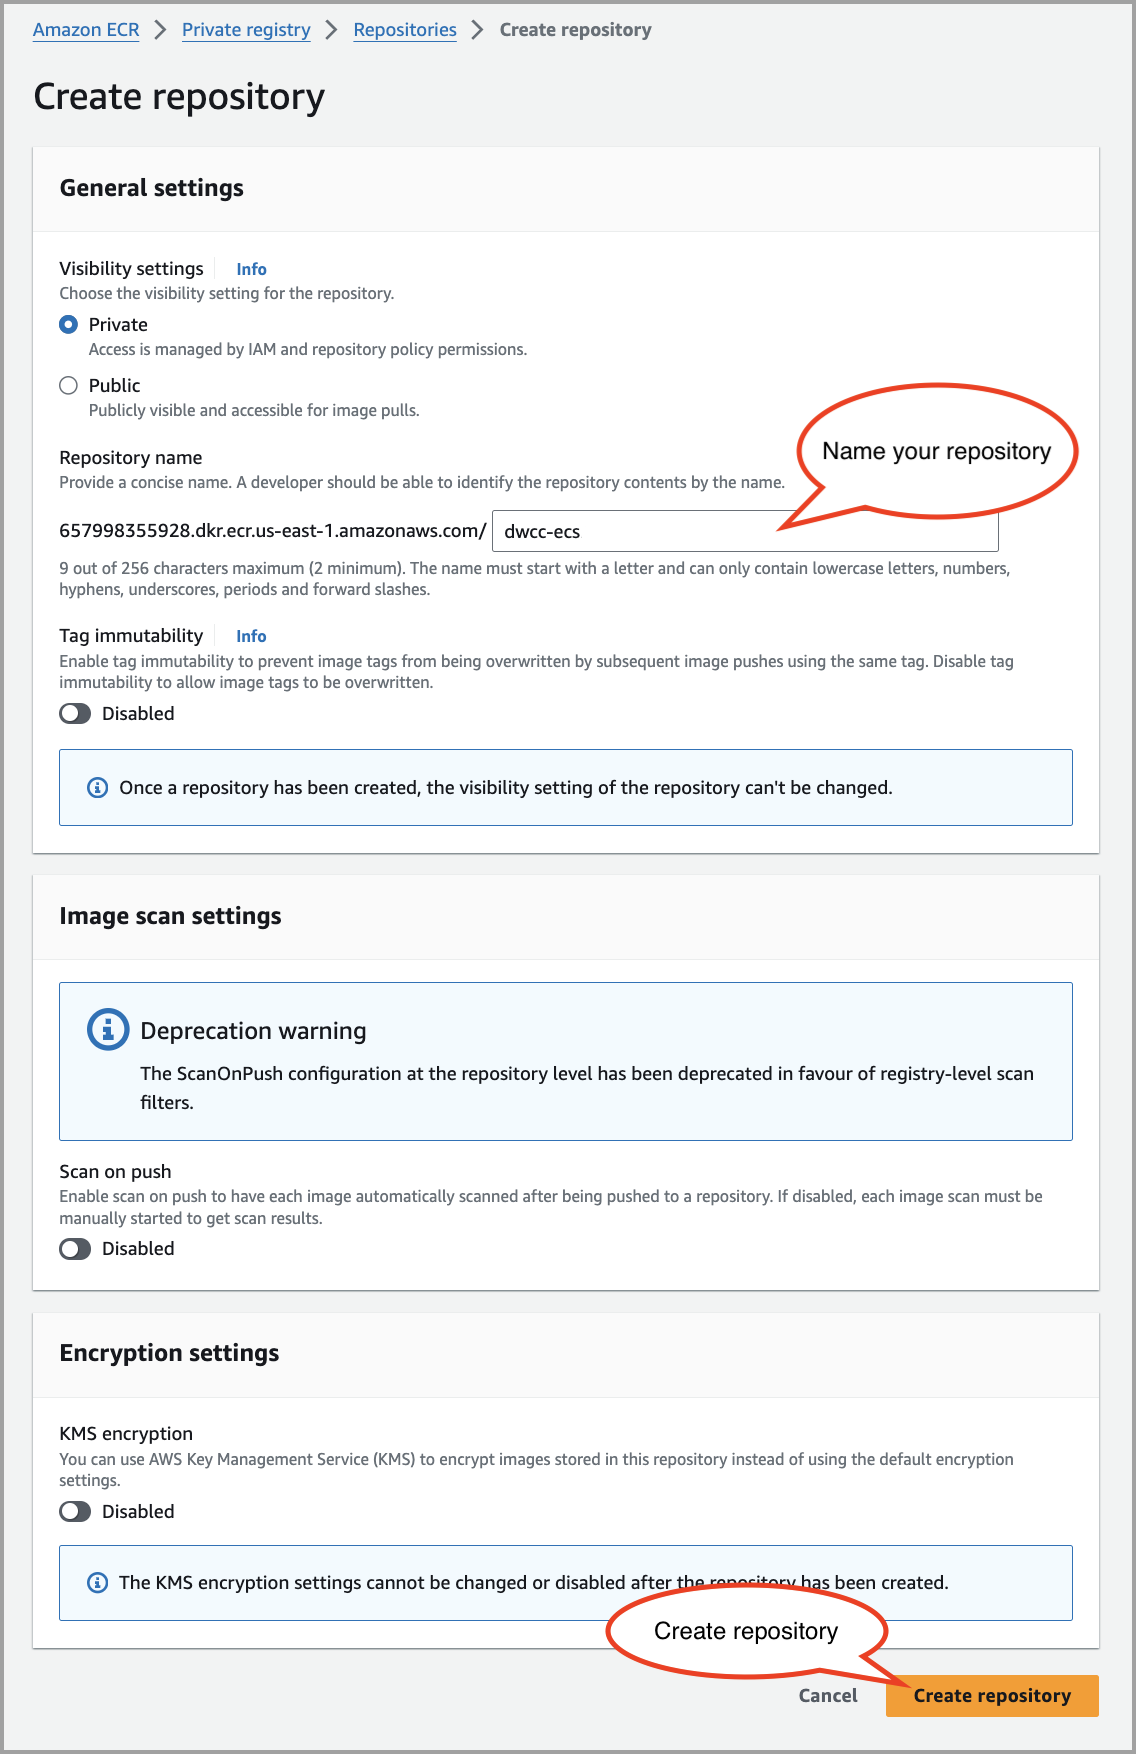
Follow the instructions on how to create a private repository in AWS ECR. Name the repository with the same name you gave the custom collector docker image in the build step (i.e. dwcc-ecs). You can leave default options, or make changes as required by your AWS policies.
In the AWS Console, on the newly created ECR Repository, click the View push commands button to open the push command wizard.
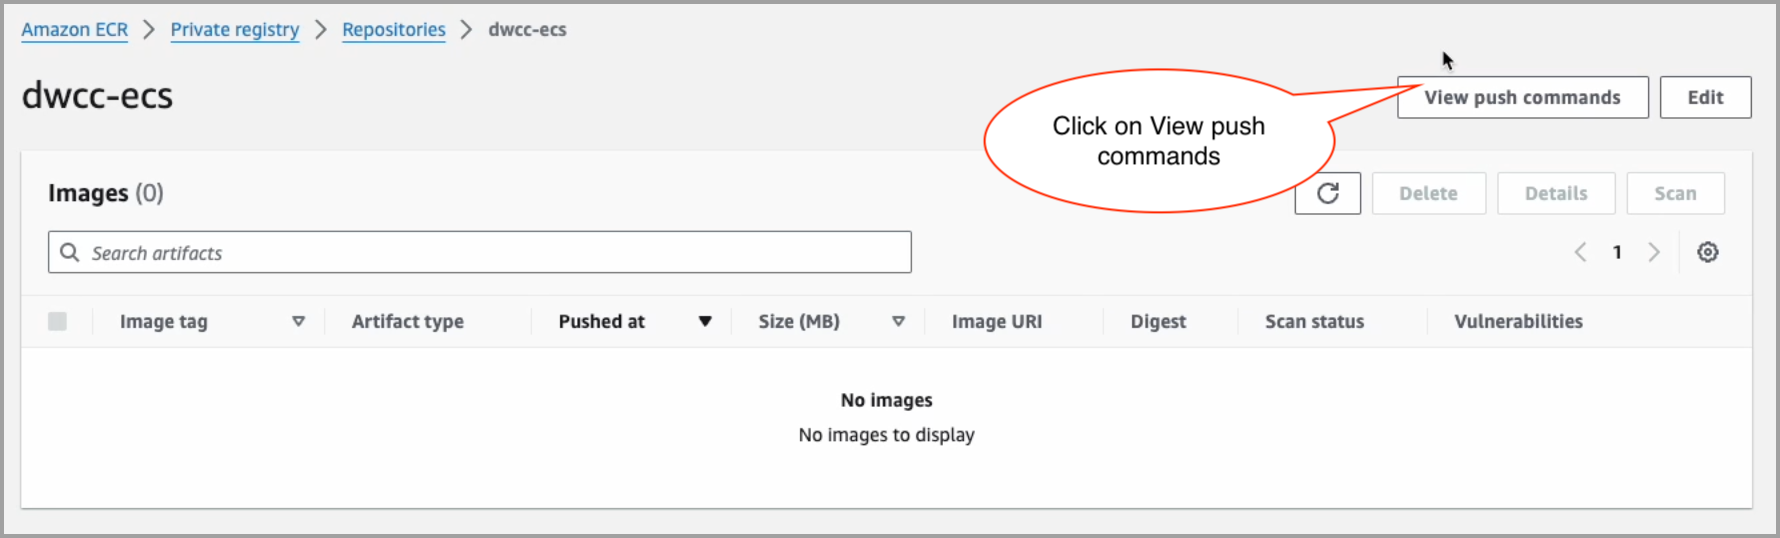
The Push commands for dwcc-ecs window gives you the list of commands which you should run in a terminal on the local machine.
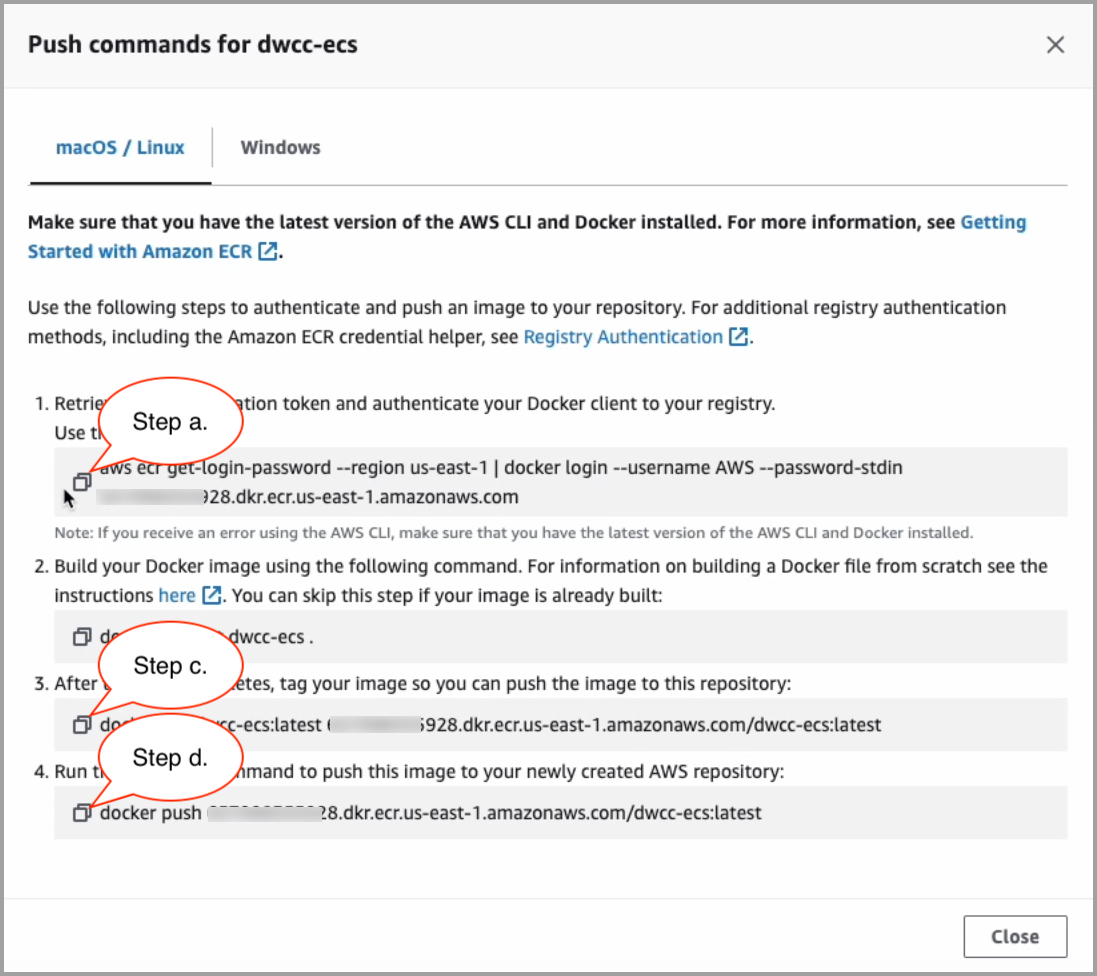
Authenticate your Docker client to your registry.
Skip the step 2 because the collector docker image has been already created.
Tag the custom collector docker image so it can be pushed to the repository. If you added a version tag in the build step, change the first and second :latest tag to the value of the tag used in the build command. For example:
docker tag dwcc-ecs:2.186
12345.dkr.ecr.us-east-1.amazonaws.com/dwcc-ecs:2.186
Push the custom collector docker image to the AWS repository. If you added a tag to the ECR image in the previous step, change the :latest tag. For example:
docker push 12345.dkr.ecr.us-east-1.amazonaws.com/dwcc-ecs:2.186
After running, you should now see the custom collector docker image (dwcc-esc) in the Images list of the repository.
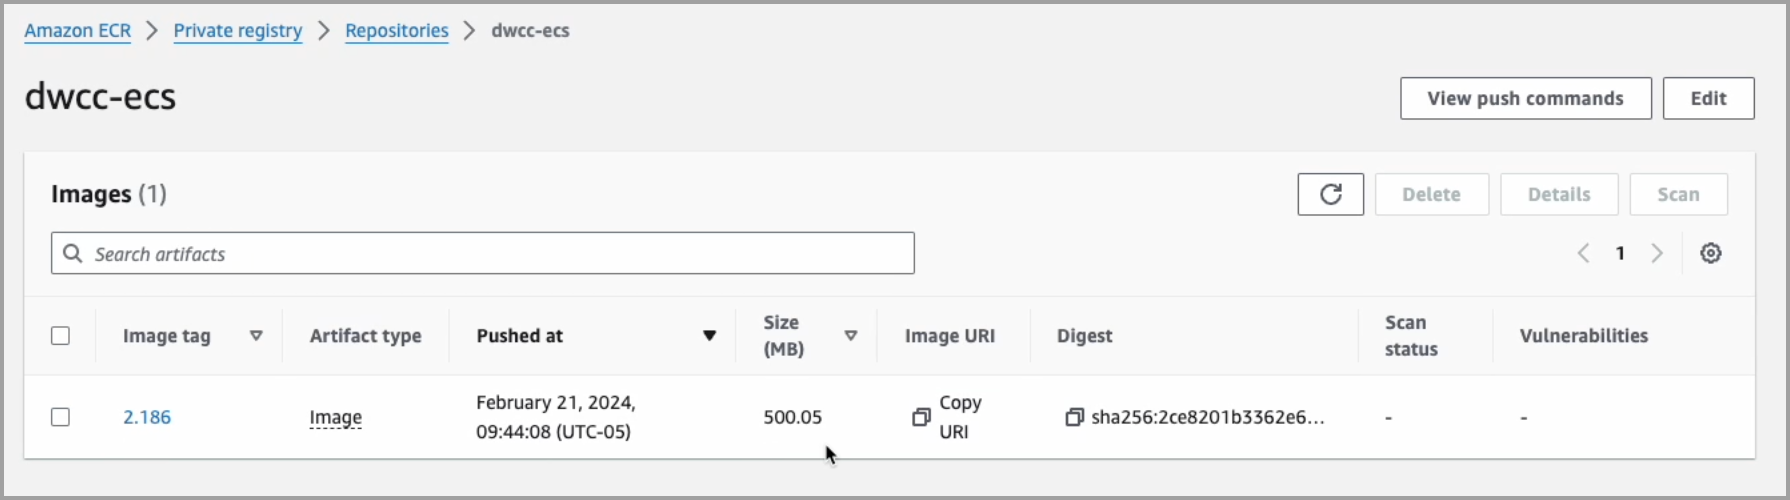
In the Image URI column, click the Copy URI button to get the URI of the image, and note it for using in the ECS task definition.
STEP 4: Create the ECS task definition
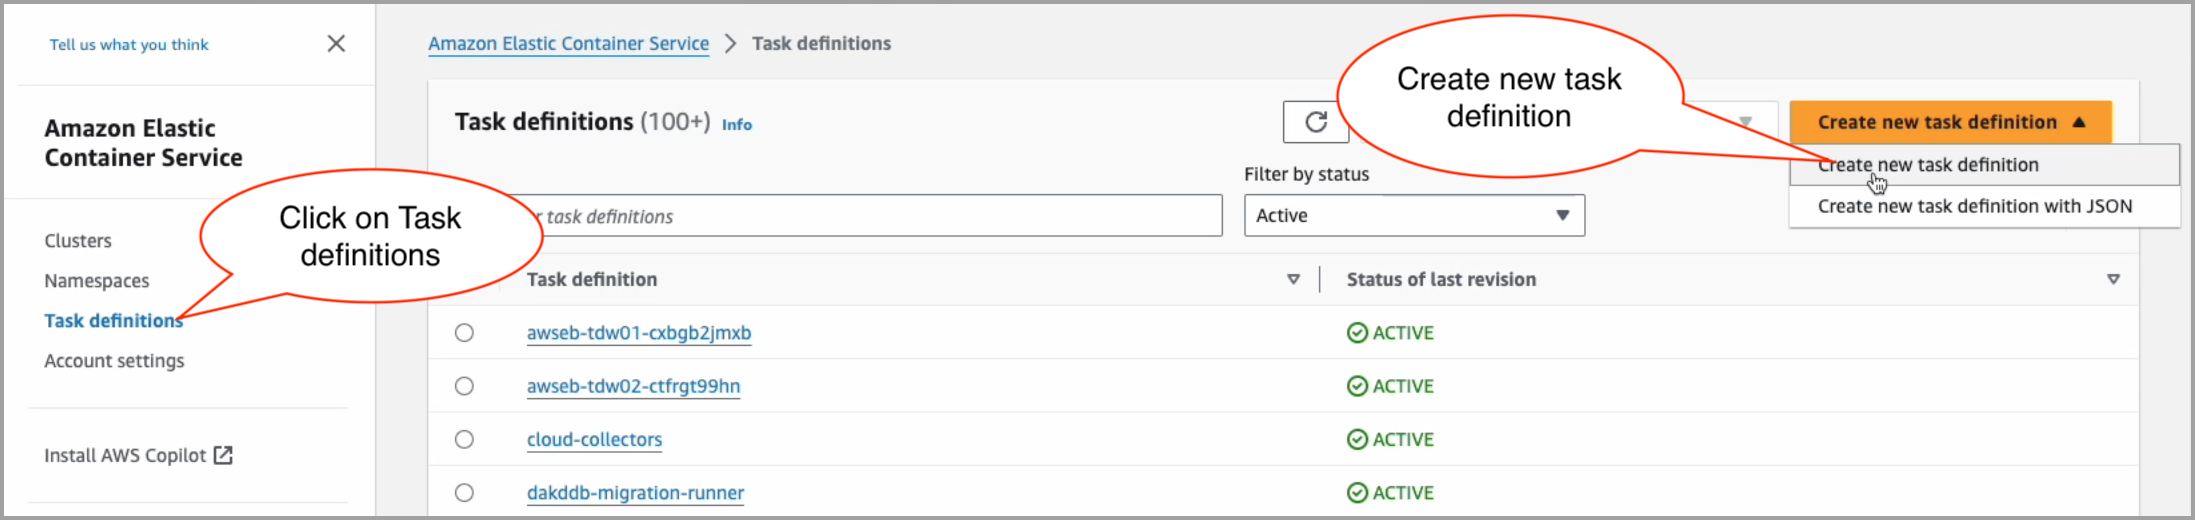
Go to the AWS Console and select the Elastic Container Service (ECS) console.
In the ECS console, click on the Task definitions in the sidebar.
Click the Create new task definition button on the upper-right corner to create a new task definition, and give the task definition a meaningful name.
In the Infrastructure requirements section, do the following:
Select AWS Fargate as the Launch type.
Important
In the Operating system/Architecture dropdown list, choose the architecture matching the local machine where the docker image was extended and built. For example, if the custom image was built on an arm64 machine, choose Linux/ARM64.
In the CPU dropdown list, choose at least 2 vCPU.
In the Memory dropdown list, choose at least 8 GB.
Choose a suitable Task execution role. By default, it is ecsTaskExecutionRole, linked to AmazonECSTaskExecutionRolePolicy.
In the Container section, do the following:
In the Name field, enter the meaningful name of your container.
In the Image URI field, enter the image URI copied from the ECR repository. For example:
12345.dkr.ecr.us-east-1.amazonaws.com/dwcc-ecs:2.186In the Environment variables section, enter the Key and Value of the variable by populating it from your noted configuration file. You may also use an environment file hosted on S3 to pass environment variables.
In the Docker configuration section, in the Command field, enter the location of the configuration file in the container:
--config-file=/dwcc-output/<config-file-name>
For example:
--config-file=/dwcc-output/config-snowflake.yml
Set other configuration options as needed or accept defaults.
Click Create to save the task definition.
STEP 5: Run the task
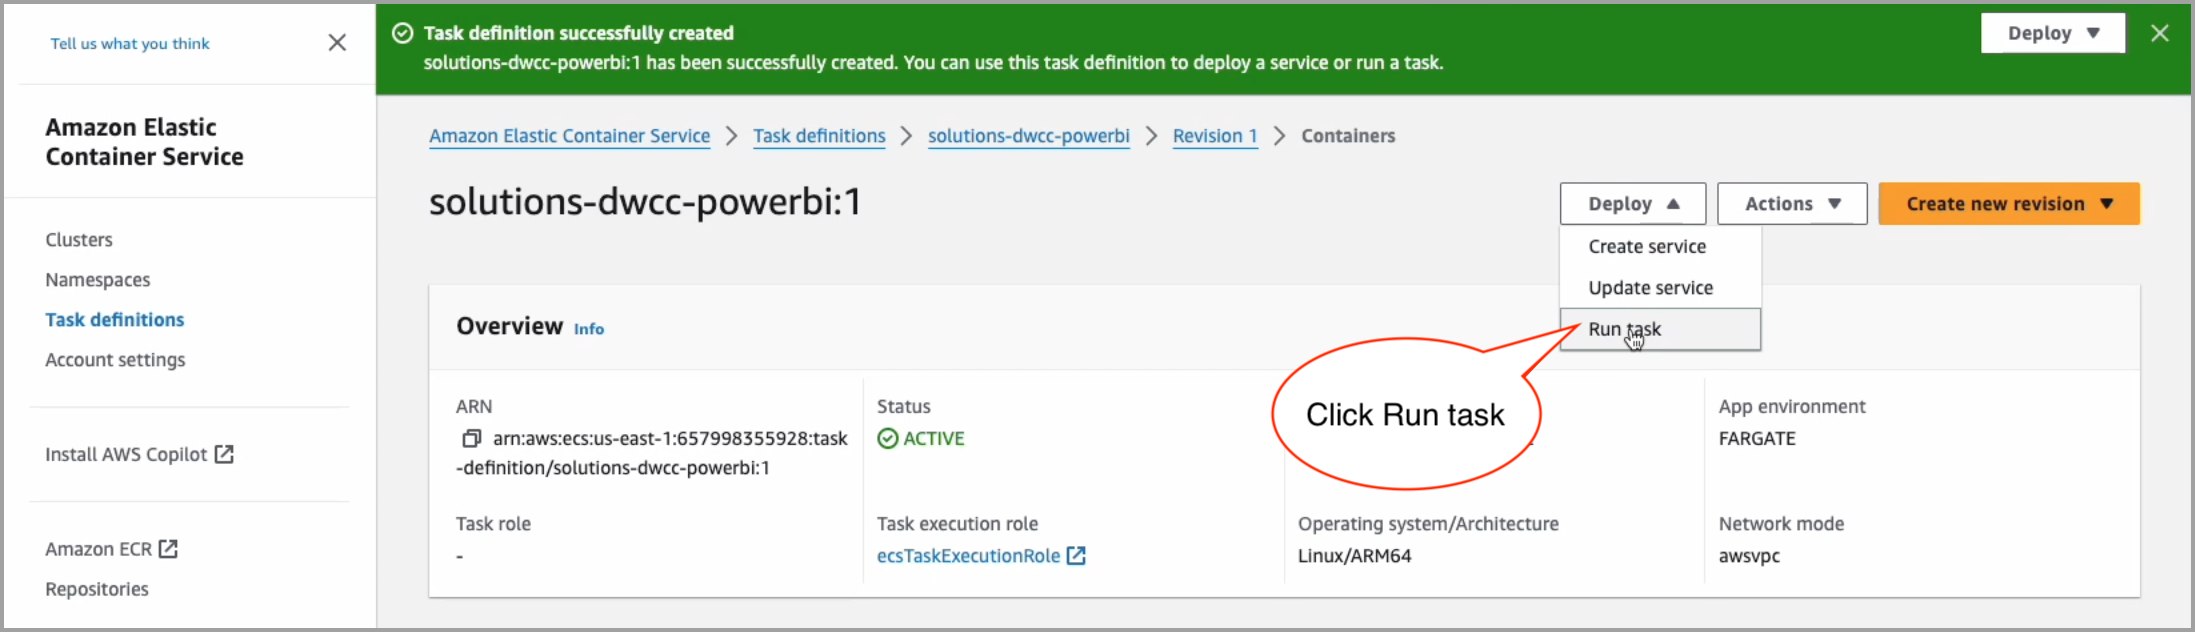
Once you create the task definition, you are automatically redirected to the Task definitions > Revision page.
In the Deploy dropdown list, select Run task.
In the Environment section, choose an Existing cluster to execute the task.
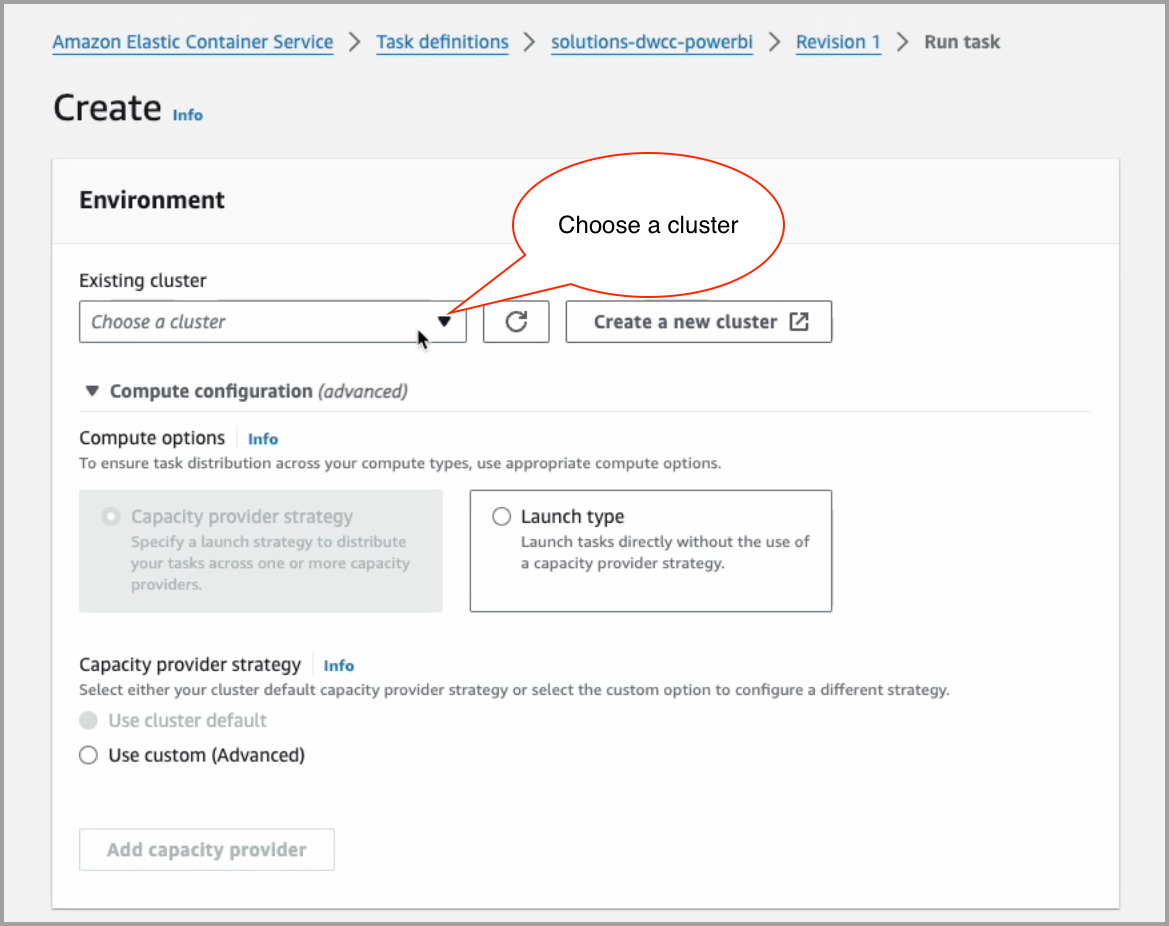
Set other configuration options as needed or accept default.
Next, click Create to run the task. You are automatically redirected to the Clusters Task page where the task begins executing.
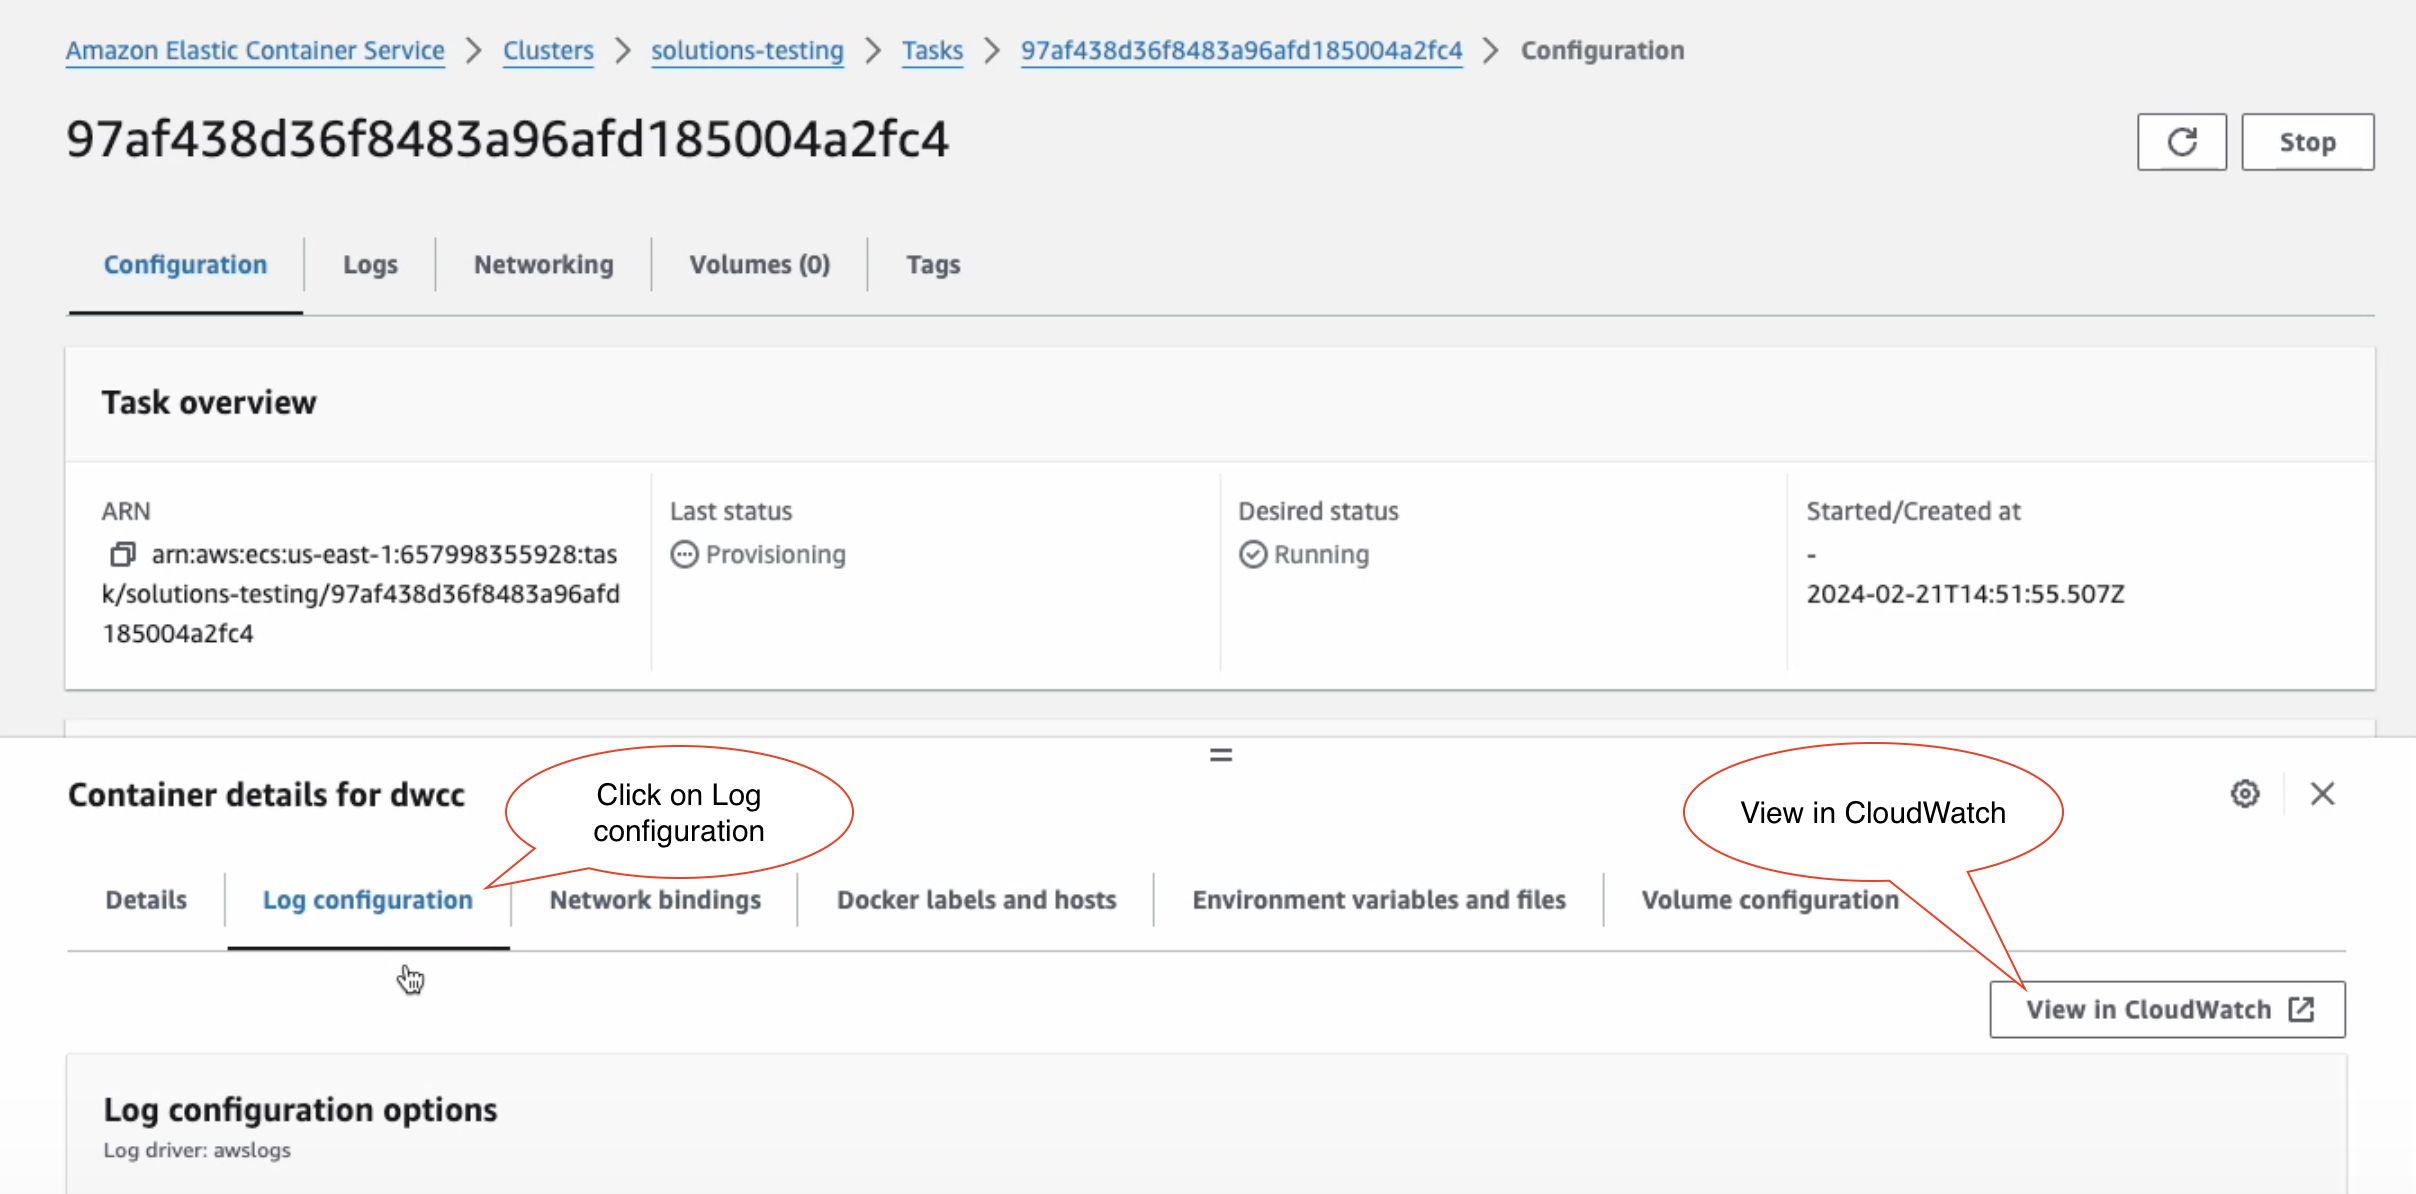
To watch the logs and see if there are any errors, in the Tasks section, on the Task panel, click on the task ID to go to the task configuration, and do the following:

Click on the Log configuration tab > View in CloudWatch.
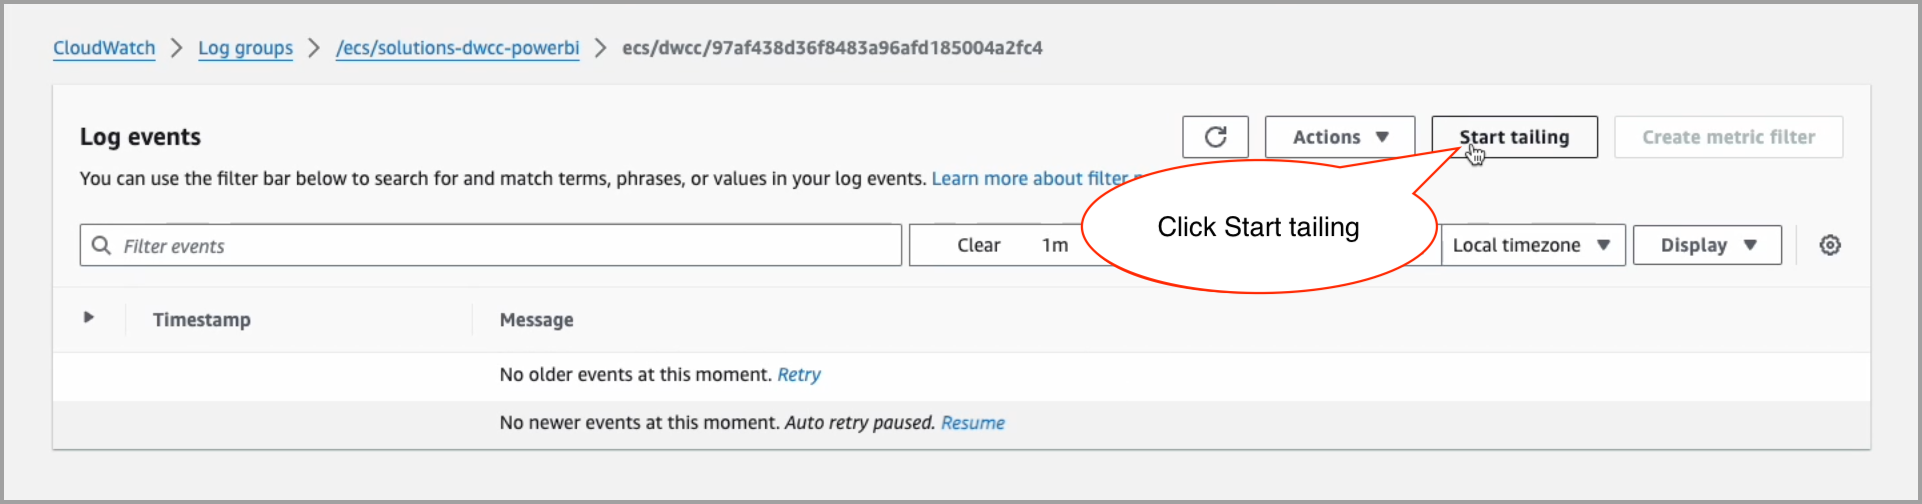
In the CloudWatch, click Start tailing.
STEP 6: Confirm upload of the output to data.world
Go to the data.world Datasets page and select your dataset.
You should see that a new TTL file has been uploaded to the dataset, along with a text file latest_dwcc_log.txt.
STEP 7: Schedule the task
Follow the Amazon EventBridge documentation to automate task runs at specific intervals, providing you with the most up-to-date dataset in data.world.